external and internal.
Internal filters
External filters
How necessary is water filtration in an aquarium? This question often arises among beginning aquarists.
Do I need to filter and which filter to choose?
In most cases, aquarium filtration is necessary, especially for those who have recently started getting into aquarium keeping.
There are 2 types of aquarium filters: these are external and internal.
Internal filters are immersed directly into the aquarium and attached to the machines with suction cups.
External filters located outside the aquarium. Water is drawn through a tube immersed in the aquarium. Water flows back through the same tube.
Of course, an external filter is better:
- the filter does not take up space in the aquarium, which means the underwater world looks more aesthetically pleasing,
- The external one, containing various filter media, purifies water better than its internal counterpart.
When I started my aquarium, I initially used an internal filter, because... I already had it.
I don’t have a lot of fish: 13 neon fish, 2 speckled catfish, a female guppy and a dozen of her fry. All these living creatures live in a 75 liter aquarium.
You can, of course, buy a filter, but you can also make it yourself!
desire to do external homemade filter did not leave me.
The desire turned out to be stronger
Let's look at the general diagram of my homemade filter.
The filter has the shape of a cylinder located vertically. At the top there is an electric pump that circulates water in our system.
Water from the aquarium flows into bottom part filter, and passing through the filter elements rises to the top, and then through the pump and tube - back into the aquarium.
Foam rubber and a ceramic biofilter are used as the filtering part (this filler is sold in any pet store).
While buying building materials and all sorts of things for the house, I at the same time selected parts for the future filter.
What is needed to make an external filter for an aquarium?
As you can see in the picture it is:
- 2 pieces of plastic sewer pipe, which fits into one another (inside rubber cuff). One pipe is possible, but longer (up to 60 ms);
- 2 end caps per pipe (bottom and top);
- fitting (according to the diameter of the outlet from the pump);
- faucet on outlet pipe;
- to release remaining air from the filter;
- nuts;
- water pump,
- for sealing threaded connections and a set of wrenches.
The heart of the external filter was the pump from the previous submersible filter.

At the bottom of the pipe we make a hole of such a diameter that the fitting can be screwed in tightly. First, we wrap the thread of the fitting tightly to seal the connection. Tighten the nut with inside. In the photo, the nut is also coated with silicone - this is not necessary, I removed the silicone from all the nuts, because... water did not pass under the fittings.

To ensure that the inlet hole was always free, I cut out plastic bottle, a kind of cap in which I drilled holes. On top of it I made a grid from a CD disk (also with holes). Water will flow freely through these holes.
You can make a lot more holes than shown in my photo. The next time I clean the filter (as the water pressure becomes weaker), I will drill more.

1
- mesh cap at the bottom of the filter,
2
And 3
- the same thing, but already assembled,
4
- place a layer of foam rubber on top of the mesh.
We pour a ceramic biofilter on top of the foam rubber as shown in the diagram above. Another layer and again ceramic filler.

Photo of the top part - the filter cover.
The pump is held in place by being connected to the outlet fitting with a piece of reinforced hose.

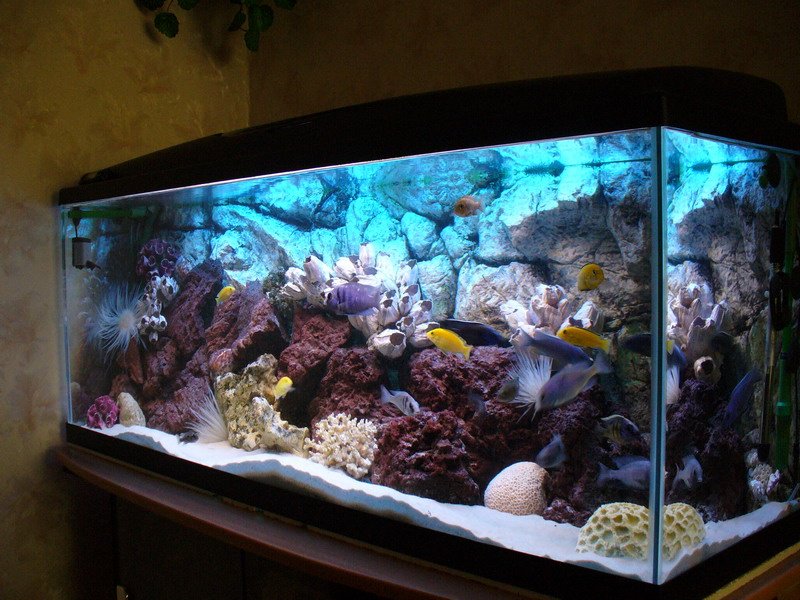
The picture shows an external homemade filter for an aquarium already in operation.
Filter height 42 cm, diameter - 10 cm.
A- In the upper part there is a fitting with a tap (water outlet into the aquarium), and a hole for the pump wire outlet.
B- All threaded connections it is necessary to wrap it with a sealing material to avoid leaks.
C- The wire outlet is also sealed. From above and from the inside, plates of of stainless steel, and between them a rubber tube is compressed and put on the wire. When twisted, it spreads out in all directions and hermetically closes the hole. I installed a switch where the wire broke.
D- I reliably soldered the joint of the 2 pipes and the bottom plug together with an electric burner. After filling with water, the seam leaked here and there. I additionally soldered these places.
To collect water from the aquarium, I used a glass tube, the one in my hand. The second tube - through it water enters the aquarium.
I recorded the first one on back wall with a suction cup, the bottom edge rested on the ground, the second one was simply hung on the wall, immersed a little in water.

Thus, the space in the aquarium is not occupied by any filters, but glass tubes, one might say, are not visible at all!

The filter has been repeatedly tested for leakage. The leaks were fixed approximately 6 times. Now the filter is in front of the bedside table with the aquarium - I’m still watching to see if it leaks. Then I’ll hide it behind the cabinet and it won’t be visible at all.
Goal achieved!
The first filter cleaning is planned in a month or a month and a half.
Perhaps I’ll also install a filter element on the inlet tube for rough cleaning, so that the filter itself can be washed less often.
the cost of an external filter in a pet store is from 1,500 rubles. The homemade one cost me 500 rubles. taking into account the fact that there was a pump (only parts were purchased).
External filter characteristics:
dimensions :
height 42 cm, pipe diameter 10 cm.
filter volume: 3 liters
approximate throughput: 5 liters per minute.
That. the filter is capable of passing through the entire volume of my aquarium in 15-20 minutes. The filter does not create a strong current - fish and plants feel comfortable.
If you have questions about the manufacture or design of the filter, please ask. If you have any ideas or additions, write to us and we’ll discuss them!
Every aquarium should have a filtration system that will purify the water, ensuring the health of the fish and plants. As you know, the waste that the inhabitants of a reservoir leave behind, as well as food residues and suspended soil particles are very harmful to fish. Uneaten food oxidizes, turning into toxic ammonia. To ensure that the water undergoes all stages of purification in a timely manner, it is better to make an external filter for the aquarium with your own hands. It will prevent the appearance of harmful substances that can poison living beings.
Quickly navigate to the article
How to design an external filter?
Before making your own aquarium filter, you should understand how the filtration system works. Biological method filtration in an aquarium is a process as a result of which ammonium is converted into nitrites, then into nitrates. Biofiltration is carried out thanks to beneficial microorganisms that live in aquatic environment. This process depends on the amount of oxygen absorbed, so it is important to maintain a constant supply of aeration in the tank using a filter and compressor.
See how a homemade external filter made from plastic bottles works.
To make an external biological filter with your own hands, you should prepare the following materials:
- A plastic bottle from mineral water volume 0.5 l;
- A plastic tube with the diameter of the neck of this bottle;
- Sintepon;
- Compressor and hose for it;
- Aquarium pebbles with a diameter of up to 5 mm.
The plastic bottle must be divided into 2 parts so that fragments are obtained from it different sizes. You should have a cup with a neck and a large bottom. The bowl should be directed with the neck side up and firmly seated in the bottom. In the outer circle of the bowl, you need to make several openings through which water can flow into the filter. The recommended diameter of the openings is 3-4 mm, their arrangement is in 2 rows, 4-6 holes in each.


Next, the tube should be inserted into the neck of the bowl so that it fits tightly into it. After the procedure, you should not notice any gaps or holes between the tube and the neck. The length of the tube itself is selected taking into account the protrusion above the structure by 2-3 cm. However, it should not touch the bottom of the bottle. If the step is done incorrectly, water will not be able to flow into the mechanism.
Take gravel and pour it on top of the bowl in a layer of 6 cm, and cover it with a piece of padding polyester. Install the hose from the aerator in the tube and secure it. When the mechanism is ready, it needs to be placed in the aquarium. Then you should turn on the compressor so that the filter begins to do its job. Beneficial microorganisms will appear in the operating equipment, which will convert ammonia into nitrates, which forms a useful microbiological environment in the water.
How does a handmade external filter work?
A homemade external filter is designed on the basis of aerolifting: air bubbles that come from the compressor rise to the tube from which they flow upward, and lower the water flow from the filter with them. Clean and oxygenated water enters the upper compartment of the glass and passes through the gravel. Next, water enters the bowl through the hole, goes down the tube, and enters the reservoir. The synthetic winterizer here functions as a mechanical filter. This material prevents the process of silting of the gravel substrate.
Chemically and mechanically purifies water. It is better to install such structures in a large aquarium with a volume of 200-400 liters. For larger aquariums with a capacity of 500-1000 liters, you will need several of these devices. Branded external water purification systems are expensive, so it’s better to make them yourself. The materials are inexpensive and accessible to everyone.


Another way to make an external filter
For the next external filter you need to prepare the following parts:
- A plastic container with a tight-fitting lid (you can take a box for storing cereals);
- Sponge or thick material with a porous structure;
- Sealed water pump and fitting for attaching to the container lid;
- Material for biological filtration (medical cotton wool, ceramic granules);
- Several suction cups, resin with sticky texture.
See how to make an external filter with your own hands.
Instructions for making a filter:
- You need to take a thin file and make cuts around the entire perimeter of the lower compartment plastic container. The cuts will let water through.
- In that Plastic container Place a sponge and cotton wool or other element for biofiltration on it.
- Make holes on the container lid that will correspond to the diameter of the pump fitting.
- Insert the fitting into the hole made and secure it with resin or aquarium silicone.
- A pump should be screwed onto the fitting, which can create pressure inside the container.
- Several household suction cups should be attached to the wider side of the container.
- The internal filtration system can be considered complete. Suction cups will be able to hold the device on the wall of the aquarium.
Such a homemade filter can be mounted not on the wall, but placed on the ground of the tank. The soil will also play the role of a biological filter. A plastic nozzle in the form of a long tube extending outward can be attached to the sediment outlet. Then, after purification, the water will be saturated with oxygen.
Instead of a small plastic container, you can use plastic canister or a canister made of stainless, non-toxic metal. This design is suitable for large aquariums; large cassettes and cartridges with filtration elements can be placed in it. Homemade filters need to be serviced at the same intervals as branded ones.
If the filter is leaking, check all its elements:
- Are the mechanism clamps tightly closed? Perhaps you were careless in securing the parts with glue or resin. The problem can be solved by re-fastening the clamps.
- While the filter is running, the sponge or suction cup may become dirty. Mucus and debris can be cleaned with water. Check the cleanliness of the structure monthly.
- Damage to the plastic container, which will have to be replaced when remaking the filter itself.
No experienced aquarist would dare to breed fish without necessary equipment for arranging an aquarium.
And a special role here is played by the filter, which is used for mechanical and biological purification of water, as well as for enriching it with oxygen.
Today big choice filters are presented on the shelves of pet stores.
You can buy both internal compact filters for small aquariums, and external ones for installation outside and purification of large volumes of water.
But it is not at all necessary to buy an expensive device; you can make it yourself. Scroll necessary details will depend on the type of filter, as well as the size of the aquarium.
And if you're wondering, how to make your own silent aquarium filter, this article is for you.
Let's consider one of the options making a homemade external filter for an aquarium.
The design diagram looks like this:
- the filter takes a cylindrical shape, the device will be positioned vertically,
- an electric pump is responsible for the movement of water, which must be installed at the top of the structure,
- water flows from the bottom of the structure through the fillers, and then flows back into the aquarium,
- filter materials are possible different variants fillers.
To make the device you will need:
- two interconnected plastic pipes with a rubber cuff inside,
- two plugs for the ends of the pipe,
- fitting,
- faucet,
- electric pump,
- nuts,
- FUM tape,
- spanners in the set.

The following materials can act as filter media:
Synthetic and foam elements: the cheapest and most accessible. They can take any form, and also serve as both a biological and mechanical filter. There is enough space in the pores for bacteria to settle. Periodically, the material must be washed to remove clogged mucus.
Also, sludge particles will be retained in the pores; under no circumstances should it penetrate inside the filter and interfere with its operation.
- Filter wool: an inexpensive filler that can be used several times, is easy to wash, tightly fills the entire space, and eliminates leaks. Optimal for use as the final stage of mechanical cleaning.
- Ceramic rings: used for uniform distribution of water flows, which will ensure the delivery of oxygen to bacteria
- Bioballs: plastic material, rolls in water and helps to evenly wash all filter materials. In addition, it is a good substrate for the settlement of bacteria.
- Sintered glass: convenient to use in the form of balls with a diameter of up to 14 mm. Thanks to a special baking technology, the balls acquire pores in which beneficial bacteria that process nitrates and nitrites are actively populated. The efficiency of sintered glass is significantly higher than that of other biological treatment materials.
- Ceramic straws: Used to colonize bacteria in small pores.
- Zeolite: a cheap, but very effective sorbent that quickly absorbs ammonium from water. Allows you to quickly get rid of nitrates in the aquarium.
- Activated carbon: There is still debate about the need to use this filler. Only carbon with small granules is suitable for use in aquariums, and the number of pores is important, because the absorption efficiency depends on this indicator. The quality of coal can also be determined by the presence of dust and characteristic shine. Before placing the material into the filter, it must be thoroughly rinsed. It can only be used in a newly started aquarium.
- Peat: a natural filter material given by nature. It is inexpensive and effectively copes with a number of tasks - it reduces the growth of fungi, has a positive effect on the condition of the inhabitants of the aquarium, and lowers the pH level.
All of these fillers can be purchased at any pet supply department.
VIDEO INSTRUCTION
Step 1
A hole must be made in the lower part of the pipe to screw in the fitting. Its thread must be wrapped in advance with FUM tape. You need to tighten it from the inside with a nut.
To ensure that the hole for water inlet is always free, it is easy to make a cap with small holes from a plastic bottle, and attach a mesh with holes from a CD on top.
Step 2
You need to lay two layers of each filler on the mesh, alternating with each other.
To hold the pump, a piece of hose is suitable, which will attach it to the water outlet fitting.
Step 3
The water intake tube must be secured with a suction cup on the back wall so that one end rests against the bottom. The tube for bringing water into the aquarium is enough to hang on the aquarium, slightly lowering it into the water.
In this model of a homemade filter, the tubes are practically invisible; the space in the aquarium remains completely free for its inhabitants.
This filter, with a height of about 40 cm, a pipe diameter of about 10 cm, and a volume of about 3 liters, passes 5 liters in just one minute, without creating strong movement of water flows.
VIDEO OPTION 2
Internal filters have a simplified structure, so making them yourself is not difficult even for an inexperienced aquarist.
For making an internal filter for an aquarium required:
- plastic bottle, for example, a soda bottle, 0.5 liter volume,
- piece of padding polyester,
- plastic tube matching the diameter of the neck,
- pebbles for filler,
- hose and compressor.
VIDEO ON THE TOPIC
- The bottle needs to be divided into two parts, but so that one is smaller than the other. The smaller part should remain with the neck. The bowl must be directed upside down and with force, so that the structure is tight.
- Then you need to make holes around the outer circumference for water to flow in. Their diameter should be about 3-4 mm; it is better to place them in two rows of 6 holes each.
- Next, you need to insert a pipe into the neck of the bowl. In this case, no gaps should be left between the neck and the pipe.
- The length of the tube should be enough so that it protrudes slightly above the surface. But the structure itself should not lie on the bottom, so as not to impede the flow of water.
- On top of the bowl you need to add a layer of gravel, and then a layer of padding polyester. Next, you need to install the hose into the tube and secure it. This design must be placed in an aquarium. After the compressor turns on, the device will start working. After some time, live bacteria will appear in the device, necessary to dissolve ammonia into nitrates.
The operating principle of the filter device is as follows: it is entirely based on airlift. Air bubbles penetrate the tube, and then move upward and attract water currents.
Oxygen-saturated water penetrates the upper layers through the gravel, then moves down through the holes made and goes through the tube into the aquarium. The task of cleaning is performed by synthetic padding; it will help the gravel not to silt.
Let's consider several options for bottom filters that are suitable for small aquariums with a volume of up to a hundred liters. Can also be made according to these patterns bottom filter for round aquarium.
Bottom filter from a plastic box
The role of the device body will be performed by a durable plastic box with a lid that tightly closes the box on top. In this case, it is desirable that either the body itself or the lid is clearly visible so that the level of contamination can be monitored.
A plastic tube must be glued into the lid. It is necessary to make several holes on the side wall, but such that small inhabitants of the aquarium are not sucked into the filter through them.
Inside the housing you need to place a pre-prepared filler for filtering water. It is recommended to use a ceramic one as a water spray; it will not be difficult to buy it in a store.
Bottom filter from a glass jar
An ordinary glass jar with a volume of up to 1 liter will be used as a body for the future design. It needs to be closed tightly plastic cover and make a hole in it so that water can flow inside, as well as a hole for the tube.
It is necessary to make a partition from another cover and lay down the filter material.
A glass jar can be replaced by a ceramic vessel filled with quartz sand and nylon threads.
Many experienced aquarium keepers will not breed fish without necessary equipment for setting up an aquarium. One of the leading roles is played by filtration systems, which are used to purify water from mechanical and biological components and to saturate the liquid with oxygen. You can purchase internal and external filters for an aquarium in specialized stores or make them yourself, which will save you a lot of money.
Filter plays important role in aquarium
Types of devices
All filters for cleaning aquariums are divided into external and internal. The latter work directly inside the aquarium, and the former purify the water outside the fish house.
External filtration systems differ in power, type of design and content. Today, small hanging devices for small aquariums, a variety of phytofilters, and also canisters are produced. In addition, there are large filtration systems called sumps. External filters have a number of undeniable advantages:
- fit organically into the design of the aquarium;
- have significantly greater power and efficiency compared to internal systems;
- do not take up space inside the aquarium;
- Suitable for large volumes of liquid.
In this video you will learn how to make an external filter:
Of course, such devices also have some disadvantages, for example, the filtration system requires a separate location. This is not critical if there is free space. The price of external fixtures is much higher than internal ones.
If desired, you can hide the filters, or turn them into a decorative element. To save money, you can make your own filter device from scrap materials. The advantage of homemade filters is that the system will be customized to the characteristics of a specific container.
 You can make the filter yourself
 Filling options
The most common and available materials padding polyester and foam rubber are used to fill the aquarium filter system. They are able to take any form and also act as mechanical and biological filters. The pores of these materials provide enough space for bacteria to spread. It is necessary to periodically rinse the filler to get rid of mucus that clogs the filter system. In addition, silt can settle in the pores, which should not be inside the filtration system, interfering with its operation. There are several options for filling external aquarium filters:
- Filter wool is a budget-friendly filler that is suitable for repeated use. It is easy to clean, with its help the filter space is filled quite tightly, which eliminates the possibility of leakage. It is the best option for use at the final stage of cleaning.
- Ceramic rings are used to uniformly distribute water flows, which ensure the transport of oxygen to the bacteria.
- Plastic bio-balls. Their movement in the water promotes uniform washing of all filter materials. It should be noted that this filler can be used as a substrate to support the vital activity of bacteria.
 You can fill the aquarium various materials
 - Sintered glass. Most convenient option, if the material is purchased in the form of balls. A special baking technology promotes the formation of pores in products. The latter contain beneficial microorganisms that process nitrites and nitrates. The efficiency of glass is significantly higher than that of other materials used for biological treatment.
- Ceramic tubes are used to breed bacteria in small pores.
- Zeolite is a low-cost, but very effective sorbent that quickly absorbs an element such as ammonium from water. With its help you can get rid of nitrates in the aquarium.
- Activated carbon. Many experts argue about the advisability of using this material for cleaning aquariums. Some people tend to think that it is better to use small granules for filters. It should be noted that they should have many pores, because this indicator affects the absorption efficiency. In addition, the quality of the material can be determined by the presence of characteristic shine and special dust. Before placing material into the filter system, it must be thoroughly rinsed.
- Peat - natural material for filtration systems. It is affordable, successfully copes with many tasks - it reduces the Ph level, slows down the growth of fungi, and has a positive effect on the inhabitants of the aquarium.
All of the above fillers can be found on the shelves of pet stores.
DIY external filter
Before you begin making an external aquarium filter, you need to prepare all the components. To work you will need:
- water pump;
- sewer pipe having a diameter of 110 mm;
- 4 plugs;
- 4 input glands;
- Mayevsky crane;
- transparent hose with a diameter of 80 mm;
- a tap that will regulate the outlet pressure;
- selected fillers;
- silicone
 Don't forget to prepare required material
 Often, in the manufacture of filter systems, pumps are used that were used, for example, in old submersible filters. It should be noted that such a device can be used for both classical systems and nanoaquariums. The latter have gained popularity due to their compactness and ease of placement in any room. Step by step process making an external filter for an aquarium with your own hands:
- As the basis of the filter device, you can take a connecting coupling, the internal diameter of which is identical to the diameter inner tube at the insertion point of the plug. You can use plastic plumbing pipe or coupling for repair. It is necessary to cut a piece 17-20 cm long.
- In one plug, cut 5 holes into which the Mayevsky tap will then be installed, as well as seals. It is necessary to take into account the fact that the holes must be made 1 mm smaller than the diameter of the seals and tap.
- Fix all parts tightly; for better sealing, it is recommended to coat the joints with silicone.
- Place a hose on the pipe that comes out of the pump and secure it tightly. It is necessary to select the size of the hose as accurately as possible so that it fits tightly onto the tube. Then insert the structure into the seals and tighten it. The pump should fit tightly onto the plug. Pull the wire from the pump into one of the small glands, cutting it first.
- Insert a PVC tube into the second steel piece. Then put a hose on it to collect the liquid. The distance between the bottom of the filter and the pipe must be at least 1 centimeter. Coat the plug with silicone and then insert it into the coupling.
- Trim the protruding sides on the two plugs so that they can be easily placed inside the housing. Then drill multiple holes: one should correspond to the diameter of the intake pipe, the rest should be made small so that water circulates in the filter unit. Close the pump so that it is located inside between the two plugs.
- Make the bottom cover of the filter device. To do this, you need to remove the end part of one of the plugs with holes. Reduce the diameter of the cut ring by about 1 cm.
- Cut a ring from the tube, the height of which should be equal to the distance between the two plugs. Assemble the parts together and place filler in the filter element.
- The external filtration system for the aquarium is ready. During the work, one of the small seals remained unused. The temperature sensor can be removed through it so that it does not interfere with the inside of the aquarium.
If a filter is needed large sizes, you can use a similar principle to make a more complex model. The assembly diagram is identical to the previous one, but a biofilter and foam rubber can be used as filter materials, which will be placed on a mesh partition.
Difficulties may arise when cutting foam rubber into the required pieces. Experts give the following advice: moisten it in water and leave it in freezer for 1−2 hours. After this time, the material can be cut into convenient pieces. Allow the foam to dry, and then begin the process of placing it in the filter unit.
Internal fitting
Making an external filter for an aquarium is much more difficult than making an internal one. This is due to the fact that the latter is simpler in structure, so even a novice aquarist can make it. To make the device you will need:
- plastic bottle with a capacity of no more than 0.5 liters;
- padding polyester;
- plastic pipe, the diameter of which is equal to the neck of the bottle;
- hose and compressor;
- pebbles
Follow the filter manufacturing instructions
The latter will be used as a filler. Step-by-step master class on making a filtration system:
- Divide the bottle into two parts so that one is larger than the other. The smaller part should have a neck. Point the bowl upside down and apply enough force to get a tight structure.
- Make holes on outside circles for water passage. Their diameters should be 3−4 mm. The optimal placement option is 2 rows of 6 holes.
- Pass the pipe through the neck of the bowl so that there are no gaps between them.
- Make the pipe long enough to be located above the surface. The structure itself should not be at the bottom, preventing the flow of liquid.
- Pour a layer of gravel onto the bowl, and then lay out the padding polyester. Install the hose into the tube and secure it. Place the structure inside the aquarium. After turning on the compressor, the device will start working. After a little time, live bacteria will begin to appear in the device, which are necessary for the breakdown of ammonia into nitrates.
The principle of operation of the filter is as follows: air bubbles entering the pipe move upward and then attract water flows. The air-saturated liquid enters the top layer of gravel, then moves downwards, ending up in the aquarium. Cleaning is carried out by a layer of padding polyester, which prevents silt from settling on the gravel.
Bottom filter device
There are several types of bottom filters that can be used for both large and small aquariums. This way you can make a filter system for a round aquarium. The first option is to make the device from a plastic box. The housing is a durable plastic box with a lid. The latter should tightly cover the base. It is advisable to make the lid or body of the box transparent so that you can see the degree of contamination.
A plastic pipe is glued into the lid, then holes are made on the side. It should be noted that they must be of such a size that fish do not get into them. You must first prepare filter elements, which are then placed inside the box. It is recommended to use a ceramic water sprayer, which can be easily found in stores.
Another option is to make a filter unit using a glass jar, which will act as a housing. The container volume should be no more than 1 liter. Close the jar with a plastic lid, and then make holes to allow liquid to enter. Using another lid, make a partition on which to then lay the filtering material. An alternative glass jar can be a ceramic container filled with nylon threads or quartz sand.
Using the methods described above, you can make homemade filters for an aquarium. The main thing is to arm yourself with perseverance, ingenuity and patience. Self-made equipment will help not only save money, but also get a device that is ideal for each specific case.
Many people believe that aquarium fish are the most unpretentious pets. In reality, things are different.
In order for representatives underwater world felt comfortable, did not get sick and did not die prematurely, it is necessary to supply the aquarium with a number of additional devices, one of which is an external filter.
Purpose of the external filter
An aquarium filter is a mandatory attribute of modern pet fish abodes. Life in an aquarium without a filter is only possible if there are a large number of living plants in it.
The main tasks of the filter are the mechanical purification of water, the removal of waste products from the inhabitants of the aquarium, as well as the movement of water masses and their saturation with oxygen. Given that correct selection and installation of the device, the lower and upper layers of water will constantly move, which helps improve gas exchange between the aquarium water and the surrounding air.

Upper layer it releases water carbon dioxide and goes down - this ensures that the fish will not accumulate on the surface of the water, but will be distributed more or less evenly throughout its entire volume.
Aquarium filters are available both internal and external. The latter, due to the possibility of increasing their volume, often have greater power and can be installed on aquariums of impressive size. Among aquarists, this model of filter device is often called a bucket.
Undeniable advantages external filter in front of its brother with indoor installation are:
- higher quality filtration;
- ease of cleaning and maintenance;
- the possibility of providing several stages of purification (mechanical, biological), as well as the possibility of softening water through additional additives.
Among the disadvantages of the devices under consideration, we can note high cost and the need for space to install it.
Purchased external filters
If you decide that you definitely need an external filter, you will definitely think about which one is better in your particular case. First of all, it should be borne in mind that the production of equipment for aquariums is carried out by a large number of companies. The most reliable manufacturing companies in this market segment are deservedly considered:
- Eheim;
- Tetra;
- Jebo;
- Aquael;
 Tetra
Tetra External filter for high-quality water purification will delight its buyer not only with the quality of its functions, but also with a long, trouble-free service life. You do not have to constantly search for spare parts for such a device or deal with its leaks.
Each specific modification of the external filter has its own specifications, including indicating what size aquarium the device is intended for.
Important! The power of the filter, as well as the amount of water pumped through it, can be indicated for an empty device. When loading its canister with filter materials, these indicators will decrease. Clogging of fillers and hoses also helps to reduce them during operation.
Based on the above, the choice of a water filtration device should be made with some reserve. For example, on an aquarium with a volume of 200 liters, it is advisable to install a filter designed not for 150-200 liters, but for 200-350.
In addition, when choosing an external aquarium filter, you should pay attention to the possibility of purchasing spare parts for a specific model, as well as the availability of warranties and service from the seller and/or manufacturer. It is not advisable to purchase unknown brands that have proliferated on modern market. Of course, they will attract you with a modest price, but this saving is very doubtful and may soon result in additional financial expenses.
For those who want not to overpay for the brand of one of the above companies, we can only recommend the Chinese manufacturer Atman, which produces equipment for aquarists quite for a long time and has proven itself well both in the market of its native country and abroad. This is one of optimal options in terms of price and quality.
Homemade aquarium filter
Those aquarium fish lovers who want to save as much as possible on an external filter, and also have hands growing “from where they need to,” can be offered to make a canister filter for an aquarium themselves. For this you will need:
- two plastic pipes with a rubber cuff inside, butted together;
- a pair of plugs for pipe ends;
- fitting;
- small faucet;
- electric pump;
- nuts;
- FUM tape;
- spanners;
- plastic bottle;
- unnecessary CD;
- rubber hose.
In addition, to fill the filter you need filter materials that can be purchased at almost any self-respecting pet supply store, such as:
- filter wool;
- ceramic rings;
- bioballs;
- sintered glass;

- ceramic straws;
- zeolite;
- Activated carbon;
- peat.
The process of making an external filter for an aquarium with your own hands can be described in the form of the following algorithm.
- At the bottom and upper parts pipes holes should be made into which the fittings will be screwed. The threads of the latter should be pre-wrapped with sealant tape. The fittings inside the pipes must be secured with nuts.
- So that the inlet hole organized at this stage (in the lower part of the pipe) for water flow is always free, you can make a cap for it with small holes(from a plastic bottle), on top of which attach a kind of mesh with holes (from a CD).
- Selected fillers must be placed on the mesh(2 layers each), alternating them with each other.
- To fix the pump, use a piece of hose, attaching it to the fitting at the outlet of the filter.
- The water intake tube must be fixed to the back wall of the aquarium so that its end rests on the bottom. This can be done using a suction cup. It is enough to hang the water return tube on the edge of the aquarium, slightly immersing it in water.