DIY sweets at home: recipes and photos
Chocolate... so much in this word! Each of us has a favorite taste, familiar from childhood or discovered in adulthood. And who wouldn’t be “hooked” by an advertisement with pouring liters of sweets, a fountain or a fondue with liquid icing? It’s very easy to prepare all this yourself, causing the surprise of guests at a family celebration, the joy of the birthday boy from such a gift, or simply creating a small holiday for yourself.
Belgian chocolate
Historically, sweets appeared in Belgium in the 19th century - in 1839. Then the confectioner Stolwerk began to make tiles in the shapes of local, Hanseatic gingerbread, which had been accepted by that time. Basically, the word candy implies a shaped little tile
In the same Belgium, in 1912, confectioner Jean Neuhaus, who founded the Neuhaus confectionery brand, saw an opportunity to make a body with candy filling.
The first such sweets were filled with “praline” - a mixture with a base in the form of nuts, as well as cocoa, powdered sugar and milk powder. They were made by hand. In 1915, the process of making treats was mechanized. Also, a few years later, Neuhauz's wife invented the rectangular "ballotin" box, in which most gift delicacies are now sold.
Recipes for chocolates with cocoa - photos
Everyone loves sweets, but everyone prefers them different types treats Of course, the first things that come to mind are chocolates, cakes, cookies and muffins. Sweets can be healthy and homemade!
To cook deliciously and interestingly, you don’t need to have a lot of equipment, cutting-edge kitchen gadgets or expensive cookware. An unusual duck in apples can be successfully baked on a regular baking sheet in foil, exquisite coffee with syrup can be prepared in an inexpensive but beautiful Turk, and a bouquet of sweets requires only sleight of hand.
Filling
The prepared filling (fondant, gillyage, praline, etc.) is placed in Silicone forms. The sweets are then frosted, usually drizzled with hot cocoa frosting. Those that are made by hand, on the contrary, are dipped in glaze.
The hardest filling is grillage. It is made from sugar and roasted chopped nuts. This is one of the expensive varieties; in the Soviet Union they were considered elite, but they are easy to make yourself.
Please note that there should be no large sugar crystals in the grilled meat - if this is the case, it means that the grilled filling was made carelessly, the technology was broken.
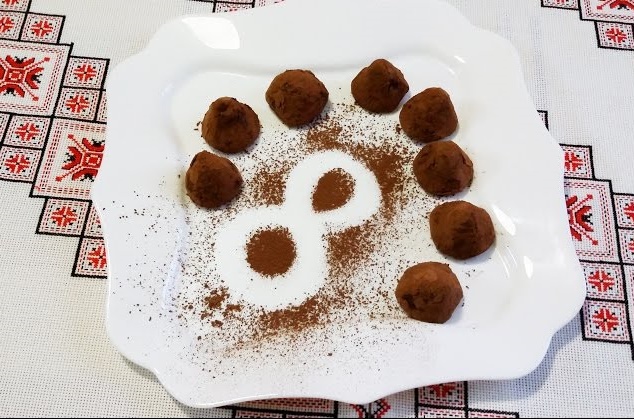
Chocolate balls
Homemade sweets compare favorably with factory-made ones due to the complete absence of chemicals. It’s a paradox, but delicacies prepared in a factory are more expensive the more natural their ingredients are. We pay factories less so that sweets can be produced in larger quantities and can wait for their consumers. But we are willing to pay more for naturalness.

However, believe me, all this is easy to do at home!
So, the components for your first masterpieces:
Vanilla crackers – 300 g;
Milk – 250 g;
Butter – 200 g;
Sugar – 250 g;
This is the basis not only for this recipe, but for any desserts.
We add cocoa - 100 g, so that the sweets contain cocoa beans (or you can leave it as is - it will be “white glaze”, or add glucose balls to the sprinkling instead of cocoa);
Walnuts – 100 g;
Powdered sugar - 50 g - for sprinkling.
This dessert will be similar to the mini-pie “Potato”, familiar and loved by everyone since childhood.
Take the butter out of the refrigerator in advance.
Heat milk in a saucepan until hot. Stir cocoa and sugar, then place in a saucepan with milk and cook until sugar dissolves.
Crumble the crackers with a mortar or meat grinder. Place the finished crumbs in a container with milk, cocoa and sugar, stir.
During this time, crumble (grind into food processor) walnuts.
Mix walnuts, powdered sugar and remaining cocoa for sprinkling future candies.
Now add butter to the main mass for sweets (you can warm it up a little in the microwave, stir the mass in a container until it becomes homogeneous).
Make balls and roll them in a mixture of nuts, powder and cocoa.
The delicacy is almost ready! It remains to keep the balls for about an hour in the refrigerator or half an hour in the freezer.
Chocolates Hedgehogs - joy in the house
This is a super healthy treat! Fruits and dried fruits do not cause much enthusiasm among many, but what do you say if you are offered an unusual and healthy delicacy?

The main composition of "Hedgehogs" is what we know from children's books that hedgehogs love: fruit.
Dried apricots -100 g;
Raisins – 100 g;
Dried figs – 100 g;
Lemon – 2 pcs.
Add some nuts with honey:
Walnuts – 100 g;
Sweet almonds - 100 g - you can use one type of nut;
Honey - the same amount as all previous ingredients by weight.
For sprinkling:
Cocoa powder - 100 g or Powdered sugar - 100 g, or glucose colored balls for sprinkling.
You can maintain the proportions by changing the weight of the ingredients.
Grind the first 4 ingredients and nuts in a meat grinder. Add to them in a ratio of 1:1 (the same amount) honey - preferably candied, not runny. You want the consistency of a good sticky dough.
Now roll it into balls, roll them in powder, cocoa or balls. These goodies need to dry out. They should sit in the room for about 3–4 hours, then in the refrigerator for about an hour.
Chocolates with almonds “Surprise” - make at home
The ingredients are similar to our first recipe, the only difference is the absence of crackers.
Butter – 100 g;
Powdered sugar - ½ cup;
Cocoa powder – 100 g;
Almonds – 50 g, (You can use raisins instead of almonds).
Heat and melt butter in a saucepan until hot. Stir cocoa and sugar, then place in a saucepan with butter and cook until sugar dissolves.
Cool at room temperature for half an hour.
Almond time! Form balls from the cooled mass, placing a nut or raisin in the core of each.
A real yummy surprise is almost ready! It remains to keep the treat for about an hour in the refrigerator or half an hour in the freezer.
Chocolate covered almonds - a favorite and unforgettable treat
Want to make your own glazed nuts? Tired of looking for your favorite treat in stores? Now you don’t have to pay a lot of money for sweets, make your own and remember the taste you loved from childhood! It's quick and easy, but this recipe requires store-bought tiles. However, you can make your own frosting using the recipe above.

200 g almonds;
Baking paper.
cocoa - 4 tablespoons;
Preheat the oven to 100°C.
Dry the almonds, poured onto a baking sheet, in a preheated oven for about half an hour.
Now, nut by nut, dip the almonds into the liquid, then roll them into the cocoa.
Chocolate covered raisins, DIY sea pebbles
Such a familiar childhood treat - sea pebbles! This is a multi-colored sugar icing. It can also be made with a glaze of liquid cocoa and sugar.
200 g raisins;
100 g tiles (for melting; choose the flavor yourself - milky, bitter, white).
For " Sea pebbles“you just need sugar (although glazed raisins made from melted white bars with food coloring might deserve that name).
Baking paper;
For sprinkling - desirable, but not necessary;
cocoa - 4 tablespoons;
powdered sugar - 1 tablespoon.
Preheat the oven to 100°C.
Dry the raisins, poured onto a baking sheet, in a preheated oven for about 15 minutes.
Melt the tile in a saucepan or “water bath”. It is important not to stir it at this time!
Sprinkle cocoa onto baking paper.
Now dip the raisins in the liquid, then roll in the cocoa.
The finished candies should be shaken in a sieve to remove excess cocoa powder. Leave to dry.
Sprinkle with powdered sugar and place on the table for guests.
For Sea Pebbles, melt sugar or white tiles in a saucepan, add food coloring to it (in the ratio written on the packaging of the product you purchased). Do not roll in cocoa or powder.
DIY sweets with condensed milk
Lunch - condensed milk with chocolate! Let's combine two of the best delicacies in the world!
You will need:
A can of boiled condensed milk with cocoa;
OR
A can of boiled condensed milk plus three large (heaped tablespoons) spoons of cocoa;
walnuts - 1 cup, crushed in a mortar or meat grinder;
2 tablespoons flour or crumbled breadcrumbs:
foil or parchment (thick);
Berries from jam to taste - in quantity to taste.
For this recipe, you first need to boil the condensed milk. But since on average 10% of Russians have had a negative experience with condensed milk exploding, we advise you never do this! Why wash wallpaper and curtains when you can just buy boiled condensed milk?
So, add crushed nuts (and cocoa if the condensed milk was regular) to a can of boiled condensed milk. Stir.
Sprinkle appropriately sized foil or parchment paper (about a sheet on an oven tray) with flour or breadcrumbs. Scoop out the condensed milk mixture with nuts using a teaspoon or an ice cream scoop in the form of balls. It is better if it is moistened with water. You will have to spread it onto the foil or parchment using a second spoon (otherwise you will have to shake it off, otherwise the shape will change).
Place condensed milk balls on a sheet. There should be a distance of about 2 cm between them. Place a jam berry or raisin on each flatbread ball.

Drying at room temperature is not enough for these sweets - you need to dry them directly on foil or parchment in a preheated oven for about 15 minutes at a temperature of 100. After removing from the oven, let the sweets cool, so remove (pick) from the baking sheet with a knife or spoon.
Coconut and Nut Treat Recipe
This unusual recipe dessert in the form of tartlets with glaze and coconut crumbs.
You will need
tartlet blanks - 30 pcs;
2 tablespoons of hazelnuts and peanuts or any other nuts to taste;
3 tablespoons sour cream;
2 tablespoons cocoa;
2 tablespoons sugar;
40 g butter.
It is important to take the volume of tablespoons without a slide.
To diversify the recipe, you can take cashews, walnuts and pistachios: the choice of peanuts and hazelnuts is due to their relative abundance and the fact that they are not expensive, as well as the fact that they are the ones most often taken for confectionery.
Fry the nuts if they have husks (hazelnuts, peanuts) over moderate heat without vegetable oil until the husks come off. Tartlets will taste better with roasted nuts. You can just buy roasted nuts.
DIY chocolate
We continue to make tartlets using universal method preparing the glaze. Of course, there are recipes with factory-made glaze made from melted tiles, condensed milk or milk. But we will take a standard recipe with what every housewife always has in her kitchen. We will cook in a large cezve or steel ladle.
Place the container on low heat. Pour in the ingredients and stir until smooth. The mass will not boil, but after the “gurgling” starts, you need to immediately remove it from the heat. The glaze is ready. This glaze can be used for glazed almonds, for pouring sponge cakes, and for glazing cookies.
In our case, let the mass cool a little - it is important not to miss the moment of hardening! At this time, place the purchased (or pre-baked) tartlets on a wide plate. Now we put our nuts on the tartlets. Moreover, if the nuts are larger (hazelnuts, cashews, almonds, pistachios), then one nut per tartlet is enough, small ones - 3-4 (pine nuts, peanuts).
Pour the cooled glaze over the tartlets along with the nuts. Try to wait and not let the cooled glaze reach the consistency where it “slides” out of the spout of the ladle or cezve in large drops. Then it will not moisten the tartlet too much, the latter will not soften. Try one of them and, if all is well, work with the rest.
Now you can start making coconut crumbs. Use a pinch or teaspoon to sprinkle it onto the top of the tartlets, on top of the chocolate glaze.
The candies will be ready after the glaze has hardened (becomes shiny and almost hard) on the tartlets. This will happen in 10-15 minutes, it may take a little longer.
We have prepared a photo of tartlets according to this recipe - as you can see, your work will not be in vain, and the sweets homework They will not be inferior in taste or beauty to sweets from the store.
DIY chocolate covered prunes
Do you want to make your own glazed prunes, are you tired of looking for your favorite delicacy in stores? Now you don’t have to pay a lot of money for sweets, make your own and remember the taste loved by many since childhood! Today it is a very sophisticated delicacy for adults. It is simple and quick, but this recipe requires a store-bought bar. However, you can make it yourself using the recipe given above.
200 g pitted prunes;
100 g of tiles (for melting; choose the taste yourself - milky, bitter, white);
Baking paper;
For sprinkling - desirable, but not required:
cocoa - 4 tablespoons;
powdered sugar - 1 tablespoon.
Preheat the oven to 100°C.
Dry the prunes, poured onto a baking sheet, in a preheated oven for about half an hour.
Melt the tile in a saucepan or “water bath”. It is important not to stir it at this time!
Sprinkle cocoa onto baking paper.
Now, berry by berry, dip the prunes into the glaze, then roll them into the cocoa.
Ready-made sweets should be shaken in a sieve to remove excess cocoa powder. Leave to dry
Sprinkle with powdered sugar and place on the table for guests.
Glazed prunes at home
As a variation of the previous recipe, melt sugar or white chocolate in a saucepan, add food coloring to it (in the ratio written on the packaging of the product you purchased). Dip prunes into this glaze and do not roll them in cocoa and powder. Leave to dry.
Sweet walnuts at home yourself
Glazed walnuts are quick and easy, but this recipe requires you to purchase a bar. However, you can make it yourself using the recipe given above. In addition, you can use any liquid sweetness for pouring to taste.
200 g walnuts;
100 g of tiles (for melting; choose the taste yourself - milky, bitter, white);
Baking paper;
For sprinkling - possible, but not necessary:
cocoa - 4 tablespoons;
powdered sugar - 1 tablespoon.
Preheat the oven to 100°C.
Dry the walnuts, poured onto a baking sheet, in a preheated oven for about half an hour.
Melt the tile in a saucepan or “water bath”. It is important not to stir it at this time!
Sprinkle cocoa onto baking paper.
Now dip nut by nut into chocolate, then roll into cocoa.
The finished candies should be shaken in a sieve to remove excess cocoa powder. Leave to dry.
Sprinkle with powdered sugar and place on the table for guests.
Candies "Grillage in chocolate"
Our grandmothers, who so loved the scarce grilled chocolate in chocolate, had a secret ingredient recipe for its preparation... if you cannot learn this recipe from your grandmother right now, read ours and follow our advice.
Ingredients of the treat:
250 g walnuts;
10 g butter;
250 g granulated sugar.
Melt the sugar and butter in an aluminum or steel utensils, add the walnuts and butter crushed in a mortar or mixer. Stir the mixture. Now place the future sweets on a sheet of parchment or baking paper or simply on a baking sheet coated with butter or vegetable oil. Use a rolling pin to make it about half a centimeter thick and cut into pieces.
To make the glaze, you can melt the tiles in a saucepan or water bath, or you can make the glaze yourself.
3 tbsp. sour cream;
2 cocoa;
2 sugars;
40 g butter.
It is important to take the volume of tablespoons without a slide. Of course, there are recipes with factory-made tiles, condensed milk or milk. But we will take a standard recipe with what every housewife always has in her kitchen. We will cook in a large cezve or steel ladle.
Place the container on low heat. Pour in the ingredients and stir until smooth. The mass will not boil, but after the “gurgling” starts, you need to immediately remove it from the heat. The glaze is ready. This glaze can be used for chocolate-covered almonds, for filling sponge cakes, and for glazing cookies.

Pour the glaze over the finished grilled bars and let cool for an hour.
Gift set
Any type of sweets can be given as a gift - especially if you make it yourself. Choose a craft gift box and tie it with a straw ribbon: this way you will emphasize the naturalness and usefulness of the delicacy. You can wrap each sweet in corrugated or golden paper, thin foil, and tie with thin braid. Put sesal inside for beauty, artificial grass for floristry, etc.
It is customary to serve in a vase or on a wide platter. It can also be decorated by placing candies in rosettes made of crepe or gold paper.
Who doesn't love sweets? And the kids are completely crazy about all sorts of delicacies! But you don’t always know what store-bought sweets are made of. Therefore, it would not hurt to know how to make sweets with your own hands from available ingredients. Next, we will tell you how to make candy at home quickly and easily.
Recipe 1. Magnificent chocolate candies
You will be surprised, because making chocolates at home is as easy as shelling pears. You will need: walnuts (peanuts are fine), dark chocolate (about 150 g), 4 tablespoons of honey, “For tea” cookies (about 100 g), butter (50 g). Next, let's take a closer look at how chocolate candies are made:

- Grind nuts and cookies using a blender. Just don’t turn everything into tiny crumbs, you should just get small pieces.
- Melt butter on the stove and add honey. Bring the mixture to a boil. Loan, throw some nuts and cookies in there. Mix everything thoroughly to form a homogeneous thick mass.
- Melt the chocolate in a water bath. Roll the resulting mixture into balls, dip in chocolate and place on foil. Let it harden, and your homemade candies are ready.
Recipe 2. Sugar treat
Now you will learn a simple recipe on how to make lollipops at home in a few minutes. This is a simple delicacy beloved by many, but not everyone knows how to make sugar sweets at home from simple ingredients.

Take a container and mix about 200 ml of water, a couple of tablespoons of vinegar and 0.5 kg of sugar. Place on the stove and cook until the liquid turns bright yellow color. Grease the molds you have chosen with vegetable oil, then pour in the sugar mixture and insert toothpicks. Minimum costs and maximum pleasure, since everyone can make sugar candies at home.
Recipe 3. Yummy jelly
Another recipe for your favorite delicacy - we will tell you how to make jelly sweets at home from available ingredients. You will need: instant gelatin, fruit juice (about 150 g), 0.5 cups of cold water, sugar (about 300 g).

Soak gelatin in cold water. Then prepare a syrup from sugar and juice: mix everything and cook on the stove until the sugar dissolves. Add dissolved gelatin to the mixture, then pour everything into molds and let it harden.
The YouTube video will definitely tell you more about how to make candy at home, watch it right now.
Recipe 4. Homemade caramels
Do you know how to make caramel candies at home to surprise your family? There is nothing complicated about it! To prepare milk caramels, take 0.5 liters of milk, butter (100 g), sugar (3-4 cups).

Put the milk on the stove, bring to a boil, add sugar and cook until a brownish mass forms. Then add butter there and cook for about 1-1.5 hours. Then pour the resulting mixture into molds.
Recipe 5. Delicious toffee
It doesn’t cost anything to make candy with your own hands, the photos demonstrate this. You can also prepare your favorite childhood delicacy - toffee. You will need condensed milk (about 300 ml), 40 g of flour, a glass of milk, butter (about 100 g).

Melt the butter over low heat, add flour and fry until golden brown. Then pour condensed milk into it and cook for 10 minutes over low heat, stirring constantly. The milk needs to be heated to room temperature and add it to the condensed milk. Cook the mixture until thickened. After this, put the mass into a mold and let it cool, and then cut it into cubes or rectangles.
Don’t be afraid to experiment, pamper your family with various delicacies, since it’s very easy to make lollipops, toffees and other sweets with your own hands at home!
Cook for yourself, your kids and family, and share delicious Tips with your friends in in social networks right now!
Since childhood, many people have known the taste of their favorite homemade delicacy made from fruits - jam. It can be made from different fruits. Below we’ll talk about how to prepare apricot jam for the winter.
Classic recipe
If you strictly follow the technology specified in the recipe, you get excellent and very tasty apricot jam in slices for the winter.
In order to prepare the classic in a very tasty and sweet syrup, you need to take sugar and ripe hard fruits in equal proportions. Apricots should be thoroughly dried and pitted, cutting each fruit into two halves. All the slices need to be placed in one large pan with the centers up in small parts, periodically sprinkling them with sugar until the ingredients run out. After the manipulations have been carried out, the pan with the contents must be left for some time until the fruit releases its juice. Alternatively, you can leave them covered in the refrigerator overnight.
After the fruits have acquired the required condition, they need to be put on the fire to boil until the aged syrup boils. After this, remove the pan from the stove, let it cool and repeat the procedure twice more. After all the steps, it’s time to put the finished jam into small jars and seal with metal lids.

Jam with seeds
Despite the fact that the technology of many recipes for apricot jam for the winter requires the removal of seeds from the fruit, you can go against the system and prepare it with them.
To create such an original delicacy, you need to take fruits and sugar in equal proportions and, cutting the fruits in half, remove the seeds from them. Next, having placed the fruits with their centers up, they should be carefully sprinkled with sugar and left for a couple of hours in a cold place so that they release a little juice. After the specified time has elapsed, place the pan on the stove and bring its contents to a boil over low heat. As soon as this happens, you need to remove the resulting foam, remove the container from the stove and leave it for 6-8 hours (some wait the whole night and continue cooking in the morning).
After the time specified in the recipe has passed, the jam must be boiled again so that the contents are simply warmed up. Now it’s time to start preparing the seeds. They need to be broken, the kernels removed and the skin removed from each one. As soon as the jam becomes hot, it should be removed from the heat, cooled and cooked again, but this time with the seeds. At this stage, the jam should be cooked for no more than 7 minutes. After this, the dessert needs to be poured into sterilized jars and sealed with metal lids. This homemade apricot jam will certainly please all guests. It can also be prepared not as a winter preparation, but as a seasonal delicacy - it will also be delicious.

Thick aromatic jam
Don’t know how to make apricot jam for the winter? It couldn't be easier! It can be made not only from whole fruits, but also in the form of jam.
To do this you need to take:
- 1 kg ripe apricots;
- 0.5 kg sugar.
Practical part
The fruits need to be washed, wiped dry with a towel and, after removing the seeds, put them in a saucepan and sprinkle with sugar. Immediately place the container on the stove and wait for the contents to boil.
After this happens, you need to reduce the heat and continue cooking at lower power for 20 minutes, remembering to stir occasionally. At this stage, you will notice how the fruit gradually takes on a porridge-like shape. As soon as the jam begins to reach a state of homogeneity, you should add cinnamon to taste to the pan, stir well, let it cook until the end and, after placing it in jars, roll it under the lid.

Jam "Kyiv"
This apricot jam for the winter is very easy to prepare. In addition, it looks very beautiful, since the jar contains only whole fruits.
To prepare it, you need to wash 1 kg of ripe, dense apricots, wipe them dry with a towel and pierce each fruit in several places with a toothpick. After this, you need to start preparing syrup from 1.5 kg of sugar and a couple of glasses of water. After it is ready, you should pour it over the apricots and leave it to infuse in a cool place for a day. It is very important to choose good fruits, without damage, to prepare such jam. This way they will retain their original appearance.
After 24 hours, the syrup must be drained from the fruit and boiled thoroughly over the fire. After this, the procedure must be repeated. Pour sweet syrup over the apricots again and leave again for the same period. As soon as a day has passed, the fruits along with the syrup should be put on the stove, boiled and, poured into jars, rolled up under the lids.

Five-minute jam
This recipe describes how to make five-minute apricot jam for the winter. When cooking using this technology, you won’t have to stand at the stove for hours waiting for the contents to boil, and you won’t have to wait a while for it to infuse and become saturated. In addition, the fruits retain great amount useful substances, since no heat treatment is performed on them.
To prepare tasty and healthy jam, you need to put 1 kg of peeled apricots in a blender. After this, you need to boil a couple of oranges and one lemon for some time. This is done in order to eliminate the inherent bitterness from the fruit. After this, you need to remove all the seeds from them and cut them into small pieces, and then add them to the apricots. All ingredients must be ground until smooth, preferably twice. The jam is almost ready - now you need to add 3 kg of sugar to it. After thorough mixing, pour into jars and roll under an iron lid.
Apricot slice jam
To prepare such apricot jam in slices for the winter, it is advisable to choose dense fruits. You can even use slightly unripe ones.
To prepare it, you need to wash and pit 1 kg of apricots, dividing each fruit into two halves. In a separate bowl, prepare syrup from 700 g of granulated sugar and 1.5 liters of purified water. Having brought it to a boil, it is worth pouring it over the fruits, which were previously placed in a sterilized jar (it is advisable to use a liter jar, since with a smaller volume the fruit may lose its shape). After this, the containers should be covered with a lid and left to sterilize for 20 minutes, after which they can be rolled up using a machine.
Apricot jam with cherry leaves
The original technology of how to cook apricot jam for the winter is presented in this section. The recipe for making such a delicacy is very simple and does not require any culinary tricks. Any housewife can please her guests and her household with a ready-made dessert.
For cooking fragrant jam you need to take 1 kg of apricots of the juiciest variety. They are best suited for this type of jam. You need to remove the seeds from them and place the fruit in the pan. Add 0.5 kg of granulated sugar there and leave to infuse for 40 minutes. After this time, the fruits must be mixed so that the sugar is distributed evenly and, placing the pan over low heat, bring everything to a boil. In this state, the fruits need to be boiled for 5 minutes and, after setting aside for a couple of hours, cool slightly.
After such manipulations, all steps must be repeated, but with 5-7 cherry leaves, which can be placed directly with the twig. In this composition, the ingredients should be cooked over low heat for 15 minutes, stirring without stopping, but without destroying the structure of the apricots. After the allotted time will pass, you need to take out the leaves and put the jam in the jars, rolling up the lids.

Apricot jam in a slow cooker
The recipe for apricot jam in a slow cooker for the winter is very simple and even an inexperienced housewife can prepare such a delicacy.
To do this, you need to take ripe and, preferably, large apricots (600 g), peel them from the seeds. Place fruit and 300 g of sugar in the slow cooker. You also need to add fresh juice extracted from half a lemon. For an hour, the ingredients should be cooked in the “Stew” mode, covered, stirring occasionally. After these simple procedures, the jam is ready. It can be placed in sterilized jars and rolled under the lids.
Jam in the oven
Apricot jam for the winter with extraordinary taste can be prepared in the oven. To do this, you need to take 3 kg of ripe, but not very soft fruits, wash them thoroughly, dry them and remove the seeds. After this, you need to add 1 kg of granulated sugar to them and leave for a while so that the juice comes out. To speed up this process, you can leave the container with fruit in a warm place. After this, the basin with apricots must be sent to the oven, which should first be preheated to a temperature of 180 o C.
During the heat treatment, the contents of the container must be stirred periodically. How long does it take to cook apricot jam for the winter, prepared according to this recipe? Everything is simple - to a state of homogeneous density. As soon as a thick mass forms in the basin, the jam is ready. After reaching the required state, the dessert should be placed in jars and, covered with metal lids, sent to a cold place to wait for winter.
Spicy apricot jam for the winter
The recipe for this dessert is a little unusual. Indeed, in addition to fruits and sugar, among its ingredients you can find a certain amount of spices. The end result is an excellent delicacy that will certainly become a favorite for all family members.
To do this for real delicious dessert, you need to take 1 kg of ripe pitted apricots and, putting them in a saucepan, lightly crush until the juice appears. After this, the fruit must be put on fire to produce them. heat treatment, bringing to a boil.
Squeeze the juice out of one ripe lemon. One pectin must be dissolved in it. After this, place in a saucepan with boiling apricots lemon juice with pectin, as well as 1 kg of sugar and a certain set of spices, which should include a couple of cinnamon sticks, as well as 5 cardamom and clove seeds each. In this composition, the ingredients need to be mixed well and wait until they boil again. As soon as this happens, you should immediately turn the heat down to a minimum and keep the container of jam on low heat for 10 minutes, then put it into jars. Delicious and spicy apricot jam is ready for the winter.

Apricot jam for the winter (with gelatin)
To prepare such a dessert, 0.5 kg of apricots must be washed, pitted and half the fruits placed in a container. inside up. Sprinkle them on top with 0.5 cups of sugar and a pack of dry gelatin (15 g). In this composition, under the lid, the ingredients should be left for exactly one day. As soon as the allotted time has passed, the pan with the contents should be placed on low heat and add about 0.5 cups of purified water and just a little citric acid (1/4 tsp).
Apricots should be brought to a boil and cooked for 5-6 minutes, without turning up the heat. Once everything is done, the fruit and syrup should be transferred to sterilized jars and rolled under metal lids. This is how easy it is to prepare apricot jam with gelatin for the winter.
Greetings, our dear readers. Summer is in full swing, various fruits are ripening, including apricots. We love apricots very much and enjoy making apricot jam for the winter.
How nice it is, in winter, to pour a cup of hot tea, take out a jar of apricot jam and, while enjoying the amazing jam, remember the wonderful summer.
In addition, apricot jam perfectly preserves vitamins that are so necessary for the body, especially children, in winter time, and especially in Siberia.
This jam can also be eaten at breastfeeding, it is perfectly absorbed and does not cause allergic reaction. It is rich in vitamins A, B, C, iron, magnesium and potassium. What is so necessary for a growing organism.
This jam is also perfect for baking. In general, the most basic advantages have been identified, it’s time to start with the recipes themselves.
Apricot jam with pits (kernels).
We most often prepare this jam, if it works, but we do not throw away the seeds, but cook it together with the kernels. It tastes better and the kids like it. In principle, the technology for making apricot jam is not much different from, say, raspberry jam, but there are differences.
We will need:
- Apricots – 2 kg;
- Sugar – 2 kg.
Sugar is taken at a 1:1 ratio, as in many other jams.
First, peel the apricots, removing the pits. But we don’t throw them away; we’ll get the kernels out later.

Then add sugar to the peeled apricots and mix.

Now let’s leave it in this state for several hours so that the apricots release their juice and the sugar begins to dissolve. At the same time, periodically stir the apricots with sugar.
While the sugar is dissolving, you need to remove the kernels from the nuts. To do this, we ask our husband)))) or children.
After a few hours, the sugar has completely dissolved and the nuts have been peeled.

Now you can start making jam. Place the pan over medium heat and bring to a boil.
After the jam boils, reduce the heat and set it to slightly below medium. In this case, a foam forms on top, remove it as usual. So let the jam cook for another 30-40 minutes.

About five minutes before the end of cooking, pour our nuts into the pan and mix. Cook for another five minutes and remove from the stove.

Then pour the apricot jam into jars using a hot method. The jars do not need to be sterilized, but they must be clean, of course. We close them with iron lids; they also do not need to be sterilized.

Afterwards we put the jars on the lids and wrap them in something warm. After cooling, the jars can be stored.

By the way, apricot jam according to this recipe can be stored at room temperature.
To make jam without seeds, just don’t put them in the jam and that’s it, the recipe remains the same)))
Apricot jam without seeds, an interesting option.

In principle, there is nothing difficult to make jam from pitted apricots, even the recipe is above, everything is elementary and simple. But you can prepare apricot jam a little differently, the apricots turn out like dried ones, dipped in jelly (roughly speaking), but the taste is amazing.
Ingredients:
- Apricots - 1 kg;
- Sugar - 400 g;
- Gelatin - 2 tbsp. l. Incomplete.
Wash the fruits and remove the seeds. This is easy to do if the apricots are really ripe.
Mix apricots with sugar and gelatin.
Cover the dish with a lid and shake so that the bulk products are evenly distributed in it. If you don’t have a special copper basin, a pan made of non-oxidizing material with a thick bottom will do, in which you will then cook the jam until cooked.

At night, find a place for the apricots in the refrigerator.
In the morning, sterilize the jars and lids. Place the dishes with the prepared mixture, which has released the juice, over medium heat.

As soon as it boils, you can pour the jam into jars and immediately roll up. What will come of such conservation? The barely visible jelly will thicken very quickly, but will not stop shaking. The most tender apricots will also freeze in it and taste like dried apricots.
A simple recipe for apricot jam with orange.

Now let's prepare apricot jam with orange. This is an amazing combination of flavors, we also recommend it to everyone. Just an explosion of taste buds. At the same time, the jam becomes even healthier due to citrus fruits and orange zest.
We will need:
- Apricot - 1 kg;
- Orange - 2 pcs;
- Sugar – 1.4 kg (ratio of 1 part sugar to 1 part fruit mixture);
- Pectin for jam – 1.5 packs.
We clean the apricots, removing the pits. We won't use them, but if you want, you can peel them and then add them to the jam.
Cut the oranges into slices and remove the seeds.
Grind the oranges and apricots into a homogeneous mass. You can use a food processor or meat grinder. If you use a blender, it will turn out very liquid, I don’t recommend it.
There is no need to peel the oranges.

Now add pectin for jam. Be sure to look at the packaging to see how much you need for 1 kg of jam. We needed 1.5 packs. It will give the jam a jelly-like appearance. But you can do without it altogether or add gelatin.
Also, immediately add sugar at the rate of 1 kg of sugar per 1 kg of fruit mixture. And mix everything thoroughly.
Now pour the mixture into a saucepan with a thick bottom and place on medium heat. Stir our jam periodically. After it boils, cook for another 5 minutes and remove from the stove.

Now you can pour it into jars and seal it for the winter. Bon appetit.
Apricot and orange jam with lemon, without cooking.
It may turn out to be butter, but essentially it’s jam without cooking. Since there is no need to cook it, this apricot jam retains the entire range of vitamins and minerals. Very helpful.

And in order for the jam to ferment, they add citric acid or the lemon itself. We also prepare and sterilize jars in advance.
We will need:
- Apricots – 2 kg;
- Orange – 1 piece;
- Lemon – 1 piece;
- Sugar – 3 kg.
Wash and peel the apricots well, removing the pits.
Thoroughly washed lemon and orange, grind using a blender or food processor along with the peel. Grind the apricot with them.

Mix the resulting fruit puree with sugar.

Sterilize jars with screw caps.
Place the mixture in jars and add a spoonful of sugar on top to prevent mold from appearing on the surface during storage. Twist.
That's all, apricot jam without cooking is ready and very tasty.
Apricot jam with orange can contain not only lemon, but also lime, grapefruit, gayanima, rangpur, citron and other citrus fruits. Apples, plums or pears will also perfectly complement this jam. Only when rolling up the mixture for the winter different ingredients, it is advisable to mix in half a teaspoon of citric acid per 1 liter jar.
Apricot jam in a slow cooker (video).
Also, if you have a wonderful thing - a slow cooker - you can make wonderful jam. In fact, the recipe may not change at all; you can repeat all the above recipes where you need to cook. We just use a slow cooker rather than a stove.
But let’s describe one more recipe, different proportions, plus you can leave the apricot slices whole and then you can enjoy apricot halves in the winter, it’s also very tasty and beautiful.
Well, that's all for us, I hope you liked our recipes, leave your comments below. Also join us on Odnoklassniki and support us on our channel in Yandex.Zen.
Thank you all for your attention, bye bye, stay with us, it will be even more interesting.
How to make apricot jam at home for the winter. updated: July 26, 2018 by: Subbotina Maria
The simplest and delicious recipes tender and fragrant apricot delicacy
Apricot jam without seeds

Sunny apricot jam can be prepared in many ways. But it’s always more pleasant to feel the full harmony of taste without interrupting the removal of seeds from the delicacy. To prepare 1 liter of tender jam without the core you need to take:
- Apricots – 0.9 kg;
- Water;
- Granulated sugar – 0.9 kg.
To make jam from pitted apricots, well-washed fruits are cut lengthwise and pitted. If desired, the fruit can be left as is, or cut into pieces. Sprinkle the apricots placed in a deep pan with granulated sugar and leave overnight or for 12 hours. During this time, the fruits will release juice and become saturated with sweetness.
Please note: if you don’t have that much time, you can pour about 190 ml of water into the pan and immediately put it on the fire. In any case, boil the infused or water-filled fruits for 1 minute, removing the resulting foam. After this, the fruits must be set aside again for 11 hours. Now, after the jam has boiled, boil it over low heat for another 12 minutes. The hot, finished delicacy is divided into clean and sterilized jars and sealed.
Five-minute apricot jam in slices

For those who cannot boast of a lot of free time, but still want to try homemade jam in winter, the “five-minute” recipe is perfect. In addition, the preparation is very simple, you need:
- Apricots – 1.5 kg;
- 1.5 kg sugar;
- 500 ml water.
How to cook jam from apricot slices for five minutes: dry the washed fruits with a towel. Cut the pitted apricots into slices and pour them into an enamel pan in layers. In this case, you need to lay out the fruits with the centers up, sprinkling each layer with granulated sugar. While the apricots release their juice, you can set them aside (for at least 4 hours, you can put them in the refrigerator overnight) and start preparing the jars.
Pour infused apricots clean boiled water(you can do without it if the jam should be thicker) and put it on the stove. Boil over medium heat for 5 minutes, then set aside for 3 hours. We repeat these events 3 times. If you want to leave whole slices, then you should not stir the jam during the cooking process. You just need to shake the container or rock it from side to side. When it boils, remove the foam.
After the third boiling, pour the jam into dry, clean jars, seal and let cool, after which we put it in a cool place.
Five-minute pitted apricot jam
You can also make seedless jam using the five-minute recipe.
For it you need to take the following ingredients:
- Sugar – 1 kg;
- Apricots – 2 kg.
The jam boiled according to this recipe turns out to be liquid, but it is perfect for soaking cakes and biscuits; you can use it to make a fruit drink or cocktail. Peel the cooked fruits and place them in a saucepan or bowl with an enamel surface.
After covering the apricots with sugar, leave them aside to form juice for 12 hours. Depending on the degree of maturity, the time can be reduced. After that, the fruits are placed on the fire and, stirring, bring to a boil. Boil the delicacy for 5 minutes, then cool and boil again for 5 minutes 3 times.
When the finished treat has cooled, you can pour it into sterile jars. Once sealed, the delicacy should cool, after which it can be stored in the cellar.
Apricot jam with kernels
 Apricots without seeds but with kernels are also useful. Original jam will be made from the following amount of ingredients:
- Fruits – 1 kg;
- 1 kg – sugar;
- 100 g of water.
Remove the pits from washed and dried apricots by making a cut. We take out the kernels from them and return them back to the fruits. This way you will get jam from stuffed apricots. Now we cook syrup from sugar and water. After boiling, stir and wait for all the sugar crystals to dissolve.
Pour the stuffed fruit into the boiling sweet liquid and cook for 5 minutes. After this, you need to let the mixture brew for about 3 hours. Then boil again for about 5 minutes and let cool again for about 2 hours. The third time after cooking, immediately pour into sterile, clean jars and seal.
How to make apricot jam in slices

In order to properly prepare jam from apricot slices, you need to take equal parts sugar and fruit.
How to properly cook apricot jam in slices: wash the fruits well and remove the seeds. Then, cutting into slices the right size, apricots are placed in enamel containers in layers, alternately sprinkled with sugar. Last layer We also sprinkle sugar on top.
After this, you need to let the fruit release its juice. To do this you need to leave them overnight. Be sure not to stir the fruit. Also, the secret of whole slices is not only to shake, but not to stir the jam, including during cooking. Also, for this you need to use ripe, but not overripe fruits.
On the stove, bring the apricots to a boil and cook them for about half an hour, after which we put them in sterile jars and seal them. You can prepare jam from the wedges according to the five-minute recipe, boiling in several batches for 5 minutes. You can also add citric acid at the end of cooking.
Apricot jam with gelatin
For lovers of jelly, marmalade and thick treats the best recipe There will be an option for apricot jam with the addition of gelatin.
To do this you need to take:
- Apricots – 1 kg;
- Gelatin – 30 g;
- 2 tbsp. Sahara.
The washed fruits are cleaned, removing seeds, and divided into halves. Sprinkle with sugar and place the apricots in a cooking container, adding instant gelatin crystals. Leave it in this form for a day. The next day there will be enough juice and the fruit can be put on low heat. Bringing to a boil, remove the foam.
After boiling the jam, pour it into sterile jars and seal. Before using, it is advisable to put the jam in the refrigerator for a while so that it hardens a little. After which the apricot jelly-like jam is ready. Enjoy your tea!
Overripe apricot jam
It is not always possible to cook what you want from overripe fruits.
For example, they are unlikely to make compote. However, you can make excellent jam from overripe apricots. Or rather, it will turn out more like jam, but very tasty. For it you need to prepare the following products:
- Overripe apricots – 1 kg;
- Sugar – 1.2 kg.
To make the jam even more tender, it is recommended to remove the skin from the fruit. In addition, then the color of the delicacy becomes more saturated and bright. So, we wash and dry the apricots. Once the fruits have dried on a kitchen towel, you can remove the skins from them. Don’t be upset if, when peeling, the pulp starts to turn into mush—you’ll have to cook less.
Sugar is added to the pulp, the mass is mixed and immediately put on fire. Another advantage of overripe fruits is that you don’t have to wait for the juice to release. Boil over low heat for 15 minutes, stirring constantly. When the jam has cooled completely, you need to boil it in two more batches for about 10 minutes. Between cooking, we also set the mixture aside to cool.
Each time the jam will become thicker. You need to finish cooking on the stove when the thickness seems sufficient. And after that you can immediately put it into sterile jars. Enjoy your tea!
Is it possible to freeze apricots for the winter: recipe
Housewives freeze a lot of berries and herbs for the winter for future use, but for some reason not everyone remembers about larger products.
This is how apricots are ignored. Many simply do not know whether it is possible to freeze apricots for the winter, but they not only can, but also need to be prepared in this way. Sunny fruits contain many useful substances that are difficult to preserve using traditional harvesting methods.
Beneficial properties of apricots that are preserved when frozen:
- This bright color The fruits receive the sun due to their saturation with carotene, the amount of which they contain is not inferior to the amount contained in egg yolk.
- The presence of vitamins B (B1 and B2), C and PP.
- Apricots contain many useful microelements: manganese, cobalt, copper, iron and potassium.
This fruit is useful for people suffering from cardiovascular diseases, and it also helps with burns on the face in the form of a mask. And when frozen, you can preserve absolutely all the vitamins and elements. There are several freezing methods:
- Entirely;
- In syrup;
- In halves;
- Grinded with sugar.
The main thing with any method is to adhere to the rules of correct preparation.
Firstly, if you freeze it, it is better to do it in several smaller portions at once, since thawed foods cannot be re-frozen.
Secondly, the process of freezing apricots should be gradual and unhurried, so as not to end up with an unappetizing porridge.
How to freeze apricots correctly
Depending on the freezing method, the harvesting rules will change. So, to find out how to properly freeze apricots, you must first decide how you want to prepare them. Let's look at the features of freezing apricots in different ways.
General procedures for all freezing methods:
- For freezing, you need ripe, undamaged fruits.
- The fruits are thoroughly washed in warm running water and laid out on a towel to dry.
- At the next stage, you can divide the whole fruits into two slices, also removing the seeds.
Next, to preserve the fruits whole or in halves, you need to prepare a small tray that will fit in freezer. Place the dried fruits on it in one layer and put them in the freezer. From such fruits you can subsequently prepare anything you like: compote, sauce, smoothie, jam, etc. Instead of a tray, you can just use a clean one plastic bag. Naturally, it is desirable that there are no other products in the chamber during the freezing period.
To freeze in syrup, place clean dry fruits in a saucepan and sprinkle with sugar in layers. They stand like this until the granulated sugar dissolves in the juice that comes out of the berries, turning into syrup. Then we freeze it in closed food-grade plastic containers.
Well, the last method is grinding the fruits with sugar. Washed apricots are crushed using any in an accessible way in puree. Now add sugar to taste and lemon juice. When the sugar has dissolved in the juicy mass, you can spread it over plastic containers and, closing them, put them in the freezer.
Apricot jam in slices: quick and easy
Everyone is accustomed to the fact that making jam from apricots and other fruits requires not only skills, but also a lot of patience.
But not everyone knows how to make apricot jam in slices quickly and without hassle. To do this, you will need a microwave (in extreme cases, an oven) and food in the following proportions:
- Fruits – 1 kg;
- Sugar – 500 g-1 kg;
- Juice of half a lemon or 3 tbsp. l. water.
We clean the washed and sorted fruits from seeds and pour them into a special container for microwave oven. Please note that it is advisable not to use plastic or very small containers, as boiling will create quite a lot of foam from the jam. Pour lemon juice or water into the apricots and place the uncovered container in the microwave turned on at full power for 5 minutes.
During this time, the fruits will release juice and soften. Add sugar to them and mix the products carefully. Then put the container back into the oven for 5 minutes. After taking it out after the time has passed, mix it again and put it in the microwave for another 5 minutes. It turns out it only takes 15 minutes to make the jam!
The delicacy comes out very bright with an amazing aroma and rich taste of apricots. Bon appetit!
Apricot jam: recipe by Yulia Vysotskaya

The famous actress and now popular TV presenter Yulia Vysotskaya turned her favorite hobby - cooking - into work and now shares her secrets with all of us. Not only a tasty, but also a healthy delicacy - apricot jam according to the recipe of Yulia Vysotskaya: simple but elegant. To prepare a delicacy according to this recipe you need to prepare:
- Lemon – 0.5 pcs.;
- Granulated sugar – 900 g;
- Apricots – 1 kg.
Wash the fruits and remove the seeds from them, cutting the fruits into halves. Fill the apricots with water and place on the stove. When the water boils, add sugar and the juice of half a lemon to the fruits. The products are cooked for 1.5 hours. During this time, we regularly check the accumulated foam and remove it. If you really want to get jam rather than jam, then periodically rub the fruits with a spoon against the walls of the container.
The result is a homogeneous jam, which we immediately pour into jars and let the delicacy thicken. That’s it, Vysotskaya’s jam is ready!
Apricot jam in a Redmond slow cooker
Anyone who has tried this miracle of technology knows how much easier it is to cook with a slow cooker.
It makes it much easier and faster to prepare sweets for the winter. To make excellent apricot jam in the Redmond multicooker, you need to prepare the products in proportions of 1 to 2:
- Fruits – 600 g;
- Sugar – 300g.
The amount of granulated sugar can be changed to your taste, you can use 1:3. First of all, wash the apricots and remove the pits. The finished halves can also be cut into pieces. Place the fruits in the multicooker bowl, pouring sugar on top. If desired, you can add lemon juice to the dish.
We set the multicooker for 1 hour in the “baking” mode. Next, the housewife will only need to periodically stir the mass so that it does not stick to the bottom. But that’s all, when the time is up, all that remains is to put the jam into jars and roll it up. Now the main thing is to wait until winter so as not to open the delicacy ahead of time.
The only drawback of cooking jam in a slow cooker is the small volumes of one batch of workpiece. But it's worth it. Enjoy your tea!
Apricot jam with pits: a royal recipe
An original variety for those who love apricot jam with pits - a royal recipe for making a delicacy.
It will require more effort and time spent, but all the work will not be in vain. For this variation of a simple recipe you will need:
- Apricots – 4 kg;
- Sugar – 3 kg;
- Citric acid – a pinch.
We thoroughly wash and dry the fruits. The seeds from the fruit are not completely removed traditional way. You need to insert a thin piece into the recess from the tail wooden stick and squeeze the kernel out of the fruit. This must be done very carefully in a circular motion. Thanks to this simple method, all apricots will retain their integrity.
We remove the kernels from the seeds, carefully breaking them with a hammer, and “stuff” our apricots with them. Now prepare the sweet syrup. Pour the boiled liquid over the fruits placed in the pan and put it on the fire. Having brought to a boil, remove the foam from the jam and turn off the stove. Now you need to be patient, the delicacy should infuse for about 10 hours, no less.
After the time has passed, we repeat the cooking procedure twice, between these stages the jam cools for more than 12 hours. The third time, the jam can be poured into sterile jars and stored for the winter. Enjoy your tea!
Transparent apricot jam “Amber Lake”

In order to please your family and friends with a crystal clear amber delicacy, all you need is to prepare clear apricot jam. To do this, you need to take products in the following ratio:
- Peeled apricots – 1 kg;
- 0.8 - 1 kg granulated sugar.
Any fruit is suitable for this recipe, both slightly overripe and unripe. For utensils, take a pan with a thick bottom or a brass basin. The apricot halves are sprinkled with sugar and left for 3-4 hours to release the juice. In the meantime, you can prepare containers for the preparation.
Then we move the pan with the fruit onto the stove; you can add a little water to speed up the cooking process. While the sugar melts, carefully stir the mixture with a wooden spatula so that all the berries are covered with syrup. When all the sugar crystals have melted, wait for it to boil and remove from heat. While neither the container nor the mass has cooled down, you can turn the fruit over, completely covering them with hot syrup. Now we leave the treat for a day.
The next day, reheat the jam by placing the pan over low heat, bringing it to a boil. Now turn the flame down to very low and heat for another 10 minutes, always stirring the mixture. Then we leave the apricots again for another 12 hours - a day. The jam will already be quite viscous and thick, but another procedure will be required.
For the third time we repeat the second stage of cooking completely, after which we get an amazing thick jam with whole fruit and amazing aroma. After another 12 hours, at least, reheat the jam in last time, continuing to mix the fruit very carefully. Pour the already quite hot jam into jars and seal.
Apricot jam slices with pits
To treat yourself to apricot jam, slices with seeds, you need to take whole fruits, but ripe enough.
Instead of apricot kernels You can take almonds, then the taste of the delicacy will be especially bright. So, for preparation you need:
- Apricots – 1 kg;
- 1 kg granulated sugar;
- Citric acid – 1/2 tsp.
The given amount of products should yield about 1 liter of finished jam. We rinse the fruits well in running water, dry them on a kitchen towel and divide them into slices, removing the seeds along the way. We take the kernels out of the seeds and also wash and dry them. Now place the apricot slices in the pan in layers, sprinkling them with granulated sugar. If the fruits are not quite ripe, you can add a little water to the pan. So we leave the food for a day.
The next day, place the pan on the stove and bring the mixture to a boil. At this time, you need to stir constantly, helping the sugar to dissolve better. When the jam boils, reduce the heat and simmer for about 40 minutes, stirring constantly and removing the foam that has formed on the surface.
About 5 minutes before the end of cooking you need to add citric acid if you decide to add it, although this is not necessary. At the same time, add our kernels and mix everything thoroughly. The jam is ready! Pour the delicacy into clean steamed (sterile) jars, seal and leave to cool in the usual way - wrapped in a blanket and turned upside down.
Royal apricot jam
Royal apricot jam cannot be called a simple homemade jam.
This is an incredibly tasty and exquisite delicacy that you won’t be ashamed to treat your guests to. To prepare it you need to take the following products:
- Fruits (apricots) – 1 kg;
- Water – 1 tbsp.;
- 1/2 kg sugar.
Apricots need to be sorted, selecting only dense, ripe fruits without damage. Then best fruits wash and remove seeds. The kernels removed from the seeds must be placed back inside the fruit and placed in a saucepan or bowl for cooking. It is recommended to choose cookware made of brass or copper. Instead of apricot kernels, you can use walnuts.
Pour water (about 200-250 ml) into the pan with the fruits and add sugar. Cook the fruit with sugar over moderate heat. Stir the mixture regularly with a wooden spatula, but with extreme care. Cook until all the sugar is dissolved in the liquid, but not burnt. If you suddenly missed it a little, you can add a little hot water.
Having boiled the syrup with apricots in this way, let it cool. After this, pour the syrup into a separate bowl and return it back to the stove. Pour boiling syrup over the fruit. Then, when it cools, drain again and bring to a boil. The procedure is repeated at least 3 times. Look at the richness of the jam.
When the jam has acquired the desired thickness and taste, it can be placed in sterile jars and sealed. The rolls are immediately wrapped in a towel that has been previously soaked in water. We remove the already cooled workpiece into the cellar.
Apricot jam slices with soda
The recipe involves making apricot jam in slices with soda so that the fruits do not boil over and retain their shape.
The recipe will require some attention and hard work. Required Products:
- Fruits – 1 kg;
- Granulated sugar – 1 kg;
- Water;
- Soda – 1 tsp.
Remove the seeds from the washed fruits and divide the fruits into slices. To prevent the fruits from falling apart during thermal treatment, you need to fill the slices with a soda solution for 5 minutes. Dissolve soda in 1.5 liters of water.
Separately, prepare the syrup, which we pour over the apricot slices. Let them cool, then pour the syrup back and boil again. Pour the re-boiled syrup into the pan with apricots and cool again. This procedure must be repeated 4 times. The last time, let the jam cool completely and distribute it into sterile jars.
Apricot jam slices in a slow cooker
 You can easily and quickly make apricot jam in slices in a slow cooker. For this recipe you will need the following amount of ingredients:
- Fruits (apricots) – 0.6 kg;
- 300 g sugar;
- Lemon juice – 1/2 pcs.
Dry the washed fruits with a kitchen towel and remove the seeds. Next, cut the apricots into slices and place them in the multicooker bowl. Sprinkle granulated sugar on top of our fruits, add lemon juice, mix thoroughly but gently. We select the “quenching” mode and set the equipment to work for an hour.
Please note that if the “stewing” mode is selected, you can cook with closed lid, if “baking”, then do not close the lid. Stir the jam periodically during the first 15 minutes and constantly during the last 15 minutes to prevent it from burning.
When time has passed, the jam is ready and can be poured into clean steamed jars. Having rolled up the pieces, turn them over, wrap them and leave them to cool. The recipe can be slightly modified to suit your taste, for example, adding nuts or apricot kernels. Enjoy your tea!
Unripe apricot jam
If you get a lot of unripe fruits from your harvest or purchased apricot, don’t be upset.
You can make amazing jam from unripe apricots with an original shade and aroma. For him we take:
- Green apricots – 1 kg;
- Sugar – 1 kg;
- Half a lemon (juice);
- Water – 3 tbsp.
The fruits, washed three times in cold water through a colander, need to be pricked with a needle, or better yet, with a toothpick across and along the fruit directly through the soft seed. Then put the fruit in boiling water for a couple of seconds and drain. Now you need to leave them on a towel to dry. While they dry, you can prepare the syrup.
In already ready hot sugar syrup we lower the dried fruits, squeeze the juice out of the lemon and send it there. Boil the mixture until cooked, periodically skimming off the foam with a slotted spoon. You can add vanilla if you wish. Pack the finished jam into jars.
Delicious apricot jam in a bread maker

If there is a bread machine in the house, then this miracle of technology can be used not only for its original purpose. You can speed up the traditional preparation of the delicacy by making excellent apricot jam in a bread maker, which will also significantly save time. Required Products:
- Apricots – 0.8 kg;
- Sugar – 0.4 kg;
- 3 tbsp. l. water.
We wash the apricots, divide them in half, removing the pits along the way. Pour water into the bowl of the bread machine and place the prepared fruits. In technology modes, select “Jam” and press the start button. Periodically you need to check the consistency of the jam; if necessary, you can set a different cooking time.
If you want a thick jam or jam, then before cooking the apricots need to be divided into 6-8 parts and mixed well with the rest of the ingredients during cooking. When the bread machine is finished working, the jam can be sealed in sterile jars and cooled and stored in the cellar until better times.
When to buy apricots for jam?
If this is the first time a housewife has encountered preparing sweet dishes for the winter, then jam will probably be included in this list.
But, when should you buy apricots for jam, in order to catch ripe and not already overripe fruits, or, on the contrary, not to rush, purchasing still green fruits? Let's try to answer this question.
Despite the fact that apricots can be found on sale at the end of spring, the season of these sunny fruits begins in mid-July and lasts until the end of the month. Ideal option There will be harvesting, and therefore purchase of fruit, in the second half of July. If you plan to prepare jams or just preserves without whole fruits, then you can extend the preparation period to a maximum of the beginning of August. Then the amber fruits already disappear from the shelves.
It is worth mentioning not only when, but also how to choose fruits so as not to get into trouble. Firstly, the fruits should not have brown spots and points that indicate that the fruit is second-rate. They are not harmful, but they will spoil the quality of the final product. Secondly, you should not choose soft fruits, because this also indicates their venerable age. It is recommended to give preference to elastic apricots.
Another note: you should not purchase pinched or cracked fruits, since the place where the juice is released creates a good environment for the development of microorganisms. As for varieties, it is better to purchase fruits with red sides for preparations - they will be both sweet and aromatic.