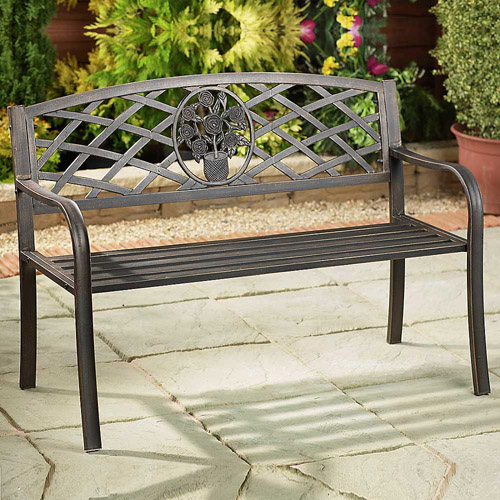
Respite during the day is as necessary as sleep at night. Have a smoke break while working in your summer cottage, sit in the shade after long working days, enjoy the long-awaited evening atmosphere, or even play sports - comfortable wooden benches are used for this.
Buying luxurious furniture for the street - now few people can afford to ruin their wallet. Making a bench with your own hands according to the drawings is a triple benefit:
- A practical product made of wood, in which all individual wishes and elements are taken into account, an order of magnitude higher than stamped factory models focused on saving material. Ordering a bench from a separate craftsman also does not always meet expectations.
- Do-it-yourself production will only require costs for Consumables, and if they already exist, then it will cost you no investment at all.
- Construction of interior and landscape elements It’s hard to call it work for a dacha according to your own taste. It is always a pleasure to skillfully create something new for yourself, so that you can then be proud and enjoy the efforts of your work.
Why made of wood?
Wood is the most suitable material to make a bench with your own hands. This is due to its qualities:

Requirements for material and tools
The wood must be of high quality. For the bench, you should choose elements without knots, cracks, or rotten areas. The ease of processing and joining parts, as well as the service life of the finished product, depend on this.
Special attention: only dry wood is suitable for starting work. A damp board is the reason for the deformation of the bench and its destruction when changing weather conditions. Before processing, the material must be thoroughly dried.
The breed is not limited to anything: to make a garden bench for a summer house, any available wood will do. Oak is the most durable, but heaviest. If you stand on a bench all your life in one place, it is better to choose it.
Pine - optimal choice for any product options. It is the most common building material: wood will be easy to find at home or purchase at the nearest base; affordable, moderately durable, less susceptible to temperature influences. Linden, larch and other species are also used.
Making a bench with your own hands - carpentry work, it will require simple carpentry tools. For safety and quality reasons, it is recommended to use only reliable, working tools. Firmly secured hammer handles, plane blades, a sharpened hacksaw or a high-quality blade on an electric saw are the key to effectively achieving results.

Wooden bench design
The general structure of a wooden bench will be useful for those who decide to make it themselves. Before starting work, it is recommended to make a drawing of the future creation with the dimensions and location of the elements. It will help you quickly make the necessary wooden parts of the bench and correctly assemble them into one garden structure. Each element of the drawing performs its own function, without which the product will be unfinished, unreliable or not convenient enough:
- The legs of the bench are supports. For comfortable planting, they are brought to a height of 40-50 cm from the ground. A lower or higher position forces you to take an unnatural posture, from which rest becomes torture and unfavorable tension on the spine. Depending on the length, wooden benches are provided different quantities elements: maximum every 150 cm. Rear and front supports are at the same level with each other. Usually two pairs are needed as most wooden benches have small dimensions.
- Between the legs and seats of the bench, the diagrams provide for intermediate transverse and longitudinal beams, because the plane of the seat is not always formed by one board. They must be attached around the perimeter of the seat to the tops of the legs, but if the distance is large, there may be additional transverse elements attached to the longitudinal beams. Intermediate wooden supports may be absent only if the seat of the bench is made of wide boards.
- The seat is formed from elements nailed to the intermediate beams and extending 5-25 cm beyond the legs. It is recommended to choose even boards.
- The screed is an element of the strength of the bench. In the drawings it can be made in different forms, but the function is the same: rigid fastening wooden frame. This can be one beam or board, the ends connected to the legs of the bench at a height of 20-30 cm, or corner bars connecting each leg with intermediate beams. The screed prevents the wooden supports from loosening.
- The back is a functional element that divides all benches into two configurations: with and without it. It serves for greater comfort and relaxation of the back. The back should not be vertical at 90° - this is an uncomfortable position. Optimal angle tilt from the seat plane - 110-120°.
The presence of a backrest requires modernization of the drawing of the legs. The support area needs to be larger. Geometrically, the load is distributed across the seat and the horizontal projection of the backrest. The back legs of a wooden bench are moved further from the middle or tilted so that the lower points go back. The back consists of supports and a plane. The first ones are attached to the legs at an angle, and boards or slats are attached to them.
General manufacturing principles Assembly wooden parts
benches are made using screws or nails. The second option is recommended. High-quality long nails will provide a stronger connection, while soft modern self-tapping screws often break and over time may no longer hold the rigidity of the wooden frame. The wooden surfaces of the seat and back must be carefully sanded. The functional planes of the bench can be different shapes : straight or curved to add beauty and greater comfort. For example, the back of the seat can be made in the shape of a boat, and the edges of the seat and back are rounded. The result is achieved by changing the shape in the drawing cross beams

(the upper edges are cut out with a wave).

In order to save material and time, you can often find benches where there are gaps between the slats in the seat and back. A simple example: city alleys. This is not inconvenient and, in general, practical, but it is recommended to avoid such savings when making it yourself. A solid garden bench made of wood with full-fledged elements is more beautiful and safer for health. The spaces between the seat and back act as draft windows: after sitting on a bench, an unseasoned person can get sick.
The assembly order is not specified in any way. If the seats and backrests consist of many slats, it is recommended to first make and fasten the frame elements and screed according to the drawing, and then form the planes. If there is no backrest, and the surface of the bench is one large and strong board, it is advisable to use it as a basis for connecting the remaining elements.
Wood processing is a mandatory process. Immediately after making the bench, it is necessary to impregnate the wood with protection against insects and fungi. Further painting will not only give the wood product a finished look, but will also protect it from external weather influences.
Decorative value Those who say that there is no beauty in wooden benches simply have no taste. This is one of the landscape and interior elements that form cottages or premises. Recreation areas primarily attract the attention of visitors and the owners themselves. That's why beautiful products made from wood, made with your own hands - this is wealth for the home and soul.

Experienced craftsmen, designers and creative newcomers often surprise with their unique solutions. When using seemingly the most inappropriate wooden elements– knotty logs, stumps, old driftwood create masterpieces that people are proud of and admire. Only individual approach to making benches with your own hands will help make your summer cottage unusual and pleasant.
Application of products
The bench is an ambiguous element. Application finished products applies to both the dacha plot and living conditions, and for specific needs. Some of its structural features during manufacture depend on where the wooden bench will be used.
The most popular garden bench is because it is necessary in any garden yard. The version without a backrest is characterized by the presence of only the seat surface; there is no element of vertical back support. Such a bench for a summer house is less convenient, but it is easier to make it with your own hands according to the drawings.
The option without a backrest is chosen by those who do not like to sit still for a long time: a couple of minutes of respite and then back to work. The light weight of the product and simple load distribution allow the use of thin wooden or even 2 metal legs. for a summer residence it is more attractive, convenient, but more difficult to manufacture.

A beautiful and comfortable bench can be placed on the porch of the house, in a gazebo or indoors, where it will play the role of a full-fledged wooden furniture. Benches designed for this purpose are often supplemented with soft material: the backs and seats are covered with a blanket or bedspread, upholstered with leatherette on cotton wool or foam rubber, faux fur, etc.
For sports needs (for example, for training with dumbbells) wooden bench without a backrest is a great option to get the benefit. The optimal surface covering for the seat is linoleum with lining.
A bench is a must-have element for any summer cottage. Today, such structures perform many important functions: from their intended purpose to giving the garden a unique design.
Many owners suburban area prefer to build benches themselves, since this simple task will not take much time and money.

There are several basic materials that are used as the basis for constructing benches.
Wood

The most popular option is wood. It is believed that it is from this material that the most aesthetic designs are obtained.
Due to the universal aesthetic characteristics of the material, wooden benches fit perfectly into the landscape of any garden. It is important to consider that the benches are constantly under open air. Therefore, it is necessary to choose those types of wood that are characterized by maximum resistance to atmospheric conditions.
These include: hazel, oak, cherry pine, and larch. For additional protection, the material is coated with a special varnish.
Metal

Metal is popular for the production of benches for many reasons: durability, practicality, resistance to precipitation, ease of use. As an optimal option for the garden, openwork structures with interesting patterns are most often made. As an alternative, you can stick to minimalism.

Stone


Stone benches are impressive and monumental. Main materials: granite, marble, quartzite. In some cases, rough stone is used to create a unique design, in others, stone with a smooth surface is used.
Plastic

Plastic is the most affordable convenient option. It is considered more seasonal and budgetary than aesthetic and decorative. However, when correct design plastic bench, it can become a garden decoration. Colorful pillows, lanterns, flowers and much more are often used for decoration.


Types of benches
Garden benches are traditionally divided into several categories. The criterion for division is location.


They are usually installed near the threshold, which determines the choice of material. Design experts insist that appearance the front bench must match the exterior country house. Thus, if the structure is made of stone, then the bench, accordingly, should also be made of stone.
water bench

The main purpose is to be able to spend time comfortably near a body of water. For the construction of structures, it is recommended to choose waterproof materials - artificial or natural stone.


Can be located virtually anywhere in a summer cottage. Plastic is usually used as a base, as it is lightweight and easy to maintain.
![]()
An indispensable option for hardworking summer residents. Garden benches are installed so that the owners of the site can relax comfortably while working in the garden. To ensure aesthetic pleasure that accompanies relaxation, the structures are located next to flower beds.


This variety can also be called a “solitude bench.” The fact is that it is customary to place them in the most remote places of the garden so that a person has the opportunity to hide from prying eyes. A popular material for manufacturing is wood.
Seasonal bench

This is a foldable design that is lightweight. This greatly simplifies the task of moving the bench from one place to another: in the summer - in the shade, in autumn or spring - in sunny places. Optimal material– plastic.
DIY wood bench
There are many different types of wooden benches. We'll look at a few of them.
Standard wooden bench

Materials:
- slab - a board with bark on one side - 2 trimmings one and a half meters long;
- bars - 2 pieces;
- cuttings of bars - 2 pieces 15x20 centimeters.
Step 1. We dig two holes and level them in depth.
Step 2. Align the angles between the posts and bars so that it will be comfortable to sit on the bench later.
Step 3. We nail the bars at 200 millimeters.
Step 4. Bury the blanks.
Step 5. Compact.
Step 6. Nail the back to the posts.
Step 7. Nail the back to the bars.
Step 8. Treat the wood with special enamel or varnish.

The described option is an ordinary country bench, which acts more as a functional option than a decorative element.

List of materials:
- suitable boards – cedar is best;
- simple pencil;
- roulette;
- saw;
- self-tapping screws;
- nails;
- hammer;
- polyurethane glue;
- plant pots;
- priming;
- plants.
Bench manufacturing technology
Step 1. Arm yourself with a calculator and tape measure, calculate the dimensions of the bench.
Step 2. Sand the boards so that there are no nicks, burrs or other defects on them.
Step 3. Cut out 46 pieces of equal length (about 50 centimeters each).
Step 4. Set aside 6 pieces to the side for further construction of the turret.
Step 5. Assemble the support boxes from 40 pieces.
To do this, we place two segments parallel to each other, and then place two more segments on top perpendicular to them. In this way we lay out the remaining planks to form a turret. We secure the corners with glue and self-tapping screws for greater strength. Each drawer requires 20 slats.
Step 6. We take long boards and begin to make a frame for the future structure. To do this, we lay the boards on their sides and secure them in the middle with a crossbar.
Step 7. Attach the frame to the support boxes using self-tapping screws and glue.
Step 8. We make a “turret” from the remaining 6 segments. To do this, we lay the planks on one of the support boxes in the same way as we did earlier.
The last row must be made continuous using short pieces that are inserted between the walls of the boxes.
Step 10. If desired, we make “window sills” on the top row by adding four sanded boards with oblique corners.
Step 12. Take long boards and cover the future seating area with them.
Step 13. Place pots with plants in the turrets.
It's very beautiful and simple design, which does not take up much space, but contributes to pleasant leisure time.
We will consider the production technology of the simplest country bench without back. It only takes a few hours to assemble the bench. The basis of this design is a profile pipe.


Set of tools:
- welding machine;
- profile pipe;
- steel corner;
- Bulgarian.
Step 1. Determine the location of the future bench and carry out the appropriate calculations. The standard length of such a bench is 120 centimeters.
Step 2. Using a grinder, cut three metal blanks 120 centimeters long. They will act as a seat.
Step 3. Lay the pieces evenly on a flat surface. You can use a stove.
Step 4. Take a steel corner and cut off two cross members.
Step 5. We apply the crossbars perpendicular to the workpieces, stepping back from the edges about ten centimeters, and weld them.
Step 6. We weld two bench legs to the corners, the length of which is adjusted according to the wishes of the owners of the site.
Step 7. We weld a transverse bar to the legs, stepping back from the bottom of the seat by about 20-25 centimeters.
Step 8. From the scraps of the corners we make two crossbars.
Step 9. We weld these cross members to the bases of the bench legs.
Step 10. Apply a protective coating to the metal.
Step 11. Install the bench.


If desired, you can modify the structure by welding railings and a backrest to it. Bright paint will give the bench an interesting appearance.
Construction from scrap materials
First of all, you need to decide what materials will be used as the frame of the structure. It can be:
- stones;
- wooden pallets;
- bricks;
- bottles.
Also during the work you will need following materials: clay, straw, water, sand, paint, brushes.
Preparing a frame from pallets


- Fill the bottles with soil.
- We lay them in several layers on a bed of sand and gravel.
- We tie the bottles with wire.
Preparing clay solution


Stage 1. Mix straw with sand and clay.
Stage 2. Add water to the mixture and stir the contents of the container.
Stage 3. Using your hands, roll small balls from the solution.
Stage 4. We apply the balls to the pre-prepared frame, thus forming the outline of the future bench.
Stage 5. Cover the finished bench with polyethylene so that the solution gradually dries and does not crack.
It is believed that clay benches can last up to a hundred years without losing their attractive appearance. Besides, it's enough economical option, which will certainly add originality to any garden.
Choose the option that will fit well into your garden plot and bring maximum satisfaction.
Video - Do-it-yourself benches for a summer house
Video – Garden benches
A garden bench made of wood, made by yourself, can be an excellent addition to the exterior of a summer cottage. It will be aesthetic and comfortable to use. Some people purchase similar furniture in the appropriate stores, but if you decide to do this, you will understand that choosing a bench based on size and design is very difficult. For this reason, it is recommended to make a similar design on your own. The instructions presented below will be useful for both private home craftsmen and professionals.
Preparation of a basic set of materials and tools
A garden bench made of wood with your own hands can be made only after the craftsman manages to prepare the following materials and tools, without which the work will be impossible. Thus, you will need to prepare:
- screwdriver;
- drill;
- a circular saw that can be replaced with a hand saw;
- chisel;
- grinding machine;
- hammer;
- pencil;
- square;
- level;
- roulette
It will be impossible to ensure a strong fastening if you do not use glue designed for working with wood during the work. You will also need a primer. After manufacturing, the bench can be painted, for which you should use an appropriate composition, which will not only improve the appearance of the wood, but also make it more resistant to external manifestations. Don't forget that putty will also come in handy. But in order to make the pores closed, you need to purchase a composition that promotes this.
A garden bench made of wood with your own hands must be processed; you must use one that has a grain size of 120. For fastening, you should use self-tapping screws, the length of which is 5 and 6.3 cm.
Preparation of material for the structure

You will need to prepare four bars with dimensions equal to 5x10x244 cm. And also a couple of bars with dimensions equal to 2.5x10x244 cm. Another beam should have dimensions equal to 2.5x5x244 cm. After you manage to prepare the above elements, you should cut them out smaller ones, the dimensions of which will be presented below. To do this, you should use, however, you can cope with the work hand saw, but the process will be somewhat longer.
Sawing out parts of the bench

It is quite possible to make a garden one) it will have four legs, the size of each of which is 5x10x42 cm. You will also need wooden spacers in the amount of two pieces. The size of each is 2.5x10x5.7 cm. The edges of the frame should also be made in duplicate, each measuring 2.5x10x15 cm. There should also be two spacers (5x4x30 cm). The sides of the frame (2 pieces) must have the following parameters: 2.5x4x155 cm. You will also need the same amount internal partitions frames with dimensions of each within 2.5x4x24 cm. But the supports need to be cut out five pieces, their dimensions are 2.5x5x24 cm. The boards that will form the basis of the seat of the structure should be four, their dimensions are 5x10x165 cm. At the end you can cut There are also two edge boards, their size should be 2.5x10x35 cm.

Before you make a garden bench out of wood with your own hands, you need to think about whether it will be used in tandem with any table. This is important because the bench should be in harmony with the rest of the furniture in the garden. In order for the shop to look general exterior, its surface after manufacturing can be painted to match the color of the rest of the furniture on personal plot. After the master has cut out all the elements, among which the legs can be distinguished; seats; beams for the frame, etc., you need to carry out work to clean the surface of all elements in order to rid them of roughness and chips, using sandpaper.
Bench assembly technology

If you are thinking about how to make a garden bench out of wood with your own hands, then at the first stage you need to work on the legs. During this process, the master must try to take care of the stability of the structure. To do this, it is equipped with spacers. Using a chisel, you need to make a notch in the bars that are intended for making legs. A hammer should also be used in tandem with a chisel. Each leg consists of two bars, which are secured together with glue designed for working with wood. In addition, for a more durable connection it is necessary to use mechanical fasteners - self-tapping screws. The recesses must be made such that their depth is equivalent to the thickness of the leg bar. At the next stage, you need to start attaching the gaskets that are installed on the inner surface of the legs. In this case, it is necessary to use self-tapping screws, the length of which is 5 cm. Additionally, the parts are attached with an adhesive composition.
Fixing plates to spacers

When you make a garden bench from wood with your own hands, the drawings of which are presented below, at the next stage you can begin attaching the spacer plates. In this case, mechanical fastening and glue should also be used. The length of the self-tapping screw used should be 5 cm
Working on the spacers and frame
Now you can strengthen the legs together using spacers. You must use the same screws and glue. Then you can start installing the frame. To do this, a pair of 155-centimeter bars and a pair of 24-centimeter boards must be strengthened with screws and glue. In this case, the master must use a square, which will ensure the correct arrangement of the elements in relation to each other, as for the bars. The spacer parts must be installed and then fixed with self-tapping screws and glue to the lower edge of the main frame, this will ensure the stability of the frame.
Fixing the legs and seat boards
Making garden benches and wooden benches with your own hands, at the next stage you can begin fixing the frame to the legs. Now you need to use self-tapping screws, the length of which is 6.3 cm. The fastening is also carried out with glue. It is necessary to install mechanical fasteners extremely carefully, this will eliminate the possibility of damage to the bar, the body of which may simply split.

In order to be able to correctly install the boards for the seat, you must first determine the center of the supports, and then attach them. If you make blind holes, then the seat of the structure can be mounted separately, only after fixing it to the frame. When making a garden bench from solid wood with your own hands, a diagram of which is presented in the article, you need to make the grooves between the boards minimal and ensure that the boards are close to each other.
Working on edge boards and finishing
Only now can you start working on the edge boards. They need to be screwed with self-tapping screws to the legs of the structure. But if you make blind holes, it will be possible to strengthen the edge boards at a distance of 6 cm from those that underlie the seat.
With your own hands, solid wood must be finished with high quality in order to protect its surface from negative influences environment. Initially, the product must be rid of burrs, there should be no chips on the elements, for which the structure must be well polished using sandpaper. The holes that remain after installing the mechanical fasteners must be filled with putty. Afterwards, the wood must be treated with a foam-filling compound. This will not only protect from moisture, but also from drying out, the latter of which can cause a violation of the original dimensions of the bench. For high-quality paint application, the wood is pre-treated with a primer. After it has dried, you can begin painting. In this state, the bench should be left for the time necessary for the paint to dry, only after which the bench can be used.
Certainly, excellent option is a combination of wood and metal. Garden benches DIY projects made from metal and wood are not only aesthetically pleasing, but also durable, but in order to make a bench from steel, you must have the skills to use a welding machine.
No one will argue that a bench is simply a necessary attribute for any summer cottage. There are a great many types of garden benches, but in this article we will look at a very simple one. classic version benches designed for 2 people, which is not difficult to make with your own hands. The bench should be strong and not heavy; it can be easily moved by two people to any place on the site.
Below you will find a working 3D model of this bench, which can be rotated in all directions, as well as drawings of the bench parts from which it will be assembled.
So what do we need?
Since you will be doing it yourself, you need to stock up on the following tools and materials:
Tools
- Circular saw (you can get by with a simple hacksaw for wood).
- Planer (if you use unplaned boards).
- Drill or screwdriver (with drills and bits).
- Measuring tool (tape and corner).
- Wrench.
- Paint brush.
- A grinder or hacksaw for cutting a threaded rod to size.
Materials
- Edged board 100*40 mm.
- Edged board 100*25 mm.
- Furniture screws or threaded rod with a diameter of 8-10 mm:
- Nuts and washers for the selected screw size.
- Self-tapping screws with a countersunk head for fastening the elements of the back and seat of the bench.
- Self-tapping screws with a turnkey head for fastening the power strut - 4 pcs.
- Abrasive sandpaper (you can use a drill attachment, or ideally use a surface grinder).
- Protective impregnation for wood.
- Wood putty for sealing screw heads.
After all the elements of the future garden bench have been sawed and planed, you can begin assembling it yourself. And below are her isometric drawings with dimensions.
BY SIZES:
I adapted the model of this bench to the sizes that are often found in lumber at our sawmills, but this nasty but is always present. When preparing parts, rely on the main (overall) dimensions, because unplaned material can have a spread of up to 5-8 mm. Accordingly, you will have to make adjustments to the dimensions of your structure.
Drawing of a garden bench made of wood 1400 mm wide.


Assembling a garden bench
- Assembling the sides of the bench.
Drill holes for threaded connections. You can make a hole in the wood with a special drill if you want to recess the caps and nuts. To make it easier to work, you can first fix the entire structure of the side of the bench with clamps or thin nails (screws). - We secure the sidewall structure with screws and nuts (a washer should be placed under the bolt head and nut). Do not tighten too much right away; you may have to move the entire structure further for better stability.
- We perform the same operation with the second sidewall.
- Connect the two sides of the bench using a spacer-tension element (below).
Secure it with large self-tapping screws. - Secure the seat and back elements with self-tapping screws using a screwdriver. The gap according to the drawing between the boards is 5 mm (use, for example, nails or screws of appropriate thickness as a spacer).
- Tighten all threaded connections.
- Apply wood putty to all recessed heads of the screws securing the seat and back of the bench.
- Sand all over with abrasive sandpaper wooden surfaces so as not to plant a splinter and smooth out the putty. All external corners can be rounded.
- Apply protective impregnation or paint to all surfaces in two layers with intermediate drying.
- Voila! After drying, the DIY garden bench is ready for installation.
- Lumber dimensions are nominal. When purchasing boards, add at least 10% to the total footage for possible losses.
- To save lumber, start cutting boards with the longest elements.
- The width of the garden bench can be made at your discretion, just keep in mind that a larger width will cause the seat boards to sag under the weight of the body and the structure will have to be strengthened.
- Whether to install the bottom board of the bench back is at your discretion.
- To minimize accidental bruises and injuries, file or cut off all sharp corners of the seat and backrest elements.
- If lumber is used to make a garden bench natural humidity(not dried), then the dimensions and gaps may change during drying and it is better not to varnish it until the wood is completely dry.
3D model of a garden bench
Click on the picture, wait for it to load and use the pressed button left button mouse to rotate the model. Rotate the mouse wheel to zoom in and out. Watch full screen - icon in the lower right corner. Exit full screen - Esc key.
To fully view 3D models, you need to download the SkethUp viewer program from the official website (free) and install it on your computer. You can download this model for viewing by clicking on the logo in the lower left corner of the viewing window.
Drawing: bench details
This figure shows a diagram with the number of parts and main dimensions.

Examples of similar garden benches
A similar bench with a lighter backrest on one board. As an option for weight loss.

And here is a variant of a bench with a rear shelf on the back. Moreover, the author did correct angle on the backrest reinforcements at the top, and the shelf turned out to be in the correct plane.

The same option with a rear shelf on the back. But here the author did not make the right angle, and the shelf turned out to be littered.
Please note that here, 4 boards are also used on the seat, and 3 on the back. The elements of the bench are varnished.

In the photo below you see a whole ensemble of three benches. Quite a good idea for a relaxation corner on the site. But it seems to me that the long bench should have been strengthened in the middle, otherwise a sag appears, which is what I wrote about above.


With that, thank you for your attention, I was glad if it helped someone. Post your options for made garden benches below in the comments or send them to me by email.
You can read about how to make a large stationary and heavy garden bench in another article: “Garden bench with back and armrests”, drawings and dimensions are attached.
If you want to purchase a ready-made garden bench, we advise you to contact a trusted furniture seller Kupistol, they offer a wide range to suit every taste and budget.
Perhaps only a classic garden can do without benches; there should be nothing in the garden except potatoes or cucumbers. But even small garden One can hardly imagine without benches. The garden is still intended for relaxation and admiring nature, but doing this while standing is not very convenient. Currently, the choice of such structures is quite large; wooden and metal garden benches are especially popular.
Types of garden benches
Regardless of the design and size, the purpose of any bench remains the same - it should give a person the opportunity to sit down, relax and leisurely enjoy the view cozy garden. Benches can be classified according to several criteria, for example, by the material from which they are made and by design.
Materials for making garden benches
There are several popular materials:
- plastic – the advantages of benches made from this material include resistance to climatic influences, light weight and a relatively low price. There are options for folding structures on sale; they are convenient to take with you on periodic trips to the country;

- wood - do-it-yourself garden benches are usually made from this material. The tree looks great on garden plot, and in general it is considered a classic, and classics are always in price;
Note!
Wood, even if applied protective coatings, is much less resistant, for example, to moisture and insects than plastic, stone or metal.
So the wooden ones will fail first.

- metal - as for metal products, then 2 options are possible: homemade benches from a profile pipeline or forged ones. It is impossible to make forged benches from scratch without having blacksmithing skills; the most that can be done is to buy ready-made forged sidewalls and then assemble the bench yourself;

- stone garden benches– record holders for durability. You can fit 1-2 large boulders under a bench, or use purchased marble and sidewalls, the whole question is in the price and the general style of design of the site;

- concrete - the sidewalls can be cast from concrete, and a concrete slab will act as a seat;
- combined options– the most common type is a combination metal frame and wooden slats (back and seat). There are options for combining stone and wood.
Note!
The use of wood makes the bench more comfortable.
In cold weather, it is not pleasant to sit on icy metal or stone; wood is preferable from this point of view, because its thermal conductivity is much lower.
Garden bench design options
At first glance, there is nothing complicated in the design of the bench - 4 legs, a seat and a back.
But there are also more complex designs:
- bench without back - simplest option, a dubious option in terms of comfort, because you won’t be able to sit back and relax;
- garden bench with backrest – adding a backrest takes relaxation comfort to a new level;

- bench with table - with this option, a pair is installed on one base. This design is optimal for communication in nature;
- a bench with a canopy - can be considered as an analogue of a mini-gazebo. However, protection from slanting rain is weak, so such a structure should not be considered as a full replacement for the gazebo;

- benches created in artistic style, the main focus in this case is on appearance. Instead of standard sidewalls, for example, figures can be used fairy-tale creatures etc.
If the bench in your garden is not planned in the form of a large stone or a fallen tree trunk, then you will have to spend a little time thinking about the design and calculating the required number building materials. Correctly drawn up drawing - main basis good shop.
Drawings of garden benches made of wood, or any other material, must contain not only a general image of the structure, but also detailed dimensions of the main elements.

Wooden bench
There are several manufacturing options:
- use large tree trunks as the main elements. Half of such a trunk may well lie on the ground and, due to its large thickness, act as a seat at the same time;

- just dig a couple of posts (or concrete) and use them as the basis of the structure;
- beam construction is the most common option. It makes sense to take a closer look at an example of such a design.
As for the sizes, everyone selects them based on their requirements for the shop, but you can focus on the following values:
- The height of the back most often does not exceed 50 cm;
- the height of the bench, that is, the distance from the surface of the ground to the surface of the seat, is also taken to be approximately 50 cm;
- The angle of the backrest is important; it can be taken in the range of 15 - 30ᵒ.

Note!
This will not change the price of the bench, but the level of comfort may seriously suffer.
If the back is at a right angle to the seat, then the back will be constantly tense and you can forget about rest.
The design of a typical wooden bench looks something like this:
- the sidewalls are assembled from wide beams (as a rule, the sidewalls are connected crosswise with a selection of grooves at the junction). That part of the cross, which will also be the basis for the backrest, is made longer by the height of the backrest;

- if the width of the bench exceeds 2.0 m, then to ensure rigidity the same structure as on the sides must be placed in the center, otherwise the seat will bend greatly under the weight of a person;

- The sidewalls are connected into one whole square beams. The load on them will be small, so you can use a small section;
- after this, garden benches and benches are covered with wooden planks. It is not necessary to make the cladding continuous; gaps of 1-2 cm can be made between individual planks;
- At the final stage, all that remains is to coat the wood with protective compounds.
Metal and combined benches
Purely metal constructions don't happen that often. The fact is that the weight of such a structure turns out to be quite large, and the cost of the product increases. Therefore, the seat and back are usually made of wood.

Combined options can be made with your own hands, we're talking about, mainly about designs using profile pipelines.
All work comes down to fulfilling several points:
- the side parts of the frame are made of pipes. The best option can be considered one in which the entire sidewall is made of one pipe. Of course, you can also use welded joint, but this complicates the work;

Note!
A homemade garden bench made from wood and metal will most likely require pipe bending.
To do this, either a pipe bender or other methods are used (for example, filling the pipeline with sand) and subsequent manual bending.
- When covering the frame with wooden planks, a bolted connection is used.
In case of forged structures everything is much simpler - forged parts are bought, and all that remains for the gardener to do is select suitable tree and cover the metal frame with it.
Stone benches
When it comes to how to make a garden bench from stone or concrete, it all depends on general style future design.
There are several options:
- a small bench can even be made from small stones. In this case, oblong boulders are used for supports, and flat stones are used for the seat. Most often, such designs are made without a backrest;

Note!
It is allowed to use a little mortar in such structures to make the connection between the supports and the seat more durable and reliable.
The solution should not be visible.
- a bench in which both posts are made of stone masonry (using natural stone), and a heavy marble slab is simply laid on top. When laying the supports, you can also concrete the frame for the back, and make the back itself forged.
Unusual design
Author's benches should be placed in a separate category; it would be more accurate to call them a work of art than simple device for relax. As for the material, the greatest scope for creativity is provided by the use of wood; of course, in this case, detailed drawings of benches for the garden are not needed, you can only estimate the overall dimensions of the structure.
The following options deserve attention:
- ring bench - conventional design, but is arranged around a tree; in place of the usual seat, an emerald green lawn looks unusual;
- a bench can be arranged between 2 flower beds;
- A bench arranged, for example, in the mouth of an animal looks interesting;
- stone articles can be decorated on both sides with elegant figurines;
- you can make a bench in the form of a huge bundle of bamboo, in the central part of which there is a cutout for sitting.

In conclusion
Garden benches are an excellent testing ground for creativity. Despite the abundance of standard designs, you can always stand out and invent own design benches. Of course, the flight of thought should not come at the expense of comfort. The information provided will help you navigate the mass of standard benches and offers several unusual options.
The video in this article shows an example of making a garden bench.