When the need arises for home repairs, the owners begin to grab their heads and feverishly calculate how much it will cost them. There is no need to despair. You can always find workarounds. In this material we have collected 15 ideas that will help you create luxurious interior and not spend a fortune.
1. Brickwork

Brickwork is one of the most popular techniques in the interior design industry. However, its construction requires special skills and high costs. In addition, this finishing option is not always acceptable in city apartments. Fortunately, there are now a lot of alternative options that imitate natural brick. For example, for interior decoration will fit perfectly sheet panels made of PVC or high-quality wallpaper with a three-dimensional pattern.
2. Newspapers

A designer renovation will not be complete without major financial investments. Moreover, expenses will require not only the services of a designer, but also high-quality finishing materials. However, you can get by without spending a lot of money by using regular newspapers instead of expensive wallpaper. To create the design you will need whole sheets of newspaper. Pasting should be carried out in several stages. First, you will have to clean the walls of the old coating, eliminate existing flaws and thoroughly putty the surface. Next, for better adhesion of the materials, the surfaces need to be coated with a primer and a special glue applied. Place the first sheet on the glue-coated wall, carefully smoothing it out. Each subsequent sheet should be glued with an overlap. At the last stage, secure the newspapers by covering the walls with a protective varnish.
3. Cabinet Makeover

Buying new cabinets will require serious expenses. But before you go to the store, try working on some old DIY ones. A wide range of paints, decorative fittings and new handles will transform boring facades beyond recognition and turn them into something unique.
4. Imitation tiles

The construction of garden paths can greatly undermine family budget. However, serious expenses can be avoided by purchasing a special stencil. With its help you can create a similarity paving slabs from ordinary concrete.
5. Stucco molding

Stucco molding is an indispensable attribute elegant interior. Just to own one, you don’t need to be the owner of a luxurious mansion. Cheap foam rosettes can transform a boring white ceiling. In addition, such parts can be partially coated with golden spray paint.
6. Fake fireplace

Not everyone can boast of having a real fireplace at home. However, anyone can build a fake fireplace. To implement this idea you will need one large or several small cardboard boxes. From them you need to build the frame of the future fireplace, fastening the boxes together using tape or a stapler. The next stage is covering the frame with newspapers. After this, the product should be thoroughly puttied, and then covered with paint or wallpaper. Ready product can be placed in the living room by placing several large candles on the floor.
7. Spills

Wooden saw cuts are a fashionable finishing material that can dilute the boring interior of a city apartment and create a truly unique detail. Get fashionable finishing material possible at own dacha. It is better to attach saw cuts to a surface that has been puttied and coated with primer in advance. Joints can be sealed decorative plaster, and then cover the wall with a layer of varnish.
8. Flower pot

You can easily make an exclusive flower pot with your own hands. To do this, you only need an aluminum bucket, plaster, mounting mesh and sea pebbles. To begin, make several small holes in the bottom of the bucket and use a spatula to apply plaster to the sides of the bucket. Wrap the prepared base with a mounting mesh and begin laying the stones. Fill the holes between the stones with grout mixture. New flower pots you can decorate your apartment or place them in the garden of a private house.
9. Candlestick

Lampshades from old chandelier can be used to create beautiful candlestick, which will become a worthy interior decoration. In addition to lampshades, you will need several wooden planks from which you should put together some kind of narrow box with round holes for lampshades. You can decorate the base of the candlestick using bright paint or beautiful paper.
10. Mat

It's amazing how many beautiful and unique things you can make with your own hands from completely available materials. For example, from ordinary threads you can make a bright and very soft rug that will decorate any space and become an effective interior decoration.
11. Vases

IN beautiful interior every detail matters. To avoid going broke on designer jewelry, try making it yourself. For example, buy the cheapest ones glass vases and paint them with bright enamel. Such decor will not require any special skills, and the result will exceed all expectations.
12. Wooden slats

An accent wall is a trendy way to freshen up your home without having to commit to a major renovation. For example, you can decorate one of the walls of the bedroom or living room using wooden slats, glued to a pre-prepared wall.
13. Stencil roller

A roller stencil is another device that can create an imitation tile on fresh concrete or putty. Such a device will improve garden paths and facades of country houses without special costs.
14. Unique design

An original painting will help decorate plain walls. Good modern devices allow even people without any artistic skills to do this. You just need to get a special roller stencil with three-dimensional patterns and purchase paint of the desired shade.
15. Tile stamp

Façade renovation country house- it’s a very expensive business. A special stamp will help you save on purchasing special tiles or stones to decorate the facade. With its help, ordinary concrete or plaster will turn into an imitation of tile or stone.
Video bonus:
If old cladding has become ugly, but you can’t just wash it off - paint for ceramic tiles can help update coverage without complete replacement. In addition, such methods are sometimes used by designers to paint and create a unique pattern on tiles.
There are several ways to paint tiles:
- Paint for tiles and glass (stained glass). It can be applied directly to a smooth surface without preparation. Typically the outline is applied first, followed by the acrylic background paint. Due to the high price, it makes sense to use it only as a decorative effect. As alternative option can be used vinyl stickers.
- Epoxy paint. It is harder to find on sale and is more expensive.
- Latex or Oil paint. It is necessary to first apply a special primer, for example, Tikkurila Otex.
Quick navigation through the article
Preparatory work
Before painting the cladding, you need to remove the remaining cement adhesive and excess grout from the surface with abrasive materials. The fallen tiles are glued to cement glue or liquid nails and left to dry completely. If they are lost, you can replace them with tiles of a different color. Chip tiles also need to be replaced.
Glue the old tiles in place and grout the seams
See also the article: .
The surface is degreased using acetone, alcohol or solvent.
Apply Tikkurila Otex primer with a short-haired roller and leave it to dry for 12 hours. It is white in color, so it will partially help hide the old color of the texture.
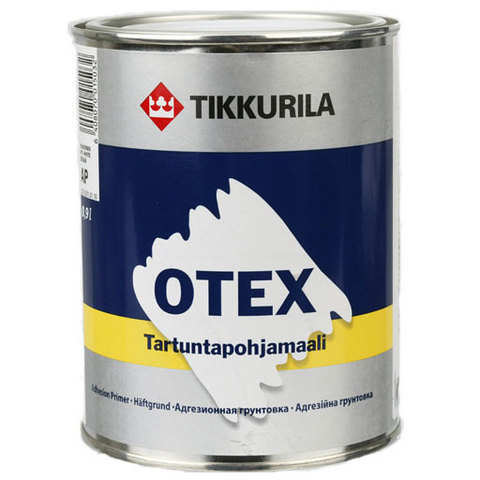
Tikkurila Otex primer
Painting
Tile paint is applied in several layers to completely hide the old pattern and achieve a uniform color. A new layer should be applied only after the old one has completely dried.

Apply the first coat of white primer
If you do not want to get a monochromatic surface, but divide it into several parts or diversify it with ornaments, use masking tape to get straight lines of the intended design.
Painting tape to create an ornament is glued only after applying the base coat of paint. The easiest way is to make a geometric pattern out of it.
After the paint has dried, the masking tape can be removed.


The video shows the result of painting an apron in a kitchen with a white and red pattern with oil enamel:
The joints can be additionally painted using a special tile marker (Edding 8200, PUFAS FRISCHE FUGE paint).
Using stencils
A stunning effect can be achieved if you use ready-made stencils. The photo below shows an example of decorating a backsplash made of white tiles with paint. 
Conclusion
You shouldn’t expect to get a cool result after painting. for a long time, because along with a layer of paint, the tile will lose a lot of its important properties. The decorative layer will no longer be protected by the glaze. It will be more difficult to wash, fungus and mold can form on it, the seams will have the same color, and over time the paint will begin to peel off. I would not recommend that you do such repairs to the tiles in the bathroom unless absolutely necessary; it would be safer to replace the tiles.
comments powered by HyperCommentsNo similar entries found.
13-04-2014Hand-painted ceramic tiles are a creative, pleasant and uncomplicated way to add some “zest” to your kitchen or bathroom interior. By painting the tiles with your own hands, you will not only show the world your artistic talents and excellent taste, but you will also be able to save on finishing, because the finished colored tiles with painting or patterns is more expensive than white.

In order for the paint to adhere to the surface of the tile, you need to use a primer.
Required tools and materials
You should first decide on the working “canvas”, that is, tiles. It should have a smooth surface, without patterns or relief, white or plain colored. It is not recommended to paint floor tiles, since it is subject to increased mechanical stress, and the design will not last long on it. You should not paint those tiles in the bathroom that are often exposed to water. Because of high humidity Even moisture-resistant paint will begin to flake and peel over time.
Tools you will need to paint ceramic tiles:

To increase the durability of the pattern, place the tiles in the oven for half an hour.
Stencil. You can purchase it in specialized stores or make it yourself. The drawing you like (you can, for example, cut it from a magazine) is pasted onto cardboard and cut out along the contour. For those new to design best choice to begin with there will be not very complex geometric patterns.
Stencil large sizes, which can be placed on two, four or several tiles at once, will allow you to create a truly original, highly artistic panel with your own hands. It will look especially advantageous on a kitchen apron.
You don’t have to limit yourself to stencils; you can use curly scrapers to create beautiful wavy lines on the tiles or foam rubber stamps.
Paint is applied to them, then impressions are made on the tiles using stamps.
It is important to choose the right paints. To completely paint the tile surface, oil, epoxy, latex paints. To create patterns, special acrylic paints for painting ceramics. When using such paints, please note that they are usually very bright, so they should be diluted with white or solvents before use.
The contours of the drawings are outlined with special contour paints, sold in small tubes with thin dispenser tips. This paint creates a kind of barrier that prevents other paints from spreading.
Return to contents
Let's start creating masterpieces
For painting tiles, acrylic paints diluted with white or solvent are best suited.
The procedure for painting ceramic tiles is divided into the following stages:
- Cleaning and degreasing. Includes cleaning with detergents using a hard sponge. You can degrease the tiles by pouring sand on a sponge and rubbing the surface thoroughly, or by wiping it with vodka or alcohol.
- The next stage is sanding. It is necessary then to remove the topmost smooth layer of tiles. It can be produced by treating the surface sandpaper or a whetstone for sharpening kitchen knives.
- Next you need to apply a primer. This is necessary to ensure good adhesion of the paints to the smooth surface of the tile. It is recommended to use epoxy primers with high adhesive properties; For bathroom tiles you will need a moisture-resistant primer. It should be remembered that the tiles can be painted only after 24 hours, that is, after the primer has completely dried.
- The paint is applied in 2-3 layers. Complete painting of the tiles is done with a foam roller or sponge. Before applying the next layer, you need to wait until the previous one has dried; after each application, the roller should be squeezed out thoroughly.
- The stencil design is painted over with a special soft brush. To prevent the stencil from moving during operation, it is fixed with temporary aerosol glue or regular tape. The brush must be held strictly perpendicular to the surface of the tile, while the paint is applied in neat strokes. Random drops of paint should be removed with a cotton swab, the blunt end of a match or a toothpick.
- On final stage Waterproof varnish is applied.
After the paint has completely dried, you can safely wash the tiles without fear that the design will come off or fade. It is important to remember that painted tiles must dry for at least 24 hours, and it can take up to 2 weeks to dry completely.
It is worth mentioning that an alternative or addition to artistic painting tiles can become moisture-resistant vinyl stickers presented in a wide range. As with painting tiles, it is vital that the work surface is dry and completely clean.
Another way to improve the decor is to stick ceramic border beads onto the tiles.

Stenciling is a great way to decorate your home with unique tiles. Ceramic tiles with a pattern are quite expensive.
Moreover, if you want uniqueness, you want tiles that are not like everyone else’s, then there are even more difficulties - with single copies to order it will be even more expensive.
But with a stencil you have a great opportunity to turn ordinary plain tiles into tiles with a unique design.
How to draw on tiles or how to apply a design to ceramic tiles? You may be interested in the technology of applying patterns to ceramic tiles.
So, detailed instructions on the use of stencils for decorating tiles.
Begin. We prepare everything you need. There is little that is necessary. We will need:
- Stencil and tile. We buy stencils from us, tiles - anywhere and any kind.
- Paints for ceramics. In our case - a set of GAMMA-ASSORTED
- Of course, our favorite, but not required spray glue.
- Stencil brushes. Although, as you will see a little later, they are not at all necessary.
- Jar of water. Useful for holding the brush there before washing it. Otherwise, while you are drawing another one, the first one may dry out tightly. This is acrylic.
The tiles need to be wiped free of dust and dirt, even invisible ones. To do this, just wipe it with alcohol (vodka) or wash it under the tap with detergent for dishes. Then wipe dry.
While the tiles are drying, take the stencil and cover its back side with spray adhesive. In principle, you can do without it - then the back of the stencil must be moistened with water. However, aerosol glue is more convenient, simpler and more reliable.

What color to start with is up to you. We started with a darker one. The considerations were: if next color climbs onto the first one, then on the dark one the light one will be less noticeable than vice versa.
Please note - the brush must be held perpendicular to the surface and apply paint with point movements! This is not a hard and fast rule, but if you move it around the surface, the risk of paint flowing under the edge of the stencil will increase significantly. Also make sure that there is only a small amount of paint on the brush so that it does not flow.

Since it is similar in tone to the first (we got it by mixing paints), you don’t have to be afraid of accidentally stepping over the line and ending up with the first color. No one will ever notice this. Moreover, often such “misconducts” even add expressiveness to the drawing.

This is what ours looks like tile with an unfinished drawing. It seems like nothing can save her. However, this is just an illusion, see for yourself!

It is fundamentally different from the previous two. Therefore, in dangerous proximity to the previous flowers, we use a basic technique that guarantees the absence of unwanted crawling. We simply cover the adjacent area of a different color with a regular napkin. Acrylic dries very quickly, so it is impossible to damage previous colors.

Dye different colors may have different consistency. If you suddenly find that it is too liquid, you can change the brush to a sponge. We did this with blue. A special foam rubber “brush” was at hand. However, you can just as easily cut off a piece of dish sponge and draw with it. We draw with “blotting” movements.
In fact, changing the “tool” provides another, very useful and necessary, by-effect. If a brush applies paint with the effect of stripes or veins, then the sponge creates a completely different pattern on the surface - a uniformly rough coating. In our case, all this is very beneficial - the leaves have veins, the berries are even.

The paint we chose dries very quickly, so we remove it immediately after finishing the last color and washing the brushes. This was the first time we painted on tiles, so we await the result with bated breath... I wonder, after all, what we are capable of? At first glance, everything turned out to be just wonderful!

Upon closer examination, it turned out that the leaf we drew first was defective. The reason for this is too liquid paint, which is what we used in the beginning. Unfortunately, we ignored our own advice to try the brush on paper and, dipping it in paint, immediately began to paint. For which we paid the price - there was too much paint on the brush and it flowed under the edge. We drew all other parts of the drawing taking into account the initial mistake. But the first sheet came out just like that - with a streak.

On the advice of one of our clients (stupid word, but how else?), we tried a new trick - removing smudges with the opposite end of a match. This must be done without delay - in an hour the paint will no longer care!

Removing smudges with a match is simply ideal. And the surface is not scratched, and the paint can be removed like a pencil with a good eraser, and the accuracy is high and easily achievable. See the result in the photo.

In fairness, we want to warn you: our favorite aerosol glue does leave marks on glass and tiles. They are almost invisible and can only be distinguished by touch. On any other surface - no, but on a smooth, glossy surface microscopic goosebumps remain. They need to be removed. We DO this using ZIPPO lighter gasoline - it is clean, so it smells less and leaves no traces.

We saturate a rag with gasoline and wipe the film with light pressure. We did this a few hours after the last touch of paint, so it had time to dry thoroughly. If you don't rub with all your might, you won't be able to wash GAMMA paint for ceramics off the tiles with gasoline - it sticks very well. We check the quality of work by looking at the surface of the tile at an angle. In reflected light, the “goosebumps” are clearly visible, and the washed surface sparkles.

Without undue modesty, we want to say that he pleased us. However, this is by no means ours - you don’t need talent or skills to draw with a stencil. It is very simple and anyone in our place would repeat the result of the same quality.

Finishing touch. The paint manufacturer's recommendation is to bake the result in the oven 24 hours after painting. It's very simple, turn on the stove at 150 degrees oven, place the tile there, leave for 15 minutes and let cool WITHOUT removing from the oven.
However, we would like to note— we conducted a cruel test, took a rag with gasoline, gave it to one of the men of our team and he began to erase the drawing with effort... We did not notice any visible changes! Although a stain of color appeared on the rag (which told us that after two hours of hard work the drawing might suffer), there was no visible damage to the drawing. From this we made a very important conclusion:
The paint produced by GAMMA adheres well to tiles and without fixing in the oven. It will withstand repeated washing with water and a sponge, even without additional temperature treatment of the pattern. In practice this means: A pattern can be used to decorate not only new tiles that have not yet been laid on the wall! With the same success, you can give a unique look to tiles that have long been glued to the wall. Imagine - without extra effort, without noise, without RENOVATION, your kitchen can be given an exclusive, unique look!
Tiles in the kitchen age over time, losing their appearance. It is not at all necessary to replace the tiles; in this case, they can be decorated. Replacement? Even with the most simple version- It’s a costly task, but you can decorate it yourself.
The most important thing here is to choose waterproof materials with high adhesion (adhesion) to the tile surface. And the work itself can be done with the most basic tools for painting works, additionally using office supplies.
Apply a stencil
To update the tile, you can apply a stencil to it (see the article “” about their types). First you need to thoroughly clean the surface. For this we will need a brush and any detergent.
Then the surface is wiped with alcohol and then wiped dry with silicone carbide paper. After this procedure, the surface of the tile will become rough. This is done to better fix the paint. And after this, the tiles are coated with a primer.

The patterns are applied using special paint for glass. Choosing a pattern is perhaps the most difficult thing in this matter. Go online and you will find many pattern options. After we have decided on the pattern, we make a stencil. Then, having attached the stencil of the design to the wall, we simply paint over its cut out areas.

Advice: so that there are no smudges when decorating the tiles, and for better fixation of the stencil, it must be secured to the wall with aerosol glue. There will be no traces left after it, and it can be removed quite simply.
Drawings can be applied in different formats. For example, a repeating pattern is applied to each tile or a large composition is made. The second option is the most difficult. Only a person with certain abilities can complete such a task. If you don't have them, perhaps someone you know has a similar talent.

So, we have drawn the image. Now it should be varnished. After this, our decoration is ready. It can be applied to the walls of any room. Just remember that you cannot use abrasive materials to clean decorated tiles.
Vinyl decoupage
You can also update tiles using vinyl. Stores sell special interior stickers made from this material. These stickers have images on them. This material is quite resistant to mechanical stress and has excellent water resistance. Vinyl film can also be used to decorate ceramic tiles in any room.

Interior stickers can be purchased at hardware stores; If they are not there, then you can try to make a purchase online. There is big choice similar stickers with a wide variety of designs.
The film glued to the wall is also varnished. Be sure to ensure that there are no air bubbles left under the film after gluing. But if they still remain, then pierce them with a needle. There will be no traces left of this, and the air will escape.
Decoupage with paper or napkins
And there is another way to update the tiles. This method is perhaps the most effective, but at the same time the least expensive. This is a way of decorating old tiles paper. This is done as follows: a certain design is printed on translucent paper, then this design is cut out and glued onto a thick paper base.

A sheet of thick paper with a pattern is impregnated with glue and then pasted onto a previously degreased surface. Instead of paper, you can also take a napkin with a pattern. The dried paper is coated with acrylic varnish. After this procedure, the paper becomes moisture resistant. Now it will serve you for a long time. And if you get tired of paper decoupage, you can easily remove it from the surface of the tile.