Country life attracts people with the opportunity to enjoy fresh air and unity with nature. Outside the city everything is fine, except for difficulties with hygiene procedures. Agree, would it be nice to make a heated summer shower with your own hands to solve this problem?
This option will help increase the comfort of staying at the dacha, but will not greatly affect family budget. We will show you how to realize this idea.
The article discusses in detail the best Constructive decisions and cabin construction technologies. Effective help will be useful tips on the choice of materials required in construction, arrangement of drainage, simple and quick heating of water. The information presented is supported by photo and video applications.
The comfort and ease of use of the structure depends on how well the summer shower is designed. The task of a thrifty owner is to build an economical, easily constructed and at the same time maximally functional shower, equipped with heating.
The easiest option to implement is an open shower.
Summer shower open design is a frame-collapsible block or modular container, one of the walls of which is adjacent to the main building
When choosing this arrangement option, the tank is installed on load-bearing wall buildings, positioning it in such a way that Sun rays hit him at right angles.
Do you prefer closed designs that are convenient to use both in the warm season and in the cold months? Build a stationary outdoor shower with the simplest system heating It can be a frame structure or a permanent structure.
The main advantage of this solution is that in warm times the water in the tank is heated by the sun's rays, and in cold months by means of a heating element
Traditionally, when building a shower with enough space for an adult to bathe, they focus on the following parameters:
- height– 2-3 m;
- width– 1.5 m;
- length– 1.9-2 m.
The indicated dimensions are convenient when constructing a structure from wooden planks. Taking into account the wall thickness in finished form The area of the structure is approximately 2 * 1.5 m, of which an area of 1 sq. m will be allocated for the shower stall. m, and for the locker room - 60*40 cm.
When using boards of standard sizes, the material is consumed with virtually no residue.
In addition to wooden planks, the most commonly used building materials for the construction of cabins are:
- polycarbonate sheets;
- moisture-resistant plywood;
- sheet metal;
- flat slate;
- lining;
- brick.
When choosing facing material It is important to focus on the exterior of the site so that the building harmoniously complements the already created architectural ensemble.
Polycarbonate shower cubicle:
Image gallery
Purchasing the necessary materials
In addition to making or purchasing a heating tank, you must purchase plastic water pipes D 50 mm. It is convenient to use a flexible silicone hose to supply water.
To set up a system of materials you will also need:
- gutter reinforced with metal mesh;
- valve with float;
- divider
To perform foundation pouring during construction cesspool, you will need cement marked M150 and higher. The drain can be covered with waterproofing roll materials or hydroglass insulation.
To make a wooden floor in the shower, it is best to use a tongue-and-groove board, treated with a water-polymer emulsion or oil white.

For the final finishing and arrangement of the bathroom, you will need paint for exterior and interior work, spacious shelves for bathroom accessories and hooks for clothes
To erect the structure you will need the following tools:
- building level;
- roulette;
- corner;
- screwdriver;
- self-tapping screws
To pre-mark the area, you also need to stock up on a skein of twine and wooden pegs.
Instructions for building a summer shower
There is no particular difficulty in building a summer shower at your dacha yourself. The only stumbling block for a novice master may be the question of how to install a heated tank and how to organize a wastewater disposal system.
Step 1: Carrying out preparatory work
The scope of work during site preparation depends on the type of building being built. If you plan to build a temporary frame structure, to prepare the foundation, it is enough to remove a 15-centimeter layer of earth from the marked area, and then level the bottom of the dug “pit” and fill it with sifted sand.
When installing the shower stall on a strong heaving soils To reduce the risk of it tipping over, the thickness of the non-heaving “cushion” of gravel and sand should be increased to 30-40 cm.

When constructing a wooden pouring floor over a gravel fill, be prepared for the fact that while swimming you will experience some discomfort due to a slight draft
Are you planning to build a capital country shower heated? To erect it, you will need to lay the foundation. The depth of the foundation depends on the type of materials used. For example, for brick building A foundation buried 30-40 cm is quite sufficient.
The foundation is laid in the following sequence:
- Territory marking. For creating the right basis Wooden stakes are driven into the outer corners of the future building and string is pulled between them.
- Digging a pit. A layer of soil is removed from the marked area, going 15-40 cm deep depending on the type of building.
- Preparing the site for laying pipes. Dig trenches and level the bottom in such a way as to ensure unimpeded flow of waste water in the direction of the drainage hole.
- Installation of drain and discharge pipes. A reinforced gutter is installed on the leveled and compacted bottom, not forgetting to maintain the angle of inclination.
- Fill concrete mortar . To create level base, filling is carried out using a level and guides.
For interior decoration choose facing materials with increased moisture resistance: PVC film, linoleum, plastic. When choosing wood paneling The surface must be treated with drying oil and painted.
To make hygiene procedures more convenient and safe, a grid made of wooden boards is installed on the floor, on top of which a rubber mat is laid.
The grate is assembled from wooden slats size 30-50 mm. Wood preparation is the same. If you want to increase its resistance to shoe wear, treat the material with an acrylic compound used for repairing bathtubs.

It is advisable to separate the dressing room and the bathing compartment with a curtain made of waterproof textile fabric or polyvinyl chloride film
If desired, both the internal and external walls of the facing material can be painted and decorated with designs. Original design will allow you to turn the shower not only into a place for taking water procedures, but also in decorative element suburban area.
Additional interesting arrangement options garden shower suggested in these articles:
-
The heated summer shower is ready. To prevent water stagnation, it is advisable to operate the shower at regular intervals. Before a long break in use, so that sediment does not clog the watering can, it is recommended to completely empty the tank.
A shower is simply necessary in a dacha; you can’t live without it. Especially if you got wet from shock work, or just got warm in the sun. Some water will invigorate, refresh, and give strength for further achievements.
An important condition is that the barrel is flat and black.
I consider the ideal option to be a flat container that is painted black. If possible, then the best solution There will be a purchase of a ready-made shower mold. Now they are available and available everywhere.

Summer residents in general are extremely smart people and prone to engineering experiments. Apparently, this is the only way to get high yields and improve your land. Over the years of dacha experimentation, people have invented many ways to get warm water at a minimum cost.
Take warm water from the top of the tank
The easiest method to use for heating water is to take it from the top of the tank, where it warms up on its own most quickly. Traditional tanks have significant drawback in what pours out of the horn is the most cold water from below, and the warm one from above simply does not have time to reach.
There are, of course, craftsmen who make flat tanks at the top, this solves the problem. But if the barrel is high, then a float and a hose will help. See the drawing diagram.

This is the solution. You will need a hose one and a half to two meters long. Yes, polystyrene foam and a weight for the float. We insert a hose into the pipe that goes out to the shower head, and attach the other end of the hose to a float made of foam plastic or some other floating material.
This way we will always have the warmest water in the shower. Well, to prevent the hose from catching air, hang a weight that will hold the float with the hose in the water, immersed at some distance from the surface.
It's simple and at the same time effective method Always use warm water. On hot summer days the water will always be hot. Sometimes even excessively :)
Options with drawings

Examples of heating a country shower
The figure on the left shows an example of heating a country shower using a float. Warm water is taken from above, cold water is not taken. Shown on the right is a simple convector that allows you to heat water in a tank.
The pipe is brought to sunny side, takes water from below, warms it up and brings it up according to the principle of heat up, cold down. This way the tank warms up better, but it is optimal to add the first drawing to this diagram, so that the water intake also comes from above.
The middle drawing shows an example of saving water; you press the pedal with your foot and the water starts flowing. You need to lather your body—press the pedal and save warm water.
A practical warm solution - a flat tank
Since we are talking about warming up the water column, the most reasonable solution, at the shower construction stage, is to immediately install a flat tank. Such that the water has as much large area spreading, and, accordingly, heating from the sun.
If the water in the tank seems too hot to you, you can separately install a container with cool water in the shady part of the shower. By placing two nozzles on the horn, you can adjust the temperature to suit yourself and even take a shower on a hot afternoon comfortable temperature without getting burned, but also without freezing.
Heating water with a heating element or boiler
The next option will be for those cases when the water cannot warm up enough. Because of the sun, or because of the cool night air. After all, in May the nights are still quite cold, and in August-September they are already cold. In fact, only in June-July can we take a shower at the dacha without discomfort.
To solve the problem of cool water, the simplest thing is to heat it upper layer boiler. Of course, for this you must have electricity at your dacha. Place a slatted board on top of the barrel, and hang a boiler from it on a rope.
The water heats up in about an hour and a half, but this depends primarily on the volume of the tank and the ambient temperature. The boiler is capable of heating only the top layer of water, to the level of its immersion. But we don’t need any more, since we already have a float with a hose installed!

It would be optimal to use a kilowatt boiler. It is capable of heating approximately 20 centimeters deep in the tank.

This volume of heated water will be enough to wash two people. Most importantly, do not forget to unplug the water heater while taking a shower! Precautionary measures must be followed strictly. You never know...

Electric heater with thermostat for shower in the country house
I have considered the most simple options heating showers, such that a woman can use without male help. Men, I know, make built-in heating elements and install relays so that the water warms up to a certain temperature. But these are already more complex structures.
Video instructions - warm water from a whole barrel
The summer shower is one of the significant buildings on suburban area. How to equip a shower in your country house with your own hands, building a reliable and durable structure with a minimum financial investments? Guided by the advice of the master, you can easily cope with the task.
In hot months, the presence of a summer shower is one of the conditions for a comfortable stay in a suburban area. A shower gives you the opportunity to freshen up after working day, relieving accumulated fatigue and recharging with vigor for new things.

Summer shower with a simple layout in a summer cottage
There is nothing difficult about building a shower in the country with your own hands. You just need to sketch out a drawing and decide on the dimensions of the future structure, prepare necessary materials and set aside some free time.
Outdoor shower design
There are many options for arranging a summer shower. It might work out simple design from wooden frame with a small tank on the roof and a curtain to protect from the wind and prying eyes. Or a full-fledged cabin with strong walls and a roof that can withstand a heavy barrel filled with water.

Summer shower design options
But in any case, the summer shower should be comfortable and spacious. When thinking over the dimensions of the future shower stall, keep in mind that it is necessary to provide a place protected from splashes of water for storing bath accessories and hanging clothes. This will require from 40 to 60 cm of room area.
According to the experience of craftsmen who have already built a shower at the dacha with their own hands, for comfortable water procedures a sufficient room measuring 160x100 cm or 190x140 cm and a height of 2.5-5 meters is sufficient.
Tip: A small drawing or simple drawing will help you correctly calculate the required volume building materials, preventing unnecessary expenses.
Choosing a location on the site
The design of a summer shower assumes that the water will be heated from solar heat. Therefore, it is better to select a well-lit area for installing a shower stall, where the sun's rays will actively warm up the water tank throughout the day.

The best place to build a shower would be a sunny place.
When choosing a location, it is worth considering the convenience of water supply, ensuring, if possible, automatic filling of the tank.
It would also be reasonable to worry about water drainage in advance by placing the structure on a natural elevation, or making a small embankment so that after washing it flows into a septic tank or sump.
Preparing the base
When constructing a lightweight frame structure It is not at all necessary to lay the foundation, but when building a stationary summer shower, this stage of work cannot be skipped.
To carry out the work you will need:
- Roulette and level;
- Pegs and cord;
- Bayonet shovel;
- Garden drill;
- Pieces of roofing felt;
- Metal grid;
- Crushed stone and sand;
- Cement mortar.

Preparing the base for a summer shower
The dimensions of the foundation depend on the building materials from which the building will be constructed. For the construction of a shower from cinder block or brick for installation slab foundation You will need to dig a pit about 15 cm deep.
The work is carried out in several stages. Having decided on the location of the summer shower, prepare the site:
- Using a tape measure, pegs and string, mark out the area of the required size.
- In the designated area, a layer of turf 15 cm deep is removed.
- Level the base of the pit.
- The bottom of the pit is lined with a “cushion” of sand and filled with mortar, creating a flat surface.
Tip: If you plan to use wood or metal carcass, before pouring the base, it is necessary to prepare a place for the racks by installing sticks of the required diameter vertically wrapped with roofing felt.
Laying the foundation
When screeding a floor, it is better to use a level and guides, because only a horizontal surface can become a reliable basis for the entire structure. At this stage of construction, it is also worth taking care of arranging a drain, making a gutter reinforced with a metal mesh in parallel with the concrete screed.

Foundation for the construction of a capital summer shower
Using columnar or pile foundation under a frame summer shower, there is no need to dig a pit. Enough only at the installation site support pillars by using garden borer make holes about 1 meter deep.
They need to be inserted metal racks, the height of which is 1.2 m, and D = 90 mm, so that the posts rise above the ground surface by 20 cm. Columns made of hollow pipes are filled with cement mortar diluted with crushed stone and sand in a ratio of 1: 5: 3 and wait until it will acquire the necessary strength.
Important: To extend the service life metal poles, the ends buried in the ground must be pre-treated with used machine oil.
Drain arrangement
It is better to place a septic tank for a summer shower not under the shower stall, but at a short distance from it. This will prevent it from being flooded with large volumes of water, thereby preventing the destruction of the foundation and soil.
To equip it, dig a hole about 2 meters deep, decorating the walls with brick or cinder block masonry. Some craftsmen use for this purpose car tires, laying them on top of each other in the form of a well. A gutter for draining water is connected to the finished septic tank and covered with a shield made of wooden boards.

Option for arranging a drain for a summer shower
It is better to decorate the walls of the gutter for water drainage with waterproof material: roofing felt, hydroglass insulation or ordinary PVC film. It is placed on a slope so that the flow is directed towards the drainage tank.
A metal or enamel tray is installed in the shower stall itself, which can be purchased at any specialized store without much hassle. Water will flow from it directly into the gutter.
Advice: You can partially solve the issue of soil drainage by planting moisture-loving perennials near the shower stall, such as bathwort, buzulnik, hazel grouse, iris, and loosestrife.
Construction of the frame
An outdoor shower made of beams or boards is one of the most popular options for a structure needed in the household. For the construction of the structure, it is better to use coniferous species, the main advantage of which is:
- High density;
- Moisture resistance;
- High level of resinity;
- Ability to withstand heavy loads.

Shower frame made of beams
To construct the frame, 100x100 mm beams are used. First, assemble the lower frame, fixing it with bolted connection to support posts or screw piles. When installing, it is better to use long bolts with complete alignment of the axes.
Installed vertically wooden supports, perform the top trim. To give the structure additional stability, the side frames are secured with spacers.
Planed wood is ideal for cladding coniferous species. She has a presentable appearance and fits harmoniously into the surrounding landscape.
Important: To extend the life of wood, it is advisable to treat it with an antiseptic and moisture-repellent composition, or simply coat it with 1-2 layers of varnish for exterior use.

Construction of the walls of a wooden summer shower
Special seals will help ensure a tight fit of the door. The door to the booth also needs to be painted or sealed.
For interior decoration of the cabin you can use plastic panels, oilcloth or linoleum. Photos from interesting options You can view the design on the Internet.
Installation of the barrel
When choosing a barrel of the required volume, they are usually guided by the formula that up to 40 liters of water is enough for one person. To set up a summer shower for a family of three or four people, it is enough to install a barrel with a volume of 200 liters. If you choose between plastic and metal container, then it is worth noting that plastic is lighter in weight, but metal (painted in dark color) heats up faster.

Various water supply schemes with natural heating
A little trick: To ensure faster heating of water, the outer surface of the roof under the barrel can be lined with reflective material such as galvanizing or foil.
The container is placed on the roof and secured with straps. All that remains is to choose the required diagram water supply to the cabin:
- cut two holes for filling with water and connecting a faucet with a diffuser, fill the container and enjoy water treatments.
- pedal circuit is similar to the first one, but water is supplied using a pedal and not a valve as in the first case.
The second option is more complex, but at the same time very economical because water enters the shower in doses and at the right time, which is very convenient. Both options with natural water heating. It is also possible to connect electric water heating. The presence of an electric heating element in a barrel entails the abandonment of a barrel made of simple plastic (it is better to use metal) and the inclusion of another container in the circuit for supplying cold water.

Scheme of arrangement of a tank for a summer shower
Cold water will save a lot of energy because washing only with heated water is not very practical and convenient, because there is no way to adjust the water supply temperature. You will also need a mixer or some kind of circuit with two taps and the need for an electricity supply. Although electricity is desirable anyway, it is necessary to illuminate the shower.
Construction of a shower in the country: video
Naturally heated shower: video
Summer shower at the dacha: photo


A dacha is the dream of almost every metropolis resident. Many city dwellers enjoy spending part of their vacations and weekends at their dacha. They enjoy working in the garden, gardening, and arranging the dacha itself: this way they are distracted from the noisy bustle of the city. It’s good if the site is located near rivers and reservoirs. The rest have to build their own country shower cabin on the site, equipping it with heating and a changing room. We will discuss how to do this with your own hands in this material.
Choosing materials for a country shower
A country shower with heating and a changing room is not so difficult to build. But how great it is to swim after a hard day in comfortable conditions. It's worth spending a little time and effort, and for your own convenience. In this case, it is absolutely not necessary to spend a large number of funds for construction and equipment of the structure.
For a summer shower, you can choose practical and not the most expensive materials. Firstly, you will definitely need cement mortar. It is better to install more massive structures on a poured foundation; for lightweight models, you can choose a pile option.
When choosing materials, you should be guided by the characteristics of the work. For a small pit for pouring the foundation, a shovel, available in every house, is sufficient. Pile structures will require narrow but deep holes, which are dug using special electric or pneumatic tools.
Choosing suitable material, take into account not only its cost, but also the characteristics and requirements regarding preparation and care (impregnation protective equipment, the need for timely ventilation, etc.).
What material to use to build a summer shower
- brickwork is not the cheapest option, but it is the most durable of all. If you have brick left over from building a house, then choose this option. Such a shower with a dressing room and heating will last a long time;
Brick building
- You can often find wooden shower buildings in the country. Natural wood is environmentally friendly, looks impressive against the backdrop of nature and has quite acceptable strength. But here it is important to remember: to ensure the durability of the building, it is necessary to provide high-quality ventilation for the shower stall. For this purpose, during construction they specially leave wide gaps in the floor and walls. The disadvantage of this option is that in windy weather or when it gets cold, it will blow from these cracks. In addition, it is necessary to treat the wood with a fire retardant (fire retardant) to protect against fire, because the building is equipped with heating devices (electric or fuel);
- a modern option is a garden shower with a changing room and heating made of polycarbonate. This material has a lot of advantages: while the sheets are light in weight, their cellular structure provides high strength. In addition, polycarbonate does not change its properties under the influence of natural factors. The ease of cutting and installation are also convincing arguments in favor of this material. Thanks to a lot of advantages, it is quite convenient to work with polycarbonate even for those who have picked up this material for the first time;
- outdoor showers are often built from plywood. This material is inferior in strength to boards, but is also much cheaper. Plywood also requires treatment to resist fire, moisture and rot;
- slate with a straight surface can also be used to build a country shower. It is more difficult to work with when cutting material, but it has strength and durability, is not afraid of moisture, so it is quite suitable for building a shower cabin;
- sheet plastic is a moisture-resistant material that allows you to build a heated summer country shower and changing room yourself in the shortest possible time. Varieties with different characteristics. When choosing, you should pay attention to the strength, possible temperature Range, no toxicity, including secretions harmful substances when heated;

Plastic shower
- It is also possible to use corrugated board or siding.
All sheet materials used as frame cladding. The frame itself can be made from wooden beams, metal pipes or profile. Special attention deserves an upper deck on which the water tank will be placed. It must rest securely on the vertical parts of the frame and be strong enough to support the weight to the brim of the filled tank.
Heated tank options
The tank, that is, a container for water, is selected based on how many people will use the shower. If few people come to the dacha, then there is no need for a large tank. The compact container is easy to install, weighs little, so it heats the water faster. This is quite enough for washing 1-2 people.
There are several types of tanks for summer cottages, depending on the material they are made of:
- carbon metal. This material quickly becomes covered with rust, so its surface must be enameled. Its disadvantage is that with the slightest damage, corrosion develops over time and leaks form. Such a tank is not the best choice at all;

Carbon steel tank
- stainless steel. This material is not afraid of moisture and temperature changes, but it has another disadvantage - it is heavy, which is why it is necessary to build a more durable frame.
- Cink Steel. The coating lasts longer than black steel, but is also short-lived.
- plastic. Nowadays, country showers are increasingly made of plastic. Its basis is food grade polyethylene. Light weight, different colors, quick heating - all these are the advantages of plastic tanks for country showers.
Heating methods
There are two ways to equip your shower with heating:
- use solar energy;
- apply a heating element- Heater.
For a dacha that is visited mainly in hot weather, a naturally heated option is suitable. To increase the sun's effectiveness on the water tank, choose a black container.
Artificial heating is carried out by a device such as a heating element. This device Sold separately, so you can equip your shower with it yourself. At the same time, you can purchase a ready-made container with an already installed heating element. Its advantage is the high-quality installation, as well as the ability to purchase a tank with a thermostat.
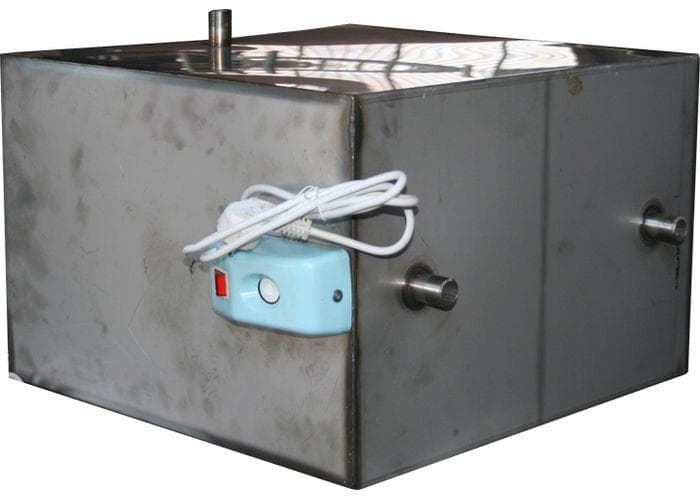
Tank with heating element
You set the temperature to which the water will warm up. Attach two containers to the roof, one of which will be with a heating element, and the second without heating device. Thus, by mixing water, you can use your wooden or polycarbonate shower at any time of the year.
Draft drawing with a locker room
First you need to choose the place where the shower will be installed. It is best to place it on the edge of the site in a well-lit place on a small hill. The optimal height is 2–3 meters.

Street building drawing
The space that the cabin itself will occupy must be at least 100x100 cm. Together with the changing room it standard sizes can be 160x100 cm or a little more.
Having decided on the location, you can begin developing the project. Despite the simplicity of the design, it is better to first transfer your idea to paper. This makes it easier to identify bottlenecks and calculate the amount of materials needed.
DIY construction
The process of building an outdoor summer shower begins with preparing the frame parts. It is better to construct it from pine boards. You will need:
- 4 horizontal frame parts (20x90x664 mm);
- Vertical jumper (20x90-664 mm);
- 2 lattice boards (15x90x700 mm);
- 7 planks (15x90x700mm);
- 4 vertical details(20x40x1820 mm);
- 4 connections (transverse) (20x40x1820 mm);
- hose support (20x40x160 mm);
- 8 fixing strips (20x40x660 mm).
It is also necessary to prepare the following parts for the construction of the shower:
- shower head (with external thread) with a plate for fastening;
- connecting element with internal thread;
- couplings for connecting the shower to the watering hose (4 pcs.);
- coupling shut-off valve;
- clamps (6 pcs.);
- hinges 25x180 mm (4 pcs.);
- wood glue;
- long bolts, nuts, screws.
Construction must begin with the installation of support pillars. Then the frame is assembled separately and attached to supports. It is recommended to use long bolts for frame fastenings, since the structure must withstand the load from a filled water tank.
How to make a floor
The floor can be made of boards, fitting them together not very tightly so that water leaves the cabin through the cracks. But the disadvantage of this option is that cold air will come from under the floor. It is better to use a ready-made shower tray. A hose is connected to the drain hole (water supply), through which the water will be discharged to the place intended for drainage.

Laying the foundation
Space delimitation
An outdoor shower can be separated: one part can be separated for a dressing room and covered with a plastic curtain, and the second can be made directly into a shower room. The second option is to install a partition made of moisture-resistant plywood or polycarbonate between these rooms.
Wall cladding and door installation
It is not necessary to install a door from the locker room to the shower - it is enough to hang a curtain made of waterproof material. However, if you have laid a wooden floor, then it is better to build a high threshold between the shower and the locker room.
The outer door must close tightly. However, a well-fitted door can swell from moisture and then jam. To prevent this from happening, you need to provide a gap between the door frame and the door, which will be covered by a seal attached along the contour door leaf or frames.
The frame can be covered with polycarbonate. The shower stall will be quite bright. You can also cover the walls with siding or cover them with clapboard, but then you will have to install artificial lighting.
Electricity supply
To connect heating elements to the electrical network, it is better to call an electrician who will select the required wire cross-section and do everything necessary to ensure safe operation of the device. It is better for an inexperienced person not to undertake this part of the work.

Electricity supply
As you can see, building a summer shower with a changing room and heating is not such a difficult task if you have the desire and opportunity to make such a shower with your own hands. To do this you need:
- Decide on a shower model;
- Choose a water heating method and materials;
- Find a suitable place for installation on the site;
- Build a shower taking into account all the rules listed above in the article.
Video
For an example of creating a warm shower for a summer house, see the video
Conclusion
Using this shower is easy and convenient. It can be used in the off-season, and, if desired, in the winter, you just need to insulate it. All in your hands.
Even if summer residents do not live in country house all year round, in the summer they spend a lot of time there. That’s why many people think about how to properly improve their home and grounds and create at least minimal comfort. One of the first things to do at the dacha is usually a summer shower - the simplest without insulation or a more convenient warm shower with heated water.
After the forum member Foxic from Moscow rotted, unable to withstand the next winter tests, the owner decided to build a more reliable new one. Old building, which served for ten years, was a plank cabin with a frame made of 50x50 cm timber, a black barrel on the roof and a drain from below.
The inhabitants of the house presented a number of requirements for the new building: it had to be warm, with heated water and a full-fledged dressing room. Considering the limited budget for a warm shower for the dacha and the lack of running water on the site, Foxic decided that it was possible to insulate the shower stall and build a wood-burning hot water heater into it. According to the instructions, this device must be connected to the water supply. To create the required water pressure, the owner came up with the idea of raising the barrel of water higher.
In this way, the height of the future building was calculated, the remaining dimensions were determined based on the size of the shower tray, the column and the dimensions of the owners themselves. The dimensions of the shower were 2.5x1.6x2.5 m. For the base placed on foundation blocks and paving slabs, 150x100 cm timber was used, pre-treated with a protective compound.
Supports were laid under the column for heating water in the shower at the dacha and for the tray, and boards were cut for the floor. By flipping them over, Foxic had a subfloor. Then a frame was erected from 50x50 timber, which the forum member covered with clapboard on the outside. Then the structure was put under the roof.
Since a barrel of water had to be installed on top of the shower, the owner decided to make a roof similar to a roof rack passenger car. Above the pitched sloping roof, she made a base of timber for a level platform. A barrel will subsequently be installed on it, which will be filled with water from the well using a pump.

Finally, it was time to insulate the shower stall, build the interior walls and lay the floor. The hostess insulated stone wool, laying it between the timber. I secured the vapor barrier over it with a furniture stapler. I insulated the entire building: the ceiling, walls and even the door.

Foxic treated the pipe passages through the ceiling and chimney with pine-colored parquet sealant. The remaining cracks are near the pan, windows, etc. sealed it with clear silicone bathtub sealant.
The windows were made from cellular polycarbonate, which remained from the reconstruction of the greenhouse. The forum member laid the roof with European tiles, covered the outer walls with Neomid, and installed siding on top of it. Internal walls covered with two layers of Dufatex.

Thermal insulation of the walls near the speaker was carried out by Foxic from thermal insulation material for chimneys, I screwed sheets of aluminum foil on top of it. Near the entrance there is a coat rack and a woodshed bench. The frame of the box is made from leftover timber and lined with scraps of clapboard. The seat is made of floorboard.
The walls from the inside were covered with clapboard, the floor was laid, sanded and varnished, a water heater was installed and water was supplied to it, the walls near the water heater were insulated, a chimney was installed and a locker room was equipped.
The plans include making external porch steps, shelves, a mount for a watering can, a mirror for the door, and on the roof - a platform for access to the barrel and a staircase to it. Foxic is going to tile the area in front of the shower.

Materials:
- unplaned timber 150x100;
- unplaned timber 50x50 for the frame;
- planed timber 50x50 for the doorway and door frame;
- three-meter eurolining class C;
- batten x36;
- vapor barrier "Plenex";
- Rockwool insulation;
- Euro slate "Ondulin";
- cream siding “Alta-profile” and accessories for it;
- foundation blocks;
- paving slabs 50x50 cm;
- sheets for thermal insulation of chimneys;
- aluminum sheets for thermal insulation of walls near the column;
- transparent silicone sealant for baths;
- parquet sealant “Pine”;
Equipment:
- wood-burning water heater "Silistra";
- chimney with sandwich type thermal insulation;
- flexible water hose;
- container for water;
- shower tray.

Results
The heated shower for the cottage was built by Foxic independently in 3.5 weeks. The building passed the first tests successfully: warmth and beauty! The water in the boiler heats up quickly enough: to properly heat 80 liters, 20-30 minutes are enough. The shower is very warm thanks to the heating stove and chimney. Lights and electricity were provided - the hostess made a socket for a hair dryer and hung energy saving lamp. Electric heating is not planned yet. Waste water V drain hole doesn't linger.
Based on materials from “Home and Dacha” forum participant Foxic