Who among us doesn’t like to go fishing with family or friends, have a picnic, barbecue, or just relax in nature.
However, in addition to fishing rods, food, barbecue and tents, you need at least some kind of camp furniture - it’s uncomfortable to cook and sit on the bare ground.
And the main item needed for a picnic outside the city is a folding table.
Now it can be purchased at any tourist or fishing store, but why spend money if you can make a folding table yourself. Let's find out how to do this and what is needed for this.
Design Features
Without going into details, we can distinguish two types of camping tables – a table with folding legs and a suitcase table.
In the first option, when transporting or carrying the legs are retracted under the tabletop. Upon arrival, you just need to move the legs of the table to place it.
In the second option, the tabletop is something like a suitcase or chessboard- in the stowed position, the legs lie inside it, but in place they need to be taken out of the “suitcase”, connected to it and the table placed in the right place.
Both types have their advantages. A folding table is easier to make and literally takes seconds to set up. At the same time, a table-suitcase is more convenient to carry, takes up less space, and, in addition, you can put dishes, skewers and other necessary things in it during transportation.
Wood, plastic or metal?
What material is best for making your own folding table for camping trips?
If ease of creation is your top priority and you don't have a wide range of tools or skills in working with plastics and metals, choose wood.
Timber, boards, chipboard, plywood - all this can be used to create a fairly simple folding table.
But a table made of wood, if its surface is not protected with varnishes and special coatings, will warp under the influence of dampness, sunlight and temperature changes and lose its attractive appearance.
Plastic and even metal can be used as material for legs and table tops. But here you may need those tools that cannot be found in every home. In addition, working with such materials is more difficult than with the same wood. But tables made of plastic are not subject to corrosion, and those made of metal are very strong and durable.
 In order to make a collapsible or folding table, you need a set of enough simple tools, which can be found in any home or garage:
- Jigsaw (can be replaced with a circular saw or wood hacksaw);
- Electric drill for preparing holes for screws;
- Hammer and Phillips screwdriver;
- Tape measure, square, ruler, pencil and level.
Attention! remember, that cutting tools, such as a circular saw or a jigsaw are sources of increased danger! Observe all necessary safety precautions when working.
Folding picnic table
 To make something simple and strong enough, you need the bare minimum of materials and fasteners:
- wooden boards, 20–40 millimeters thick. For the countertop, instead of boards, you can use a sheet of chipboard or plywood, approximately 10 millimeters thick;
- self-tapping screws, furniture bolts, and for each pair of legs the bolts must be of different lengths, wing nuts for the bolts;
- door handles for carrying the table and hooks.
First, cut from boards or sheets Chipboard table top required sizes. If the tabletop is made up of several boards, assemble them together, lay them down and measure the length and width.


Stages of work
Step 1. Making the frame
Lay the boards for the frame on the tabletop; on each side, the frame should move 2–3 centimeters away from the edge of the tabletop. Using a jigsaw, cut the boards to the required dimensions, then lay them back on the tabletop, checking that the length and width of the frame match the drawing. Outline the contours of the frame - use them to make holes in the tabletop for screws.

Important! In order to accurately maintain the dimensions of paired parts, connect the boards together with clamps and cut them together with a jigsaw or hacksaw.
Step 2. Intermediate bars
Cut out the support bars on which the spread out table legs will rest, and make four holes in them for screws. To prevent the table legs from colliding with each other when folding, make wooden supports for the second pair of legs, which will be located between the frame and the stop bars.

Step 3. Assembling the frame and tabletop
Assemble the frame elements together, secure the stop bars and wooden supports, and use an electric drill to make four holes for the bolts. Use screws to secure the table top and frame. 
Step 4: Table Legs
Lay out and cut out the table legs with a jigsaw. In the upper part, where they are fixed to the frame, the legs should be rounded, while in the lower part there should be a cut at a slight angle (15–20 degrees). Make holes for the bolts.

Step 5. Assembling the table
Connect the first pair of legs with a crossbar and secure to the frame with a bolt and wing nut. Repeat the same with the second pair. Check that the legs do not cling to each other when unfolding and folding the table. If they get stuck, treat the legs at the point of friction with sandpaper.
Folding table ready. Additionally, you can attach a handle to it for easy carrying and hooks for hanging towels or barbecue equipment.
Suitcase table
 To do camp table-suitcase, you will need more materials and fasteners:
- sheet of plywood or chipboard for the lid. If they are not available, you can use boards;
- wooden beam for the legs and frame of the table top;
- hinges, door or suitcase handle, two latches;
- furniture bolts and wing nuts;
- Self-adhesive screws.
Stages of work
Step 1. Take sheets of chipboard and cut out halves of the tabletop. Then saw off the frame bars to the required length and connect them to the tabletop halves with screws on all sides. Fasten the tabletop halves together using hinges.

Step 2. Cut four beams, which will be the legs of our table, make holes in them and in the frame for bolts, and make an indent so that the table legs are freely connected to the frame.


Step 3. Connect the legs and frame using furniture bolts and wing nuts.

Step 4. Attach a carrying handle to the frame. Don't forget to make two latches ,
so that the suitcase does not open during transportation.

Note! Before you start work, draw up a drawing of your table in several projections, calculate the dimensions of all the parts and how much material you will need. This way you will save yourself from mistakes, and you will not have to redo all the work again.
Protecting the camp table
 Unprotected wood ages quickly enough: dampness, temperature changes that are inevitable in nature, sunlight and many other factors have a bad effect on the material and reduce the durability of the folding table.
Therefore, do not forget to treat all its surfaces, especially the countertop, which is most susceptible to harmful influences.
Use special antiseptic compounds and stain.
A final finish with varnish or paint will improve the appearance of the plywood or chipboard and make the camp table more beautiful.
How to make another one easy option folding table, watch the video:
The cost per square meter of living space is now only growing. Construction companies Initially, many more small apartments are being built, with an area of up to 30 m2. In such apartments, every square meter is worth its weight in gold. It is for you, residents of such small apartments, that I decided to make a selection of 11 original ideas DIY folding tables.
1. Children's table for classes
When closed, the table acts as a chalk board.
2. Table-picture

For adults, for whom the chalk board is not so important, an interpretation in the form of a painting is possible.
3. Folding table in the workshop.

For those who like to rummage around in the garage, there is also an option to use the table as a cover, as well as the tabletop itself.
4. Portable table
The table does not have to be stationary. Options with portable tables that can be mounted on the wall as a frame for a mirror are also available.
5. Small shelf for work

An excellent option for those who do not need a lot of space to work.
6. Laptop table in a modern style

7. Table-bed

Some private workshops produce entire complexes that combine a bed and a table at the same time. Saves a lot of space.
8. Suitcase table

Suitcase-type tables are quite common. In addition, additional mounts for bottles can be made in the wall. And there will be a kind of bar counter.
9. Table for the sofa

Those who like to drink tea on the sofa will appreciate it. It is very convenient to place a hot cup on such a table. No need to burn your fingers!
10. “Advanced” sofa table

A more advanced version of this sofa stand.
11. Kitchen “table in the wall”

A variation of tables that can be folded at the right time for kitchens.
A folding table is a convenient and practical thing that is popular among owners small apartments, summer residents, lovers active rest Outdoors.
Functionality of folding furniture
There is a wide variety of folding tables - typical options are visible in the photo. Often ready product They are purchased in specialized stores; it is not difficult to make a table yourself.

IN small spaces often use furniture that allows you to rationalize free space– unfolds if a large work surface is required, and is removed in other cases: student desks, tables in the kitchen, hall, garage, workshop, etc.

It is convenient to use portable table models: they are light, compact, and moderately durable. They are made from different materials, each of which has its own strengths and weaknesses.
Wood must be protected from exposure to water and mold, but it is affordable and well processed, steel is heavy but durable, aluminum is easily damaged, but is light.

It should be taken into account that for outdoor use protection from moisture is required. Metal structures must not rust, the materials used must be moisture resistant - aluminum frame and a plastic tabletop is often found as the optimal combination. Plywood, wood, fiberboard are suitable for indoor spaces.

You need to choose a suitable table based on weight and dimensions. If transporting things involves using a car, then total weight and the shape of the tabletop is not very important, the main thing is that everything fits in the trunk of the car.

If you need to fit a folding table into a travel backpack, the requirements are higher: minimum weight with maximum functionality.

During operation, it is important not to overload the tables - they are usually not designed for the weight of an adult, so it is unacceptable to use them as a stand for large items.

What table to take for going outdoors
Inexpensive folding picnic tables are a popular item in stores. They are presented in a wide range. Sold separately and in combination with chairs. A rectangular tabletop with adjustable height is the most popular option. Manufacturers stipulate the maximum load on the table, the average range is 20 - 40 kg, for metal structures 2-4 times more.

Home craftsmen, having minimal carpentry skills and the appropriate tools, can quickly make an analogue that is not inferior to a purchased table.
Homemade portable table No. 1
Materials:
- For the tabletop: boards, chipboard or thick plywood, size 55cm x 30cm – 2 pcs.
- For legs: wooden beam 69 cm x 4.5 cm x 2 cm – 4 pcs., additional supports 50 cm x 4.5 cm x 2 cm – 4 pcs., crossbar 45 cm x 4 cm x 2 cm – 2 pcs.

The model of this folding table is convenient for transportation when folded; it is not difficult to do it yourself. A special feature is the folding mechanism, in which the tabletop splits into two parts.

The beam for the legs is rounded on one side and is connected to the foot supports not fixedly, but movably. To do this, a hole for fastening is drilled in the upper part of each future leg and connected to the support with bolts. The tabletop is attached to the support with self-tapping screws.

The crossbars are fixed so that when the finished table is unfolded, they are located at a distance of 15-20 cm from the ground, parallel to it. For increase overall sustainability Bottom part the legs are cut at 45 degrees.

Before doing the work, you need to prepare a drawing of the parts.


Homemade portable table No. 2
A solid tabletop is less compact, but making such a table is easier and faster than the previous version.
The fastening mechanism is simplified - two supports are connected to the tabletop and one pair of legs. The second pair moves freely and, when unfolded, rests against the limiter at the bottom of the working surface.

Most folding table models have cross-shaped legs - this ensures maximum strength and stability of the product.

For this you have to endure some discomfort - sitting behind such a structure is not very comfortable.

You can try another option in practice, when four supports are located in parallel. The safety factor is then reduced.

Roll table
A compact product is obtained if you use lining for the tabletop, parquet boards or analogues. The size and shape are selected independently in accordance with personal preferences; it is even possible to make a round table.


The workpieces do not need to be rigidly connected to each other at the same distance. A strong nylon tape is used for this. Fixation is carried out using a construction stapler or small nails.

It is permissible to temporarily insert small planks into the gaps while working, which will help ensure correct distance between the tabletop parts.

To ensure that the final structure retains its shape and is strong, a pair of removable bars are placed along the edges, to which the legs are attached.
It is good to use parts of an old collapsible Soviet stool as a support, or prepare a similar one yourself. Round pads are ideal.


To be able to use this table, all that remains is to make a through hole in the table top, removable blocks and secure everything with bolts.

Externally, such a table is similar to a stationary one, but is not designed for heavy loads. When disassembled, it can be easily rolled up; the legs and fixing boards do not take up much space - it is convenient to transport and store.

It is easy to find a portable aluminum table on sale, which also folds into a roll and is placed in a protective case when stored.

With a dead weight of 5-7 kg, such models are designed for an average load of 80 kg. They are quite durable, easy to use and have a reliable locking mechanism. For a large group going on vacation in nature, this is a good option.

Compact tables for apartments and cottages
Collapsible furniture is often used in stationary settings when there is a shortage of space. If guests are expected to arrive, then the usual seats at the dining table are not enough; having a folding one is an excellent solution to the problem.
Change in the number of permanent residents in a family at constant square meters also makes you think about implementing interesting design solutions in your personal space.

A full-fledged office is a luxury available to everyone in a standard apartment, but decorating a compact one work area is quite real. Multifunctional furniture, such as transformable tables, is often used by schoolchildren and students.

Manufacturers modern furniture offer different models folding tables, the most picky buyer is able to choose the best option for himself.

Before purchasing, you need to think in advance about the exact purposes for which the table is intended, whether it will have a minimally useful, constantly used area, or if folded it will be stored in a secluded corner.

Most popular square tables, which expand to a rectangular shape with a large area. Over the years, book tables have proven their reliability and practicality. Sliding system The slider principle also finds its application.
Significantly save space in the room comfortable models with wings". A bistro-type kitchen folding table is rational to use for a tiny room. They unfold like an ironing board and hide when not in use, freeing up useful space.

Many of the listed ideas can be implemented independently if you have the desire and suitable materials. For family budget the benefit is obvious - a manufactured product will cost less than a new purchase.

You can implement the most daring ideas that are optimally combined with the interior and the size of the room. Wooden table – classic version, But raw material You can choose any one, depending on personal preferences and the amount of planned expenses.

Home craftsmen often like to remake suitable parts old furniture rather than buying new building materials.

Choose folding tables wisely and do not experience everyday inconveniences at home or on the go.

Photo of a folding table


With its help, you can change the location of the feast, as well as take the structure into nature. Such a product will not take up much space in the interior, because when you are not using it, the table can be folded and placed behind the door.
Preparing tools
A folding table with your own hands can be made by any home craftsman who has dealt with wood at least once in his life. However, to carry out this work you will need a certain set of tools and materials. You should prepare a screwdriver with a quick-release chuck and a set of bits, a grinding manual typewriter, tape measure, pencil, building level and right angle.
If not grinding machine, then there is no need to purchase it for one time, it is best to use sandpaper, at the same time you can finish making the table, making its surface smooth. Some modern shops offer consumers to use similar equipment for rent.
Preparation of materials
You can make a folding table with your own hands in one evening if you have everything at hand necessary materials. You will need two types of slats, one of them should have a cross-section equal to 30 mm, while the other should have a cross-section of 20 x 40 millimeters. In the first case, you need to prepare four elements, the length of each of which will be 1200 millimeters. The total length of the latter should be 5 meters.
To make a tabletop, you can use laminated veneer lumber, which is made from pine. Reliable and durable option will become a tabletop, the thickness of which varies from 30 to 40 millimeters. A part with the following dimensions is cut from the workpiece: 1300 x 650 millimeters. Each component is well processed with sandpaper and then varnished, which should be done before assembling the structure. The slats that will form the basis of the legs must be rounded at the top and then sanded well.

Additional preparation of elements
The do-it-yourself folding table is made to dimensions that will suit the future owner. But the technology remains the same as described in the article. Thus, in the legs that have not yet been cut to length, it is necessary to drill through holes; they will be needed for the frame strips and axial bolts. The diameter for the fasteners should be 8 millimeters, and the two holes for the strips should have a diameter of 5 millimeters.
In the central part of the strip, you should drill a hole for the axial bolts, stepping back 430 millimeters from above. The frame strips are marked by eye, but symmetry should be maintained.

Nuances of the work
A do-it-yourself folding table is made using a certain technology, it involves the creation of trestles and a table top; these components should not be fastened together. It is necessary to make grooves in the tabletop where the legs will be installed and then wedged. Special sockets must be made in such a way that they are fastened to the tabletop using 4 x 50 mm self-tapping screws.
At the next stage, you can proceed to assembling the structure. If you decide to make a folding table with your own hands, then the trestles should look like a folding bed; such a system will save space in the house or the trunk of your car.

Initially, the legs should not be sawed off from the bottom, but they should be approximately the same. The axle bolts are also not fully tightened to allow the legs to be extended. Lock nuts should be used to secure the tolerance. The master can purchase absolutely any bolts, but their length and diameter must be suitable. For the legs, for example, 8 x 70 millimeter bolts should be used. In the grooves of the table top, limit bolts should be used, the parameters of which are 8 x 120 millimeters.
When built with your own hands, at the next stage you can install the upper ends of the legs in the unfolded state into the grooves of the tabletop. The unfinished structure should be installed on any flat surface to determine how much the legs need to be cut to eliminate the error in length. Be sure to use a building level. When adjusting the length, you should not be particularly zealous; to carry out these manipulations you will need a jigsaw. If the table will be used only outdoors, then the generally accepted height of 750 millimeters should be reduced, since you will have to sit at such a structure literally on the ground.

Making a coffee folding table
Folding coffee table You can also make it yourself, photos of it are presented in the article. The frame is assembled into confirmations, and you need to use a special drill. Marking on the surface of laminated chipboard can be done using stickers, since the pencil will not be visible, its lines glare. A transformation mechanism should be installed in the frame, which has the shape of a rectangle, but before this, springs are installed to help unfold the structure. The mechanism is fixed through the end-to-end method, because the weight of the table will be impressive.
Folding legs should hide all technical fastenings and holes. Markings for fastenings can be done in the same way. Through holes for bolts should be prepared at the next stage, then a drill is used to mark the location for installing the bolt head. This fastener will allow you to fix the mechanism, but do not be alarmed by the fact that the number of fasteners is quite large. The legs have the shape of a rectangle and must be as strong as possible, since the weight of the entire structure is approximately 45 kilograms. These components should be secured together with ties.

A folding table with your own hands, the drawings of which are presented in the article, can be completed by you in one evening. The next step is to screw the legs to the structure itself; for this, the fasteners are first marked. You can drill locally if you have enough experience. It is recommended to install on metal bushings. For this fastener, holes are drilled in the legs. Legs are installed on four sides, which will allow you to hide the technical holes in the frame.
Assembling the tabletop
The tabletop must be assembled with extreme precision, since the hinged folding is quite strong and ensures smooth sliding of the elements. It will be quite difficult to hold the hinge in the sockets, and the screws cannot cope with this task. Therefore, you can purchase other hinges. A tabletop of this design is divided into two parts, first the small one is installed, then the large one. At this point we can assume that the table is ready for use.

A do-it-yourself folding picnic table, drawings of which are presented in the article, can be made according to custom sizes. You can make the design according to the book-table principle, which has an attractive appearance. To do this, you need to prepare two legs, a drawer, a base, 4 horizontal and two vertical beams, movable leg and All cuts should first be edged. Afterwards the central part is fastened. The next step is to assemble the tabletop and fix the lid to the ends of the legs. The movable element with the frame is installed on the piano hinges, only after this the table can be completely assembled and, if necessary, varnished.
Conclusion
When making a folding camp table with your own hands or any other type of structure for eating, the particular difficulty lies in preparing the parts. It is better to entrust their cutting to professionals if you do not have special skills and tools. But each master can do the assembly independently.
Summer is in full swing, and many townspeople, as soon as they have free time, go on a picnic. And modern man wants to communicate with nature, but for some reason, communication, in his opinion, should take place in the most comfortable conditions for a city dweller. So “tourists” bring tents and camping furniture sets into the forest, which today are produced in abundance by domestic and foreign manufacturers.
The folding table is lightweight, compact and easy to assemble.
In this variety of tables and chairs, differing from each other in shape, material of manufacture, price, and finally, the eye, as a rule, clings to a rather interesting items furniture, the origin of which is clearly not store-bought. And by the proud look with which a person assembles a table in a clearing, at a campsite or on the beach, noticeable to everyone around, one can determine that this table was made with his own hands.
2 simplest designs
I would like to offer those who want to make picnic furniture themselves, 2 simple designs camp tables that do not require manufacturing special costs and the presence of complex tools.
One of them in assembled form will look like a suitcase, and the other one easily rolls up like a rug and can be put away in a case.
Return to contents
Making a suitcase table
The blanks for the suitcase table will be:

The tabletop can be made of MDF or plywood.
- 10mm plywood;
- planed timber 30 by 30 mm made of birch;
- self-tapping screws 4 by 50 mm (thickness and length of fasteners) for fastening the frame bars;
- self-tapping screws 4 by 25 mm for fastening fittings and plywood to the frame;
- 2 hinges for windows (the width of each plate is no more than 30 mm);
- 4 furniture screws with a length of at least 70 mm, nuts for them and 8 washers.
Of course, every “self-respecting” suitcase should be equipped with a carrying handle and locks. The latches can be taken from an old case or suitcase. Small hooks are also suitable for locks. The choice of handle for carrying the table is up to the master, but perhaps instead there will be a strap so that the folding table hangs on the shoulder while camping.
For the tabletop you need to cut 2 pieces of plywood measuring 580 by 500 mm each. For the frame, you need to cut 8 bars for it: 4 of them will be 500 mm each, and the rest will be 520 mm each. For the legs, you need to cut 4 beams no longer than 500 mm (so that they fit into the box when folding the table).
First of all, the frame is assembled. To prevent the bars from splitting when screwing in the screws, it is necessary to drill holes in the wood. After tightening the frame, the tabletop plywood is attached to it. Before screwing in the screws, do not forget to make holes in its surface and countersink them for the fastener heads.
Return to contents
Installing legs and hinges

Legs can be either wooden or aluminum.
The table legs will be attached to the 500 mm frame bars. In the frame, step back 15 mm from each frame internal corner and 15 mm from the tabletop and mark the centers of future holes for furniture screws. In the bars for the legs, also measure 15 mm from their end and one of the sides. Drill the holes with an 8mm drill bit.
The most crucial moment when assembling a transforming table is installing the hinges. It’s easy to screw them to the frame, but if the hinges are not recessed into the frame, then after closing the table, gaps will be noticeable between its halves.
Yes, and the suitcase will definitely need 4 legs made of rubber or plastic. Their thickness must match the diameter of the hinge hinges so that the closed table stands stably on the surface and there are no problems when opening it.
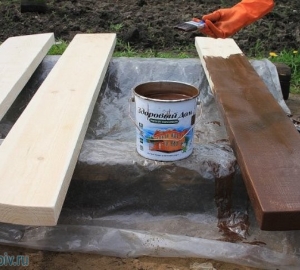
So, the draft version of the table is ready. All that remains is to sand it wooden parts sandpaper. Treat the wood with antiseptics and cover the table with paint or varnish.
Return to contents
Making a roll-up table
There is an even easier way to make your own camping table. To work you will need cuttings for garden tools or wooden rods round section, several meters of wood planks and fasteners.
Here is a more accurate list of required materials:

To protect the table from moisture, treat all parts with stain.
- 10 600 mm wooden planks 15 by 45 mm;
- 2 540 mm strips 15 by 45 mm;
- 4 wooden rods with a diameter of 30 mm and a length of 400 mm;
- 2 nylon, leather or canvas belts, 540 mm long;
- 4 threaded inserts with internal thread 10 mm;
- 4 bolts M 10 70 mm long.
Choose the straightest birch cuttings or rods in the store, as the type of table will depend on this. Birch wood is the most suitable material and for tabletop slats.
After you have cut 10 slats of 600 mm each, 4 rods of 400 mm each, 2 slats of 540 mm each and sanded their surface, you can begin assembling the table. 10 wooden planks of the future tabletop are fastened to each other with a belt using a construction stapler. Make a small gap between the planks. To ensure that it is the same between all slats, place bars of the same thickness (15 mm) between them. To prevent the tabletop from deviating from a rectangular shape, do not refuse to use a square in your work. So, the tabletop is ready. Now you can roll it up or fold it like an accordion.
Clamp the table leg in a vice, but to prevent the jaws from damaging its surface, use rubber, wood or sandpaper as a spacer between them and the material of the rod. Drill a hole at the end of the leg to a depth of 40 mm into which the threaded insert will cut. Repeat this operation with each of the 4 rods. Make sure that the drill enters the leg perpendicular to its end. Screw the threaded inserts into the body of the legs.
The 540mm planks will serve as a rigid base for the countertop. Drill 2 holes for bolts in them near the edges. Then place the slats across the slats of the tabletop at the same distance from its edges and mark the centers of the holes in the outer slats. Using the same drill, make 4 holes in the tabletop.
Treat the wood antiseptic composition and paint the table. You can coat its surface with varnish.
Perhaps it will not be difficult for anyone to make such tables for a picnic. And if we put production folding furniture“on stream”, then you can provide them to all your relatives and friends.