Floor slabs with adjustable posts
Disadvantages of adjustable floors
Characteristics of adjustable ground on logs
Possibility of selecting adjustable soil
Types of floors with adjustable brackets
Floor design with adjustable flags
Floor coverings with adjustable supports
Tips for Installing Adjustable Foot Structures
Modern flooring options include adjustable flooring in the latest designs.
The day system, installed on mobile brackets, makes the floor surface completely flat with minimal physical effort.
Manufacturers produce several versions of so-called “adjustable floors,” depending on the purpose of the specific space, the design height of the floor covering, and the condition in which the underlay is placed.
If it is necessary to raise the floor level to the desired height in order to accommodate various services below the surface, a DNT structure with adjustable footrests can be installed. They ensure not only perfect uniformity of floor coverings of all materials, but also allow the installation of a frame when the floors between the floors in the house are wooden elements.
The upper form is capable of raising the covering to a height of 5 centimeters or more, depending on cross section logs and sizes having polymer screws. The system can be attached to a wood or cement floor or other type of foundation.

When it is necessary to solve the problem of leveling rough ground without losing the height of the space, the adjustable bottom structure on the plates can be adjusted.
It is used to prepare the base for laying, for example laminated or parquet panels, provided that the difference in height does not exceed 2 mm with 2 linear meters. Maximum amount of lift flooring in this case does not exceed 5 centimeters, which corresponds to the thickness of a standard concrete screed.
The parameters of the adjustable DNT structures allow you to create a strong and durable floor for a short time, characterized by excellent thermal and sound insulation of the room. In this case, there is no need to deal with dusty and wet processes, as in the case of installing cement sand. The DNT system costs no more than traditional leveling options such as semi-dry or concrete screeds or Knauff flooring.

If the soil rises 2 inches or more, you can save a lot by preparing a rough base for finishing.
Disadvantages of adjustable floors
As for the disadvantages of this design, they may arise if the requirements for proper operation were not met during installation.
DNT adjustable floors with high quality installation provide a reliable and durable base for everyone finished materials for the floor. It will not only be possible to move on foot, but also to travel by car.

If the DNT system is not properly assembled or the adjustable flag fasteners are of the wrong type, the soil will become unusable within a short period of time.
Characteristics of adjustable ground on logs
The structural solution of such floors has the following characteristics:
- It is possible to create adjustable floors on logs with your own hands without experienced craftsmen.
How to make adjustable floors
You just need to buy quality materials and supply of some instruments.
- Floors will not exceed one or two days. In exchange for dry concrete it will take about a month.
- Adaptive design allows, if necessary, to install engineering Communication in a technologically free space.
This allows for space-saving and at the same time impermeable floor coverings.
- Using an adjustable system, you can significantly increase the sound insulation of a room, which is why in recent years such floors have been installed not only in residential buildings, but also in recording studios and concert halls.
- Simply weigh similar structures to use them successfully in areas where they are poorly covered, such as private homes or balconies.
- There is almost no work associated with dust and dirt during the adjustment of adjustable floors.
This is why this option is an ideal solution for areas where cleanliness is required.
- As shown in the picture, the adjustable floor system is capable of carrying a load of about 2.5 tons per square meter, which means that it can be installed in offices for various purposes - office, residential, warehouse, commercial.
Possibility of selecting adjustable soil
Although adjustable structures have many benefits, many property owners are hesitant to install them during renovations.

- if the rough ground is difficult or impossible to regulate because it has great differences and shortcomings;
- when leveling the substrate, for many technical reasons you cannot use materials with high weight;
- If the floor covering is to be created with different heights;
- when utilities must be placed underground;
- if there is a need for additional noise and thermal insulation.
Types of floors with adjustable brackets
On modern market Consumers are offered two types of flooring:
- Structure containing adjustable floor coverings;
- floor systems with adjustable brackets.

The main difference between these varieties is the difference in height.
When installing systems on logs, the amount of lift is 5 centimeters or more. Concerning adjustable design on plates, it can be raised by a maximum of 3 centimeters.
Installation work related to the installation of adjustable systems on logs and boards is carried out using similar technology that allows you to do it yourself.
Floor design with adjustable flags
The seals for them are made from plan rays.
The size of wooden elements usually does not exceed 50x50 centimeters. First you need to prepare your tools and building materials.
To install the floor, you need:
- lags behind the rods;
- level;
- polymer screws;
- nails with dowels;
- hammer;
- drilling.

At the first stage, preparatory work is carried out:
- Clean the base.
If necessary, build utility lines.
- Tighten the screws wooden screws. In the presence of threaded holes on the rods in them the screw is screwed into the stand for the adjustable logs.
Otherwise they must be executed independently. At least 5 holes must be made at a distance of 2 meters. This simple operation is performed by drilling with a flared top. To ensure installation rigidity, it is necessary to drill slightly smaller than the diameter of the bolt.
- After hand tensioning, tighten the screws with a drill and special nozzle.
During the installation phase, the following measures are taken:
- Wooden sticks are scattered on the ground.
In this case, the difference between them depends on the type of floor area. When the floor plan is covered with linoleum or slab, the distance between the beams should be up to 30 centimeters. Leave at least an inch of space between flags and walls to ensure proper ventilation.
- Once the adjustment of the adjustable log is complete, proceed to firmly attach the screws to the rough surface. Take a solid drill bit and make a hole about 4cm long through the post in the concrete.
- The spindle was then secured into it and driven with a hammer, securing the bolt to the bottom of the floor.
The hole must be securely fastened so that the structure does not move.

During the surface smoothing process:
- Once the adjustable full clamps are installed around the perimeter of the space and secured securely, they begin to repair them.
This applies a rule and a key that needs to be adapted.
- Let's break down to a height that should not exceed 1-2 millimeters. Using the wrench and focusing on the measurements, we begin to raise or lower the screws as they work toward perfect alignment.

On final stage complete the following tasks:
- Once the adjustable flags are leveled by hand, the nails are finally secured with a hammer.
- On stands that are cut with a knife or other tools to cut out unnecessary residue.
- Where necessary, sound or thermal insulation materials are placed between the logs.
- On logs, or better yet, on top, fix the floor.
The choice of materials depends on the purchased flooring. Typically the flooring is made from slabs made from plywood, rarely using DSP or GVL slabs, with linoleum or laminate on top.
- Directly on the floor for adjustable installation of the final floor covering.
Floor coverings with adjustable supports
This option is used if the height of the floor surface does not exceed 3 centimeters.
In such a narrow space it is unlikely that communications can be hidden, but telephone cable and Internet wiring will be available. This type of installation technology is similar to the procedure for installing adjustable floors on logs.

It is necessary to prepare a set of adjustable presses on plates, consisting of sheets of plywood (other building material), posts, bushes, self-tapping screws.
You will also need: a hammer, a drill, a level (water or laser).
The work begins with the preparatory stage:
- Prepare the work surface, remove debris, dust, and dirt. Then separate the messages that need to be removed underground, remembering that the height of the floor surface should not exceed 3 cm.
- The leaves are located along the perimeter of the space at a distance of 2-3 centimeters on each side.
- Mark the points for drilling holes.
If it has a 1.5 x 1.5 meter sheet, it should be approximately 9. One of the holes should be placed in the middle of the plywood or other material. Four holes rotate in each corner and 4 in the middle of the sheet. For this reason, a reliable plywood connection can be ensured.

Installation of panels should be carried out in the following order:
- After marking the holes on the plates, they begin to drill.
Use a special drill bit with an extended tip.
- The pre-prepared holes have screws with spacers, and on the underside they attach the bushings using self-tapping screws.
- Once the screws are inserted into each of the holes and secured, the sheet is reversed and placed on the structure.
- Using the screw holes in the hole, drill holes and insert dowels into them.
They lead them halfway.
At the adaptation stage, the following measures are taken:
- When the adjustable support is installed, the sheets are leveled. This work is done using a level and a special key.
- After finishing, carefully cut off additional centimeters.
- One-inch nails are driven completely into the base.

Proceed to the final stage:
- If there is a need to improve noise and thermal insulation of the soil, suitable materials are placed at the top of the sheet.
- Once the sheets are assembled, the selected flooring is installed.
Tips for Installing Adjustable Foot Structures
To successfully install this type of flooring system, you will need to:
- Once the adjustment of the adjustable brackets is complete, the subfloor must be cleaned before laying the floor.
The fact that uncleaned debris, plastic cutouts, sawdust from the last floor covering can lead to pulleys and noise.
- All fasteners for the floor structure should be carefully tapped and tightened as this is critical to the strength and reliability of the system.
- Experts recommend mounting as fastener, and an anchor for an adjustable floor.
This is the same dowel, but stronger. Anchors provide a secure and permanent connection. They not only hold the stick in place, but at the same time attract it to the ground, which, in addition to being rigid, also transmits rigidity.
- When high floor arranged, the best solution is to place the wrists in soundproof materials.
There was no noise during operation of the coating.
- You don't have to maintain product quality if you want to create a regulated structure. From the financial side, it will be more profitable to immediately buy an expensive component than to process all the work again.
If you need to move the link after installation is complete, a few strips of cover can be removed and then put back on.
Adjustable floors

Often, people associate floors with joists with something old, creaky, rotting and obsolete.
Of course, there are now many advanced technologies for floors that make it possible to insulate, waterproof and raise the floor level to a greater height, if the design requires it. However, one should not exclude good old logs - the solution is simple and, with high-quality installation, will eliminate the disadvantages typical of such floors.
Advantages of adjustable joists
The most undeniable advantages of adjustable floors are the ability to raise the floor level to a greater height without adding weight total weight designs and speed of installation, in comparison with various screeds and self-leveling floors.
The big advantage is that there are no wet processes and therefore no need for drying. Insulation of such floors also does not cause any problems - polystyrene foam, extruded polystyrene foam, mineral wool, all these materials are acceptable. In comparison with self-leveling, floating screeds, the insulation does not have high requirements for insulation density and it is possible to select a budget material.
When pouring screeds up to 5-10 centimeters thick, the advantages of lags are not relevant, however, situations often arise when the floor level needs to be raised by 15 centimeters or more. Such heights may be required when there is a large difference in floor slabs, during partial renovation of an apartment, where it is necessary to join the old floor on joists.

Of course, there are screeds with the addition of expanded clay, various floating screeds that allow you to raise the floor level and at the same time insulate.
As a rule, the cost of materials and work increases, and if a 5-centimeter screed is 1.5-2 times cheaper than an adjustable floor, then with layers of more than 10 centimeters, the cost of the lag remains the same, which cannot be said about wet screeds.
Flaws
The disadvantages of flooring with joists include the risk that the floor will creak; in an aggressive, humid environment, wood is not so durable. The issue of squeaking is practically reduced to zero when choosing high-quality, dried logs and the correct fasteners.
Many people are confused by the possibility of laying tiles on such floors - this problem can be solved, the joists are installed in sufficient quantities to eliminate significant deflections in the canvas, and gypsum fiber is laid over the canvas.
Gypsum fiber serves as a damper; even with large fluctuations in the size of the canvas due to changes in humidity, gypsum fiber is quite stable and does not provoke the tile to snap.
The material of the canvas laid on the joists is quite diverse: from the most budget chipboard to two-layer plywood. Planed boards, lining and OSB - you see, a very wide choice for flooring with joists.
How to make a level floor on adjustable joists with your own hands
Results
Let's summarize: in renovations where standard screeds and self-leveling floors do not cause high loads on the floor and the layers are quite thin, adjustable joists are not relevant.
Where you need to raise the floor level by 10+ centimeters, the logs become very practical solution. Important high-quality installation, it will prevent squeaking, sagging and other typical wooden floors Problems.
Self-installation of adjustable joists
Companies involved in adjustable floors exaggerate their professionalism and the uniqueness of their technology. I will try to dispel some myths, because I worked in this field for several years.
Let's consider important points in installation.
Anchors, fasteners

To attach the logs to the concrete base, it is the anchors that are needed; plastic dowels are not able to cope with the loads to which the logs are subjected.
The so-called plastic bushings, which are screwed into the joist and attached to the concrete, are very inconvenient to install; they can only be purchased from those who professionally install floors. Naturally very expensive. In addition, they have questionable reliability; the bushing is attached to the concrete base with a dowel-nail.

The most reliable fasteners can be assembled yourself, despite the cunning marketing of “sex companies”. However, the components for the rack are usually available in most stores.
So, homemade fastener for adjustable joists . The base is an expansion anchor (drive-in), it holds tightly in the concrete and is easy to install, it can be made of steel or brass, the anchor expands due to a screw-in bolt.
Brass is preferable. The product is suitable for M10 or M8 threads; other components are selected based on the selected diameter. The next element is a bolt with a diameter suitable for the anchor and a corresponding length; the higher the logs need to be raised, the longer. Instead of a bolt, you can take long studs and cut them to the desired length, but you need a special tool to screw in the studs.
Two nuts with washers (preferably reinforced) are screwed onto the bolt, and the joist is actually clamped between these nuts/washers.


The resulting fastener is very reliable and easy to use.
It does not pull out even if the joists were made of raw wood, the joist guides it when it dries, and the anchor holds it.
Lags
Usually a 50 by 40 mm block is used, but if the height allows, you can take a thicker block. In thicker bars, fasteners to the base can be used less frequently.
As a standard, a 3-meter log is attached to 7 anchors. The logs are set at intervals of 30-40 cm, depending on the material of the covering sheets.
The logs should be chosen drier and without too many bends and screws. The worse the lag is dried, the greater the likelihood of squeaking in the future. Ideally, dry, planed bars, planed after drying, are suitable, but finding them is not always easy. Usually, stores sell bars that are planed “wet” and then dried naturally; they have a bent shape. You can use them, but you should carefully choose those that are smoother.
Let me note that the logs do not have to be planed and smooth, preferably straight and not “screwed”. You should also avoid knots; if the hole with the anchor hits a knot, the joist will significantly lose its strength.
Prepared logs can be treated with an antifungal compound; this will not interfere in potentially damp areas.
How to cover logs
Materials can be varied, from rough to finishing. Under the next finishing you can put a regular bed edged board- this option is more suitable for a private home.
Sheet materials are suitable for both private and apartment buildings. It can be plywood, chipboard, OSB. All these materials are considered rough, with subsequent installation of linoleum, laminate and parquet board. With additional gypsum fiber flooring, tiles are laid.
The finishing coating includes batten, lining.
Their further finishing consists of sanding and painting (although it is often useful to do this before installation).

As a sheet material, I would like to mention plywood - it is strong, durable and tolerates moisture well. Due to the different orientations of the veneer layers, plywood is less susceptible to variations in size.
There is, however, one unpleasant drawback: in most cases, the thickness of the sheets may differ slightly by 1-2 mm, and the difference may be present at different ends of the same sheet. Because of this difference, for linoleum flooring, for example, you will have to putty the seams. However, despite this, plywood is considered the most the best material for adjustable floors - 10 mm plywood in two layers is the most durable solution.
Plywood no thinner than 18 mm is placed in one layer.
Preparing the base
A concrete base is required to securely fasten the anchors. Typically, in commercials, fasteners for joists are installed in a perfectly leveled cement-sand screed (CSS). But the reality is that for real work leveling the base is not required, moreover, usually the screed does not have sufficient strength to reliably hold the anchor.
If in your case the installation will be carried out for some reason on the central fiber substation, then you should drill down to the concrete. Or check the strength of your tie by tightening a test anchor.
Preparation consists of cleaning, foaming and caulking various cracks to avoid drafts. You should also mark the location of future logs; this is done on the walls, where the middle of the log will be. When marking, you should take into account the centimeter gaps of the sheets from the walls so that the seams clearly fall in the middle of the joist.
The easiest way to mark is this: first, mark the logs on which the sheet joints will be, and only then distribute the remaining logs between the seams so that the distance between them does not exceed 30-40 cm.
I would like to note: usually all the lags are made parallel; at seams perpendicular to the lags, additional lags are not required for connecting sheets; more on this later. Of course, the logs can be set as you like, they can be longitudinal or transverse, the point is that there is no need to make extra crosshairs.
Installation of logs
From my own experience, I was convinced that it is more convenient to drill holes for bolts and countersunk nuts in place. If you make holes with countersunk holes in advance, the possibility of moving the fastener is eliminated; this may be necessary when the fastener gets on weakness in concrete, in a smeared void, etc.
This is my personal opinion; it is certainly possible to drill holes in the joists in advance. I will describe my method, and it’s up to you to decide which is more convenient and practical. This method is not relevant with ready-made fasteners purchased in online stores - there you need to tighten the lowest nut to fix the anchor.
The joist is placed in the marked place, using a hammer drill, a hole is drilled directly through the joist. concrete base. Having drilled, the anchor is immediately inserted without washers and nuts. This will prevent the jog from moving during further drilling. I would like to note that in panel and monolithic houses in most cases, the thickness of the ceiling is no more than 10 centimeters, so drilling more than 5 cm is highly undesirable, be careful! Having drilled, you need to clean the hole with the same hammer drill in drilling mode so that all the crumbs come out.
In this way, all the joists are drilled and the bolts are tightened in the anchors. The fasteners are securely fixed in the concrete, but the logs have free movement up and down.

After tightening the anchors, the bolt heads are cut off and the joists are pulled off.
Screw one nut onto each protruding stud and put one washer on. It is not easy to screw a nut onto a sawn bolt, so it is useful to have a small file on hand; trimming the sawn edges will make it easier to screw on the nut. Next, holes for the upper nuts are drilled into the joists, they are put back into place, the position of the joists is adjusted using the lower nuts, and they are tightened from above with a second nut and washer.
It is most convenient to adjust the lag using a laser level. A tubular wrench is convenient for tightening the upper nuts, and an open-end wrench for adjusting the lower nuts.
After all the adjustments, the studs sticking out above the joist are cut off. The installation of the logs is complete. If insulation was planned, the insulation is laid and foamed. Excess foam is cut off and the floor is ready for laying.
Flooring
The most important thing in flooring is to align the sheets so that the seams fall in the middle of the joists. It may happen that the seams will be significantly displaced, if the sheet does not fit onto the joist by at least a centimeter, you will have to change the layout of the sheets or make additional seams; twisting the joist is much more problematic. The seams running across the logs are pulled together from below with a bar or the same sheet material.
It is important to leave a 5-15 mm gap from the walls, the canvas will have room to expand if something happens, this will in some cases avoid the floor creaking.
When laying plywood, an unpleasant phenomenon may occur: the screws may not fit into the canvas and burst, the result is not a tight fit and a squeak may appear in this place.
In the place of the broken screw, you need to tighten a new one, stepping back a few centimeters. If the screws break too often, there are two options: take thicker screws instead of 3mm, for example 6mm, or before tightening, make a countersink with a drill slightly larger than the diameter of the head.
That's all, I hope I gave comprehensive information.
Return to the section “Apartment renovation”
© Yserogo.ru All rights reserved.
Design: ® Creative workshop of Fyodor Rasp.
Wooden floors are the warmest, most environmentally friendly and beautiful of all types of floors because:
- wood has a fibrous structure, it has, at the same time, strength and flexibility, as well as relatively low thermal conductivity;
- wood is a material that “breathes”, that is, it absorbs moisture from the environment and releases it back, optimizing the humidity in the room;
- has a unique texture that “plays” with skillful processing: due to the difference in density, color and pattern.
There are certain design features laying plank floors.
This is laying lags - wooden beams- onto the supporting structure with a certain pitch. To understand how to make a floor on joists and choose the most suitable option for specific conditions, you need to find out what types of wooden floor structures there are.
In private housing construction they are used various materials load-bearing and enclosing structures, they are built on different types soils, which determines the choice of foundation.
Once the house is erected, the question of how to install the logs so that the floor is strong and stable is decided. This will depend on the size of the room, because even for a room with an area of 1x1 m, support for the logs is needed in the middle. Therefore, you need to decide whether to choose support pillars or the foundation of intermediate walls as the base for the logs.
Installation of the floor on joists along beams and support pillars
As a support for the logs, a frame of beams is installed along the inner perimeter of the foundation.
For support between the beams, intermediate pillars are installed every 500-600 mm. Technologically it looks like this:
- A hole is dug, it will also serve as formwork: 400x400 mm and 400 mm in depth.
- First, sand is compacted in it - in a layer of 10 cm, then crushed stone - 10 cm.
- Then the solution is poured into a 20 cm layer.
- When the foundation is ready, a column of ceramic bricks is laid on it to the level of the joists.
- Waterproofing is laid on top, under the joists, on the pole.
The logs are laid, supported by bars around the perimeter and pillars between them, so that their ends do not reach the basement wall or grillage by 2-3 cm (this is necessary to expand the tree).
The joists must overlap the support by at least 10 cm.
The grillage is the upper part of the foundation of the house. It can be “low” - somewhat recessed relative to the “zero mark” - ground level. Or “high” - raised above the ground. If the foundation is piled, a grillage is made to tie together individual columns - piles in single design and to serve as a foundation for the intermediate walls of the house.
The section of the log, depending on the load exerted on the floor, will be 10x20 or 15x20 cm.
Their length, preferably, should be enough from one wall to the other of the room.
The pitch between the lags will depend on the width of the insulation used - this will make the installation process more convenient ( optimal size 1m).
There is an opinion that before fastening the logs should lie in the room for several days and only then can they be fixed.
Before making the floor on joists, communications can be laid between them.
It is necessary that the insulation is 5-7 cm below the joist level.
This is necessary so that there is a gap for ventilation between the insulation and the finished floor layer. It is better to calculate the dimensions of the insulation and the log immediately in order to follow the technology when laying (the insulation layer can be 10-15 cm).
If, however, the height of the logs is not enough for a ventilation device, counter battens can be placed on them, which should have the same width as the logs.

Floor arrangement algorithm
- First, the beams, then the logs, are attached to the base with perforated (anchor) corners and laid on them.
Self-tapping screws 3-4 cm long are used for fastening.
- Along the joists, to their lower edge are attached cranial bars with a cross section of 4x4 cm. They serve as a support for boards or plywood (subfloor) on which the insulation will be laid.
- Before laying the insulation, the boards and joists must be covered with a layer of high-quality waterproofing, extending onto the walls, to a level above the finished floor, so that moisture from the underground space does not get into the insulation. The waterproofing is attached to the wood with a stapler.
- A layer of vapor barrier is laid on top of the laid insulation and joists, which should also extend to the level of the baseboards.
It is pressed tightly against the insulation and fixed with a stapler to the sides of the logs.
- The finished floor is laid on the joists. It can be made of planks and will be laid across the joists. If you intend to lay parquet, laminate or other sectional flooring, you should lay a substrate under it: particle boards, OSB or cement-bonded particle boards (CSB), which have sound and heat insulating properties.
Between the ends of the finished floor and the wall you need to leave a gap of 1-2 cm, left for the thermal expansion of the wood, which will then be covered with a plinth.
To ventilate the underground space with an uninsulated base, holes are left in it for ventilation, which...
b. covered with protective nets to prevent rodents. In summer, the goal of ventilation and drying is achieved, but in frosty conditions the underground becomes very cold, cooling the floor too. Therefore, it is recommended to close the vents for the winter.
A more suitable option is when the base is insulated from the inside or outside, and the ventilation is internal - the ducts are led into the room and hidden behind the baseboards.
Installation of floors on joists along intermediate walls
It differs from installation on poles in the design of the foundation.
A strip foundation is placed under each wall and thus divides the entire basement space into separate rooms.
All installation steps are repeated, only the logs will rest on the foundations of the intermediate walls or beams attached to them.

Since air flow is needed for underground ventilation, it is difficult to organize it in intermediate rooms.
For the free passage of air, through holes are made in the walls, and also in the construction of the enclosing walls. ventilation ducts, taking air out of the room.
Installation of floors on joists on a floor slab
It is clear that in this case there is no need to ventilate the floor from below, just as there is no need to lay the subfloor as a substrate for the insulation.
DIY adjustable floors
But it is still necessary to arrange soundproofing and, at the same time, insulation. The better this is done, the warmer the floor will be and the less voices and the sound of a hammer drill coming from the lower floor will be heard.
The logs are laid parallel to the short side of the room. Their size depends on the layer of insulation that is supposed to be laid under the floor.
If the floor slabs are not completely level, the horizontality of the joists can be achieved by using a level and placing pieces of plywood under the joists.

The cavities between the joists are filled with insulation or filled, for example, with expanded clay.
A sheet of polyethylene or penofol-type insulation is placed on top of the insulation, which will reflect heat inward and is stapled to the sides of the logs. The remaining space of 1.5-2 cm will serve to ventilate the space underneath.
Then the finished floor is laid along the joists, with the obligatory arrangement of gaps between the covering and the wall.
01/18/2014 at 20:01
Attaching joists to the floor: pros and cons
Log laying technology
Fastening the joists with self-tapping screws
Using Anchors
Fastening joists with corners
Attaching adjustable joists
Quite often in residential premises the floor is built on joists, which allows the use of any type of insulation and sound insulation, as well as various materials for the subfloor.
This way you can make any surface flat and lay the necessary communications under the floor. Installation of this floor is quite simple, and from an economic point of view it is not very expensive.

The result is a structure with a small load on the base. And of course, when installing such a floor, the question arises: is it necessary to attach the logs to the floor and, if this is necessary, then how to attach the logs to the concrete floor.
In this article we will give answers to these questions.
Attaching joists to the floor: pros and cons
According to opponents of fastening, these actions can destroy the screed, and where the beams and the base are connected, sound insulation is broken and sound bridges are formed, which the neighbors below will not be happy about.
And those who believe that fixation is necessary share their experience: all the work done to repair the floor was in vain due to deformation of the joists.
Is everything really as they say? Regarding the destruction of the screed, if the screed is quite strong, then you will not be able to break it with a drill when drilling a hole.
And floor repairs can only be done if there is solid foundation. If the old screed begins to collapse, then it must be removed.
The problem of violation of sound insulation remains controversial.
Rigid structures can actually transmit sound. However, the space between the joists fits insulation material, which has soundproofing characteristics. A gasket with shock-absorbing properties is placed under the joists, which also prevents the spread of sound.

The sound bridge, which is formed at the attachment point, transmits vibrations to concrete, which is a fairly dense material and, unlike wood, does not conduct sound well.
Consequently, neighbors below will not notice changes in noise levels before and after repairs.
The floor on the joists is constructed from beams, fasteners, and rough flooring. When all components are displaced relative to each other, a creak occurs, which is unlikely to please the neighbors. You can prevent the appearance of unpleasant sound by firmly securing the joists to the floor.
Another argument in favor of fastening is the fixation of the lag. When it comes to the degree of drying of the wood, buyers are forced to trust the seller’s words, since it is impossible to find out by simple inspection.
Over time, poorly dried timber may warp, eventually the coating will move, and the whole complex design the floor will be skewed.
For those who are wary of attaching logs to a concrete base, you can organize a floating floor. In this case, the flooring is not attached to load-bearing structures. This will provide excellent sound insulation, but it is necessary to use well-dried joists.
They won't warp over time.

The beams are fastened to each other in such a way as to form a lattice. This design will make the floating floor more stable. Insulation is laid in the gap between the beams, and a subfloor is built on top.
As a result, the entire structure is pressed to the floor under its own weight. Over time, such a floor will not change its shape and will serve for a long time.
In most cases, the installation of logs on a concrete base is carried out with their fastening to the floor, since there are many more arguments in favor of this than the possible disadvantages.
Log laying technology
Let's look at how to install joists on a concrete floor step by step:
- High-quality materials are the key to successful renovation.
You can use timber timber coniferous species. Its humidity should not exceed 18%. The purchased beams must be allowed to acclimatize for several days in the room where the floor is planned to be made. Logs that begin to bend should be set aside and not used in the floor installation.
The wooden components of the future structure should be treated with a fire retardant and antiseptic, which will prevent the appearance of mold and insects.
- The foundation is being prepared, that is, the surface is cleared of debris, all cracks are rubbed, and protrusions are knocked down.
- The tree should be protected from moisture, that is, it is necessary to perform waterproofing.
For this purpose, materials are used in the form of rolls, hydrophobic mastics, impregnating compounds, and dense film.
- You should prepare the necessary tools for the job, fasteners and substrates for raising logs. The substrates must be rigid, which will not sag over time, so that voids do not form at the support points. You can take thin planks, pieces of plywood, or purchase special plastic backings.
- The joists should be laid across sun rays falling from the window.
Wood can become deformed due to temperature changes, but when laid in this way, all logs will be heated evenly. In rooms such as hallways, logs must be laid across the movement. This will give the floor greater strength.
- Depending on the thickness of the rough flooring, the distance between the beams is selected.
The greater the thickness and the higher the strength, the farther apart the logs are laid. As a rule, the distance is approximately 40-50 cm.
The logs closest to the wall should be located 2-3 cm from it, and others - depending on the size of the room.
- After the sheathing is completely assembled, it should be brought into the horizontal plane. It is best to have a level base. There are craftsmen who even make a thin cement screed for this, provided that the difference in floor level allows this.
There is no need to screed, since the use of lags allows you to level even a very uneven floor. If the beam is below the required level, then substrates are placed under it.
- To provide shock absorption and additional waterproofing to wood it is necessary to lay the logs on linoleum, roofing felt, polyethylene foam or something else.
It is important that the material used is not soft. Otherwise, after some time it will sag due to the pressure acting on it, as a result a gap will form, which will ultimately lead to the appearance of unpleasant sounds, such as creaking.
After completing the construction of the structure from the logs, all that remains is to fasten them to the floor.

Exist following methods how to attach joists to a concrete floor:
- using dowels and screws;
- fastening with anchors;
- use of galvanized corners and self-tapping screws.
The choice of fastening method depends on financial capabilities and personal preferences.
Fastening the joists with self-tapping screws
Such fasteners for joists as self-tapping screws are the simplest and most inexpensive option, but at the same time guaranteeing an excellent result.
It is necessary to drill symmetrical holes in the joists and base. Then dowels are inserted into them and screws are screwed in.
The distance between the holes can vary between 40-80 cm depending on the case.

The length of the screw should be equal to the thickness of the timber plus 5-6 cm.
You can use self-tapping screws with threads that do not reach the head. They allow the joists to be better pressed to the floor.
Using Anchors
To obtain reliable and long-term fastening, you can use anchors for floor joists. In addition to holding the beam in one place, they also attract it to the surface, giving the entire system additional rigidity.
In essence, the anchor is a dowel, but much stronger.
Its advantage is its high pull-out resistance, so it is used when installing very heavy structures that create a large load on the fasteners. The probability of the floor on the joists completely tearing away from the concrete base is approaching zero, so fastening can also be done with self-tapping screws. However, anchors are quite often used for these purposes.

So, how to secure joists to a concrete floor using anchors? This method It is carried out similarly to fastening with self-tapping screws.
Identical holes are made in the beams and concrete floor. To prevent the bolt head from sticking out, it must be hidden without damaging the wood; for this, the logs should be countersunk first.
Typically, 3-4 anchors are required to secure one joist within a room.
The locking element of the anchor should be inserted into the hole in the floor, then a bolt should be screwed into it through the beam.
Anchor bolts are produced in various lengths: 45-200 mm. When choosing the length, you should take into account the thickness of the log plus 6 cm for penetration into the base. It is recommended to purchase anchors with a diameter of 10 mm.
Fastening joists with corners
Another fastener is used for the floor joists - a galvanized metal corner.
One side of the corner is attached to the beam using self-tapping screws. The self-tapping screw should enter the wood 3-4 cm and preferably at an angle, this will increase the strength of the connection.

The other side of the corner should rest against the floor.
It should be fixed using the methods described above, that is, using dowels with self-tapping screws or anchors. Instead of corners, you can take a U-shaped profile.
Adjustable floors: analysis of the technology of installing logs on supports with your own hands
Attaching adjustable joists
Installation of an adjustable system is simpler and will make it easier to obtain a perfectly flat surface. In this design, instead of anchors, plastic racks are used, which are screwed into wood and fixed to the base using dowels (for more details: “How to make adjustable floors on joists with your own hands”). By rotating special bolts you can set the required height. After the joists are adjusted, the protruding part of the bolts must be cut off.
Conclusion
In a wooden house, it is not recommended to fix the joists to the floor. And if a concrete screed is used as a base in the room, then in this case is it necessary to attach the logs to the concrete floor or not. In such a situation, fastening will not be superfluous. Everything is done quite simply, the main thing is to use high-quality materials and strictly follow all the rules.
Then the design will be reliable and will serve for a long time.
Not so long ago, in the process of laying logs on a rough base, pieces of plywood or wooden stakes were placed under the beams. In this way it was possible to protect the tree from moisture and level the rough base horizontally. But over time, the substrate dried out and became unusable, which affected the horizontality of the coating. In the article we will look at modern methods fastening the joists to various types grounds.
Features of the use of fasteners

In the process of attaching the log to a wooden base, no special problems arise. To do this, you can use long screws or corners. But what about a concrete base into which you can’t easily screw screws? To strengthen the joists on concrete, you need to use special types fasteners. The choice of fasteners required for installing beams to a concrete floor depends on the following factors:
- Horizontality of the surface. Depending on whether additional leveling is required or not, height-adjustable or non-height-adjustable fasteners can be used;
- Base moisture level. If the logs are mounted on a strip foundation, they will have to be laid almost on the ground. To secure the bars, they mainly use brick pillars, which protect the tree from moisture, playing the role of an insulating lining;
- Degree of load on the base. You can strengthen the joists on the floor using self-tapping screws and brackets. However, if the floor is used intensively, the screws may not withstand the load. That is why the type of fastener is chosen in accordance with the expected load on the floor covering;
- Heights of the underground. Wooden floors are prone to condensation accumulation under the covering and rotting. To protect the wooden base from rotting and deformation, experts recommend using high supports for logs. They form an underground space under the beams in which air can circulate freely, which prevents the formation of condensation.
To properly secure the bars to rough floor, you need to understand not only the fastening methods, but also the types of fasteners. An adequate choice of support will extend the service life of not only the rough, but also the finishing coating.
Types of fasteners

As already noted, attaching beams to the floor involves the use of only two types of fasteners:
- Simple - static supports that do not allow you to vary the installation height of wooden elements;
- Adjustable - contain screw structures, thanks to which the fasteners can be adjusted in height, which allows you to achieve maximum horizontalness of the base.
What types of fasteners can be used to secure beams to the floor?
- support posts;
- self-tapping screws;
- corners;
- brackets;
- anchor.
To understand the essence and features of the use of the above parts, let’s consider each of the categories in more detail.
Self-tapping screws

Self-tapping screws are simple fasteners that are used to finish wooden, but not concrete, floors. Sufficiently long male threaded rods are capable of attaching beams to wooden floors, but only if the following nuances are taken into account:
- Before fastening, through holes must be made both in the beams themselves and in the base;
- It is necessary to insert a dowel into the through hole and only then screw in the self-tapping screw;
- To ensure that the logs do not come off the wooden base, screws are attached in increments of 40-60 mm;
- The length of the screw is determined by the thickness of the beams; it is desirable that during the screwing process the “tail” of the screw goes into the base at least 5 cm.
The affordable price of fasteners has made them very popular among home craftsmen. But in order to achieve the desired result, during the installation of the logs it is necessary to take into account the above points.
Anchor

Anchor – a combined fastening element with self-mounting, which, unlike dowels, is not only easily fixed to the base, but also supports the weight of heavy structures. The anchor is one of the most durable and reliable types of fasteners that are used to attach logs to any foundation (strip, pile). If we discard all the “sentiments”, the anchor is still the same dowel, but with a more powerful base.
During the process of fastening the lag, the anchor is mounted in approximately the same way as a self-tapping screw:
- Through holes are made in the beams, after which symmetrical, but not through, holes are made in the base;
- To disguise the bolt head, the beams must first be countersinked;
- Since the anchor is very strong and is capable of supporting heavy structures, no more than 4 fasteners will be required to attach one beam;
- The locking parts of the anchors are inserted into the resulting holes, through which the bolts are screwed;
- When stitching the joists through, you need to ensure that the bolts go deep into the base by about 6 cm.
To strengthen beams on a rough base, experts recommend using anchors with a diameter of 8 to 10 mm. Metal rods of this thickness can easily withstand very heavy loads.
Brackets

Brackets are cantilever supports that serve as a static base for fastening parts in a vertical plane. As a rule, they are used in the process of attaching joists to support posts. Cross-shaped (x-shaped) curved parts have fixed flaps into which timber is placed. The price of such products is much higher than in the case of self-tapping screws, however, the range of possibilities for such fasteners is much greater.
Very often, in the process of laying a subfloor, brick columns are installed on a strip foundation. They act as supports and protect the tree from moisture. Since the lag becomes dented over time, it can become deformed without additional fasteners. The only convenient and reliable way to secure beams to supports is to use brackets.
Support posts

Posts for logs are supporting structures that are assembled from bricks with a cross-section of 1-2 bricks. In fact, these elements perform the task of an “invisible” lining, preventing the impact of dampness on the wood. The columns are mounted when laying the rough foundation on a strip foundation or concrete. Since the groundwater level can constantly change, in order to protect the logs from water, they specially form an underground.
In order to properly strengthen the logs and erect columns, the following points should be taken into account:
- It is undesirable to build supports from hygroscopic materials - artificial stone or sand-lime brick;
- Do not install posts on loose soils that can be washed away by water;
- Supports that will be installed on non-flowing soil must be made above the soil level in the underground by at least 2-3 rows of masonry;
- It is advisable to lay the pillars with a single-row dressing, maintaining the same height level for all supports;
- You can attach the beams to the supports using brackets, anchors, or special corners with self-tapping screws for concrete.
Corners

Corners are galvanized metal parts with two planes located orthogonal to each other. The price of such fasteners is largely determined by the size of the elements themselves, as well as their thickness. The degree of strength of the corners directly depends on the mentioned parameters. In the process of fixing the lag, it is advisable to pay attention to such nuances.
Are you planning to make renovations in your house, apartment, cottage, warehouse or office space yourself? Then you will need our tips, tricks and step-by-step instructions for assembling an adjustable floor.
There are several types of “adjustable flooring” depending on the purpose of the room, the quality of the base and the design height of the floor. To solve the problems of raising the floor level to the required height and placing various communications under it, a floor structure on adjustable DNT joists is used, which provides not only the required levelness of the floor for laying any types of coverings, including wooden floor coverings that require minimal differences in the base, such as parquet , parquet board or laminate (no more than 2 mm per 2 linear meters), but also allows you to make a floor frame, if the quality interfloor covering wooden beams are used.
This design raises the floor to a height of 5 to 20 cm or more, depending on the height of the polymer bolts and the cross-section of the logs, and also allows it to be fixed to a concrete, wooden or any other base.
To solve the problems of leveling the base of the floor without loss of height, an adjustable floor design is used adjustable plates DNT. Its use allows you to prepare a base for parquet, laminate or parquet boards with a difference of no more than 2 mm per 2 linear meters. At the same time, the floor will rise to a height of 2 to 5 cm, which does not exceed the thickness of a conventional screed.


All these designs of adjustable DNT floors allow you to install in the shortest possible time (there are no wet and dusty processes associated with concrete) a flat and reliable floor that has increased sound and heat insulation of the room, the cost of which is no more expensive traditional types leveling (concrete screed, semi-dry screed or Knauff floors), and with a floor lift height of more than 5 cm, it allows you to significantly save on preparing the base for the finishing coating.
Pros and cons of "adjustable floor"
The disadvantages of an adjustable floor may appear if the requirements for proper installation of the floor are not met, which also applies to other methods of leveling the subfloor.
At correct installation and compliance with all material quality requirements, the “DNT adjustable floor” is a reliable and durable base for any finishing coating on which you can not only walk, but also drive a car.
If you do not follow the DNT adjustable floor assembly technology, entrusting it to “woe to the specialists”, or use a regular plastic dowel and nail to attach polymer adjustable bolts to a concrete base, the adjustable floor will look like this:
DNT adjustable floor installation technology
Features of adjustable floors
- You can install an adjustable floor yourself without the help of a professional. To do this, it is enough to purchase necessary materials and stock up on simple tools.
- Installing the floor takes very little time: 1-2 days. For comparison, a concrete floor screed must dry for several weeks.
- An adjustable floor allows you to hide communications in the technological space, which means you can save space and remove all visual defects under the base of the floor.
- Using an adjustable floor, you can significantly increase the sound insulation of a room, which is why this type of flooring is often used in concert halls, studios and residential buildings.
- The adjustable floor is quite light in weight. Therefore, you can install it in rooms with weak ceilings - in private houses or on loggias.
- When installing an adjustable floor, virtually no dirty work is carried out. Accordingly, this coating option is ideal for rooms where it is important to maintain cleanliness.
- The adjustable floor can withstand loads of up to 2.5 tons per square meter. This means that this coating can be used for almost any type of premises (residential buildings, offices, shops, warehouses).
Using adjustable floors
Despite all the advantages of adjustable floors, many owners still think about the advisability of installing this type of covering. So, in what cases is it best to use an adjustable floor?
- If the floor surface is difficult or almost impossible to level (there are strong differences or unevenness).
- If to level the floor according technical specifications It is impossible to use heavy materials.
- If you need to make a floor with at different levels height.
- If there is a need to hide communications under the floor.
- If you want to create additional insulation from noise or cold.
Before we move on to a detailed description of the installation process of an adjustable floor, let's understand its key features. Today there are two types of adjustable floors on the market: floors on joists and adjustable floors on slabs. The main difference between these types of floors is the minimum lift height.
When installing a floor on joists, the rise is 5-20 centimeters or more. For an adjustable floor on slabs, the minimum lift height can be from 3 centimeters.
The process of installing adjustable floors on joists or on slabs is almost identical, but we will still describe the installation of each type in detail so that you can do it yourself at home.
Technology for installing adjustable floors on joists
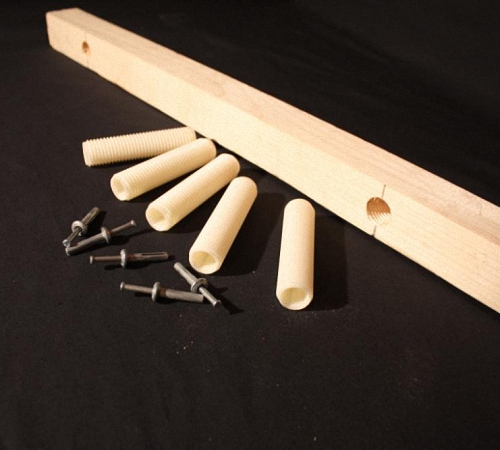
Logs are planed timber. Its dimensions, as a rule, do not exceed 50x50 centimeters. So, before we begin installing the floor on the joists, we will decide on the materials and tools that we will need.
Video - Adjustable joists on homemade racks
Tools
To install the floor yourself, you will need: logs, wear-resistant bolts, a drill, a laser or water level, a hammer, and dowel-nails.
Now we will look at step-by-step steps that will help you quickly and efficiently install an adjustable floor on joists.
Preparatory stage of work

Video - Adjustable joists preparatory process
Installation phase
- We lay the wooden joists evenly on the base of the floor. The distance between the joists depends on the choice of floor covering. If you plan to cover the floor with linoleum or lay tiles, the distance between the joists should be small. Experts recommend taking a step between lags of no more than 30 centimeters. It is advisable to leave a distance from the joist to the wall of at least 1 centimeter. This will create the necessary ventilation.
- After laying out the joists, we move on to rigidly attaching the bolts to the base. To do this, take a rigid drill and drill a hole in the concrete through the bolt. The depth of the hole should be about 40 millimeters. Next, we insert a dowel-nail into the prepared hole.
- We hammer in the dowel-nail with a hammer, securing the polymer bolt to the base of the floor. Try to drive the nails as firmly as possible so that the entire floor structure does not move in the future. Also good fastening will avoid squeaks and noises when using the floor.
Alignment
After the wooden logs are installed around the entire perimeter of the room and tightly bolted, we proceed to leveling. To do this, we need a water (or laser) level and a special tool (key) for adjusting the height.
- We carefully measure the level data. The height difference can be no more than 1-2 millimeters.
- Using a special wrench, raise or lower the bolts, focusing on the level. We try to achieve perfect alignment, since the quality of installation of the final floor covering depends on this.
The final stage of work
- After leveling the joists, firmly secure the nails to the floor using a hammer.
- We cut off the unnecessary remains of the post bolts using a knife or any other cutting device.
- If necessary, we lay materials between the joists for soundproofing or thermal insulation of the room.
- We place the flooring on the upper base of the joists. The choice of decking materials depends on what type of flooring you plan to use. Most often, plywood is used as flooring. It is suitable for further installation of laminite or linoleum. GVL or DSP is also used as flooring.
- After installing the flooring, we lay tiles, linoleum, laminate, parquet or any other covering on the adjustable floor.
The second type of flooring is done on slabs. It is chosen if the height of the floor should not exceed 3 centimeters. It is difficult to hide communications in such a space between the base of the floor and the covering, but it is quite possible to place cables from the telephone or the Internet here.
The process of installing this type of floor is somewhat reminiscent of installing an adjustable floor on joists.
Materials and tools
Before installing an adjustable floor on slabs, you need to prepare the following tools and materials: sheets of plywood or other material, bushings, stand-up bolts, drill, self-tapping screws, hammer, water or laser level.
| Type of plywood | Description |
|---|---|
| Plywood FC | moisture-resistant appearance; urea resin is used for gluing veneer sheets. This plywood is intended for indoor use. |
| FKM plywood | has increased water resistance and is made on the basis of melamine resins. This type of plywood is unique, since environmentally friendly melamine resins are used for its production. At the expense of their environmental characteristics plywood is used in furniture production and for internal finishing works |
| Plywood FSF | Veneer sheets are glued together using phenolic resin. This type of plywood also has increased water resistance. It is not recommended for interior decoration, as phenolic resins are harmful to health. Typically used for exterior finishing work |
| Laminated plywood | It is based on FSF plywood, which is covered on both sides with a special film. Laminated plywood is used for the manufacture of formwork. This type can be used repeatedly |
| Bakelized plywood | Bakelite resin is used to glue veneer sheets together. This type of plywood is used in aggressive climates, sea water, aggressive environments, sometimes to perform monolithic work |
| Marine plywood | similar to bakelized, but less durable. Made from foreign wood species |
| Plywood Flexible | foreign version. Distinctive feature is the ability to bend well in the transverse and longitudinal directions |
Video - Which plywood is better
Preparatory stage of work
- Just like when installing an adjustable floor on joists, installing a floor on slabs requires certain preparation of the working surface of the floor. Be sure to remove excess debris and correctly distribute communications that you plan to hide under the floor. Remember that the maximum lift height will be about 3 centimeters.
- Carefully place the sheets around the perimeter of the room. The distance between the sheets should be 2-3 centimeters on each side of the sheet.
- Mark the points for drilling holes. With a sheet size of 1.5 by 1.5 meters, 9 holes will be enough. One hole should be located in the middle (center of the sheet), four holes can be at the corners of the sheet and four more should be located in the central part of each side of the sheet. This arrangement of holes will ensure reliable fastening of the sheet.
First and second layers of plywood flooring
Final stage
- If necessary, we place thermal insulation or sound insulation of the floor on top of the sheets.
- After installing the sheets, we also lay out laminite, tiles, parquet, linoleum or any other selected floor covering.
Secrets to successfully installing an adjustable floor
After completing installation work, be sure to thoroughly clean the floor surface before installing the flooring. Excess debris, sawdust, and pieces of plastic can create squeaking and noise after laying the top layer of the floor.
Carefully hammer and tighten all floor fastenings. The reliability of the entire structure depends on this.
If you are making a high floor, it is advisable to place it between the joists soundproofing material. This will avoid unnecessary noise when using the floor.
Don't skimp on the quality of materials. It is more profitable to immediately choose more expensive materials for installing the floor, instead of completely redoing the entire job after a short time.
If, after installing the floor, you need to move communications, you can simply remove several strips of the adjustable floor in the right place. After completing the necessary work, you can easily put the floor back in its original place.
We hope that our tips, as well as step-by-step instructions, will help you install an adjustable floor in your home, cottage or office yourself, quickly and without any difficulty.
Video - Adjustable floors
Professional installation of adjustable floors in Moscow and the Moscow region!
We make an adjustable floor using anchors and polymer bolts!
Sale of components for adjustable floors in Moscow and Russian regions.
We produce logs chamber drying for adjustable floors of any size 45x45, 40x50, 50Х50, 50x70 up to 3m/p.
We will deliver to your site with fasteners (plastic bolt, anchor pin) or under your fasteners. Pickup from our warehouse is possible.
Adjustable floors video.
Adjustable floor on merral anchors
Adjustable floor with polymer bolts
At the end of the 90s, Russian construction appeared adjustable floor technology. This one is absolutely the new kind foundations competed with concrete screeds, previously widely used in residential premises, apartments, and any buildings.
Adjustable floors
have such an advantage over concrete ones as simple and quick installation. They are used under finished floors made of parquet, laminate or parquet boards in modern buildings. As a result of official tests, it was possible to prove the durability of such floors. Their service life reaches 50 years if used correctly.
This floor leveling technology has significant advantages over other preparation methods:
absence of dirt and water;
the ability to adjust the floor within 6 -15 cm and above;
efficiency and manufacturability of the installation process, relative cheapness;
high speed installation – 100 m2 in 2 days;
alignment accuracy;
relative lightness of structures compared to concrete, dry screeds, and, consequently, lower loads on floors.
There are two types of adjustable floor designs, depending on the height of its rise. If you need to arrange a floor with a height of 4 to 7 cm, then a floor structure will be used, adjustable plywood
on the stove. Adjustable plywood is most often used in new construction. If a higher floor is required or the differences are significant, then the design is used adjustable joist floors
. It is also used for floors on floor beams. Most often, joist adjustment is used to replace old floors and dismantle them.
Adjustable floors help eliminate significant differences in height when dismantling an old floor when the required level is high. For example, during finishing work, the old floor covering was removed, and the height between the required level and the resulting base does not allow resorting to other leveling technologies.
The design of an adjustable floor with joists is used for:
installation of floors in new buildings;
restoration of pilaf in old premises;
raising the floor to reduce the load on the floors;
installation of a multi-level floor;
hiding electrical equipment and utility networks under the floor.
Adjustable plywood ( ).
Installing floors using adjustable plywood.
Reluctance to raise the floor high or the lack of such an opportunity may lead the owner of houses or apartments to use new technology flooring installations - adjustable plywood.New buildings or apartments with low ceilings require a special approach. In such cases, it is inconvenient to use logs; instead, take threaded anchor rods, install them, and secure them at the base of the floor slab. Sheets of plywood are placed on the studs in advance drilled holes. For the floors, special moisture-resistant plywood sheets with a thickness of 10 mm and dimensions of 1.5 by 1.5 m are used. As a result, we get plywood with legs, because the sheets stand on anchor studs. These legs (studs) are attached to the concrete floor. To adjust the height of the sheets, nuts with washer are screwed onto the studs, unscrewing or tightening which leads to lowering or raising the plywood to the desired height until a flat flooring surface is obtained. Finally, a second sheet is laid on top of the leveled layer of plywood and secured with a self-tapping screw. After which you can begin installing the flooring. Such a plywood base does not rise more than 7 cm from the level of the floor base.
Cost of adjustable floor installation depends on the volume of the room and additional work.
There are several ways to level floors for finishing. Among them, the main ones are screed and adjustable logs. Installing a floor on adjustable joists is a less expensive and faster process. We will learn further about how to install adjustable floors on joists with your own hands.
Pros and cons of an adjustable floor on joists
With the help of adjustable floors, it is possible to create a perfectly even subfloor without additional leveling using cement compounds. The leveling system uses a dense material in the form of a flooring, on which there are mechanisms to adjust its height. It is with their help that the horizontal floor is ensured.

Adjustable logs are installed on a solid base. In some cases, installation of an adjustable floor is necessary:
- in the process of carrying out reconstruction work in the room, and the floor level is lowered, it is not possible to install a screed, since the weight of the floor and the pressure on the foundation increase;
- when performing redevelopment, it is possible to carry out all communications in the gap between the joists and the floor;
- if a room is being furnished that serves as a cinema, the floor and walls are then qualitatively soundproofed;
- with multi-level floor construction.
In relation to the main material for arranging the floor, there are two options for arranging the covering:
- adjustable floors on joists;
- plywood adjustable floors.
Among the main advantages of an adjustable floor on joists, we note:
1. Compared to concrete floors, an adjustable floor is lighter in weight, so it does not load the building structure and foundation. This floor can easily withstand any type of flooring, especially important for cottages and wooden houses.
2. The installation of an adjustable floor is a dry finishing option for which you do not need to use wet solutions, and the room remains clean.
3. With the help of an adjustable floor on the joists, it is possible to level out not only small bumps, but also significant differences in height are eliminated.
4. Installation work is carried out quite quickly than when leveling using concrete mortar. You can level the floor in a room in one day, and you do not need to wait additional time for the floor to dry. Immediately after leveling, further work is carried out.
5. Between the main floor and the joists there is an underground space within which communications are installed.
6. In addition, heat and sound insulation is installed in this air gap. Thus, the comfort of using such a floor indoors improves.

However, adjustable floors also have their disadvantages. This is primarily a squeak, which is prevented only at the stage of installation work. First of all, there should be no dust left on the ceiling; a vacuum cleaner is used for this purpose. All fasteners are hammered in completely; the wooden elements must fit snugly against each other. In this way, it is possible to prevent the racks from loosening.
As a result, after a certain time wooden surfaces start to creak. This occurs because wood expands and contracts when exposed to moisture, changing shape. Technologically correctly installed lag floors can prevent squeaks. Another disadvantage of such a floor is that when the joists are raised significantly, the floor makes sounds, especially when walking in heels. To avoid this phenomenon, thermal insulation boards are laid between the joists.
The selection process for an adjustable floor or concrete screed should be based on individual characteristics premises in which work is carried out. When choosing adjustable joists, pay attention to such advantages as the presence of a ventilation gap and space for laying communications, speed of work, no need to wait for the screed to dry, etc. In order to obtain a high-quality coating, you must first of all follow the technological parameters for arranging an adjustable floor. Studying reviews about the field on adjustable logs, we can conclude that this type flooring is an excellent alternative to concrete screed.

Among the main functional features of control devices, we note:
- execution of a function reliable support in a lag or plywood system;
- work as a guiding element when installing fasteners;
- rapid change in floor height in the horizontal plane.
The technology for performing the work allows you to install adjustable joist floors with your own hands without the involvement of specialists or additional tools.
Installation of adjustable floor joists - construction technologies
To adjust the floor, plastic support bolts are used, which have an external thread and dowel-nails. Plastic bolts are installed either in the slabs or inside the logs themselves.
After installing the dry screed, the bolts and leveling structural elements are fixed to the floor. To do this, a dowel and nails are installed inside the bolt. Adjustable floors differ from regular floors in that they have a special screw system that allows you to quickly adjust the height of the floor. In addition, screw mechanisms serve as guides for the dowel-nail. Dowel-nails have different sizes, the choice of which is determined by the power of the leveling structures and the floor area. To hammer in dowel nails, a hammer is used.

Dowel nails are installed if the floor is mounted on a concrete base. To fix the floor on a wooden floor, it is sufficient to use galvanized self-tapping screws.
Simplified bolts for adjustable floors contain a steel rod, external thread. Their lower part contains elements for fixing to the surface of the base floor. The upper part of the fastener is distinguished by the presence of elements that regulate the fixation of the floor. Another option is to use steel U-shaped parts. They are fixed to the floor with screws, however, installation work in this case takes quite a long time and requires additional physical effort to carry out.
Sleeve-type support bolts are installed either on the surface of the joists or on the slabs. Therefore, it is customary to distinguish two technologies for installing an adjustable floor. The choice of one option or another is determined by the planned height of the subfloors:
- if the floor rises more than 50 mm, then using standard joists is sufficient;
- if the floor rise is less, then using leveling plates is sufficient.
In any case, with the help of special adjusting supports, a flat surface is created on the floor. However, the differences are in the length of the support bolts. In addition, the screw holes are located according to various schemes in the first and second cases.
When choosing adjustable floor joist supports, pay attention to the height of the resulting coating. In this case, take into account the height of the existing floor, add to it the communication systems that will be located in the underground space. Next, decide on the option of arranging a system of adjustable logs.
Draw up a project for the room, write down its total dimensions on a certain scale. With the help of such simple drawings it is possible to quickly calculate the amount of material for arranging the floor. Please note that there should be a ventilation gap of 10 mm around the perimeter of the room. Place the plates, factory supplied, on the drawing in the required order. Mark each plate with its number, determine the steps for drilling holes for fasteners, and to determine them, take into account the material to be made finishing floor.
In order to form an ideal dry-type screed for laying tiles or linoleum, the interval between fasteners must be at least 300 mm. The maximum interval for fixing fasteners is half a meter. Please note that increasing this value leads to a loose fit of the slabs to the floor, so squeaking may occur after some time.
If, after installing adjustable joists, a plank floor will be formed, then plywood will not be installed on the leveled floorboards. In this case, the board is fixed to the timber.

Technology for constructing adjustable joist floors
We invite you to familiarize yourself with the technology of installing an adjustable floor on joists with plastic bushings. For installation plastic bushings, adhere to these rules:
- when drilling the first hole, step back 100 mm from the end part;
- the remains of 10 cm from each edge are divided equally for fixing the fasteners;
- do not forget to leave a ventilation and compensation gap between the slab and the wall;
- set the logs in relation to the previously determined step of their fixation;
- The logs that are in rows are installed in such a way that each part of the plywood rests on the surface of the beam.

Among the advantages of using this method of laying lags, we note:
- creating a warm and comfortable atmosphere in the room;
- high floor strength and resistance to mechanical stress;
- long service life and ease of maintenance of wooden structures;
- environmental Safety;
- ease of installation work;
- affordable price.

In order for the floor made of adjustable joists to serve you as long as possible, before installation, everything wooden structures treated with antiseptic compounds and other protective impregnations.
Boards are most often used as flooring material. At the same time, the most convenient are tongue-and-groove floorboards. They are distinguished by the presence of tongue-and-groove joints, which form a solid and durable coating.
During installation work, you will need the following tools:
- hammer;
- electric drill and screwdriver;
- ax and hammer;
- level;
- electric jigsaw.
Among the materials you will need are logs, floorboards, insulation, special materials for the substrate, and fasteners.
On preparatory stage After installing a wooden floor with adjustable joists, the base is prepared for work. First of all, the old base is cleaned of dust and debris. When laying the floor, there is no need to level the base; this process is carried out by adjustable logs. If there are large potholes on the concrete base, fill them with putty.

Next, you should cut the logs to a certain size. A jigsaw is used for these purposes. The size of the floor log is 5x5 or 6x4 cm. Initially, the old covering is covered with a layer of roofing felt, which will ensure reliable waterproofing of the floor.
- thickness of insulation installed on the floor;
- the thickness of the floor boards themselves.
The optimal installation interval for floor joists is half a meter. To fix the logs, use anchors for adjustable floors on the logs.
We invite you to familiarize yourself with detailed instructions for arranging an adjustable floor on joists:
1. On the block, mark the places for fixing the fasteners. Further using feather drill make holes for the support bushings. They are fixed to the surface using self-tapping screws. The floor height is adjusted by tightening the outer bolts.
2. The log on which there are bushings is installed in the intended place. Using internal points, places for fixing the joists are marked.

3. To make a hole, use a hammer drill. The depth of the hole should not exceed five centimeters. Install the joist and secure it with bolt fasteners.
4. Using a bumper, install dowel nails along the edges of the joist. The final driving is done after leveling the floor. Conventional dowel nails are installed after all the joists have been installed and aligned.
5. Use a hex screwdriver to adjust the location and height of the lag. To do this, install it in the two outer bolts. Use a level to control the action.
6. After determining the ideal position of the lag, fix the last dowel-nails and install all other fasteners.
7. If there are parts that protrude above the floor surface, use a chisel to remove them.
Thus, each element of the floor covering is installed. After this, plywood or floorboard is installed on the joists. The interval between plywood fasteners is a maximum of 15 cm. This method of installing joists allows you to obtain a reliable and technologically ideal coating for further work on the installation of finishing.