The kitchen, like any other room in the house, needs decoration. Of course, you can go to a hardware store and buy a charming pepper shaker with a salt shaker or cute oven mitts, an apron, cutting boards, the front side of which is decorated with patterns and other decor. But isn't it better to make crafts for the kitchen with your own hands?
Crafts yourself? It is not difficult! By showing your imagination and using the master classes presented below, you can create things that will suit the style of your kitchen and at the same time bring coziness to such a warm room.
What will go into kitchen crafts?
DIY kitchen crafts can be made from various materials. We often have them at hand.
- Fabric: various potholders, napkins, teapot cloths.
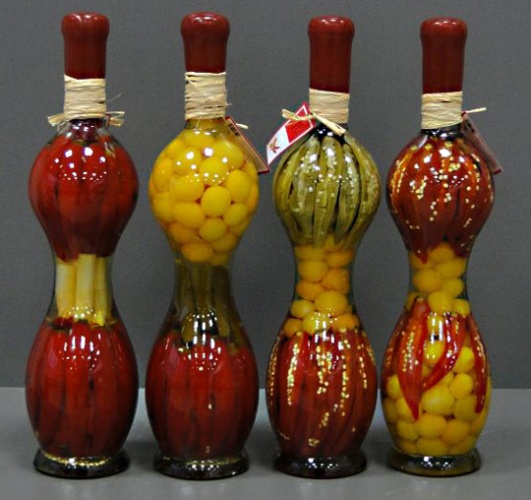
- Glass bottles and jars. Let's fill them with colorful contents.
- Regular cutting boards.
- Cardboard.
- Plastic bottles.
- Multi-colored paper or colorful magazine covers.
- Pasta, cereals, etc.

Look around the kitchen - what would you like to put in it? Now let's get to work.
Bottle with colorful contents
Bottles that attract attention with their colorful contents look beautiful in a kitchen designed in any style. Let's make them.
We will need:
- bottles made of transparent (colorless) glass;
- multi-colored vegetables, cut into cubes, cubes, slices or circles;
- cork;
- leg-split;
- vinegar;
- wax.

Remove labels from the bottle and rinse thoroughly inside and out.
Tip: to prevent the contents from becoming moldy in the future, boil the bottle.
Arrange vegetables the way you like. If the bottle is pot-bellied (like a cognac bottle), you can place lemon slices along the edges of the walls (remove the seeds). Pour vegetables up to the very beginning of the neck. A wooden skewer or a regular knitting needle will help to distribute the vegetables in places.
Pour vinegar into the bottle to the very top. We seal it with a cork or lid and fill it with wax so that the acid does not evaporate, spoiling the air in the kitchen. The wax should be soft, so heat it in a water bath. We wrap the top with twine - this will make the bottle look more beautiful.

You can decorate the outside of the bottle if you wish or leave it as is - it’s already good.
Instead of fruits and vegetables, you can take cereals or legumes: there are white, black, red beans, green beans, peas, white and red lentils. Or combine them with colored vegetables.
Bottle of salt
If there is a problem with vegetables, then salt in the required quantity is available in every home and nearby store.
But first you need to paint it different colors. We use gouache paints or food coloring as a dye.
Let's prepare:
- interestingly shaped bottle;
- extra salt – it is the finest;
- paints or food colorings;
- stopper or cap;
- twine or ribbons;
- spatula or brush.
We wash the bottle, boil it and dry it well. Otherwise, in the future, the salt may swell from moisture and form a lump. You can dry and sterilize the bottle in the oven.

Salt, bottle and crayons...
Plastic containers, yoghurt or cheese boxes are needed for coloring salt - there is a separate container for each color. During coloring, the salt will collect in lumps, so it will need to be mixed and kneaded. The salt should dry out within a day. You can dry the salt in an hour in the oven, spreading it on a baking sheet.
Using a funnel, pour the colored and dried salt into the bottle in the order you came up with. To prevent colors from mixing, use a brush, carefully straightening each floor. Pour slowly - haste will lead to the fact that the border between colors will be blurred and it will be impossible to correct this - even Cinderella could not cope with dividing the mix of salt colors into separate ones.
Tip: tilt the bottle to upper layer each paint was not straight, but at some angle. Some craftsmen manage to make entire paintings in sand bottles. Salt is no worse.

We close the finished crafts for the kitchen with our own hands with a cork, a lid, and wrap the top with twine or ribbons.
Fridge magnets
To attach small notes or a shopping list to the refrigerator, you may need refrigerator magnets, but instead of buying them, we will make them ourselves.
We will need:
- thick cardboard (can be cut from a box);
- paint: gouache, acrylic or watercolor;
- scissors, a flat brush, PVA glue and a clean sponge;
- napkins with a pattern;
- a block of notes for notes, glued on one side;
- short pencil;
- template of a figurine that will hang on the refrigerator;
- ribbon to match the napkins;
- colored paper.

Draw it yourself or print and cut out a template from which you will cut out the base for the magnet. It can be a hedgehog, a heart, a sun, a butterfly, a pear, an apple, a teapot and other figures. Use an awl or hole punch to make a hole at the top.
- The workpiece must be painted (primed) in White color, otherwise a brown background will appear through the napkin.
- Glue a magnet to the back of the workpiece (you can use double-sided tape).
- Divide the napkin into three parts. From the top layer (it is colored), we cut out or tear off the design with our hands and paste over the dried blank, covering it with glue and on top of the napkin. There is no need to decorate the middle of the workpiece - there we will have leaves for writing. Let the workpiece dry.
- We decorate the edge of the workpiece by passing over it with a sponge dipped in paint.
Advice. To make the magnet moisture-resistant, varnish it with varnish or the same PVA glue.
- We wrap the pencil in a strip of colored paper, grease the ends with glue, and glue them to each other and to the workpiece on top. The pencil should be removed from the loop - you will use it to take notes.
- Glue a recording block to the center of the workpiece, hiding the ends of the paper tape.
- We pass a ribbon through the hole and tie it in a knot.

You can make several magnets: for recipes, for the daily menu, and for notes.
Organizer for storing packages
Fabric crafts for the kitchen also have a place. For example, a package organizer. So that they do not spoil the look of the kitchen, they need to be hidden. But in such a way that, if necessary, it is easy to get these bags.
You will need a piece of fabric measuring 40 cm by 50 or 60 cm. The length of the bag depends on how many bags you have. So the cut can be 40 by 50, or 40 by 40, or 40 by 30. Matching threads and cord. Instead of a finished cut, you can take scraps left over from sewing products and sew them into ribbons of the required width (40 cm). We also grind the ribbons together until you get the length you need.
- We connect the long sides together. We tuck the short sides and stitch them, leaving a part for threading the cord. This will be the top and bottom of the bag bag.
- We pull the lace through the drawstring and tie it into a knot.

You can compact the packages into a bag. We hang the bag on a hook or nail, and take out the bags from above or below by pulling the protruding edge.
Bag decor ideas. Get creative and make a doll or animal. To do this, sew a face or muzzle. Glue or draw eyes, mouth, nose, hair on them. For volume, fill with padding polyester or holofiber. To prevent the bag from hanging like a pot-bellied sausage, make a skirt for a doll or animal. It can start right from the neck - you don’t have to achieve a perfect resemblance to the characters.
The craft is ready to take its place on the kitchen wall or on the balcony.
Cup coasters
Favorite cups do not always have saucers - this is the prerogative of tea sets. But a hot cup can ruin the polish or scratch the glass countertop. In bars, such things for beer glasses are called coasters. We will make it ourselves and supply both a glass and a cup.

- You need damaged (non-recordable) CDs, padding polyester, fabric, thread, scissors and needles.
- We trace a disc on the fabric and, stepping back half or a whole centimeter from the edge, cut out two circles from the fabric and two more from padding polyester without allowance.
- The hole in the disk can be sealed with tape on both sides, filling the hole with a piece of padding polyester, or left as is.
- Place two circles of fabric together and sew only half of the circle. Otherwise, the disc simply won’t fit into our pocket.
- We attach the padding polyester to both sides of the disk with double-sided tape and insert our structure into a fabric pocket.
- Now, having threaded the needle, sew the two circles together using a blind stitch.
The stand is ready. You cannot iron it; the disc will melt. Hand wash only, in washing machine the disk may break.
Tea house

If you drink tea in bags, then it would be nice to build tea house. All business! And you only need cardboard, a ruler, napkins with drawings, glue, a pencil and scissors.
So, we cut out the parts from cardboard.
- Four sidewalls with sides of 9 and 20 cm.
- 4 squares with a side of 10 cm for the bottom and roof.
- Roof lintel with sides 6 and 10 cm.
- Two triangles with a bottom side of 9.3 cm and a height of 6.5 cm.
The remainder of the cardboard will be used to fasten the parts.
Let's start connecting.
- In one of the sidewalls (in the lower part) we will make an arched opening - a window through which we will pull out the bags.
- We fasten the sides of the houses together using thick paper or thin cardboard. We got walls 20 cm high.
- The bottom was glued to the walls using the same fasteners. It extends 0.5 cm beyond the walls - this is how it should be for greater stability.
- Roll up a piece of excess cardboard triangular pipe and glue the two remaining squares to it - this is the roof slope.
- To prevent the roof from bending, we attach a lintel to it, bending the edges (we coat them with glue).
- We glue triangles to the sides of the roof.
- We wait for everything to dry and glue the napkin using the decoupage technique. Instead of a napkin, you can use a thin cloth or paper for wrapping gifts.

We coat our house with varnish to protect our house from moisture. Dry and use.
Broom-amulet
DIY kitchen crafts can be made from ordinary paint brush- the one that is used to moisten the wall. It should be fluffy natural materials. You will also need dried flowers: flowers, blades of grass; spices, dried fruits or dried vegetables, cereals and other decorative elements.

We divide the brush into two halves, so we can make two amulets.
The upper part (cutting) must be tied with wire so that the panicle does not fall apart. Spread the bottom one like a fan, generously coat it with PVA glue and put it under a press overnight.
According to folk traditions there should be 12 elements on the panicle. And the panicle itself signifies abundance.
- Coins are for money.
- Cereals mean prosperity.
- Chili pepper - to male endurance and strength.
- Poppy seeds - for the fulfillment of desires.
- Rosehip - for facial beauty.
- Seeds - to the health and obedience of children.
- The image of a house is a sign of a family idyll.
- Bagels and pretzels - to satisfied guests.
- Corn is for the kids.
- Bast shoes - for comfort.
- Vegetables, dried fruits - for a rich harvest.
- Sunflower flower - to peace in the family.
- Lavrushechka - to fame and recognition.
- Walnuts - to youth and health.
- Garlic – against the evil eye and evil spirits.
- Jug - to health.
- Chicken egg - for children.
- Cones - to great achievements.
- Pumpkins - for a good harvest.
In the morning we take out the broom and attach the selected elements with wire, glue, and thread. All details must be bright so that the panicle is pleasing to the eye. Ready composition Spray it with aerosol varnish and hang it in the kitchen.

How to hang a broom? It can be placed with the handle down or up. In the first case, the broom will lure wealth into the house, and in the second, sweep away evil from it. Which is better?
Remember, you have one more broom left? Make another broom and hang it in the hallway for other purposes.
These are just some of the kitchen crafts. You can also sew it.
Absolutely every housewife wants to make her kitchen as comfortable and unique as possible. Unfortunately, updating any room today is not a cheap pleasure. What to do if your budget is limited and your kitchen urgently needs to be remodeled? In our article you can find a lot of tips that will help you make repairs in a room that is important for every housewife and spend a minimum amount Money. DIY kitchen crafts are always unique and beautiful.
DIY wall decoration
If you want to completely change your kitchen, then first of all you need to start with the design of the walls. We strongly recommend changing the color. Thanks to this solution, your kitchen will change dramatically. You can decorate monochromatic walls with a pattern. To do this, you will need to cut out a special stencil from thick paper and outline it with a thin brush. It is worth emphasizing that not everyone will be able to do this carefully. If you are bad at drawing, we recommend that you seek help from an artist. By the way, you can also ask him to decorate the kitchen with some large pattern. Now this design is incredibly popular. It makes the kitchen modern and comfortable.
If you don’t know an artist and you don’t want to spend time and money on this, we recommend paying attention to special stickers. You can purchase them at any large hardware store. As a rule, they are inexpensive, but at the same time they are quite easy to apply to the wall. Before purchasing a sticker, think in advance where you want to place it. Kitchen decorations (made with your own hands) should fit harmoniously into general interior.
Great solution for travelers
Lately a large number of people prefer to spend their holidays abroad. It's no secret that every tourist undoubtedly brings home souvenirs. Usually, all these things, at best, gather dust on the shelves of closets for years, and at worst, they are disposed of. This is a very big mistake. All brought items can easily be used to decorate the premises. For example, planks that can be purchased in any resort town will fit perfectly into the kitchen interior. A potholder, a painting with a landscape and much more - these are all things that you can use to complement the design of the room. When purchasing such things in a resort town, you can be sure that no one among your friends has the same ones.

How to save money on furniture?
It's no secret that replacing furniture today is not a cheap pleasure. Few people know, but kitchen chairs, tables and cabinets can get a second life. To do this, you just need to use the maximum of your imagination.
The simplest transformation of boring furniture is changing its color. To do this, first of all you need to clean it from old paint and cover with a new one. When the furniture is dry, you need to open it with varnish. If you want more dramatic changes, you can change the upholstery on the chairs and decorate the cabinet doors with the stickers we talked about earlier. If you know how to draw, you can paint them by hand. This design will look expensive and unique.

Beautiful DIY kitchen table
I believe almost everyone is interested in how to make their kitchen table beautiful. At first glance, this task seems impossible. However, it is not. If you are tired of your kitchen table, then you can easily update it. Its design will depend only on your preferences. Tables with frescoes, mosaics and drawings look most advantageous. For decoration, you can use whatever you can find on hand.
The simplest and most affordable table update is decoupage. In order to decorate furniture in this style, you will need to purchase transparent glue, paper napkins with a pattern and varnish for wooden products. First of all, you need to clean the furniture from the old coating and wipe it with a cloth soaked in alcohol. Then you will need to cut out a design from the top cover of the napkin and attach it to the table using glue. You can place the image on a kitchen chair or table as you wish. After a day, the product must be opened with varnish and wait until it is completely dry.
Another way to update the old one kitchen table- This is drawing a picture using a burner. Perhaps almost everyone is familiar with this technique from school. By the way, in this way you can transform not only the table, but also wooden cutting boards.
Kitchen work area
The work area is the part of the kitchen where the hostess spends greatest number of its time. As a rule, it is also the most polluted. It's no secret that experts do not recommend decorating it with wallpaper. It is better to use materials that can be easily cleaned. Designers recommend kitchen shelves located in work area, make them open so that the room seems more spacious. It is also advisable to decorate this part of the room with tiles. To give it a touch of uniqueness, you can safely paint it by hand or cover it with a special film.

Textiles in the kitchen
Textiles play very important role in kitchen design. Making it beautiful and incredibly unique is not difficult. Kitchen apron- This is an important part of any housewife’s home wardrobe. He is always in sight. It is for this reason that it is necessary to pay special attention to its decor. It is worth paying attention that it must be harmoniously combined with the overall decor of the kitchen. An apron should be sewn only from thick fabric that dries quickly. You can decorate it with appliqués and embroidery. Don't forget about the pockets. They can be decorated with drawings or bows. A DIY kitchen apron will certainly delight your guests.

Curtains and towels are undoubtedly an important part of any kitchen. If you want to visually increase the space of the room, then you need to pay attention only to light tulle in a light tone. Curtains must fit into the overall interior. Designers recommend placing all textile elements in the kitchen in only one color. This will make the design thoughtful and harmonious. With the help of self-sewn covers, you can easily hide all the shortcomings of old furniture.
DIY kitchen crafts are something that always causes delight. The recommendations that are located in our article will allow you to create your own, unique design, which will not leave anyone indifferent.
Cutting boards that will help transform any kitchen
Updating a boring kitchen is quite easy. If you do not want to change the color of the walls or furniture, then the following recommendations are for you. made of wood is an excellent material for creativity. You can use a variety of decorating techniques to add some flair to them. The most in a simple way is decoupage. You can find the technique for applying it in our article. It's a little more difficult to decorate a board using a burner. However, it is no secret that almost every schoolchild was taught this. That’s why, if you don’t know how to decorate things using a burner, you can easily find among your friends someone who can decorate your cutting board using just this application technique.
The most difficult way to decorate a cutting board is to apply a design by hand. As a rule, this requires at least minimal skill in accurately applying an image. If you're not good at drawing, but want to use this particular technique, you can find and print a simple template. It will need to be transferred to the board, and then decorated with gouache and varnished. These cutting boards will definitely decorate any kitchen shelves.
Kitchen containers
In any kitchen, of course, there is a large amount of bulk products. To store them, housewives use bags, jars and other containers, which often look unaesthetic. Crafts for the kitchen (with your own hands), ideas for which can be found in our article, will allow you to make your kitchen unique.
In order to create a beautiful container for storing bulk products, you will first need to find a base. These can be cans, metal tea boxes, and all kinds of wooden crafts appropriate form. To convert them, you can use all the previously mentioned methods. To create a beautiful one, you can also cover the container with lace or sew a fabric cover for it. Such vessels can be placed not only in the closet, but also in a visible place.
Hot pot tray
A hot stand is a must-have attribute of any kitchen. Thanks to it you can save your furniture from exposure high temperatures. Little things you create yourself to decorate your kitchen can completely change the room without much expense.
Anyone can make a stand. Use the recommendations given in our article, and your kitchen will be transformed in just a couple of days. created, will not leave any guest indifferent. You can use anything to create it. We will present only a few of the most interesting options.

To create a wine cork stand you will need about 10 corks, a base and glue. First of all, you will need to cut it out of thick cardboard small circle, which will be slightly larger in volume than the bottom of the mug. It will serve as a base. The corks must be cut into circles and glued onto previously prepared cardboard. When the product is completely dry, you can use it as a stand.
There is a little trick: when wood interacts with hot objects, it begins to release an aroma. Exactly because of this reason the best stand The one made from juniper or spruce is considered hot. Therefore, you can safely use such material for a future product. Such coasters will not only preserve your furniture, but also fill your kitchen with a unique aroma.
Painting plates
Today, ideas for crafts for the kitchen undoubtedly delight with their variety. To add a special charm to the design, you can hand-paint the dishes. To do this, you need to purchase stained glass paint. It adheres well to ceramics and glass, and does not wear off or fade over time. It is worth emphasizing that only completely plain and light-colored plates are suitable for this design. Unfortunately, the image is almost invisible on dark dishes.
This decoration option is suitable only for those who know how to draw. It is worth emphasizing that today many craftswomen even sell plates that they have painted by hand. Such products are in incredible demand.
Paintings
For many people use paintings. You can post large photographs. They will make the kitchen more cozy and comfortable. One more great idea Embroidered paintings are used to decorate the walls. They make the kitchen as unique as possible. You can safely embroider a still life and place it in a frame on the wall. This decoration will delight everyone. By the way, you can also add embroidered patterns to your apron and towels.
What are the benefits of homemade kitchen decor?
DIY kitchen crafts are something that will always delight your guests. There are many benefits to decorating your home yourself. Thanks to it, you will not only make your kitchen unique, but also save a lot of money. If you create crafts with the whole family, this will undoubtedly bring all its members closer together. The interior, which was created with your own hands, will definitely delight absolutely everyone. It is worth emphasizing that you can change and supplement it at least every day.

Let's sum it up
Recently, an increasing number of families prefer to decorate their home themselves. will not only save money, but also create unique interior. Use the recommendations given in our article, and you will transform not only kitchen chairs and other furniture, but also the room as a whole. This design is sure to bring you joy for many years to come.
November 2016Many interesting and useful kitchen tools and accessories can be made with your own hands - this way your home will acquire originality and uniqueness. We have collected for you best ideas kitchen crafts!
How to decorate a modern kitchen
DIY kitchen crafts are interesting, creative and economical way decorating and organizing space. Needlewomen and craftsmen can create the most interesting and necessary things using ready-made master classes or their own skills:
- stands and pockets for cutlery and necessary small items;
- potholders, napkins, tablecloths and aprons - using the patchwork technique, for example;
- cutting boards with burning or carving;
- bottle holder;
- warmers for cups and teapots;
- dolls - both as heating pads and for storing small items (for example, bags);
- topiary;
- shelves or other wood products;
- paintings;
- organizer;
- drainer.
You can create useful and decorative little things with your own hands using various interesting techniques - decoupage, patchwork, embroidery, jigsaw cutting, and so on.
What can be used as materials? Watching any master class, you will notice that there is beautiful things, which are created literally from waste materials. These can be bamboo napkins and skewers, wicker and paper, wine corks and thick cardboard, plaster and coffee beans, cereals, pasta and spices.
So, you can make an original wall decoration from matches, a table decoration from toothpicks, and a knife stand from an armful of skewers and a jar.
However, original jewelry for the kitchen with your own hands - this includes a bottle holder or a drying rack for dishes, decorated using the decoupage technique, and a unique tablecloth and textiles using the patchwork technique:
Topiary will look great on a windowsill, table, display cabinet and more.
It’s not at all difficult to make such decorations for the kitchen with your own hands. They can be made from coins, coffee beans, corrugated paper, artificial flowers, leaves, shells, cereals, feathers and ribbons. Such interesting things can be designed in different styles. Thus, traditional topiary or the European “tree of happiness” can imitate a natural plant and imply the use of naturalistic flowers, and loft-style topiary can also be made from metal parts.
To make such a tree you will need:
- a foam blank (base, most often a ball);
- trunk (even tree branch, pencil);
- decorative elements for creating a topiary crown;
- flower pot or cup (stand);
- twine or ribbon;
- filler;
- bright decorations - rhinestones, beads, lace.
Read more in the material: How to make topiary with your own hands - 4 instructions for beginners and more.
The organizer for spices can be very different:
Pictures made of beans, colored paper or coffee beans, coasters for glasses made of wood:
“Kitchen” handicrafts often use cutlery - you can use them to make original paintings, door handles, watches, as well as textiles with expressive applications.
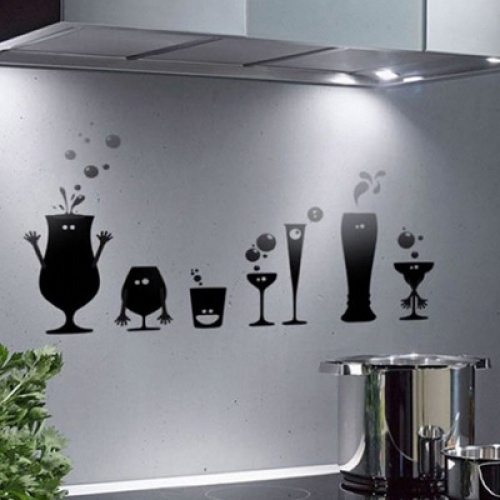
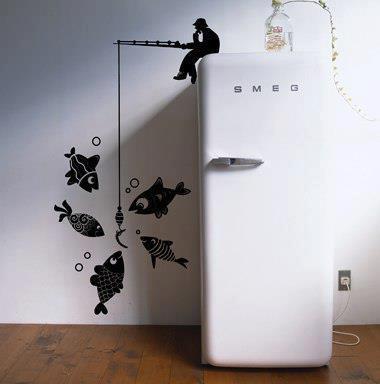
Handicrafts will allow you to transform both walls and furniture in the kitchen without unnecessary expenses. You can refresh the interior of the room by using interesting silhouette stickers depicting kitchen items, funny animals or pots with plants. These stickers are very easy to use and you can (and even need to!) involve children in decorating.
Or you can glue these polyurethane sockets of different diameters to the wall.
You can also change the appearance of furniture with your own hands - for this, decoupage techniques are often used for a set, knitting, sewing or patchwork for a dining room.
Useful kitchen items
Large and spacious kitchens are still a rarity, which is why modern housewives so value clever and interesting things that can be used to save usable space.
You can do useful devices for your kitchen:
Creative kitchen crafts designed to give back to old items new life. You can create such practical devices as jars for sweets, spices or tea.
They can also be made from wood, but this is quite labor-intensive. Almost every master class will ask you to select identical jars and decorate them in accordance with the style of your kitchen. Such useful and interesting things do not need to be hidden in a drawer - they can be placed on the edge of the table, on a special wooden shelf, or even mounted on the side of the refrigerator, having previously been equipped with magnets.
Among the original and useful little things for the kitchen that handicrafts will allow you to create, it is worth noting:
- Bottle holder for the bar counter;
- Organizer for storing vegetables in the form of bags or hanging wicker baskets;
- Long towels and potholders, indispensable in the kitchen, you can use the patchwork technique for them, that is, sewing from scraps, or you can simply sew them from an interesting fabric (for more information about sewing a kitchen towel, read the material: sewing a kitchen towel - a master class and DIY decor ideas );
- Teapot caps (knitted) - thanks to them, the tea will brew faster and the tea leaves will retain heat longer;
- Stands for cups and hot dishes - they can be made not only from wood, as shown above, but these interesting things can also be made from yarn, fabric and even stones. Knitting, patchwork, macrame are techniques for advanced needlewomen, but even a child can make some coasters.
- Pockets for storing cutlery - you will need wooden cutting boards, a stapler, fabric and decorative braid;
- Cushions for stools - for example, from thin twisted strips of multi-colored felt.
Original designer decor for the kitchen
Even if you are guided by a ready-made master class, your DIY kitchen accessories will still be your own - after all, you can bring in some interesting ideas of your own, using the recommended process as a basis.
So, you can make a beautiful eco-friendly accessory from dried branches.
Fridge magnets are not trinkets, but interesting accents in your kitchen. You can make them yourself from plaster (pouring it into purchased molds), clothespins, wood, salt dough, felt and much more.
Tips: in pursuit of creative self-realization, style and comfort, you should not waste your time on trifles - do not overdo it with the decor, otherwise your kitchen will lose its functionality and become an exhibition of hand-made products. You should also not forget about safety - in any case, the amount of flammable materials in this room should be reduced.
Kitchen crafts are useful little things, and decorative trinkets, each of the homemade things is one of a kind, because it is made with soul.
We also suggest that you familiarize yourself with the material: Crafts from tin and glass jars.
Please also pay attention to our site guide in the section Kitchen design and decor - site guide.
Photo gallery (32 photos)
There are often situations when it seems like in the kitchen and New furniture, and fresh finishing of the walls and ceiling, but something is missing. Some kind of sincerity and warmth. And it is precisely the extraordinary and beautiful decor and kitchen crafts can change the entire atmosphere of the room, making it more cozy and comfortable.
Even just one painting or an unusual shelf can completely change the entire kitchen design, adding dimension and originality to it.
You can decorate any part of the room and appliances; the main thing, of course, is to choose materials that are resistant to kitchen conditions, that is, they are not easily flammable and are not afraid of moisture, since they will be subject to frequent cleaning.
Any decoration or craft for the kitchen can be made with your own hands; it is absolutely not necessary to buy them or resort to the services of professionals; the help of your family members or friends is enough.
Wall decor
If the wall is in the kitchen solid color, then stencils and ornaments are perfect for decorating it. You will definitely need to make markings in advance so that the drawings are positioned evenly. The stencil is attached with tape, and then the necessary places are painted. After this, it is advisable to varnish it so that the design retains its external qualities for as long as possible.

Perfect self-adhesive film. On the reverse side, the outline of the future figure is drawn and cut out. You should stick the decor onto the wall slowly, gently pressing it with a rubber spatula to expel all the air.
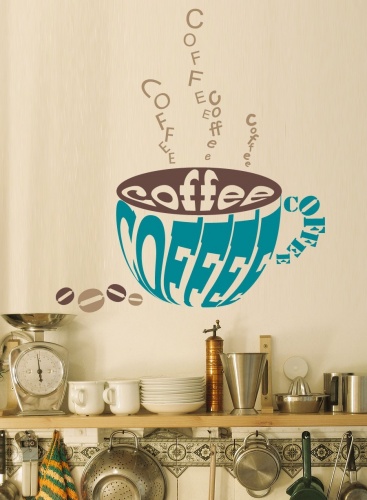
If you don’t want to cut it out, you can purchase ready-made stickers. Moreover, there are countless color and pattern options. They offer both the simplest and funniest, as well as the most complex and sophisticated. Stickers can be made in the form of silhouettes, butterflies, flowers, berries, inscriptions or vignettes.
Another advantage is that it is easy to replace old ones with new ones.

For those who have artistic talent, you can paint a landscape or other drawing on the entire wall, for example, near dining area. Can be used as acrylic paints, so decorative plaster. The latter is easy to use, you just need to dilute and decorate. Moreover, it is suitable for any surface: metal, plastic, concrete, wood, and so on.
Many people use ceiling rosettes as decoration for kitchen walls. They are painted in different colors with spray paint and glued, arranging them in an interesting combination.

Important ! When choosing decor for the kitchen wall, remember that it must be combined with its overall style.
Great decor for the wall of any room - Wall Clock. The range of designs and colors of watches is huge, so find one for a certain style kitchen will not be difficult.

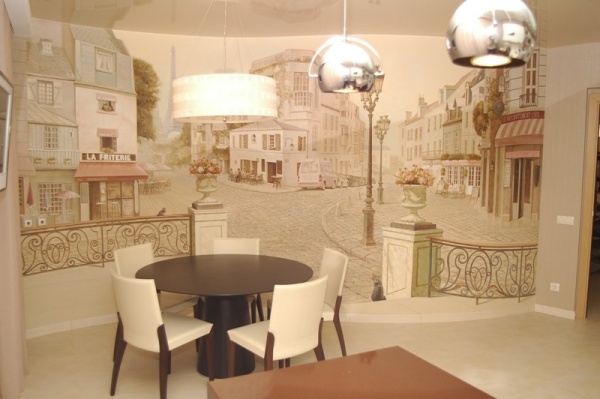
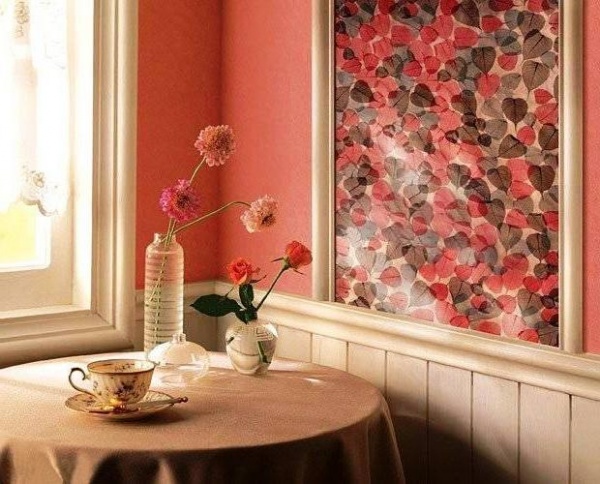
If the wall already has a pattern, for example, wallpaper with flowers, then it is better to hang paintings, panels or photographs. In the kitchen with classic design Still lifes, landscapes, herbariums and the like will look great. For a kitchen made in neoclassical style, black and white paintings or photographs are best. Rooms modern style decorated with posters, plaques or conceptual paintings.
But if the kitchen small size, then you should not hang it with many pictures. It is better if there is only one medium size or several small ones arranged in a vertical row. This arrangement will visually enlarge the room.
Rare dishes (plates, trays) or unusual colors are also ideal for wall decoration. When traveling around the world, purchase dishes with national designs. The result will be an interesting and original collection.
Wooden cutting boards look unusual. A small hole is drilled in them and hung on hooks.

It is not necessary to decorate the entire wall; it is enough to decorate either the apron, or the dining area, or part of the wall behind the stove or sink. Tiles can also be used as kitchen decor. Moreover, the choice of material is huge, ranging from patterns and ornaments to drawings or mosaics.
The tiles can be laid in a herringbone pattern or combined different sizes. In this case, you should draw a diagram in advance for error-free installation.
If you already have tiles, you can paint them with special paints that are resistant to heat and washing.
It is not necessary to paint all the tiles, especially if most of them are in excellent condition. Enough to paste over problem areas vinyl stickers or other interesting things, such as clippings from magazines or napkins. And the flaws are hidden, and the wall decor is excellent.

Another unusual way decoration is pasting different wallpapers, for certain zones or emphasizing only one of them.
For example, the dining area is covered with wallpaper in a bright shade, and the rest of the kitchen is in a more neutral color.
The decor can also be photo wallpaper. Most often they are applied to the apron or to the wall near the dining area. In addition, they visually increase the space.
And for those who like to write and draw a lot, you can use chalk wallpaper. You can paste them over the entire room, or just a part, making, for example, in the form school board. Children will especially like this option. Or arrange it in the form of paintings. Then you can draw or write something original inside. For example, a declaration of love to household members or writing down an interesting recipe.
Chalk wallpaper is easy to wash and can even be re-glued from one place to another.
You shouldn’t cover the whole room with them if it has only one window or no windows at all. The dark shade of the material will make it dull and boring.

Another way is to decorate with mirrors. An unusual decorative mirror made in an original frame that matches the style of the kitchen looks especially good. Or the mirror surface is installed on the apron. This method also increases the space, adding freedom and comfort to it.
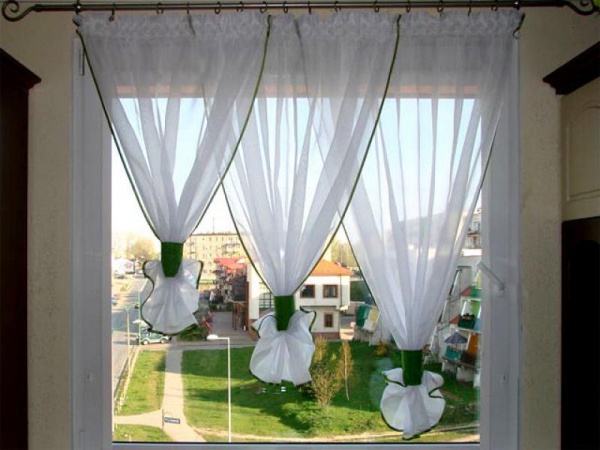
Window decoration
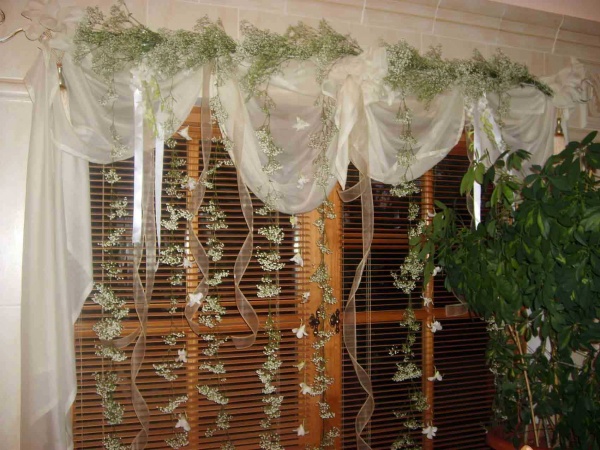
To decorate the window in the kitchen, you can use curtains and drapes. If the kitchen is small, then it is better to hang light and small curtains, but if it is large, then you can even use curtains; they will give the room a mood of chic and wealth.
Advice ! Bright and bright hues curtains or drapes will make the kitchen more spacious and add a more positive mood, while dark shades will add calmness and luxury.
Sewing curtains or curtains with your own hands will take a lot of time, but it's worth it. You can decorate the fabric with original bead patterns, butterflies, flowers, make drapery, or add only fringe and lambrequins.

Decoration of furniture and equipment
If the furniture has lost its original appearance and looks completely dull, then it can be decorated with decor. For example, paint it a different color and replace the handles. How beautiful and unusual a cabinet decorated with patterns or drawings made by yourself will look.

The glass in the cabinets can be painted with stained glass paints or the doors can be removed altogether, leaving the shelves open or with curtains. This option is especially suitable for a kitchen with a small area, because closed cabinets reduce space.
Equipment can also be painted or covered with stickers. Special attention and careful attention to detail should be given to the refrigerator, since it takes up a lot of space and is an integral part of the kitchen.

Advice ! Before you start decorating, decide whether you are working only on furniture or appliances. Because if you decorate everything together, the kitchen will become too colorful and busy.
Don't forget about the hood above the stove. You can paint it or draw patterns. We also do the same with gas stove, washing machine. Although, for the latter it is better to sew a cover.

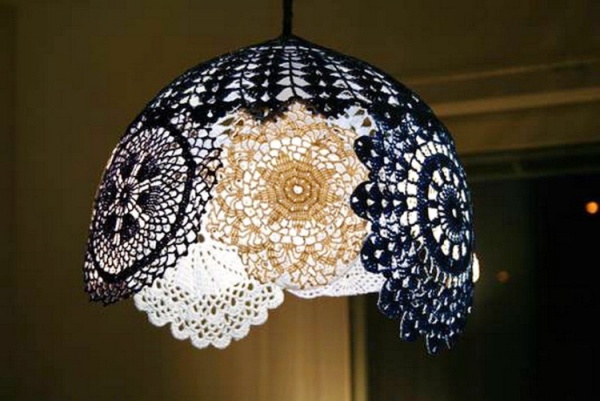
The chandelier is outdated, don’t rush to change it, try making a new lampshade.
Accessories and kitchen items
If it is not possible to decorate furniture or appliances, then various little things and fakes will help.
Moreover, there are countless things that you can do with your own hands:
- potholders, napkins, tablecloths;
- heating pads;
- dolls;
- pockets, baskets, storage systems;
- bottle holders;
- topiary;
- paintings;
- cutting boards and much more.
To create something new, there are many interesting techniques, such as decoupage, knitting, patchwork, burning, sawing and much more.
The photo below shows DIY kitchen crafts.


Using fabric using the patchwork technique, you can make chair cushions, tablecloths, and napkins. Decor made using the patchwork technique is perfect for a Provence style kitchen.

Any little thing can serve as material for creativity, even toothpicks or matches, cereals, napkins, grains and much more. It all depends only on the imagination.
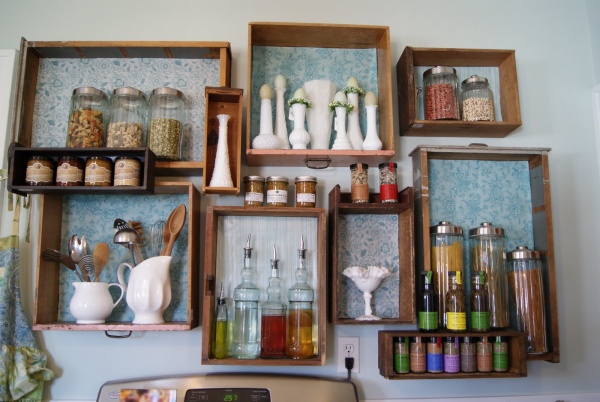
Jars with different spices, cereals and beautiful bottles will become excellent decor for any kitchen. They are placed on open shelves. Dishes or cans of preserves are placed in the same way. You can also make shelves yourself.
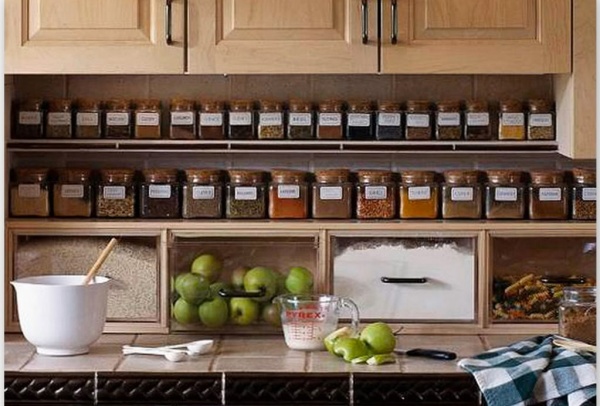
And if you have magnets, then with their help you can attach small jars of spices to the wall, making a panel.
Banks can be made of wood and decorated in the desired style. They must be placed in the most visible places: open shelves, a table, or hung from the refrigerator.

Transparent jars with bright cereals and vegetables can be filled with your own hands or purchased. In the latter case, they will retain their aesthetic appearance much longer, since manufacturers use special technologies to preserve them. In addition, all the bottles are stacked with bizarre and unusual shapes.
The kitchen is the most soulful place in the house. For a long time, this room has been used not only for cooking, but also for pleasant time with family and friends. That is why the interior here should not only be functional and ergonomic, but also comfortable and original. Pleasant little things made for the kitchen with your own hands will help transform the space, add individuality and brightness to it. In this review we will share with you interesting ideas and we’ll tell you how to bring them to life yourself.

In the kitchen, decor that has some practical significance is appropriate. Basically, the cute details that decorate the interior also perform some useful function. We suggest you do these little things to decorate your kitchen yourself. We have selected seven of the most interesting and useful things that we will learn to make:
- drainer;
- shelves for spices;
- lampshade made of plastic forks;
- cork stand hot;
- coasters for cups;
- writing board;
- felt potholders.
All of the listed items serve as kitchen decor and are used in everyday life for various needs. Let's look at how each of these useful little things is made.
Drainer
A simple and stylish drying rack made of wooden board. To make it you will need:
- cutting board made of wood;
- pencils (can be colored);
- drill;
- glue.

It’s very easy to make your own dish drainer from pencils and a board.
The basis of our accessory can be either a wooden cutting board or just a piece of wood. The process is quite simple:
- Marks are made on the board for future holes - they should be located where the plate holders are planned. Pencils will be such holding posts.
- The holes are drilled using a drill.
- Pencils are inserted into the board and glued to the base with glue.
The dryer is ready. It is very convenient to use, and if you use colored pencils for it, you will get a very fun and unusual accessory.
Spice racks

DIY spice racks
A kitchen cannot do without various organizers for storing utensils. If you like to use spices in the cooking process, make beautiful and spacious shelves for them. The simplest and most convenient to manufacture will be a rectangular shelf. To work on it we will need:
- Chipboard/boards;
- jigsaw;
- perforator;
- screwdriver and hammer;
- brackets;
- sandpaper;
- paint and brush.
Choose a place on the wall for the future product and draw a drawing of it - shape and dimensions. The work process is structured as follows:
- The shelves are cut from the boards with a jigsaw in accordance with the selected dimensions.
- The ends of the cuts are polished.
- The structure is painted in the selected color.
- Markings are made on the wall at the fastening points.
- The shelves are hung on brackets (you can buy them at a hardware store; choose the size that is optimal for your design).

If chipboard was used to make the shelves, then the sanded ends must be sealed with veneer. If desired, you can varnish the craft.
Lampshade made from plastic forks

Disposable cutlery can last you longer than one meal if desired. Using your creativity, you can easily turn this trash into an original accessory for a lamp. In order to make a stylish lampshade, you will need: forks, spoons and knives - 100 pcs. If you want, you can take only one type of disposable devices or combine them in a different proportion. The design is formed simply:
- inflate balloon to the size you want the plastic lampshade to be.
- Laying the devices on it one by one, fasten them together with glue in a chaotic manner.
- When the shape of the lampshade is ready, pierce the ball with a needle and pull it out.
To prevent devices from melting from a nearby light source, use energy-saving light bulbs.
This unusual accessory attracts not only its creative design, but also the effect it creates when the light is on. Plastic fixtures form intricate patterns on the ceiling when the lights are on.
Cork stand for hot dishes

If wine is a frequent guest in your home, take more from it than the great taste of the drink. Don't throw away wine corks, because they can be used to create a beautiful eco-friendly coaster. It is made quite simply. For this we need:
- round wine corks - approximately 30 pieces;
- belt with buckle;
- silicone;
- the knife is sharp;
- pencil;
- ruler.

The work is structured as follows:
- We select the shortest cork, cut off its uneven part and measure the remaining length. Similarly, we cut all the plugs in accordance with this value.
- We start gluing the stand from the middle - we connect the plugs so that the end result is a circle. To do this we use sealant.
- When the circle is ready, wrap the stand with a belt, fix its edges and trim off the excess.
At this point, the cork coaster for hot food in eco style is ready. It will become a stylish and functional decoration for your table. If desired, it can be painted any color, although it looks best in its natural form.
Cup coasters

Fabric coasters
Very simple, but not devoid of aesthetic accessories accessories are coffee coasters for cups. They are able to instantly transform the composition on the table, and also rid it of stains left when drinking tea. To make them you need:
- CD discs - you probably have old unnecessary discs lying around;
- coffee beans;
- glue "Moment".
The process is very easy and fast:
- Carefully coat the disc with glue on one side.
- Place the grains on the adhesive base, pressing them to the base so that they adhere better.
- Repeat the same procedure on the other side.
If there are gaps, they can be masked with something small (for example, sesame seeds).

You can make as many of these stands as you like - each requires just one disc and a handful of coffee. Such cute accessories will not only decorate the table, but also make pleasant aroma(if these are fresh roasted beans).
Note board

The kitchen is the place where news is discussed and passed on among household members. If you want to expand this opportunity, then a whiteboard is essential. It’s quite easy to make it yourself. For this we need:
- a flat board of suitable size;
- chalkboard paint;
- frame.
The board is covered with special paint, which can be written on with chalk, and inserted into a frame. To make it even more useful and functional, attach hooks at the bottom for small kitchen utensils or towels. Don't forget about a place for chalk:
- attach a narrow shelf to the lower frame;
- hang the chalk on a string secured to a nail driven into the side frame.
Such decorative element will complement the interior of your kitchen and make it more convenient for exchanging information with family members or for any other records you need.

Felt potholders
It’s hard to imagine without potholders comfortable kitchen. They are always needed, and you can make them yourself. It could be like crocheted accessories, and sewn from pieces of fabric. We will focus on the latter - they are easier to make without having special skills. We will not sew ordinary potholders, but in the form of autumn leaves.

To work you will need:
- wool felt in three different shades - three pieces of 50 cm each;
- scissors, paper and pencil;
- threads of contrasting colors;
- sewing machine.
We begin the work by creating a template for the future leaf. To do this, you can find and circle a suitable image or draw it yourself. The drawing is cut out along the contour - the template is ready. Next we move on to working with fabric:
- Using a template, cut out one piece of fabric from the first piece of fabric. We perform a similar procedure with the second and third pieces of fabric, but each next time we slightly increase the size of the sheet. As a result, we should have three fabric leaves different shades, each slightly larger than the previous one.
- Now we make loops - for this we cut out a piece of felt of a different color 8 cm long and 2 cm wide. We sew it with a “zigzag”, having previously folded it along the width. We bend the resulting strip and pin it to the largest piece of paper. Sew it on with a straight stitch.
- We stack all the blanks on top of each other so that the largest is at the bottom, the smallest is at the top. We pin them together with pins and hide the edges of the loop inside. We sew the sheet of paper on the machine in the middle - from bottom to top. Next, raise the foot and go over the sheet in one direction and the other a couple more times. This is the central wide vein. In the same way we form all the other veins of the leaf.
At this point, our autumn potholder sheets are ready. All that remains is to iron them and hang them in the work area of your kitchen. They will create a unique atmosphere of warmth and comfort in the room. Leaves scattered on the tables will not look like a mess - after all, this is real home leaf fall!

Potholders in the form of leaves
As you can see, decorating and revitalizing the interior of your kitchen yourself is quite simple. Why buy some decorative items if you can create useful little things for the kitchen with your own hands? In this review, we looked at several unusual and functional accessories that will make your life a little more comfortable and interesting. All the items presented are easy to make and do not require the purchase of expensive materials. Almost all of them can be done using improvised means. Go for it!