Ceramic roofing is very beautiful, but quite expensive. If you good master, you can try to save on installation. Now I will tell you how to lay ceramic tiles yourself.
Material calculation
To calculate the number of tiles, you need to know the size of the roof, but not only that. The tiles are laid with an overlap, the amount of overlap is determined depending on the slope of the slope:
- Up to 16 degrees – from 10 cm;
- Up to 30 – from 8;
- Over 30 – from 7.
Laying ceramic tiles on the roof it is done using counter-lattice and sheathing. The second serves as a solid base for the coating, the first provides the necessary ventilation gap.
For the sheathing, sawn coniferous timber with a maximum moisture content of 25%, without knots, is used (SNiP, paragraph II-25-80).
- The pitch of the sheathing (and therefore the number of boards) depends on the slope of the roof and on the model of the tile (order - from 30 centimeters);
- The minimum cross-section of beams for sheathing and counter-lattice is 3 by 5 centimeters;
- For complex roofs or long slopes use square beam with a side of 5 cm.
To calculate the amount of material and its final cost, you can use the services of our company.
Ventilation and thermal insulation
The technology for laying ceramic tiles involves a device ventilation system in the under-roof space. This is necessary to ensure that condensation does not accumulate inside the roofing pie, which leads to the destruction of the insulation and rafter system.
There are two options for constructing a roofing pie. In both cases, the main layers are the same:
- Vapor barrier (bottom layer);
- Insulation;
- Waterproofing.
The difference between single-layer and double-layer ventilation is that in the single-layer version there is only one air layer, directly between the waterproofing and the roof. Two-layer means the presence of two layers, the second - between the waterproofing and insulation.
The choice of technology depends on the waterproofing material. Only membranes with a vapor permeability of at least 750 grams per square can be placed directly on the insulation, which will protect the insulation from moisture and drain condensation to the outside.
note
The total height of the ventilation gap must be at least 20 centimeters. With a two-layer scheme, about two centimeters are left from the insulation to the film.Apart from the device air gaps For roof ventilation when laying ceramic tiles, special elements are used:
- Skates;
- Cornice.
The types of elements are different:
- Hard aerators;
- Rolled ventilation films;
- Ventilation grates;
- Ventilation tiles.
Elements are selected depending on the type and slope of the roof.
The brand of insulation and layer thickness depend on the region. Examples (for roofs in the Moscow region):
- Mineral wool P175 (thermal conductivity coefficient 0.072) – 40 centimeters;
- Fiberglass (coefficient 0.044) with a windproof membrane - 24 centimeters;
- Expanded polystyrene (0.032) - 15 centimeters.
Insulation and waterproofing
- The vapor barrier layer is attached to the rafters from the inside (from the ceiling) with vertical and horizontal overlaps of at least twenty centimeters.
- Fixed with wooden slats. In the future, when arranging the ceiling, the panels (boards) should not come into contact with the vapor barrier.
- The insulation is cut into blanks according to the width of the step between the rafters and placed between the rafters in a spacer.
Installation options for the top waterproofing layer
- Installation of the film directly onto the insulation is carried out with the steam-removing side facing outwards, i.e. towards the roof covering.
- The film should be rolled out along the cornice along the rafters, starting from the bottom row.
- The recommended overlap when installing the next row is approximately 10 cm for steep roofs. If the slope is less than 22 degrees, it is increased to 20 cm or the joints are taped with double-sided tape.
note
The film is secured with a stapler or roofing nails and finally fixed with counter-lattice boards.Other methods:
- When using polyethylene-based membranes, the film is pulled over the rafters with a sag of one or two centimeters. At the same time, at least two centimeters should remain from it to the insulation. In cold weather, the film is stretched without sagging.
- With a small roof slope (within 16 centimeters), a welded roof can be used as a waterproofing layer. To do this, it is necessary to make a continuous flooring and fill it with trapezoidal counter-lattice slats up to 5 centimeters thick.
Our works
Lathing and counter-lattice
- Along the rafters, on top of the waterproofing film, we lay counter-lattice bars approximately 1.3 meters long.
- We fix it with galvanized nails every 0.3 meters not higher than the marker line on the film.
- At the joints of opposite beams on the ridge, we saw the boards at an angle so that the joint is even. The angle of the cut will depend on the slope of your roof.
- Between the beams of the valley or hip ridge and the main counter-lattice we leave a ventilation gap of about 10 centimeters.
- We place the sheathing beams parallel to the earth's surface, starting from the overhangs.
- The step between the first two bars (on the overhang) is from 32 to 39 cm (measured along the outer edges of the bars).
- We place the third block under the ridge, at a distance of three centimeters from the joint of the counter-lattice bars. If the roof is steeper than 30 degrees - at a distance of two centimeters.
- We measure the distance between the second and third beams along their upper edges.
- We divide the resulting figure by the number of intermediate bars so that the step between them does not exceed the recommended parameters:
- Roof slope up to 22 degrees – 31-32 cm.
- Up to 30 – up to 33.5;
- Over 30 – up to 34.5.
We install the sheathing on other slopes in the same way.
How to lay ceramic tiles
Attention: in this article I will only tell you how to lay ordinary ceramic tiles, i.e. on the slopes. In addition to slopes, the roof has other nodes:
- Endovy;
- Ridge (except hipped roofs);
- Cornices;
- Connections (to pipes, roof windows, etc.);
- Gables have pediments;
- The hip and tent ones have ridges.
Another article is devoted to the installation of all these elements.
Tile laying technology:
- Check the roof prepared for laying ceramic tiles for deviations from the plane. For two meters of roof, deviations for sheathing beams should not exceed half a centimeter.
- Lay out the tiles on opposite slopes in columns of five to six tiles.
- Lay out two rows, top and bottom, without fastening. If the length of the roof and the width of the tiles are non-multiple numbers, use half tiles.
- Mark the outer rows of tiles on the sheathing. Additional marking - after 3-5 intermediate rows.
- The bottom row of shingles should extend beyond the roof by one-third the diameter of the gutter running under the eaves.
- Lay tiles from bottom to top. Secure the first row with 4.5 mm by 5 centimeter screws or anti-wind clamps.
- On gable roofs The tiles are laid in the direction from one end to the other.
- On the hips - from the middle of the slope, which needs to be beaten off with a marking cord from the top to the middle of the cornice.
note
You need to lay tiles on triangular slopes in the following order:
- Middle vertical row;
- Bottom horizontal row:
- Second row from the bottom, from the middle to the ridges;
- Third, etc. to the top.
Which tiles should be fastened with hardware?
- Bottom row (cornice);
- Upper (at the ridge);
- Lateral (at the ends and ridges);
- Any trimmed tiles;
- At the junctions.
If the area is characterized by high wind loads, all tiles must be secured.
For different models tiles, screws (self-tapping screws) 4.5 by 50 galvanized or universal clamps made of stainless steel can be used.
Laying ceramic tiles with your own hands is a long and energy-intensive process that requires highly qualified installers. Moreover, we are talking about expensive material.
At our company great experience laying roofing coverings, ceramic tiles are no exception. Entrust this matter to us, and you will receive a beautiful, high-quality roof quickly and inexpensively.
There are tabs on the back of the tiles for locking purposes. At the top there are holes measuring four millimeters. Through these holes, the ceramic tiles are attached to the sheathing using self-tapping screws. To secure it, you need to use self-tapping screws that do not rust, so that there are no leaks later.
The fastening of the tile sheet is not done too tightly. With this step, you don’t have to worry about reducing the size of the tiles due to changing weather conditions. In order to trim, you need to use a grinder or a hacksaw for cutting metal.
Installing tiles near the ridge
In order to secure the tiles to the ridge, you need to use a self-tapping screw measuring sixty-five millimeters. It is necessary that there are gaps between the top of the screw, the board and the ridge. This is done so that when the tiles expand due to weather conditions, the self-tapping screw does not burst. The tiles that lie on the ridge should cover the edge of the last row.
Attached to the article are 2 videos in which you can more clearly study all the aspects of laying tiles. We also recommend that you familiarize yourself with the process of laying tiles on the website of the tile manufacturer (in this case, Braas).
Drainage system
To use all the characteristics of the tiles, the installation of a water supply system (unorganized) is provided. Such a water supply system is installed on low buildings that have only one slope on the roof. You can also use organized water supply. This type of water supply is made of galvanized steel. This steel is coated with PVC polymer. Organized water pipes can be purchased at the store.
Ceramic tiles made by craftsmen from Germany. Roof tiles are the oldest construction material known to mankind and used today. The process of making clay tiles includes four stages:
- The clay blank is poured into molds;
- Drying takes place in special places;
- Covered with a special coating of minerals and clay;
- They burn this ceramic product in an oven at a temperature of about one thousand degrees.
In Russia, the most commonly used tiles are those made by German companies, as they are of higher quality, but tiles from Austria are also sold. This best roofing material has its advantages:
- Reliability (will protect against unforeseen circumstances);
- Durability (will last quite a long time);
- Has an aesthetic appearance (looks great);
- It is fireproof (withstands high temperature fire);
- Withstands changes in temperature and climate (not afraid of frost and heat);
- Resistant to ultraviolet radiation;
- Does not transmit sound.
Natural ceramic tiles are rightfully considered one of the oldest roofing coverings. During this time, it has proven excellent performance characteristics, such roofs last for many decades, or even centuries.
Modern technologies and materials have allowed manufacturers to significantly improve the characteristics of ceramic tiles and eliminate traditional disadvantages. One of the disadvantages was considered to be greater complexity and labor intensity. roofing works. Now this problem is not considered urgent; designers have developed special locks, which not only make laying tiles easier and faster, but also significantly increase the reliability, durability and tightness of the roof.

Ceramic tiles belong to an elite coating; such roofs can only be seen on prestigious houses, historical or religious buildings. Ordinary consumers are of little interest in the technology of installing tiles, but they all pay attention to appearance. And it depends on two components.
Prices for ceramic tiles
Ceramic tiles
Geometry of tiles
The more complex the geometry, the more expensive the material. The fact is that the productivity of industrial equipment largely depends on geometry, and this factor has a decisive influence on production costs.
What profile can the tiles have?
- Flat. The simplest profile and the cheapest tile. Manufactured on continuous pressing lines with further piece-by-piece cutting. Disadvantage: the strength of the fastening is questionable among some developers, and big square overlap reduces useful dimensions each tile.


- Tray. Traditional European material, often used in places of worship and monasteries. Hence the second name “Monk-Nun”. By all operational parameters superior to flat.

- S-shaped. It occupies a leading position in the tightness of the coating, original form completely eliminates the wetting of the rafter system due to slanting rain.


There are differences between the types of locks for fixing individual tiles, but they do not affect the installation technology.

Ceramic tiles are a piece of roofing material that has many advantages over other coatings. For example, the service life of a tiled roof is hundreds of years. You can learn more about the advantages of tiles, their disadvantages and characteristics
Features of processing external surfaces
IN old times ceramic tiles had only one color, which depended on the chemical composition of the clay. Currently, technology has gone so far that it has enabled manufacturers to change not only the color, but also the physical characteristics of the finishing front surfaces of the tiles.
| Type of outer covering | Short description |
|---|---|
| This is the natural color of clay obtained after annealing. Depending on the annealing temperature and the chemical composition of the clay, it can have several shades. The natural color is indicated by the surface of the tile - it is slightly rough, much like the surface of facing red brick. |
| This color is achieved by complicating the production technology roofing material and allows you to achieve the most identical shades of different batches of tiles. The fact is that slight differences in colors create difficulties during installation. It has to be constantly stirred, otherwise large spots with multi-colored shades may appear on the roof. This significantly worsens the appearance of the building. To eliminate such phenomena, a special clay milk with a stable chemical composition. After firing, the surface of all tiles becomes completely identical. |
| The most complex treatment of the outer surface of the tiles significantly improves all the performance characteristics of the roof. The disadvantage is a significant increase in cost. Glazed tiles are fired in two stages. At the first stage, only clay is fired, then it is applied special composition and the tiles are again fed into the kiln for re-firing. |


Modern ceramic tiles resemble traditional ones in only two things: the name and the material used. All other characteristics: appearance, size and shape, physical and operational characteristics differ significantly. Laying technology has also undergone significant changes; now work is done much easier and faster. But this does not mean that installing ceramic tiles is as easy as metal roofing. As before, such work can only be performed by the most experienced, responsible and conscientious roofers.
Conventionally, the technology can be divided into two large and equally important stages: preparatory and main.
Preparatory stage
At this stage, the technology provides for the construction of a rafter system, sheathing, special layers of waterproofing, etc. Let us consider these works in more detail.

To install the tiles, you need to prepare measuring instruments, a grinder with a diamond blade for cutting tiles, a screwdriver, pliers and pliers, a stapler and a hacksaw for wood.

Important. During installation, be sure to follow safety rules, work with safety systems, and protect your respiratory and vision organs.

Step 1.

To do this, you need to find out the number of columns (vertical rows) of the tiles. In this case, it must be taken into account that the extension beyond the outermost side rafters should not exceed 33 cm.

Make your calculations very carefully, tiles are expensive material, excess Negative influence for the total estimated cost of the roof.

Each slope must be calculated separately, taking into account the nomenclature and number of special additional elements and tiles, the need for cutting, the length of ridges and valleys, the presence of chimneys, ventilation pipes and other utilities. Then the data is summarized and only after that the material is purchased. Elements of the drainage system are purchased separately.
Step 2. Installation of drip. It is needed to drain condensate that gets onto the protective membrane. The element is nailed along the entire length of the cornice with an overlap of approximately 10 cm. When joining in valleys metal strips are cut at appropriate angles, the amount of overlap depends on the angle parameters.


Step 3. Installation of sheathing in valleys. These are very complex and most dangerous areas of the rafter system; it is here that leaks most often appear and rot prematurely wooden structures. In the valleys, nail diagonal counter-lattice bars to the rafter legs; the lower ends should be sawn flush with the metal cornice strips. A waterproofing system must be installed in the valley; any modern fabric can be used.


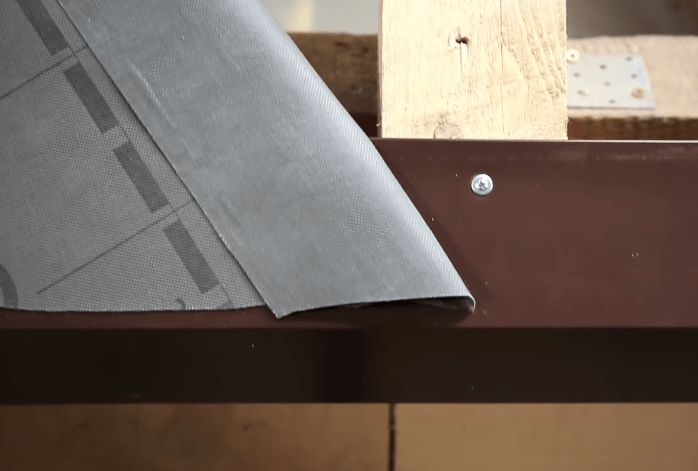
Step 4. Nail the membrane along the entire length of the slopes, direction from bottom to top, overlap within 10–15 cm. The canvas is fixed to the rafters with a stapler. The membrane is glued to the drip edge of the eaves with double-sided tape. Avoid wrinkles.

Step 5. Nail the counter-lattice bars; they are fixed to the rafters on top of the membrane.


Practical advice. The length of the bars is no more than 1.5 m, leave holes for ventilation between them natural ventilation under-roof space.
In order to make it convenient and safe to work on the ramp, a temporary counter-lattice can be nailed to the bars in several places; it is used only for the movement of workers. Subsequently, as the main counter-lattice is manufactured, the temporary bars are removed.

Step 6. Cover the valley and ridge on the second side of the slope. The overlap of the material on the triangular slope should be approximately 5 cm. The top row is always laid on the bottom, the overlap in these places is at least ten centimeters.

Laying material on the roof ridge
Step 7 Mount the counter-lattice on triangular and rectangular slopes. If the roof is a complex hip roof, then bars are nailed on the ridges along the joint line of the slopes, then vertical bars of the counter-lattice are nailed in, be sure to leave a gap between them and the diagonal ones for ventilation.

Step 8 Nail the bottom batten of the sheathing along the perimeter of the roof along the eaves; at the joining points it must be filed down for a tight connection. Use perforated tape to close the ventilation gap.

Installation of bottom bars

Step 9 Installation of the bottom sheathing. This is a more complex and very important technological operation that requires very careful marking. First you need to know the exact position of the bracket for fixing the gutter and tiles of the first row.

Do not forget that the overhang of the tiles into the gutter should not exceed a third of its diameter. Specific values are further adjusted depending on the vertical distance between the gutter and tiles.
After the fitting has been done several times, finally mark the position of the sheathing batten under top part tiles. Nail the counter-lattice bars only to a level; they must be strictly horizontal.
Step 10 Nail the top ridge bars of the counter-lattice. Place them at a distance of 3 cm from the ridge line. It is better to do the final marking of the position of the bars along the entire slope using a special beating rope.

Step 11 Installation of sheathing on slopes. First, distance calculations and markings are made. Take these operations very seriously, everyone depends on them further work for laying the roof.

Important. Calculation of the counter-lattice must be done in such a way that entire rows of tiles must fit on the slope. Such work can only be performed by professional roofers; amateurs should not try to do it. The consequences of the mistake are the need to completely dismantle not only the roof, but also the counter-lattice.
Prices for safety belts from various manufacturers
Safety belt
How to make calculations and markings correctly?
- Measure the distance between the lower support bar and the last one near the ridge.
- Remember that the distance at the overhang should be within 32–39 cm, in other areas the lathing pitch is 31.2–34.5 cm. Parameters may vary depending on the manufacturer, the exact data is always specified in the instructions.
- Divide the resulting length by the size of the allowable step so that you get a whole number of rows.
- Using a tape measure, make marks on the first and last vertical slats of the counter-lattice.
- Marking the rows must be done with a special marking cord. Beat off your own lines for each row of counter-lattice.

Please note that during the manufacture of counter-lattice, roofers never use templates, but mark the position of each bar individually. This algorithm of actions significantly reduces the likelihood of errors. This completes the first stage, you can proceed to the second.

Tile laying technology
Installation of tiles begins after installing the drainage system, or at least after screwing in the gutter hooks. Each manufacturer of drainage systems recommends its own technology; you should read the instructions and follow its requirements.


Step 1. Work should begin with the valley gutters; they divert water to the spillways. The elements are fixed to the sheathing with special brackets in increments of ≈30 cm.


Step 2. Install the first gable shingle on the gable overhang.

Important. On the back side of the tile there is a special support spike, its presence is caused by technological features production. This tenon is not needed for the first row; it should be carefully knocked down with a hammer. Be careful not to crack the surface of the tiles. If the spike is left in place, it will interfere correct installation coverings.
Step 3. Mark 90 cm from the edge of the gable tile to the left. This is the distance between the three vertical columns of the tile. Make such marks along the entire length of the slope, then, using string, apply markings along the entire height of the roof. The lines will help to constantly monitor the correct position of the tiles, which simplifies the installation of the roof and makes various technological errors unlikely.
Step 4. Lay out the first bottom row, attach each tile to the sheathing batten with nails or self-tapping screws. To do this, you need to drill holes in the comb.

Step 5. Lay out the vertical column of the gable row. All gable tiles also need to be fixed, but with at least two self-tapping screws.


Scheme of laying tiles, correct trimming. Pink color showing tiles sawn in half lengthwise
Carefully check the position of the rows you have made. Everything is normal - excellent. Then the tiles are laid out from right to left from bottom to top. Nothing is nailed down in these areas, which greatly speeds up the process of covering the roof. In areas of valleys and at the ridge, the tiles again need to be screwed. The ridge elements are fixed with special devices.


Fastening the center beam and tiles near the valley


Laying the first shingles on the ridge


Laying tiles on a ridge. Fastening the lower edge tile of the ridge
Prices for popular models of screwdrivers
Screwdrivers
Video - Technology for laying ceramic tiles
It is no secret that ceramic roofing tiles have earned their wide popularity among many developers due to their technical and aesthetic qualities. This can be confirmed by at least its service life, which can reach one hundred years. Thus, the production of ceramic tiles is carried out using sintering natural materials, therefore the coating is able to withstand absolutely any impact from natural factors. Of course, like any material, ceramic tiles also have some of their disadvantages, the main of which are the rather labor-intensive installation of a roof made of ceramic tiles, or rather, its individual elements, as well as the need to clearly and strictly follow the requirements of the installation instructions.
Getting started with the installation of ceramic tiles
When starting to work with a material such as ceramic tiles, its installation can be divided into two main stages. During the first stage, all calculations are performed and the bulk of the required materials are prepared, and at the second stage, the installation itself is carried out.
Required quantity of ceramic tiles for roofing
When for a room such as a bathhouse, the roof may include one, two or more slopes located at different angles. The installation of tiles is carried out according to the overlap-overlap principle, the size of which is influenced, first of all, by the angle of the roof slope. If you subtract from the entire length of the ceramic part the segment that is necessary to form the overlap, you will get a value called the useful length of the material. The useful width is usually indicated by the manufacturer in the instructions supplied with the material.

Having received all the necessary data to calculate the area, you should calculate how much material is required for 1 m² of roofing. The obtained data should be rounded up, which is justified by the need to trim part of the material.
After this, to the already prepared data you need to add another tiled row, which is required for “combat” and trimming. It is also important not to forget to calculate the numbers that are necessary for the construction of the skate and.
Calculation of the amount of waterproofing material
If you are installing ceramic tiles yourself, it is worth remembering that if the roof slope is 22 degrees, then it is necessary to lay a layer of waterproofing. It is best to use for this roll material, which is laid according to the principle of overlapping canvases at a distance of 10 centimeters, letting in pediment and pitched overhang lines of 15 centimeters, observing overlaps through the corners protruding on top of 15 - 20 centimeters. To calculate the required amount of material, you need to multiply the total pitched area by 1.4.

Laying the waterproofing membrane at a distance of 30 centimeters from the ridge can guarantee normal ventilation to the structure. The ridge itself must be equipped with a special insulation tape.
In the area of the chimney passage and the junction of the walls, it will be necessary to leave an inlet if the bathhouse on which the roof is mounted is attached directly to the room.
Calculation of parameters of sheathing and rafter legs
Thus, the equipment for the production of ceramic tiles works in such a way that the normal weight of natural tiles, which falls on 1 m² of roof, is 40 kilograms. Here you also need to add the potential load of snow, especially this applies to specific regions with snowy winters. That is why, when equipping a rafter system, it is important to approach the process very carefully and perform it in such a way that it is powerful. But there is no particular need to use exclusively thick timber; it will only be possible to reduce the installation step of the rafters. The best solution For rafter leg there will be a beam having a rectangular cross-section of approximately 75x150 millimeters. It would be more correct to install mounting trusses every 60 - 90 centimeters.

For the installation of a lathing system, a timber with parameters of 50x50 millimeters is suitable, but you can also use a rectangular analogue (40x60 millimeters).
The rows of sheathing should be the same number as the horizontal rows of shingles. Another row is also added here, which will run along the overhang of the cornice.
Fastening ceramic tiles
The main elements for fastening the coating are zinc-treated screws and special clamps. Sheets of ceramic tiles must be carefully fixed in those places where the wind load is increased. It is imperative to fix the bottom row, which runs along the eaves line, as well as the row located along the ridge and pediment. If the work on laying the material is carried out on a roof whose slope is more than 50 degrees, then the ordinary elements should be additionally secured according to the staggered principle. With this arrangement, one element of the tile can support the neighboring ones located above and below.

Verification as part of the preparation phase
In order to avoid any errors during the construction of the sheathing system, such as those associated with misalignment of the material, the parameters of the installed rafter system must be measured before the actual installation begins.
- First, the direction in which the horizontal laths are located is adjusted, placing them according to the fan principle. In this case, the space left between the slats should increase towards the larger gable.
- Any deviations in the vertical direction should be removed using the same fan principle, forming a slight backlash of parts in the desired direction.

It is worth starting testing work with pitched diagonals. Provided that their parameters differ from each other, each side of the slope should be measured separately.
Installation of ceramic tiles, details in the video:
The process of laying ceramic tiles
When installing natural tiles on a base of waterproofing and insulation, it is important to equip the roof with two gaps intended for ventilation. The first of them should be located between the thermal and waterproofing membrane, and the second - between them and the coating. With this method of installation, all elements of insulation, wood, as well as the tiles themselves can be freed from excess moisture, as a result of which the service life will be significantly extended.
- The first of the ventilation gaps can be installed either using a sheathing device or by laying an edged board 5 centimeters thick along the ridge.
- The counter-lattice device is designed to provide the second gap.

The order of laying ceramic elements:
- Initially, without any fastenings, rows are laid along the ridge. If it is not possible to make a series of whole parts, the ceramic elements can be cut using a grinding tool equipped with a stone cutting disc. Pruning should only be done on the ground;
- The installation lines of vertical columns are marked through pre-prepared directions. It is important to outline the line of the pediment and then the lines located after 3 – 5 vertical rows;
- The tiles must be fixed only in accordance with the instructions provided by the manufacturer. It is best to start laying from the lower right roof corner and move to the left and up;
- It is important not to forget about the arrangement and fixation of additional parts intended for the pediment and ridge. Edged board, mounted on a ridge, should not have points of contact with ridge tiles. The elements are adjusted to each other by trimming;
If you've ever looked at a good-quality clay tile roof, you've probably wondered: what holds all the shards together? Don't they fly off for an hour? How many people do you need to install natural tiles at such a height, and is it really possible for just one or two people to do it? And do skill and experience play a big role in such a process?
Such questions always arise for those who decide on this beautiful and centuries-old roofing covering. After all, with fragile modern analogues everything is more or less clear: cut, stick, secure with a self-tapping screw - and everything is ready. What to do with such heavy weight elements as ceramic tiles, what to fasten them with and how to ensure the safety of people below?
Yes, of course, from century to century roofing masters passed on and improved their experience, but they also baked shards individually and by hand. A modern manufacturers They not only established large-scale production, but also completely changed the approach to installing tiles, for which they showed ingenuity and added special accessories.
Where to start then? We will now try to illustrate the entire process in as much detail as possible.
Let's start with the most important thing - design. In addition to the shingles themselves, you will need waterproofing substrates, an eaves overhang and a ridge with a valley:

Think in advance which of these elements you will need, how many tiles will be used for the slopes (calculate by area, and for 1 square meter the consumption is usually 9-15 shards).
And also decide right at this stage whether you will use in the future attic space as residential, because the structure of the roofing pie itself depends on this:

Stage II. Assembling the rafter system
Competent and high-quality installation is one of the most important conditions durability of tile roofing. Let's look at its main stages. Let's start with the preparatory work.
Before laying the tiles, be sure to check the geometry truss structure, measure the diagonals and compare their lengths. Any unevenness must be leveled out because tile locks have an extremely small range of motion.
Those. You won’t be able to correct defects using the roofing itself, unlike soft roof, which can go around any radius.
Therefore, arm yourself with a two-meter strip or cord and check all planes. The deviation should not be more than 5 mm along a length of 2 m. Now, for convenience, arrange the tiles in stacks of five or six pieces on opposite slopes to create a uniform load on the rafters.
If you have decided on the roofing pie, proceed to installing the rafter system. The optimal rafter pitch is up to 75 cm, because natural tiles have quite a significant weight.
The sheathing is the base on which the tiles rest, so it is important to correctly calculate the sheathing pitch so that you get a whole number of tiles on the roof. Therefore, using a level, make sure that the beam is located strictly on a horizontal surface. Use softwood beams, without passing knots and wane. For rafters that are installed in increments:
- no more than 75 cm, take bars with a section of 30 by 50 mm;
- exceed 90 cm, bars 40 by 50 mm are needed;
- if the rafter pitch reaches 110 cm, then the bars should measure 40 by 60 mm or 50 by 50.
To make the correct marking of the rows, a marking cord is used. It is pulled according to the marks made.
Consider especially carefully the location of the counter-lattice where the attic window will be located:

Now proceed to installing the eaves strip or drip line, the task of which is to remove condensation and prevent the wooden structures from getting wet.
Installing drip pipes is generally the simplest of all installations:

Stage III. Installation of waterproofing and sheathing
Once the base is ready, proceed to the waterproofing device:
- Step 1. Nail the bars on both sides of the valley to the rafter legs.
- Step 2. Place the waterproofing membrane on top of the counter-lattice, always with the inscription and the front surface facing up.
- Step 3. Trim it along the edge of the eaves overhang with a margin of at least 15 cm. Lay it starting from the lower right corner and fix it with a stapler, aligning it with the drip line. Double-sided tape will help you with this.
Here's what it looks like in practice:

Now nail the counter-lattice directly to the rafters, on top of the membrane, at approximately 30 cm intervals. Ventilation gap Cover under the light eaves with perforated ventilation tape.
To find out the optimal position of the bottom support sheathing, you need to try on the shingles from the bottom row and the gutter bracket. The support sheathing beam should be fixed at a distance of 32 to 39 cm from the bottom edge:


At this stage, it is very important to properly waterproof the gable overhangs:

By the way, to make the gable overhangs look beautiful, special side tiles are attached to them.
You can also resort to traditional way, arranging the pediment with carved boards, which are also called piers. They just need to be treated with an antiseptic and protected with a metal apron.
Stage IV. Gutter installation
Now install the gutter on the pre-mounted mount. Attach a clamp to the wall of the building drainpipe and assemble the elbows with connecting elements.
Cover the ends of the gutter on the gables with a universal cap so that the gutter does not interfere with the installation of the lower gable tiles.
And connect the straight elements of the gutter with a connecting element and close with inner side using clamps that are attached to the additional sheathing:


Stage V. Working with the valley
Lay the valleys starting from the eaves overhang, from bottom to top. After laying, it can be trimmed by 3-4 cm to prevent the groove at the top from slipping.
If you need to choose the exact size of the valley, then follow this simple principle:
- if the length of the valley is no more than 4 meters, the width of each half should be 20 cm, and when unfolded, about 55 cm.
- if the valley is long enough, more than 4 meters, then in the unfolded state the steel sheet should be at least 66 cm wide.
Secure the valley to the sheathing with two screws. Trim the tabs on both sides for a tight fit, secure with self-tapping screws, and seal their joint with sealing tape.

At each edge of the valley groove, install a self-adhesive foam rubber strip with water-repellent impregnation.
On both sides of the valley, along the entire eaves overhang, an overhang aero-element is attached, which should not extend into the valley further than 10 cm from the edge of the groove, otherwise it will trap debris, fallen leaves and snow melting there.
Make sure that the visible part of the valley is at least 13 and 15 cm. The fact is that if the groove is completely covered with tiles, then rainwater will accumulate in it.
Stage VI. Laying tiles on slopes
So, now that everything is ready, try on the gable tiles on the gable overhang, which should lie with a gap of 1 cm from the front board.
On the sheathing, mark the left edge of the pediment tiles, and to the left of it, mark the position of future columns after 90 cm, at the rate of 30 cm per column.
Using string, apply these markings to the sheathing. Now lay out the lower first row of tiles freely, while carefully checking the position of every third tile using the previously made marks.
The support spike, which will rest on the front board, needs to be knocked down with a hammer, as in this photo master class:

Now fasten each tile of the bottom row with a self-tapping screw through the holes drilled in the ridge, and lay out the first column of gable tiles along the previously marked vertical line. At the same time, fasten each tile at the top with two screws.
After this, lay the tiles on the slope, from bottom to top, along the vertical markings applied to the sheathing:

To walk on a tile roof, all you need is a harness—you can step on it anywhere. Laying and marking tiles on hipped and hip roofs start from the middle of the slope. To do this, you will need to find the middle of the triangle: simply lay out a vertical row of tiles from the very top, right in the center, and now lay the bottom row.
After this, mark the vertical rows where you can, and lay the tiles from bottom to top, in rows, starting from the middle of the slope towards the ridges.
Stage VII. Fixing tiles using different methods
Now let's talk about fastening the tiles. Up to 60 degrees, most of the tiles do not need to be fastened at all; only the bottom row on the overhang, the top ridge rows and the side gable rows must be fixed.
They also fasten all the trimmed tiles, which are usually located on the valley, ridges and adjacent to the walls, roof windows and hatches. In regions with strong winds the shards are additionally secured with wire.
But groove tiles, which are also called castle tiles, are produced separately. It has the largest area and profiled shape, and this tile differs from others in the presence of locks.
The locks consist of two edges, top and side, which overlap the adjacent ones, snap into place and ensure reliable tightness of the coating. In addition, at the bottom, such tiles have protrusions that, during installation, cling to the sheathing bars.
The most popular models of such tiles are double S-shaped, Dutch and S-shaped Marseilles. Most of them have sliding locks, so the shingle periods can be made as wide or as narrow as possible. Thanks to the presence of such sliding locks, the tiles fit perfectly into the existing spacing of the bars, and there is no need to trim them:

In addition, basically all tiles today are produced with two manufactured holes for screws. They are not end-to-end, it is worth noting.
Therefore, if you decide to fasten the tiles, then these holes need to be drilled with a 6 mm drill and fixed at the top to the sheathing using two anti-corrosion screws 4.5 by 50 mm, and at the bottom with anti-wind clamps.
Also, if the slope has a length of more than 4.5 m, additional ventilation tiles must be installed on it. This is placed in the third row, in increments of 1 meter. If the slope is more than 7 m, then the ventilation tiles are laid in two rows:

Ventilation tiles are also needed where chimneys or skylights, because they create obstacles to air circulation under cover.
Stage VIII. Window bypass and waterproofing of junctions
There, natural shingles go around the skylights, you will most likely need half shingles (unless you timed everything perfectly). Place it next to the others and try to close the joints as much as possible.
We have prepared for you a detailed master class on waterproofing the junctions of natural tiles with windows and chimney pipes, so that you can understand all the intricacies of such work:

Here is another example of how to “fit” a window into a tiled roof:

Stage IX. Trimming tiles for valley joints
To correctly lay the tiles in the valley, use a string on the groove to mark the hanging line so that the overlap of the tiles on the groove is 8-10 cm. After this, cut the tiles at an angle along the marked line. Just don't use small, triangular pieces of shingles that are difficult to secure.
To move the column and ensure quality fastening, you will need half shingles. Approximate consumption – 1 piece for 2 rows:

For convenience, first number the cut tiles and remove them from the sheathing. To cut tiles, we advise you to take a miter saw with a power of 2 kW and a diamond blade with a diameter of 22.23 cm, which is specially designed for dry cutting of heavy concrete. Protect your eyes with goggles or your face with a respirator.
By the way, accuracy will be achieved on a water-cooled machine. Wash the cut tiles with water to remove dust and let them dry. Since you will not cover the cut edges with anything, cover them with cold engobe to match the color of the roof - this is sold immediately with the tiles.
To properly secure the cut tiles to the ridges, use special stainless steel clamps. These clamps come in two types:
- anti-wind, which attract the tiles to the sheathing;
- universal, which support the tiles in weight.
The wire fastener is screwed to a nail, which is driven into the nearest lath. And sometimes the wire is used so thick that it itself is driven directly into the sheathing instead of a nail.
Stage X. Installation of ridge tiles
To install a natural tile roof ridge, follow our detailed master classes. Here's how to install a ridge on a ceramic tile roof:

If you have a residential attic under such a roof, then use an aero element with largest section for ventilation it is “Figarol”. If in the under-roof space there is only cold attic, then ventilation will be provided by any other aero element.
To install ridge shingles, bend the beam holders so that when installing the beam, the distance from the top edge of the beam to the top edge of the rafter matches what you previously measured.
Trim the tiles so that the gap remains 2-3 cm. Fasten the trimmed tiles to the sheathing with corrosion-resistant 4.5 and 50 mm screws, or directly to the ridge using copper wire. Special stainless steel clamps are also suitable.
You will need to place one holder at the end and the beginning. After this, tighten the lace and install the intermediate fastener directly along it.
Stage XI. Fixing the spine tiles

The installation of hip roof ridges begins with the installation of spine bars. To calculate their height, you need to lay two ridge tiles on top of the rows. Start measuring from the narrow end. The spine block should be lower than the ridge tile so that it rests on the waves nearby. Leave at least 1 cm between the spine bar and the inner surface of the ridge tiles.
Now be careful! Metal fastenings The spine beam needs to be bent and installed at the beginning and end of the spine. Mark the intermediate brackets along the lace in increments of no more than 60 cm.
Install the backbone beam directly into the mount and secure with nails or self-tapping screws. To ensure ventilation of the roof, cut the tiles on the ridges diagonally with a gap of 1-3 cm from the ridge beam and secure them with clamps, which are secured with screws on opposite side:

On a triangular slope, mark the middle of the slope on the lowest and highest sheathing, and from this mark, to the right and left towards the ridges, lay out the bottom row. Lay out all the following rows as well, starting from the center.
To ventilate the under-roof space, you can use Figarol roll material. Roll it along the axial tape for the backbone beam and secure it with a regular construction stapler, in increments of 30 cm.
Remove the protective tapes from the rubber strips, press the material on the sides with a roller (just do not press the central part). At the top of the hip, “Figarol” is laid with an overlap on another slope.
 Start installing the initial spine tiles with a slight protrusion, and secure with two screws with plastic washers through drilled holes in the upper and middle parts of the tiles.
All upper spine tiles must be trimmed at the top of the hip along the joint line. Simply lay the hip tiles on top, and their outline should be marked on the ridge tiles so that they are cut 6 cm above this line. And finally, the finishing work. Lay out the ridge tiles on the ridge in the same pattern as on the hip, the only thing is that the tiles that go to the valley need to be trimmed on both sides.

To create a beautiful roof spine, use starter spine shingles. It should be installed with a small allowance and secured with galvanized screws 5x70 or 5x100 mm.
Stage XI. Additional roofing elements
pay attention to proper organization eaves overhang, which must correspond to all technical requirements: collect water and provide air access to the under-roof space for high-quality roof ventilation. And also not to be devoid of aesthetic appeal.
Additionally, a ventilation tape and a cornice aero element are installed here:


At the finishing stage, the ends of the slopes are covered with a protective strip made of steel sheet. Further along the length of the rafters, at the edge of the eaves overhang, an aero-element against birds is fixed, if the rafters are less than 8 meters, and a rigid profile with perforation, if the rafters are longer than 8 meters. At the same time, it supports the bottom row of tiles.
As you have already seen, old and modern technologies They combine perfectly with each other and allow you to build houses without losing the spirit of their history, while taking only the best from centuries of experience.