If something in old furniture is broken or it has lost its appearance, this does not mean that it is necessary to change it. Furniture can be restored, any furniture, including kitchen furniture. To begin with, it is important to determine what exactly is broken, whether it is possible to fix it, whether the repair will be temporary or whether the furniture can still last for a long time. If the set is made of good quality material or only the correction of cosmetic defects is required, repairing kitchen furniture with your own hands is justified. Especially it concerns wooden furniture, it can be repaired repeatedly. But more affordable furniture made from MDF and chipboard can also be repaired when, for example, you need to improve the appearance of the facades.
Cosmetic repair of kitchen furniture
Usually, the kitchen loses its appearance the fastest, and this is most noticeable on the facades. If these are MDF facades, then in some places the film comes off (the ends of the facades are vulnerable spots), scratches appear, stains appear from various contaminants, for example fat, the coating changes color and becomes uneven in tone.
Restoration of minor damage
Minor damage includes chips, scratches, and abrasions.
- Chips are removed using wax. The chip, pre-aligned along the edges, is filled with molten wax, sanded, and then painted over with special felt-tip pens, selecting colors. Then they fix it finishing layer varnish
- The abrasions are rubbed out soft cloth made of microfiber, on which dye from a felt-tip pen is applied.
- Scratches are polished with furniture wax.
- If any parts come apart, coat the edges with PVA glue and press them together with clamps.
It happens that the edge of the table top comes off, or kitchen table. It can be replaced with a new one that matches the color. To do this you will need the edge itself, scissors, construction knife, iron.
- The edge is cut into pieces according to the dimensions of the tabletop, with small allowances. First, blanks are made for the long sides, then for the short ones.
- Then the iron is adjusted so that the edge does not overheat and swell.
- The edge is applied evenly to the end. For convenience, you can place the tabletop with the end up.
- An iron is moved along the edge with uniform, leisurely movements, as a result of which the glue melts and the edge is glued to the end.
- While the glue has not cooled, you need to press the edge to the tabletop, ironing it with pressure along the edge with a piece of felt or a rag.
- The excess edge at the corners is trimmed with scissors and trimmed with a knife.
- The excess edge at the top and bottom, if it does not fit in width, is cut off with a knife, gradually, towards the tabletop. And then they go through it again in one motion, placing the blade at an angle of about 45 degrees to the tabletop.
- Corner joints are lightly sanded with fine sandpaper.
Video: restoration of a burnt tabletop
The film is swollen and peeling off
The peel-off film can be glued back if this drawback is minor. Regular PVA glue is suitable for these purposes. The main thing is to get to all hard-to-reach places.
Video: gluing shrink film with PVA glue
When the problem becomes global, the film will have to be removed. This is done as follows.
And after that, two options are possible: either paint the facades or glue a new film.
Painting facades
If you decide to paint, the facades will need to be sanded to remove any remaining adhesive and level the surface. This applies to both MDF, chipboard and solid wood. In places where the cutter passed, the material may be rough. To prepare for painting, professionals recommend taking:
- sandpaper P220-280 on foam rubber. It takes shape better and can be used to sand complex curves;
- Scotch Brite P220-280 is a non-woven abrasive material somewhat reminiscent of felt. They go through hard-to-reach places;
- antisilicone - acts as a degreaser;
- primer for plastic (also suitable for wood);
- epoxy primer - needed for good adhesion;
- acrylic primer - pore-filling, for leveling the plane;
- solvents.
If there is gloss on the facade, it is necessary to knock it down over the entire plane to achieve a matte finish. Then carefully remove dust from the surface, degrease it and apply a primer for plastic. Then prime with epoxy primer, let it dry for 3-4 hours (if there are no paint coating, this step can be skipped) and primed with a pore-filling primer, sanded, preparing the facades for painting.

Spray paint is often used as a dye. When painting facades, first go through the ends, then apply the paint in a smooth motion from side to side, moving from bottom to top or top to bottom, overlapping layers.
Decoupage
A popular way to update furniture is decoupage. It is typical for rustic styles interior, especially Provence.
 |
The first step is to unscrew the handles from the facades. |
 |
If there are any defects, they are eliminated. |
 |
You can use a remover to remove the paintwork. After applying the product with a brush, cover the facade with film. |
 |
Then, after waiting time, according to the instructions, the varnish is cleaned with a spatula, removing the film as it is cleaned. Allowed reuse washes. |
 |
Sand the surface well and remove dust with a damp cloth. |
 |
To achieve transparency of the paint, mix white acrylic varnish and white acrylic paint. Paint in the direction of the wood grain. |
 |
The design must be carefully cut out along the contour with a stationery knife, adjusting it to the size of the plane. To arrange the elements symmetrically, control the distances using a measuring tool. |
 |
Apply a napkin and apply PVA glue on top of it. |
 |
Then, after the glue has dried, the surface is covered with fine sandpaper. |
 |
Apply a thin layer of acrylic varnish. Sand and varnish again. |
 |
Additionally, the facades can be decorated with putty. The composition is prepared as follows: mix oil putty with PVA glue, achieving the consistency of sour cream. Attach the stencil to in the right place and putty is applied over the stencil with a spatula. |
 |
The resulting ornament is sanded with fine sandpaper. If desired, you can tint the putty. This area is then coated with white acrylic varnish. |
 |
Then a matte yacht varnish is applied to the surface. |
Gluing self-adhesive film
If you want to give MDF facades a certain texture is used self-adhesive film. Before gluing the film, the facade is prepared as before painting. It is important to apply the film carefully, avoiding the appearance of bubbles.
- First, cut out a suitable piece of film with allowances of 2 cm on each side. Then the film is applied evenly to the edge of the facade, having first removed 5-10 cm of the protective strip.
- Glue the material in small areas, smoothing and gradually removing the protective film.
- If bubbles do form and cannot be expelled, you need to puncture them and release the air.

Replacing the countertop
A chipboard tabletop sometimes becomes completely unusable if, for example, it is swollen from water. In this case, it is not necessary to order a new one. You can make your own countertop from tiles. Such countertops, firstly, are durable, and secondly, you can choose almost any design. It is fashionable to lay out a mosaic tabletop.
 |
The base of the tabletop is extruded polystyrene foam. It is installed on liquid nails. |
 |
First, liquid nails are applied to the base, then sheets of polystyrene foam are laid. |
 |
A metal plinth is installed on liquid nails to protect the ends of the tabletop. |
 |
Then the corner plinth |
 |
and a thin baseboard for tiles. |
 |
Then apply tile adhesive to the countertop. |
 |
The same is done with tiles. And glue it to the tabletop. |
Broken mounting holes
Chipboard tends not only to swell from water, but also to crumble under load. Due to frequent inaccurate opening of cabinet doors, self-tapping screws break the holes and are pulled out, as they say, “by the roots.” It is impossible to simply screw the self-tapping screw back into the same place. But there is one for a long time known method repair of broken holes, which is still successfully used.
If more serious damage occurs, when the laminated coating around the attachment point peels off, use another method. Mix PVA glue and wood shavings. This composition fills the damage. Allow it to dry, and then screw in the screw as if it were a new surface.
Second life for chairs
When analyzing methods for repairing kitchen furniture, it is necessary to say something about repairing chairs. The easiest way to update is a cover that will hide all scuffs, scratches or patches on the seat. If the chair has a hard seat, then just paint it, you can decorate it with decoupage. The work is carried out according to the same scheme as in the case of facade restoration. Old chair with a soft seat it is necessary to retighten. Let's take a closer look at how to do this. Materials and tools you will need: medium-grit sandpaper, primer, brushes different sizes, gloves, paint, batting, upholstery fabric, furniture stapler.
 |
First, remove the seat and remove the upholstery and filling. |
 |
Then the wooden seat is coated with a primer; it has antiseptic properties. Once primed, leave until completely dry. |
 |
The chair itself must be sanded, then primed and these two steps repeated again. If you want to achieve the effect of a perfectly smooth surface, then you need to do additional sanding and priming, and with a leveling primer. |
 |
Then you can start painting. It is recommended to start painting from the inner parts, the bottom. |
 |
Then the chair is turned over and paint is applied to its upper part. After drying for 24 hours, the chair is painted with a second coat of paint. |
 |
Leaving allowances of 4-5 cm, cut out a piece of fabric to fit the size of the seat, two sides at once. Moreover, the fold of the fabric should coincide with the outer edge of the seat, i.e. the parts will be joined together. |
 |
Then the batting is cut out. It is enough to lay the fabric in 4 layers. |
 |
All batting is fixed around the perimeter using a furniture stapler. |
 |
Then they lay out the upholstery with the wrong side up and place the seat with the batting down. |
 |
They pass along the sides with a stapler, then separately bend the upholstery at the corners and secure with staples. Place the remaining piece of upholstery on top and fold the excess inside. And they go through with a stapler or hot glue. |
 |
Reinstall the seat. |
It also happens that the wood dries out and the chair begins to wobble. This problem also corrects itself.
Video: how to fix a wobbly chair
This is how you can repair kitchen furniture. These are not all options. You can find many more repair methods, original options restoration and renovation of kitchen furniture, tables, chairs. But even using only these recommendations, it is possible to completely restore kitchen furniture, spending only on consumables.
The dream of many housewives is new kitchen furniture. Unfortunately, not everyone has the opportunity to often replace a worn-out headset with a new one. But with a creative approach, it is quite possible to update old kitchen furniture with your own hands.
Maximum renovation of the kitchen at minimal cost is carried out using various techniques. To do this, you can refresh individual parts interior:
- do new facade on the kitchen cabinet;
- decorate the wall with new fittings;
- use decorative elements.

For work you Tools and materials needed:
- acrylic lacquer;
- primer and paint for wood;
- brush or roller;
- wood glue;
- metal ruler, tape measure;
- sandpaper;
- scissors;
- decorative overlay elements, furniture fittings;
- ceramic tiles, rattan;
- molding or decorative strips made of wood.
Restoration of a damaged tabletop (video)
Changing the color of the facade
Painting the facade in a different color will help radically change the appearance of your kitchen unit. Before this, the cabinet must be disassembled, fasteners and fittings removed. The wall is cleaned of old varnish and paint. They are removed with a solvent or sanded sandpaper.
When the surfaces are cleaned, a primer is applied to the cabinet. After 1.5-2 hours the painting itself takes place. Choose waterproof paint. Automotive is also suitable for these purposes.
If you don't like using brushes, try using spray bottles. This is very convenient if you want to decorate your closet by applying an intricate pattern using a stencil.


We use decor
If updating furniture solely by painting seems boring to you, you can decorate the wall with additional decorative elements. When the main painting is done, The following is attached to the façade parts:
- stucco;
- overlays;
- molding.


They are used both separately and in combination with each other. Such elements add texture to the appearance of the furniture. Let's consider technology for decorating a set using wooden molding:
- Choose thin strips of convex semicircular or carved shape.
- Markings of the future pattern are applied to the surface of the facade.
- If the molding will be attached around the perimeter rectangular surfaces, the edges are cut at an angle of 45 degrees.
- The planks are attached to furniture using glue to fix wood products.
- The façade is being finished painted.
Stucco molding looks beautiful as decorative inserts in the corners between the molding strips.
If there are unused ceramic tiles left after renovation, they are also perfect as a finishing material. It can be used to cover both a wall and a kitchen table.
Decoupage of old kitchen furniture (video)
Porcelain mosaic
If there is a prejudice about what to store broken dishes not allowed in the house - not about you, then it may well become original finishing material for furniture decoration. Porcelain mosaic tiles on doors or table surfaces are not only very beautiful, but also functional. Such materials are resistant to temperature changes, high humidity and other harmful factors.
To decorate furniture with broken porcelain:
- Select a pattern and draw a sketch.
- Transfer it to your work surface.
- Apply adhesive.
- Lay out the fragments according to the pattern.
- Fill the gaps between the porcelain with grout ceramic tiles in tone


Updating facades with rattan
Rattan is a very multifunctional material. It is used for the production of furniture and for finishing various surfaces. It is very flexible and at the same time very durable.
They work with rattan using the following technology:
- Measure the wall for calculation required length rattan
- Soak the roll of material in cold water before work for 20-30 minutes.
- Smooth wooden strips are prepared, with the help of which the rattan will be pressed to the surface during the gluing process.
- Rattan is cut according to measurements.
- Glue is applied to the cabinet, to which the finishing material is pressed.
When the elements are firmly glued, the final painting of the surfaces is carried out.
Techniques for working with rattan rods (video)
Covering a cabinet with photo wallpaper

To update the kitchen wall, you can use a very interesting technique - pasting with photo wallpaper. The images on them can only be limited by your imagination. After all, today it is possible not only to choose a color and pattern in a store, but also to order any other one from a printing house. For this you can also use photographs from your personal archive.


To wallpaper a closet:
- Furniture surfaces are cleaned of old varnish and paint grinder or sandpaper.
- Wipe off dust and cover with a layer of primer. If separate photographs are used, after priming the furniture is painted in a single color.
- Paste them with wallpaper or directly with your own photographs.
- There is no need to fill all the available space with personal photos. It is enough to decorate the doors with them.
- After the glue has dried, the furniture is coated with colorless varnish.

Complete facade replacement
If the furniture is so worn out that painting will not significantly affect its appearance, the cabinet will help to update complete replacement facade. This method is more expensive than all of the above, but it is still more economical than buying a new headset.
For modern models modular furniture Facade parts can be ordered directly from the manufacturer. All you have to do is screw new doors into the old place and, if necessary, replace the drawers. For more ancient, rare furniture, the facades will have to be made according to individual measurements.
To install facades yourself, you will need:
- Remove old doors.
- Paint and varnish new untreated pieces to match the furniture.
- Assemble the parts by screwing them into the old place.
Adjusting fittings on kitchen facades (video)
Conclusion
Now that you know how to update furniture with your own hands, all that remains is to choose the option that suits you and get to work. As you can see, this does not require significant material costs or special skills. Only a set of standard tools, creative approach and the desire to breathe new life into your old furniture.
Examples of updating old furniture (photos)


It's time to freshen up the situation in the kitchen, but buying new kitchen furniture is not yet on the cards family budget? How to update kitchen set at minimal cost? Professional designers and decorators in such cases advise replacing old countertop and facades to new ones, repaint the “familiar” facades in a different color or cover them with self-adhesive film, and also update the fittings. The most interesting thing is that an easy facelift of old kitchen furniture can be done with your own hands using simple improvised means.
There are ways that can change a boring kitchen set almost beyond recognition
How to update a kitchen set: self-adhesive film
The easiest way to transform old kitchen furniture is to cover it with self-adhesive film. Cheap and cheerful! By choosing a high-quality film with an imitation of wood, marble, tile, natural leather or stone, you can give your kitchen, if not exclusive, then a very decent appearance. The waterproofness of vinyl film, its resistance to high temperatures and mechanical influences will preserve the pristine beauty of your design impulse for a long time. If you know how to handle a centimeter and scissors, you should not have any particular difficulties with film facelift. The main thing you need is accuracy and patience.
- adhesive tape
- centimeter
- ruler
- sharp scissors
- stationery knife
- plastic smoothing scraper

The easiest way to transform old kitchen furniture is to cover it with self-adhesive film.
Step 1: We take measurements of the kitchen cabinets: facades, sides, drawers. For better quality and comfortable work It is advisable to remove the facades and lay them on a flat surface.
Step 2: Remove the handles and other fittings. Use a damp sponge to thoroughly wash all cabinets and drawers, Special attention focusing on removing grease stains. There should be no traces of grease, dust or other contaminants on the surfaces to be glued. It should be perfectly flat, clean, dry and smooth. Otherwise, during operation in problem areas the film will begin to bubble and move away from the surface. After wet cleaning, be sure to wipe all cabinets dry.
Step 3: On Protective paper layer On the back side of the self-adhesive there is a centimeter grid, which greatly facilitates cutting and cutting of the film. We mark the required dimensions of each part. If all measurements are taken accurately, it is still advisable to leave a margin of 1-2 cm. In places where there will be bends, add 2 cm. If you have chosen a film with a repeating pattern, trace along the front side so that the repeats of the pattern match.
Step 4: We cut using a stationery knife along the ruler. We cut out curved patterns with sharp scissors according to preliminary markings with a marker or pencil.

A kitchen set covered with self-adhesive film with an elegant pattern immediately acquires a refined and unusual look
Step 5: After peeling off a couple of centimeters of the protective paper, apply the adhesive side of the film to the facade. Using a plastic scraper, smooth out the glued area to remove air bubbles and other irregularities from under the film. We do not glue the film all at once, but gradually remove the protective paper by 5-10 centimeters and carefully smooth out each area covered with a scraper. Take your time! Any bumps and irregularities will be especially noticeable on a plain surface, but on a variegated pattern they are less noticeable. Smooth out the film from the center to the edges. Small air bubbles under the film can be pierced with a thin sewing needle, and large ones can be cut sharp knife and smooth the film.
If the film lays unevenly during gluing, do not panic! It's not the end of the world yet. The matter can be fixed! The self-adhesive film will only fully stick after a few hours, so you have enough time to remove the film from the failed area and re-stick it.
Step 6: We perform similar operations with all other facades of the kitchen unit, as well as shelves and drawers. For a complete transformation in quality the final touch we change furniture fittings, in particular handles, but new ones and return the facades to their places.
If you just need to add a couple of bright accents, refresh the interior with new colors and nuances, just use the interior vinyl stickers. They can be applied to any furniture with smooth facades; they are made of durable material, so they are perfectly tolerated. wet cleaning and do not require careful care.

The most radical way to update a kitchen set is to replace old facades with new ones
How to update old kitchen furniture: replacing facades
Need a major budget redesign? Replace old facades with new ones! This is not only the most radical, but also the most expensive way to update old kitchen furniture, but it will still cost much less than buying a new kitchen set. If you have modular kitchen or a model that is still popular, it will not be difficult to purchase ready-made facades special labor. For exclusive and out-of-fashion models of kitchen sets, facades will have to be made according to individual order, fortunately, there are plenty of companies providing similar services today. When ordering a facade, you can choose not only for your kitchen original design, but also optimal material in terms of price-quality. Economy options: inexpensive wood (usually pine), chipboard, plastic. A more solid new thing: facades made of MDF and solid wood.

For exclusive and out-of-fashion models of kitchen sets, facades will have to be made to order
The installation of new kitchen facades can be entrusted to specialists, who will certainly be found in the same company that manufactured them, or you can install them yourself. To do this, remove the old doors by unscrewing the screws and securing hinges. Finished doors and drawer fronts are usually sold unfinished in stores, so you will have to finish them using a standard 35mm hole saw. Having drilled new holes for the hinges, we fasten the doors to the walls using screws. Ready! Modern furniture is assembled easily and quickly. Anyone who has ever had to do home renovations will successfully cope with the installation of new facades.
How to update kitchen facades: molding and painting

Renewing the facades of old kitchen furniture using molding and painting is simple and effective method
A great way to quickly and easily redesign old kitchen cabinetry is to use molding and paint. What is molding? These are decorative overlays that are widely used for finishing various surfaces and structures, such as walls and ceilings. Look around! Surely, various kinds of moldings are present in your interior. To decorate the facades of the kitchen unit, we will need thin semicircular strips.
Necessary materials:
- wood glue
- decorative semicircular molding
- Miter saw
- HVLP spray gun
- gloss deck paint
- drill
- furniture fittings
- screwdriver
- marker
Step-by-step instruction:
Step 1: Preparing the facades. Before removing the facades, we make the appropriate digital marks on each door and cabinet so that during installation we do not confuse anything and return everything to its place. We dismantle the facades, remove fittings and fasteners. Using a damp cloth, carefully remove all dirt. Wipe the facades dry with a dry cloth. Since we will be using paints and varnishes, it is advisable to carry out work not indoors, but on outdoors in a well-ventilated, covered place, such as under a canopy. We cover the working surface with film and lay the prepared facades on it.
Step 2: Installation decorative molding. Using a miter saw, cut the decorative molding into pieces of the desired length. We file the outer edges at an angle of 45 degrees. We glue the finished planks to the facade, “planting” them with wood glue.

Step 2: Installing decorative molding is a simple but delicate operation.
Step 3: Using a marker, mark the locations for installing fittings and fasteners. We drill holes with a drill or hammer drill.
Step 4: Prime the surface. Fill the paint reservoir in the spray gun with primer. Apply the primer from a distance of 15-20 cm. Wait about an hour until it dries completely.

Step 4: Prime the surface before applying paint
Step 5: Painting. When the primer is completely dry, fill the spray gun with deck paint. We carry out painting in the same way as a primer at a distance of 15-20 cm. To create an original pattern or ornament on the surface, you can use special stencils. If, after the final coat of paint has dried, unevenness and other flaws are noticeable on the surface, apply another coat of paint for a flawless result.

Step 5: Painting can be done with any in a convenient way- brush, roller or spray
Step 6: Installation of facades. Not a trace remains of the old facades! Go ahead and guess what to attach where. It's good that we took care of this in advance. Based on the digital markings on the facades and cabinets, we return each door to its original place using screws and a screwdriver. We install new fittings and admire the creation own hands!
How to update an old kitchen set with your own hands: decorative inserts
After a kitchen renovation, does your old kitchen set not fit into the new environment? No problem! The matter can be fixed! Decorative inserts made of wallpaper, self-adhesive film, ceramic tiles or rattan will help to update the design of old kitchen furniture.

Unusual way updating the kitchen set - using ceramic tiles as decor
We decorate kitchen furniture with ceramic tiles
How to give an old kitchen cabinet a facelift using ceramic tiles? As easy as pie! We remove the kitchen cabinet doors from their hinges, thoroughly clean the surface, and if desired, paint it in a suitable color. Using tile adhesive, glue the tiles to the facade. To make everything look as neat and beautiful as possible, we create a frame from decorative molding around the “tile applique”. That's it!

To make everything look as neat and beautiful as possible, we create a frame from decorative molding around the “tile applique”
We decorate the facades of an old kitchen with rattan inserts
Necessary materials:
- rattan fabric
- sharp scissors
- decorative wood planks
- furniture stapler
- acrylic lacquer
- small furniture nails without heads
- sandpaper
- hammer
- brush

Kitchen fronts decorated with rattan inserts immediately take on an exotic look
Step-by-step instruction:
Step 1: We measure the front part of the doors to calculate how many meters of rattan fabric we need to purchase for finishing. The canvas can be purchased in the form of ready-made rolls or cut, which will cost much less.
Step 2: Place the roll of rattan fabric in the bath and thoroughly moisten it with cool water. Leave for about half an hour so that the material is well saturated with moisture. When wet, rattan increases slightly in size. After installation and complete drying, the canvas is stretched like a string.
Step 3: While the rattan “reaches the desired condition,” we prepare the wooden planks that we will need in order to press and attach the rattan fabric to the facades around the perimeter. The color of the frame should be in harmony with the interior of the kitchen and new finishing headset.
Step 4: If necessary, the color of the planks can be changed by covering them with acrylic varnish suitable color. Apply varnish to the planks and dry. To remove roughness, carefully sand the painted workpiece with fine-grained sandpaper. After sanding, apply another layer of varnish, dry and sand again. For a perfectly smooth surface, you need to apply 3-4 layers of acrylic varnish.
Step 5: Taking the rattan fabric out of the bath, roll it out on an equal surface and cut it according to the measurements taken. The doors can be completely covered with rattan fabric, but facades on which only the middle is decorated with rattan look much more interesting.
Step 6: Using sharp scissors, cut out blanks from rattan fabric. Using a furniture stapler, we attach them to the kitchen facades. We place the paper clips along the edges, then they will be covered with strips and will be invisible.
Step 7: To make the frame on the facades have beautiful, neat joints, place the planks in a miter box and file the outer edges at an angle of 45 degrees. We blot the sawn areas with a brush with acrylic varnish.
Step 8: Using furniture nails without heads, we nail the strips to the facades along the edges of the rattan fabric so that they cover the clips.

Designers consider various types of rattan inserts effective way kitchen furniture redesign
Kitchen is an expensive pleasure. Good kitchen- even more expensive. It often happens that there is not enough money for the repairs that you really want - to update furniture, buy new technology, hang new wallpaper or tiles. But we have a solution on how to update a kitchen without renovation so that it will be pleasing to the eye: you just need to use a special self-adhesive film for the kitchen, which is an excellent and, most importantly, inexpensive solution. In our article you will find many great ideas to use it in your kitchen, many options for colors, designs and patterns.
Self-adhesive film for kitchen facades
So, we decided to update the kitchen interior without renovation. Please note that there are films for various surfaces: kitchen facades, countertops and even household appliances. We recommend starting with kitchen fronts, since this is the first thing that catches your eye when entering the kitchen, and, in addition, takes up quite a lot of space. large space. This will refresh the kitchen and create the feeling that you have purchased new kitchen furniture, while you will only have to spend money on the material itself, which is much cheaper.
When finishing facades, handles should be removed so that there are no unpleasant irregularities, and, in addition, it is advisable to level the surface in advance in case of roughness and deep “wounds”. Covering the kitchen with film is a simple solution that will allow you to decorate most of the visual space kitchens, and it turns out that you can easily update the apartment without major renovations.
Practical film for tabletops
You can give kitchen countertops the new kind, pasting them in some neutral colors or, conversely, giving them life by choosing bright colors. Most kitchen adhesive films are water-repellent, heat-resistant and truly durable, making them ideal for everyday use. We recommend that you do not skimp on such film, because usually these places are used most often and require special protection. But this will still be the best solution.
Filming kitchen cabinets
Another way to decorate your kitchen with your own hands is to wallpaper kitchen cabinets, not only the facades, but also the rear surfaces. Look at this great solution for updating old things in the photo - old furniture plays with new colors and clearly adds “value”. It turns out that we not only saved money by deciding to change the kitchen, but also made money? Not a bad solution, we recommend it. If you are not planning to renovate your kitchen in the near future, then read useful tips, . In addition to film, there are many more interesting options.
Kitchen wall design using vinyl stickers
The wall next to the sink and the wall behind the stove are the most vulnerable places to dirt. You can, of course, use standard tiles, but they are often very difficult to clean. A protective film will help to avoid these problems, and, in addition, you can always choose a beautiful color and pattern that matches the interior of your kitchen. This is why kitchen wall stickers are so popular - they are both a practical and bright solution against splashes.
Stickers for household appliances photo
Everyone loved to stick something on the refrigerator as a child. Perhaps some even received a slap in the face for such a unique kitchen update. But many have already grown up, and have the right to decide for themselves how to decorate the refrigerator. Some people choose magnets from their travels, while others cover their refrigerator with film and turn it into a designer product. So what if the designer is sitting next to him at the table and eating lasagna from this refrigerator. But what scope for creativity?
Changing the color of kitchen facades
There are several options for changing the color of the kitchen facade - sanding and further painting, varnishing, and, finally, our option - simple pasting. You don't even need any special tools, just simply apply a layer of film evenly.
Decorating the kitchen with stickers
It is not at all necessary to cover the entire surface. Everyone does this, but you can go further, for example, in the photo above - an elegant solution to create a simple, but unusual interior in the kitchen using red ribbons. You can choose the width and color to suit your taste.
Wood-like film
Using film to change the design of an apartment without renovation can confuse everyone. Exist various options its use to “replace” the facade material. You can paste over an ordinary boring monotonous surface under Scandinavian style, and it will only be possible to discover that it is not a tree upon careful examination.
Brick Adhesive Film for Kitchen
We have already studied options on how to do brick wall in the kitchen. Another solution is “brick-like” film. The main thing is not to miss the mark with the color, otherwise you will end up with a Soviet factory workshop in your kitchen.
Paintings on kitchen facades
Exists big choice patterns and paintings with which you can easily decorate your kitchen space. For connoisseurs, you can transfer some objects of art or landscapes to the surface. In this case, you should choose expensive films, because large, bright, low-quality surfaces will immediately appear in your eyes.
Decorative pattern for a white kitchen
White facades are a universal place for decoration; practically any patterns and stories, colors and shapes can be placed on them. You can use different designs for the top and bottom.
Self-adhesive film with tile pattern
How to save money on wall decoration? That's right, instead of expensive tiles, buy inexpensive film. As they once said in advertising - when there is no difference, why pay more?
And the patterns that are placed on the wall in the form of tiles are not limited to boring squares. You can use the "tile" in spanish style, you can add flavors of the east with Moroccan designs. Anything is possible - go for it!
To make dishes and services in cabinets look more expressive, use film with the correct geometric shapes for decoration back wall lockers We assure you that your guests will be pleasantly surprised!
Many people are faced with the need to refresh their interior quickly and as cheaply as possible. Such a need may arise among people who have removed inexpensive apartment for a long time. Or those who have spent all available funds on purchasing their own home, postponing repairs and changing furniture until better times. Those who live in temporary territory are also in no hurry to invest in the situation. In general, the situation is ordinary. Even if it is temporary, I want to live in cleanliness and comfort now, and not someday later.
Is it possible to transform the interior for literally pennies without making a complete renovation or changing the furniture? Yes, and there are plenty of opportunities for this. Today we will talk about improvement appearance kitchens. We bring to your attention 16 ideas for a low-budget, easy metamorphosis. Of course, a patched-up kitchen will not look completely new, and an old kitchen will remain old, but if you approach the issue creatively, with imagination and sparkle, you can achieve an excellent result.
How to transform your kitchen without breaking the bank?
1. Paint the facades of kitchen furniture
This will not only refresh the doors, hiding the signs of time, but also change the color to a more current/light/cheerful one.


9. Cover the apron with new material
If the wall is in work area has a more than deplorable appearance, you can hide it behind laminated chipboard, MDF panels, plywood sheets, mirrors, etc. In this case, it is not necessary to remove the old apron finish.


10. Cover the wall in the work area with wallpaper and cover it with glass
Tempered glass, if it is not decorated with photo printing, is not too expensive. This method of installing a backsplash is easy, clean and quick. However, the old finish, if any, will most likely have to be removed.

11. Cover the floor with PVC tiles
Exist vinyl coverings in the form of tiles, the size of which corresponds to the dimensions of the floor tiles. However, there are also variations for parquet. You can glue them directly onto tiles or on boards. This will allow you to quickly and very inexpensively update and transform the floor. Of course, such a finish will not last too long, but as a temporary option it will certainly pay off.


12. Lay a large carpet
Not that bad carpets in the kitchen. They make you feel warm and cozy. And it’s not difficult to maintain order if there is a vacuum cleaner in the house. It is better, of course, to take a dark carpet so that the stains (and they will appear sooner or later) are not so noticeable.
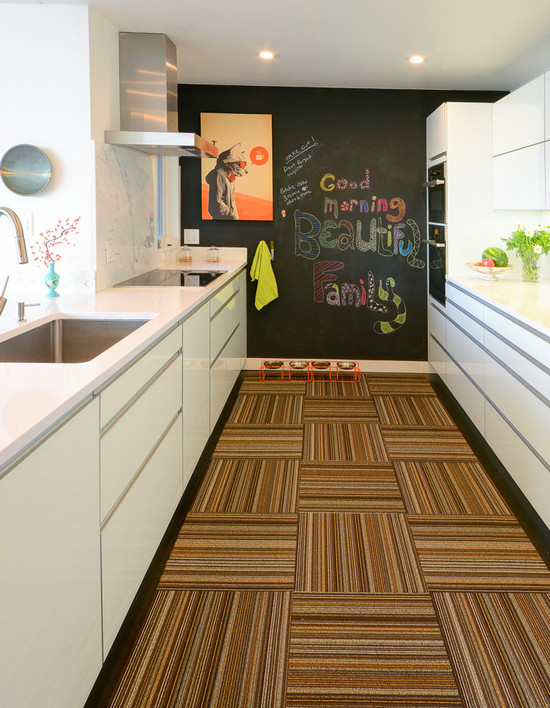
Woven carpets are hygienic - they can be washed with a rag and a mop, like a regular floor.
13. Decorate the wall near the dining table
A stylish and comfortable dining area can become the main decoration kitchen interior. It will attract attention, making the shortcomings of the old kitchen much less noticeable. Fortunately, it is much easier to transform a dining area than a work area.

Particular attention should be paid to the wall near which the table is located. If the decoration in the kitchen is very old and there is no way to change it, you definitely need to refresh at least this wall. It is not at all necessary to remove the old coating and thoroughly prepare the surface. Even on top of old wallpaper, tiles or paint, you can install, for example, lining, panels, laminate, mirror or glass panel and etc.
14. Change the dining chairs
This will instantly change the look of the kitchen (for the better, of course). Especially if the choice falls not on classic elegant models, but on something modern and/or bright.


15. Introduce bright accents
Colored elements will make even the most gloomy kitchen more lively, modern and cheerful. However, it is important to avoid chaos and excessive diversity. Accents should be one or two colors. The number of bright details should also be limited. Everything is good in moderation.

In the photo: the tiles on the walls and floor were painted, the facades were painted, the fittings were replaced, and accents were added. The kitchen looks completely new.


16. Decorate the interior
Decorative little things turn the kitchen into a cute, cozy nest. Minimalism is good in an expensive interpretation, and old interior you need to decorate it properly - new design elements will draw a significant part of the attention from old surfaces and shabby objects.
There will be wall decorations that hide old decoration (paintings, posters, mirrors), baskets and storage boxes, and living plants (visually refreshing the decor). However, don't overdo it! Don't let the decor clutter your kitchen.
Low Budget Kitchen Makeover: More Examples


