Parents who have already been able to make a dollhouse on their own or bought it in a store, spending a significant amount, are thinking about how to make furniture for dolls with their own hands. Toy furniture isn't cheap, so why not save money? family budget. You can easily make it with your own hands from available materials.


Types of materials often used
To decorate your daughter's dollhouse, you may need the materials that we most often throw away:
- cuttings of plywood sheets;
- matchboxes:
- plastic jars and boxes for cosmetics;
- shoe boxes;
- colored dish sponges;
- viscose napkins;
- plastic bottles;
- egg tablets;
- textile;
- foil
- wire and many more various little things, the place of which we often determine in the trash can.


When choosing materials, everything will depend only on your imagination.
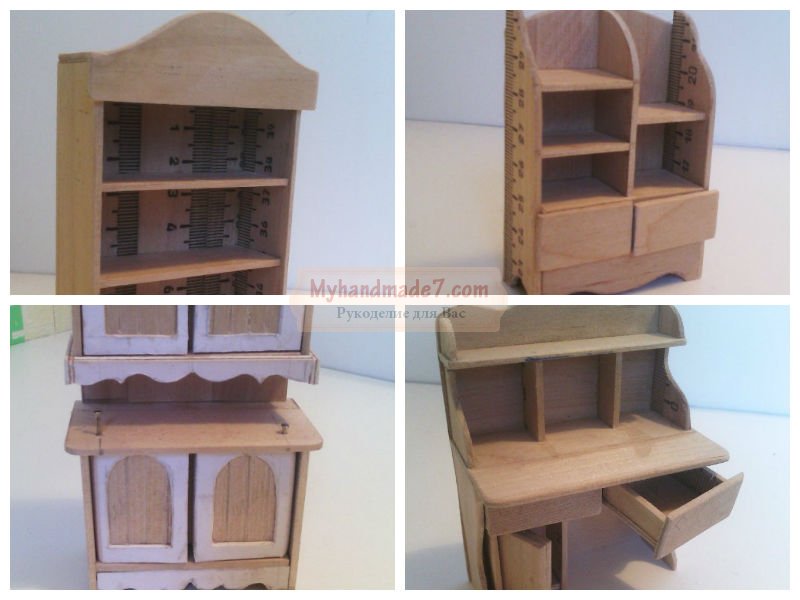
Plywood
Plywood and wood are the most popular and durable materials for manufacturing. doll furniture. However, the process of creating interior items from them is labor-intensive; skills in working with them will be required. But if you still make such furniture, it will serve the dolls for a very long time and will delight your daughter for just as long.

In order to make miniature plywood furniture you will need:
- plywood sheets;
- jigsaw;
- sandpaper;
- small nails or screws;
- glue;
- sheets of cardboard;
- pencil;
- ruler;
- varnish or acrylic paint;
- scissors;
- attributes that you will use to decorate each type of furniture: fabric, beads, pieces of leather, and much more...

Common stages of work for all types of furniture:
- Think through or find printable furniture design diagrams on the Internet.
- Draw on cardboard or use ready-made prints of furniture parts and cut them out.
- Attach the resulting templates to sheets of plywood and trace.
- Use a jigsaw to cut out parts from plywood.
- Sand all parts with sandpaper until the surfaces become smooth.
- We assemble the structure. We glue the parts or fasten them with self-tapping screws.
- We coat the finished item with paint or varnish and let it dry.
- If necessary, we cover it with textile elements and decorate it.
So one piece of doll furniture has been made.


Cardboard
Cardboard furniture for a dollhouse is very easy to make. You can also involve a child in the manufacturing process. Cardboard is the most available material for work. You can use either sheets of cardboard or take small cardboard boxes as a base.


Necessary:
- cardboard or cardboard boxes;
- white sheets of paper;
- pencil;
- ruler;
- scissors;
- glue (if necessary);
- details for decorations.

Stages of work:
- We think through the details of the future piece of furniture and make templates on paper.
- Transfer the templates to cardboard.
- Cut out the details.
- We make the necessary cuts at the joints of the parts.
- Assembling a piece of furniture. Glue where necessary.
- We give a finished look by decorating the structure.
You can decorate the dollhouse with a new piece of furniture.


Matchboxes
From matchboxes you can design almost any interior item. The advantage of such furniture will be drawers. It is enough to show your imagination and think through in detail the image of future furniture.


We will need:
- matchboxes, the quantity depends on what piece of furniture you will make;
- glue;
- decorations for future furniture.

Stages of work:
- Let's prepare required amount matchboxes.
- We glue them together in the sequence required for the interior detail.
- We decorate the resulting piece of furniture. Acrylic paint and varnish are suitable for painting.
Your daughter's dolls will be happy with the new thing.

You can make a rack for dolls from matchboxes yourself by watching the following video.
Plastic jars
Plastic jars can perfectly serve as furniture in your dollhouse. Sometimes you don’t even need to do anything with them. IN finished form they can be used, for example, as a bath. The child will be able to truly bathe his dolls; water will not spill out of them anywhere. You can construct more complex interior items from plastic jars, caps from toothpaste tubes, and other small items. They can simply be glued together in the required sequence.


For a master class on making a toilet for dolls from a shampoo container, watch the following video.
Wire
Using wire that bends easily, you can decorate your interior in Provence style. Beds whose frame will resemble a forged product will look very elegant. You can add a forged candlestick or an unusual forged chandelier. Almost any interior detail can be made using a wire frame. Your imagination will tell you the right direction.


Egg tablets
Using egg tablets you can perfectly decorate the rooms of a dollhouse. Both plastic and cardboard tablets are useful in your work. All that will be necessary is to carefully think through the composition and cut out the necessary parts of the tablets.

The work may require:
- egg tablets;
- scissors;
- glue;
- acrylic paint;
- double sided tape;
- gel pen refills
and much more. Everything will depend on how your imagination plays out.

Master classes
This section offers you some ideas for creating furniture for dolls with your own hands.
Bed with drawers for matchbox dolls
We will need:
- matchboxes;
- glue;
- pencil;
- scissors;
- sheet white cardboard;
- sheets of white paper;
- paints;
- beads;
- thin wire;
- decorative elements to suit your taste.

Step-by-step instruction:
- Measure the height of the doll for which the bed is intended. The number of matchboxes that will be required depends on this.
- Glue the required number of boxes with the side walls facing each other. This will be the base of our bed.
- If you want to make the bed higher, you can glue peculiar legs in the form of additional boxes to the outer boxes at the bottom.
- We cover the base of the bed with white paper so that the pull-out elements remain open.
- Draw the desired shape of the headboards on cardboard and cut them out.
- Glue the backs to the sides of the base.
- Paint the bed in the desired color.
- We attach beads to the sliding elements of the boxes at the base using wire. These are the arms of our bed.
- We decorate, cover with bedding and you can put the doll to sleep.

In the next video you will see a master class on making a bed for a doll from cardboard.
You can decorate your bedside table in the same style.
We will need:
- 2-3 matchboxes;
- glue;
- White list;
- the same paint and decorative elements that decorated the bed;

Step-by-step instruction:
- We glue the boxes together, placing them on top of each other with their bases.
- We cover it with white paper, leaving the retractable elements open.
- We paint in the style of the already made bed.
- We attach the beads to the boxes.
- We decorate.

Watch the following video for a master class on making a bedside table from matchboxes.
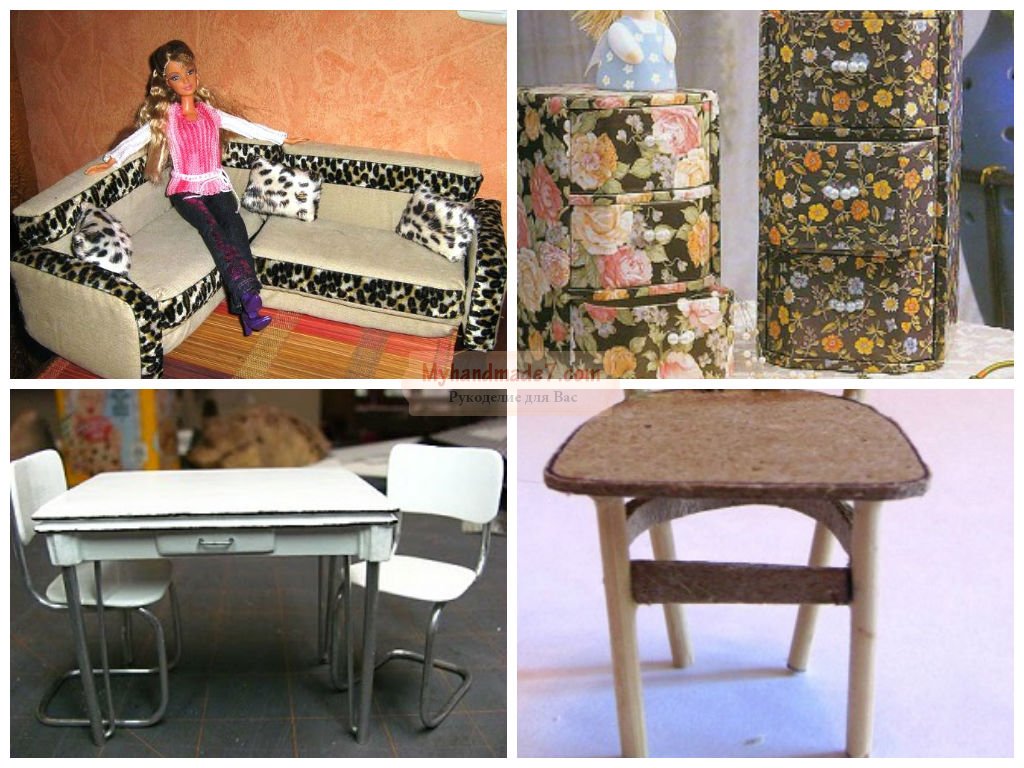
Sofa for dolls made of plywood
We will need:
- plywood;
- jigsaw;
- glue or small nails;
- sandpaper;
- cardboard;
- pencil;
- ruler;
- varnish or acrylic paint;
- pieces of fabric;
- cotton wool

Step-by-step instruction:
- We decide on the design and dimensions of the future sofa. We make drawings for the back, seat, side backs on cardboard. We take into account that with the help of the back and side backs the sofa will gain stability.
- Cut it out.
- We apply the resulting templates to a sheet of plywood and trace them.
- Using a jigsaw, we cut out the parts of the sofa.
- If you want to do upholstered furniture, then at this stage we wrap each part of the sofa with a thin layer of cotton wool and cover it with fabric. If the sofa is not covered, it is necessary to sand the parts.
- We attach the sofa parts to each other using glue. If you have soft sofa, then you need to fasten it with small nails.
- We cover the parts not covered with fabric with varnish or paint.
- We sew small pillows for the sofa.
- We decorate it to your liking and give it to the doll for use.
Chairs can be made in the same way.

You can see how to make a sofa for a doll with your own hands in the following video - master class.
Floor lamp
To make it you will need:
- thick cardboard;
- glue;
- pencil;
- strips of lace;
- empty helium pen refill;
- thin wire;
- a small diameter cap (lids from jars of medicine or ketchup are suitable)

Draw a cone blank on cardboard. Cut it out and glue it together. Cut off the top of the cone. The result is the base of a floor lamp lampshade. We cover it with lace. We bend the wire in half and pass it through the rod. We attach the lampshade to the wire from above, and to the lid from below to give stability to the floor lamp. The lid can be decorated with a lace skirt. Instead of a rod, you can use beads as a stand by passing wire through them. In this case, we also decorate the lampshade with beads.

Watch the master class on making a floor lamp in the following video.
Chandelier
To make a chandelier we need a small container. You can use medicine measuring cups, disposable plastic shot glasses, or the simplest candles in a metal case.
Show your child’s creative abilities and develop them by independently designing doll furniture. This activity will allow you to get closer to your child and help him discover his design abilities. Here are some easy options.
How to make a doll bedside table with drawers
You will need:
- Several boxes of matches according to the number of boxes.
- Cardboard strip, the width of which can cover the required number of boxes.
- Shiny foil.
- Scissors, glue.
- Several golden plastic beads according to the number of boxes.
Take the boxes and stack them lengthwise. You should have a table of the planned height. A few pieces can be removed or added, depending on the final idea. Glue the parts of the boxes stacked in a row. Take cardboard and bend it into in the right places, completely wrap it around the side that does not have drawers. Then glue the cardboard. IN ready-made version Carefully trim its edges with scissors and start decorating.

Decorating a glamorous bedside table can be different. If you cover it with shiny colored paper, similar to multi-colored foil, it will create a glamorous look, especially if it is crimson, silver, or gold. If you want the bedside table to look like a real one, then use imitation wood, colored wallpaper with small patterns, or paper similar to them. This is sold in children's art stores.
Gently straighten the paper and apply glue to the reverse side. Spread it so that the foil becomes even. Then cover the back and sides with paper, level it until it dries. This is done with the side of a ruler or a blunt turn of the knife. Boxes can be decorated completely or partially. You need to stick paper on the sliding part, and if you want it to become completely colored, you can pull it out and cover it with paper on the outside or inside. The paper also needs to be leveled.

When it's dry, start working on the handles. Take a bead and drop glue on its base. Place it in the middle of the drawer drawer. Do the same with the rest of the beads, which should form an even row. They can be replaced with voluminous self-adhesive rhinestones. When they dry, the bedside table is ready.

Doll coffee table
A beginner can do it. You will need:
- A square or elongated box for cream and soap.
- Thick tape, scissors.
- Colored paper like foil.
- Glue.
Take cardboard box. Cut out the front and back parts from it. Then cover it with large tape from the inside, then from the outside. It is important that it lies without folds - the attractiveness of the product will depend on this. Then start decorating.

Carefully cut the paper to the width of the box. Then stick it on a layer of tape. The most suitable paper is with a self-adhesive layer, onto which you need to carefully apply glue and level the layer before it dries. Remove any remaining glue and dry the paper.
This piece of furniture can be used as a coffee table for Barbie or hanging cabinet, which is glued to the wall of the house or put several products in one row. And if you combine it with glamorous bedside tables, you will get beautiful wardrobe for Barbie. You need to add a few more elements to it. Then the furniture for dolls will be stylish and glamorous. It can be used to furnish a room in the same style.
Wardrobe for dolls

You will need:
- 1, 2 bedside tables (see “How to make a bedside table”).
- 6 coffee tables for Barbie (see " Coffee table for Barbie").
- Large cardboard for the back wall.
- Cardboard for the cabinet door (this could be part of a cream box).
- Beads according to the number of doors.
- Silver foil that looks like a mirror.
- Scissors, glue and tape.
First, place the boxes across the cardboard area. This will be the back wall of the closet. Place the matchboxes in a row in the middle. Having determined the required quantity and proportions, get to work. Make a bedside table with drawers as in the description. The table, which acts as a shelf in a closet, needs some work. If at first it was necessary to cut out the front and back, now the back is cut out, and the front serves as a cabinet door. There is no need to cut it out. Cut it cut with three sides without cutting the door, and cover it with colored paper on the outside and inside.
When selecting parts, it is important that all boxes are the same height and width, then it will look beautiful and neat. When you have decided on the number of elements, trim off the excess. Get to work.

Identify an empty space. It must be covered in advance with silver foil that imitates a mirror. Can be pasted and beautiful picture. It depends on personal taste. Experts do not recommend using two shiny textures in one set, and if you make all the bedside tables and cabinets from crimson shiny fabric, replace the mirror part beautiful photo. Paste it in advance. Hide the edges of the picture behind the cabinets.
When all the parts are ready, glue them to back wall. If you want the doors to close easily, attach a sticker or a lock to them. One part is attached to the door, the other to the side wall. They are made from hooks and fasteners. They hold the door securely.

In addition to cabinets, tables and bedside tables, they also make upholstered furniture for Barbie. For example, a folding sofa. Such furniture for modern dolls will look bright and beautiful. And the material for design depends on your imagination. Here's how to do it.
Folding sofa for Barbie
You will need:
- A large piece of thick cardboard.
- Several dish sponges, the same size.
- Stapler.
- Black velvet material.
- Upholstery material.
- Tape and Velcro.
- Scissors, glue and ruler.
Glue the sponge to the cardboard. Cut it to size. Do the same with the rest of the sponges. You will end up with three identical pieces. Wrap them with material and secure them with a stapler from below. Then take the material a little smaller than the size of the piece and stick it to the surface from the inside, hiding the traces of fastening. Before us are three identical parts.
We process the back. Cut it out of cardboard and put the material on top. Secure with a stapler. Glue velvet material to secure it.

Place the mattresses on top of each other and apply them to the backrest. Then glue the bottom mattress and secure with tape. Attach it around the entire perimeter of the mattress and secure it at the back with glue. Then wrap the tape around the top mattress. Spread the glue over the surface, except for the middle, which will be a loop. They pull on it to unfold the sofa. There is no need to glue the tape to the wall, because it is secured at the back with Velcro.
The sofa is ready. To unfold it, unstick the Velcro and pull the loop. Then fold it carefully and use it.

Fairytale glamorous chairs for dolls
They are easy to make from a regular Coca-Cola can, Fanta or Sprite. To do this, you need to cut the jar into many thin strips. It is better if someone adult does this, as it is easy to cut yourself on the edges of the jar. When the can is cut, you need to direct some of the strips upward (about 1/4 of the entire mass), and all the rest downwards. Then divide the bottom strips by the number of legs and get to work.

Measure out the number of strips that will go on each leg, then start twisting them on the sides. In this case, the longest leg should remain the middle one, as it will become main support legs that give it length. You can twist the strips in different directions, symmetrically or asymmetrically, depending on your design. When all the legs are ready, you can start working on the back. It needs to be twisted in the same way as the legs, from the edges to the middle, after which you can start decorating.

The chair looks unfinished without a seat. For it you need to cut the sponge according to the diameter, carefully rounding it top part. Cover with material and secure on the underside with glue. It is better to use superglue, which fixes metal surfaces. When the seat is dry, apply glue to the surface again and attach it to the chair seat. It will dry and you're done.

Several chairs will allow you to create fantastic attributes of a magic castle. The main emphasis of chair design depends on the color and texture of the seat upholstery. The darker it is, the more mystical options you will make. Dark shades of purple, emerald or of blue color more suitable for magical Monster Height dolls than for a glamorous Barbie or a good fairy. Pink, cream, red tones will allow you to create a glamorous or vintage piece, complemented by a round silver table on a leg, and colorful fabric will create a unique antique flavor.

Floor lamp for a doll
It can be made from aluminum wire and a lampshade. It is made from threads, special beads for decoration or a lace frame.

Beads can be purchased at craft stores. They are different sizes, but wicker ones are suitable for work. They will allow you to create a floor lamp in a “country” style. More suitable for glamor lace lampshades. They are made like this.
A cone is made from cardboard or thick paper. Then lace is glued onto it. If desired, you can secure them with needles tipped with pearls, then the lampshade will look glamorous. Then let's move on to the frame.

To do this, you need to bend the wire at the bottom and string a thin rod onto it. Spread the ends in different directions from above and put a lampshade on them. Secure it. The floor lamp is ready and can be placed in Dollhouse IR. It will suit any design and will prove to be an indispensable decoration. Especially if it's a bedroom, a lounge or even a balcony for Barbie and her friends.
This is not all furniture for dolls that you can make yourself. But it will allow the child to unleash his creative potential, becoming a step in creating masterpieces.
Do-it-yourself doll furniture, photo:


Every girl who has a doll wants to get a lot of accessories for her favorite. These are clothes, shoes, a house, and of course – pieces of furniture. Naturally, this is available for sale, but, as a rule, a house and furniture for dolls are quite expensive if you buy them in regular toy stores. In addition, many girls are literally itching to make interesting crafts for dolls with their own hands.
In fact, there is nothing complicated about this, and today we will tell you how to create original and very beautiful origami furniture using simple pieces of paper and glue. Our detailed MK will allow you to easily make such necessary household items as a chair, table, sofa and much more.


First, let's look at the basic principles of making furniture for dolls in the origami style and try to decide why it is needed.
So who is interested in ideas for creating miniature paper doll furniture? First of all, for those who like to play with dolls, that is, for those little girls who cannot imagine life without a fascinating and exciting doll life. A self-production Paper furniture has undoubted advantages:
- Wide field for creativity: you can fold a wide variety of furniture, differing in shapes, colors and sizes.
- The applied art of origami is useful, because with its help you can develop perseverance, attention, and fine motor skills.
- Such paper crafts and figurines look simply charming, they will decorate any children's room, they can be presented as original gift, or simply create a souvenir.
The technique for making origami furniture is quite simple, and even a child can handle it. The main thing is to have certain templates and patterns with which you can make crafts such as a bed, chair, sofa from origami paper and much more. 
Step-by-step instructions for beginners are a great way to make your fantasies come true by creating a charming doll world with all possible details.
What do you need to make paper furniture? First of all, you should arm yourself detailed master classes for beginners. These can be photos and videos, or step-by-step diagrams for assembling paper figures.
In addition, you will need the following materials and tools:
- origami paper;
- colored cardboard;
- hot glue gun;
- regular office glue;
- scissors;
- ruler.
All this can be bought in the craft department, bookstore and stationery store.
Folding furniture
Spacious sofa

Don't know how to make an origami sofa from paper or cardboard? This means our step-by-step instructions are exactly what you need.
Important! If you need to make durable furniture on which the doll can sit and lie without damaging the product, you should take cardboard for creativity, and not origami paper.
To complete the craft, you need to take an A4 sheet of cardboard and make a square out of it. To do this, simply bend one of the edges, align it with the longer side and cut off the excess edge.
We follow the diagram provided below. From it you can see that creating a sofa from cardboard is an extremely simple and very exciting activity. 
Elegant table
Origami table is one of the most simple crafts. To complete this you will need extremely thin and fairly durable cardboard and a hot glue gun. Below are the detailed instructions:
- We cut cardboard 10x12 and 6x8.
- We put small piece cardboard in the center and trace with a pencil, using a ruler. We complete the lines and cut off the corners.
- We connect the free edges so that small leaf The cardboard remains inside, we fix everything with hot glue.
- Let's make the legs. To do this, by twisting a rectangular sheet of cardboard around a pencil, we form 4 identical tubes.
- Cut 4 narrow strips of thick, corrugated cardboard. Parameters – 1X5 and 1X7. Glue it to the tabletop. For tight fixation we also use a hot gun.
- With its help, we fix the legs, then, using small pieces of the same cardboard, we strengthen them.
The table can be placed on its legs only after the glue has completely dried. If you wish, you can make a larger table by following the instructions below.
Doll chair
We will make a chair from origami paper using the same technique as the table. Main principle- This is wrapping a base of thick thick cardboard with a thinner one; you can also use paper.
First we cut out the lower base of the furniture, then the back. An origami chair will have legs made using the same technique as the elements for the table, only in smaller sizes. All elements are fixed with a glue gun.
Origami folding beds
 Origami bed is perhaps the most important element furnishings in a doll's house. We make it from paper or cardboard of your choice. We take into account the size and weight of the doll. Next, we follow the diagram below, which completely replaces the video master class on creating paper crafts:
In the photo of the finished product you can see that the origami bed for the doll is very similar to the real one.
You can use paper to make any furniture for small dolls and larger models of Barbie size.
Video MK on making an origami table and chair
Video tutorial on assembling an origami cabinet
This master class will help you make an origami wardrobe for dolls, consisting of several drawers. Their number can be any. To create one cupboard you will need two sheets of origami paper measuring 20x20 cm.
Origami will help you assemble a cabinet detailed description all processes in the video below:
The number of miniature furniture boxes can be arbitrary. We connect them using any glue.
A selection of original furniture diagrams


There is probably no girl in the world who would not dream of having a toy house for dolls with furniture. A real set, of course, won’t fit in it, but it’s easy to make paper figures yourself. Our detailed master class, after studying which you can easily assemble origami furniture.

To work, we will need a square sheet of paper (white or colored). When choosing a size, be guided by the required dimensions of the future chair.  Scheme:

To learn how to make an origami chair, we suggest using a video tutorial. Follow step by step instructions MK and the entire manufacturing process will take you no more than 10 minutes.
Video: Master classes on creating an origami chair
Forming an origami table
An origami table is a simple paper craft, a necessary thing in any home, even though it is a toy. It will make a wonderful set with chairs. The work will not take you much time, and the result will certainly please you.
Assembly diagram for beginner craftsmen: 
Video: Lesson on creating an origami table
Origami cabinet
We suggest you make a cabinet with drawers - a craft for storing small accessories. Children put dolls' clothes in it.
 To work, you will need 2 square sheets of paper (20*20 cm), which must be folded sequentially, as in the video instructions.
Video: Master class on assembling an origami cabinet
Origami bed
The bed is the main subject home interior, we will try to make this thing out of paper. The assembly process is simple, so both children and adults can master folding skills. To work you will need a square piece of paper medium density(20*20 cm). If desired, take other sizes.
Template diagram:  Step by step description:
- Fold the sheet in half, in different directions (crosswise) and mark the center.
- We bend the side edges towards the center, 1/3.
- Then fold it again to form a rectangle.
- We lower the side parts to the fold line and open the pockets, turning the corners along the contours.
- We bend the corners away from ourselves - we make legs.
- We get a wonderful bed.

Video: MK for creating an origami bed
If difficulties arise during the folding process or some points are unclear to you, then look at the hint from an experienced craftsman.
Origami sofa
It's hard to imagine a living room without a sofa. For a guest, this is a great place to sit down, and for the owner, it’s a great place to lie down and relax after work. Let's make a sofa out of paper using the origami technique, as in the photo:  Scheme:
Step-by-step instruction:
- Fold the sheet in half (twice) and unfold it. Get a cross-shaped fold.
- Fold 1/6 of the page along the dotted line (see photo).
- We wrap the sheet along the fold opposite this strip.
- We wrap the side parts of the resulting rectangle, 1/3 on each side.
- Bend the corners forward (in the places indicated by the white arrow). We do not touch the back side of the sheet.
- Fold the opened white rectangles in half.
- Raise the part of the craft marked with a dotted line.
- Bend half of the raised part down.
- Bend the sides forward.
- Pull the front part (back) forward.
- We get a paper sofa.
Video: Lesson on how to form an origami sofa
Schemes for folding furniture using origami technique


Each loving mother I have often wondered, how to make furniture for dolls her beloved daughter? In today's master class we will answer this question; the options proposed below are not complicated and quite budget-friendly. You can be creative together with your child, so you will get twice as many pleasant emotions.
Let's start with the simplest thing, let's make a bath for the doll. For this we will need: a five-liter plastic bottle from under drinking water, hot nails, metallex acrylic paints, marker, scissors, small shells - 4 pcs, large flat shell - 1 pc. Take a bottle and mark a cut line with a marker just below the neck along its length. Using scissors or, if convenient, a stationery knife, cut the bottle and process the edge liquid nails, and paint on top. We glue small shells to the bottom of the bath using the same liquid nails. We make a headboard from a flat shell, paint it in a contrasting color, when the glue and paint are dry, you can fill the bathtub with water and give the dolls a bath day.

Another option how to make furniture for dolls quickly and simply assemble it from kitchen sponges. All you need is multi-colored kitchen sponges, as well as super glue; you can assemble any piece of furniture according to the construction set principle; it’s very easy to glue a bed or chair together. For children we have a very interesting “Crafts from plasticine”, in it you will find a lot interesting ideas for joint creativity.
How to make furniture for dolls from paper
Old shoe boxes, thick cardboard, even matchboxes are suitable materials. You will be surprised what you can assemble from matchboxes; there are craftswomen who make real works of art from them.
For small dolls, the easiest way is to glue a bedside table, just take two boxes, glue them together, decorate the top with regular colored paper, small beads are suitable as handles for drawers.

In the same way, you can assemble a larger chest of drawers - just take more boxes so that the furniture has a more believable look; you need to tinker a little with the decor, for example, cut out two rectangles slightly smaller than the end of the shelf, glue one on top of the other, then on drawer, instead of colored paper, take white acrylic paint, apply it in several layers to the entire product, lightly go over the protruding parts with gray eye shadow to give the furniture an aged look, the final stage is transparent acrylic varnish, if you have it, you can cover it with a craquelure compound. Beautiful beads are suitable as handles, they are also suitable for legs.

Looking at ready product It’s hard to guess that these were once ordinary matchboxes. Or, as decoration, you can use toothpicks or matches, previously cleaned of sulfur. You can assemble other pieces of furniture from boxes: a bed with drawers for linen, kitchen shelves and much more, all you need is a little imagination and, of course, boxes.
What no doll can do without is a bed; it can also be glued together from boxes. For the base of the bed you will need as many boxes as the size of the doll, first try it on, and only then glue it together. So we glue the boxes in two rows on top of each other, from below we get practical boxes to form the headboard, we glue all the same boxes, but on end To make the surface smooth, cut out a rectangle of a suitable size from paper, cover the front surface of the crib with it, paint the bed in suitable color, we glue the handles to the drawers, all that remains is to make the bed and wish the doll good night.

Older girls can be asked to independently glue boxes from boxes to store hairpins and other girly little things. In total you will need 24 boxes, first glue three boxes together, then arrange the blanks in the shape of a square clockwise, make a second tier on top with an offset, you will end up with a cube with drawers on each side, attach handles, paint the chest of drawers acrylic paint - original craft ready.
Making interior items from matchboxes is very simple, and this activity does not require much time. But ready-made crafts will bring a lot of joy to your children.
The most versatile and convenient material for making furniture, of course, is cardboard. You can create absolutely anything from it, assemble an entire doll house and completely furnish the interior. Moreover, utensils can be made using various techniques; even the most intricate objects can be made, because cardboard is easy to process. You can even make a miniature of your own apartment. For upholstered furniture, of course, you will need other materials, fabric, upholstery filler, various ribbons, ribbons, decorative nails, etc.
Ideas on how to make furniture for dolls
Old antique furniture is very popular now; some people can afford to buy real museum pieces, while others buy modern copies that have been deliberately aged. Well, what’s worse about dolls? I propose to make a luxurious velvet Recamier couch for a doll.
By selecting suitable model, draw details on paper, as shown in photo how to make furniture for dolls.

For work we will need thick and thinner cardboard. We cut out sketches of the parts, attach them to cardboard, and cut them out. To cut curly legs For a couch, it is better to glue thin cardboard in several layers, because it is very difficult to cut this part evenly from thick cardboard. Layers of cardboard can be glued together using any office glue, but it is better to assemble finished parts using a hot gun. We make the figured back from three layers, one solid and two prefabricated, they are adjusted to an already bent base, since if glued to a flat sheet, the back will puff up when bent. If glue for fixation is not enough, it is appropriate to use a stapler.
When all the parts: legs, back, bed are ready, we begin assembly. Irregularities and sloppy joints need to be smoothed out; electrical tape or other plastic materials are suitable for this. For decoration we will need a piece of velvet, lace, nylon cord, preferably golden or silver, depending on the color of your velvet, filler. Real high-quality upholstered furniture was filled with horsehair, but in our case even cotton wool will do, just first tear it into small pieces to make it easier to distribute evenly.

Lace is perfect for simulating a carved surface; we glue it to the edging of the back and along the end of the seat. The lace needs to be soaked with glue, then when it dries on the product it will become hard. We also use nylon rope to decorate the back and edge of the seat. When the applications are completely dry, you need to paint them, at least the lace; spray paint is very convenient for these purposes, just first cover the surfaces that should remain unpainted. To give the couch a more vintage look, cover the painted parts with a thin layer of craquelure composition, fill the resulting cracks with shadows or crushed stylus.
The final layer is acrylic varnish. To make a soft seat and back, we use a stapler to cover the cardboard parts; the padding comes only with inside, we decorate the outside of the back only with velvet. If you want to decorate the product with a decorative capitonné tie, matching beads will do; just make stitches evenly along the surface of the back and seat. We attach the finished soft parts to the frame with a hot gun.
To complement the recamier, use leftover velvet to create a small cushion or cushion. In a similar way, you can make a sofa and armchairs in the same style; you can decorate any dollhouse with this furniture set. Also, with the help of ours, you can learn how to make dolls from tights.
Now I want to tell you how to assemble a carved cradle for a baby doll from ordinary cardboard. The only materials you need are corrugated cardboard, a sharp stationery knife, plain paper, a pencil, a ruler and glue. You can draw the details yourself, or find a template on the Internet, in which case you will just need to print the patterns on a printer and then carefully cut them out. After this, we transfer the templates to cardboard.

We place the cardboard with the wrong side up and trace the template along the outline with a simple pencil. It is better to mark the corners of the carved holes with a thick needle. First we cut out the main outline of the parts, and only then the carved holes. It’s easier to cut straight lines using a ruler, but slowly cut out rounded lines by hand. If you have thick cardboard, it is better not to try to cut through the entire thickness the first time, cut through first upper layer, and cut the remaining layers along the marked line. For the back, it is better to cut out two identical parts, outer and inner, so the structure will be stronger and the joints will not be visible. We cut out the inner part with connecting grooves, and the outer part without them.

When transferring the template of the bed itself, position the cardboard so that the carved parts run across the corrugated shelves.
To bend the stock, draw the corner of a ruler along the fold lines. To make the bed strong, we also cut out identical duplicate parts for the sides of the bed and glue them to the frame.

To strengthen the sides, cut out 2 copies of them from cardboard. To do this, we will use the same crib bed template. It marks the boundaries of the outer sides. When all the parts are cut out, we begin to assemble the cradle, drop a little glue into the grooves, coat the ends with glue over the entire surface. Hold the structure with your hands until the glue sets well. If you find it difficult to carefully cut out a pattern on the crib, you can use only the outline of the template, decorate the cradle with decoupage instead of carving, or simply paint it any color. You can do the decorating together with your child.

How to make furniture for dolls photo
Objects made from newspaper tubes, the manufacturing principle is the same as if you were weaving furniture from wicker, the finished products only need to be painted and complemented with soft cushions with floral upholstery. If you are good at crocheting, you can even knit doll furniture, the main thing is to use stiff threads, or then simply starch the finished product. Also good for doll furniture is a material such as wire; in this case, you will also need strong threads. We bend the frame of the future chair or sofa from wire, wind the threads tightly to decorate the back and seat, so that the threads do not break, you can first wrap the wire frame with electrical tape.

Every fashionista needs a Barbie wardrobe to store doll clothes in it. The easiest way to make it is from a shoe box. In addition to the box itself, you need beautiful paper, a piece of foil, glue, large beads and half an hour of time.
So, the lid of the box will be used to make cabinet doors; use scissors to cut off the edging of the lid along the width, and cut the lid itself in half lengthwise. We glue foil onto one of the resulting doors - it will be a mirror, the shape does not matter. Then we cover the entire surface of the box and doors with beautiful paper; even a piece of wallpaper or self-adhesive film will do. Now we glue the doors along the remaining edges on the sides, we place large beads on liquid nails - these are the handles on the doors. In general, the closet is ready, but you can also equip the interior space by gluing shelves, or making an internal chest of drawers from matchboxes.
True craftsmen assemble doll interior items even from matches, toothpicks, bamboo skewers and wooden sticks from ice cream.