The technology for decorating a house with your own hands differs depending on the chosen material. In this article we will talk about the types of foundations and their features. We will also consider in detail the most popular types materials for finishing the basement of a private house, in particular: decorative plaster, natural and artificial stone, PVC and panels, mosaic plaster and different types of tiles.
Therefore, when choosing materials for finishing the facade of a house, it is important to take these nuances into account:
- DIY home finishing materials:
- plastering solution;
- tile;
- panels;
- artificial and natural stone;
- brick.
The presented materials have their own advantages, and also differ in the methods of their application and installation.
Under no circumstances should the foundation be left unfinished, since concrete is predisposed to absorb moisture, which has a destructive force when air temperature changes.
Before you begin finishing the basement of a private house, you should thoroughly clean it of dirt, level the wall, and repair chips and cracks. Next, the surface is coated with a primer for better adhesion of the finishing materials to the base.
Types of foundations:
Protruding. To finish the foundation of a house with your own hands, you first need to take care of the drainage. If installed incorrectly, water will begin to collect at the junction of the base and the wall. In order to prevent such a situation, water drainage should be planned taking into account the cladding of the base.
The appearance of the foundation, finished with such tiles, is similar to walls made of clinker bricks. The advantage of tiles is that they have less weight and thickness (8 - 20 cm).
The length and width are similar to brick. You can purchase additional corners to simplify the work and make the base look beautiful.
Step-by-step instructionplinth finishes:

 It's very attractive to look at, but it's not cheap either. The most popular materials for such finishing are sandstone or limestone. Marble or granite are among the most expensive natural materials. Sandstone and limestone are pre-treated with a waterproofing compound. The laying pattern is the same as for tiling. Stone glue is used to secure the elements. Seams are left between small stones, and 2 mm between large stones. If the foundation protrudes forward, it is necessary to install a cornice to drain the water.
Artificial stone is very similar to natural stone. Thanks to special additives and fillers, manufacturers obtain stone with excellent performance properties.
The technique of finishing the foundation with artificial stone is similar to laying tiles:

 Polymer sand tiles are an innovative material that imitates “torn” stone and brick. It is very light in weight, which makes it possible to lay it on weak-bearing structures. Manufacturers have minimized the risk of cracks and chips in the material and increased frost and moisture resistance. Therefore, there is no need for treatment with waterproofing agents.

Finishing the plinth with resin-based tiles
 The appearance of this material resembles clinker brick or sandstone. Its thickness is small, only 3 mm. Resin tiles are elastic, which allows them to be used on rounded plinths. They can also be bent at the corners of the plinth. The material is cut using scissors and can be easily attached to plaster, concrete and insulation. It has a smooth and rough surface and a wide range of colors.
Installation order:

 It has a granular structure. The grain size is about 3 mm. After the solution is applied to the wall, a pattern emerges that resembles a colored mosaic. The resin acts as a fixing agent.
Thanks to its qualities, the finish becomes moisture resistant. Mosaic plaster is resistant to low temperatures and external damage.
It cannot be applied to lime plaster and artificial materials. It adheres best to concrete and mineral bases (cement, gypsum).
Application order:

Finishing the foundation of a house with plastic panels
Often used for finishing small country houses and cottages. The combination of panels with siding looks very attractive.
Plastic panels are lightweight and easy to work with:

Finishing the foundation of a house with your own hands is a feasible task for anyone. The choice of materials nowadays is so wide that any idea can be turned into reality. The main thing is to follow the instructions for working with a specific type of material.
The base of a house made of brick or concrete needs reliable protection from destructive environmental factors. Such protection is not always provided during the construction of a building, and often owners are forced to install it themselves. We will tell you how and with what to cover the base brick house.
Why is it necessary?

Designs of brick houses with a basement often involve using this floor as part of the living space of the house. This means that the basement will be connected to the heating system, therefore, in case of poor thermal insulation, energy losses are inevitable.
Moreover, the maximum losses will occur through the above-ground part of the walls of the basement gap. The floor in the basement is located quite deep underground and does not freeze in winter due to natural insulation by an infinitely thick layer of earth. The ceiling is also protected by the warm ground floor, and heat does not escape through it.
Only the walls of the basement masonry remain, and here the purpose of their cladding becomes clear:
- The finishing coating allows you to protect the plinth masonry material from moisture penetration. The base located at the very bottom of the structure is most susceptible to contact with water that penetrates from the thickness concrete foundation, flows down the walls of the house during rain, comes into contact with the masonry in the form of snow drifts, enters in the form of splashes bouncing off the ground, etc.;
- Brick houses with a basement require high-quality insulation, and the insulation, in turn, requires finishing and protection. Here we see the need for a durable and reliable cladding that will hide the thermal insulation and protect it from wear and damage;
- The plinth structure is subject to heavy loads, since the entire house presses on it. In addition, if the basement is unheated, then its walls may freeze, and the accumulated moisture will expand and damage the structure of the material. Therefore, it is better to protect the masonry from moisture and frost using appropriate finishing;
- The proximity of the ground leads to the fact that bottom part All kinds of debris, dirty splashes of rain, dust, etc. fall into the walls. Porous brick or concrete absorbs all these substances and becomes dirty. The presence of a durable coating makes this problem insignificant, since the dense surface of the facing material is easy to clean.

It also often happens that projects brick houses with a base contain such a circuit in which . The above-ground part of such a foundation does not fit well with the brickwork of the walls and needs to be lined with suitable material.
Important! The finishing of the base is needed not only as a decorative element, but, to a greater extent, as a functional one. protective structure, protecting the masonry from premature wear and aging.
Types of finishes

The options for finishing the basement of a brick house are very diverse. The construction market is overflowing with all kinds of materials and technologies that can be used for these purposes. In addition, natural raw materials are widely used, including various types natural stone, sandstone, pebbles, etc.
Among modern technologies, the most in demand are such varieties as ventilated facade, siding, blockhouse, metallic profile, stamped concrete, ceramic facade tiles, porcelain tiles and others.

As practice shows, laying natural materials such as marble, granite, pebbles or sandstone requires extraordinary abilities and extensive experience, which means you will have to hire expensive craftsmen. At the same time, the price of the stone itself is also very high, and as a result, facing work can be too expensive.

Based on these considerations, we have identified the most practical and affordable methods for finishing basement masonry:
- Ventilated facade. The coating made of porcelain stoneware and other relatively natural materials looks great;
- Siding. Easy and quick to install, relatively cheap and perfectly imitates all types of natural coatings;
- Metallic profile. The cheapest and simplest coating, at the same time quite durable and reliable, although not entirely aesthetic.

Important! Use of modern facade systems allows not only to reduce the cost of work, but also to place a layer of thermal insulation under the coating, which is very important for the base.
Installation of cladding

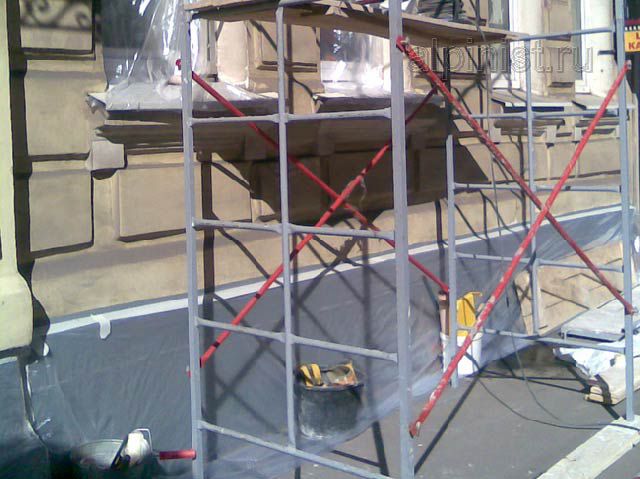
Let's start installing the cladding. We will work with our own hands; the material we use is polymer-sand plinth tiles, which are attached using ventilated facade technology ().
- We put the walls of the basement in order, eliminate cracks and other defects, remove all protruding objects;

- We mount the frame guide profiles. We use a galvanized steel profile measuring 28x67 mm. It is important to maintain a strictly vertical position of the surface of the frame structure, and place all its parts in the same plane;

We install the frame.
Is the frame of the new house ready and it’s time to start decorating it?
But you haven’t fully thought through the options, or haven’t decided on the finish of the base? We are in a hurry to help you.
After all, only correctly selected materials and their combination will give the facades completeness and make them beautiful. Let's consider finishing options from various materials presented on the construction market.
The base is part outer wall, which is located at the foot of the building and encloses the underground space of the house. In some houses it is an independent element erected above the foundation, in others it is a part of the foundation itself that protrudes above ground level (strip foundations). In both cases, he needs protection.
The base can be sunken, protruding, or located in the same plane as the walls of the house.
The most reliable is the one that sinks, it is easier to protect it from mechanical and atmospheric influences, there is no need to drain it. From an aesthetic point of view, a building with such a base is more attractive.

Projecting plinth arranged in houses with thin walls, for example, frame or chopped, as well as if the house has a warm underground. With such a device, the installation of a drain is additionally required to remove precipitation.

It is not advisable to install the base at the same level as the wall. In this case, it is more difficult to perform waterproofing.
But whatever the base of your house, it should be well protected by a layer of waterproofing. From the point of view of economy in the further operation of the building, it is better to make it from reliable materials that do not require additional decorative finishing (monolithic concrete, baked brick, stone). It is enough to treat the base part of the monolith foundation with cement mortar and paint it.
How to decorate the basement of a house if you want its appearance to be more attractive? We suggest considering several options.
Finishing the foundation of a house with decorative plaster
Decorative plaster (as well as many facing materials) is applied to a previously prepared surface: cleaned and primed. Before applying some types of plaster, a mineral-based reinforcing mass is used.

If the base has significant unevenness and geometric deviations, as well as in cases where the plaster layer exceeds 12 mm, before applying decorative composition a reinforcing mesh is attached to increase the strength of the plaster mortar and its better adhesion to the base. The mesh can be woven, welded, wicker.

If the thickness of the plaster layer is small, you can use a fiberglass mesh. Any reinforcing mesh used prevents cracking of the plaster during further use of the house.
The applied decorative layer can be smooth, rough, made with jointing or using imprints for various materials. For this purpose, special rollers and stamps are used. The finishing layer of the plastered surface is often various façade paints.
Decorative finishing of the base of the house with facing materials
A wide variety of materials are used for cladding: porcelain stoneware, clinker tiles, natural facing stone, siding, corrugated sheets. The main thing is that the selected material is in harmony with the facades and roofing material.
Porcelain tiles have increased strength, frost resistance and wear resistance, as well as decorative properties.

The plinth, lined with porcelain tiles, looks great in combination with the porch, which is finished with the same material. The foundation, lined with porcelain stoneware, is more discreet.

Clinker tiles are very decorative, creates a feeling of being laid out clinker bricks base But since the brick itself is a fairly expensive building material, finishing with clinker panels will save money, and the lined element will not look cheap.

In addition, with the help of such tiles you can decorate not only the base, but also part of the walls or corners of the building. The natural shades of clinker tiles combine perfectly with natural tiles and many other roofing materials.

Clinker tiles (as well as porcelain tiles) can be glued to frost-resistant adhesive composition or mount on a special frame system(when installing a ventilated facade). The second method of constructing a base is more expensive than the first, but is the most reliable. In addition, insulation can be installed between the frame and the wall.

Gluing the tiles is carried out according to the principle of laying any other ceramics, the only difference is that the ground level is variable around the perimeter of the building. In this connection, we calculate the number of rows (based on the width of the tiles and the thickness of the proposed seams), measure the line of the second row from the bottom, draw a horizontal line, and for convenience, install a starting auxiliary strip.
After laying the tiles, it is necessary to seal the seams with a jointing solution special for outdoor work.
Natural and artificial facing stone- another decorative material for finishing the basement of a building.

Natural stone is very strong and environmentally friendly, durable and beautiful. This is perhaps the most ancient building material.

Granite, marble, sandstone, used in the exterior and interior decoration of the house, indicates the high status of the owner, as it is the most expensive material. Natural stone is laid on cement mortar.

Alternative - artificial finishing stone for those who do not see their facade with another material, and it is not possible to purchase a natural one.

Artificial stone is produced with imitation of various rocks and a rich color palette. Its weight is significantly lower than natural stone, which facilitates the installation process.

Plastic panels (PVC), imitating various materials (stone, brick, wood), have also become widely used in the finishing of basements and facades in general. But basement siding differs from façade siding in composition. It is more resistant to mechanical damage.

Modern siding panels for exterior finishing can withstand both very low (-50 o C) and very high (+60 o C) temperatures, therefore they are used with great success for finishing work.

The panels are installed along guides (vertical or horizontal); the panels are joined together using grooves and ridges. On sale you can find large and small-sized PVC cladding elements.
You can finish the foundation of the house from the outside with galvanized or polymer coating. This type finishing is economical and easy to install. The foundation will be reliably protected from external influences and will last for a long time.
All types of finishing are good, choose your option, but do not forget that the selected material should not stand out from the overall picture. Harmony can only be achieved if all materials - from the base to the roof - are combined with each other.
Finishing the basement, on the one hand, is simpler than the facade: there are no special aesthetic and architectural subtleties here. The base can harmonize or contrast with the overall design of the building in tone, texture, and type of material used, see fig. Eager pedants just need to point to the Erechtheion, the Roman Baths or any of the Gothic cathedrals - and let them say what they want.
For small individual construction, the false plinth option is also of particular interest (photo below right in the figure): the strip protruding foundation is finished without any complaints, as long as it lasts for a long time, and the wall belt above it imitates a high plinth. This allows you to fully concentrate technically on the correct arrangement of a very critical place in the entire structure of the house - the junction of the wall with the plinth (foundation protrusion); in particular, on the ebb tide device, see below, without compromising the appearance of the house.
On the other hand, the cladding of the base is subjected to intense exposure to chemical (atmospheric moisture, dirt, organic matter from the soil), physical (temperature and humidity changes) and mechanical abrasive agents (wind-blown grains of sand). The concentration in the air of dust, dirt and splashes of solutions of soil components depend on the height above the ground according to a power law and within 50 cm from the ground they fall relative to the zero height of the building by 10 times or more. Therefore, both the materials for finishing the base and the methods of working with them require a more careful approach than for finishing the facade.
Thirdly, finishing the base with stone or other durable, resistant and heavy material almost always does not cause any technical difficulties, because the height of the base usually does not exceed 80 cm; in extreme cases - up to 2 m, for a house with a basement, and the basement itself is made of durable materials, otherwise it simply will not bear the weight, climatic and operational loads. So the material for cladding the base can be chosen, limited only by financial considerations.
Work order
The basement of a residential building is clad in the order of work at the final stage of construction - exterior finishing. In general, the finishing of the basement of the house is carried out in stages in the following order:
- A trench is dug under the blind area with a depth of approx. 30 cm (on the bayonet of a shovel) or 15-20 cm deeper under the blind area with insulation;
- A sand and gravel cushion is placed in the trench, and optionally, insulation is also placed;
- The base is rough finished in order to level its surface;
- A blind area is being built;
- Decorative finishing of the base is carried out;
- Only after this does all other work on the exterior decoration of the building begin, incl. façade cladding.
It is not recommended to violate this sequence, especially for inexperienced amateur builders, but in some cases, discussed below, this is possible, for example. if the basement of an existing building is being covered or repaired. In this case, the determining role for the complexity of the work and the possibility of using one or another finishing material The design of the base plays a role.
Base and low tide
Finishing the base of a private house with regard to the choice of material and method of its installation largely depends on the design of the base itself and its cast. The junction of the load-bearing wall with the plinth is the most likely place for moisture to penetrate into the gap between them, causing the walls to become damp. The waterproofing doesn't let it in from below, that's why they put it there. But the water flowing into the walls can also leak under the wall along the same waterproofing, this is the so-called. capillary damming. To prevent this, a low tide is installed above the base.
Base design options with low tide
Possible design options for a base with low tide are shown in Fig. If the base sinks (pos. 1), you are in luck. A simple single flashing is installed between layers of insulation; if there is a teardrop groove (dropper) knocked out at the bottom of the wall extension, pos. 1a, then capillary damming of the walls is excluded. But then either the wall should be 2.5 bricks thick, or the basement floor should be slab, pos. 1b. Last option budget developers avoid it - it’s a bit expensive - but in vain: then, during the operation of the house, the slab floor more than pays for itself. Moreover, on, in fact, the second foundation of the house, you can build a lighter and cheaper box. Also in this case, you can build from foam/gas blocks, then lining the house with brick, which looks solid and is inexpensive.
More often, however, there are houses on a protruding plinth, pos. 2. The technology for preventing capillary damming in this case is known, this is a double ebb, pos. 2a. Its outer tray (extension) is installed upon completion decorative finishing base and facade, so that they can be replaced as they wear out. For reliability, silicone is applied to the surface of the rim (upper bend, fold) of the tray adjacent to the wall before installation.
Now on sale there are “eternal” ebbs made of propylene or stainless steel; their durability exceeds the estimated service life of residential buildings conventional design. With an “eternal” ebb, the task of keeping the wall dry is simplified: the base is completely finished, and the ebb is placed on the wall before facing it with a moisture-proof material, for example. waterproof plaster, clinker or thermal panels with glue. The rim of the ebb turns out to be walled up in the façade cladding, pos. 2b, and water will no longer flow under the wall.
Note: The same methods for installing a low tide are applicable for houses on a base flush with the wall, although in general a “flat” base is bad in all respects.
Sometimes, for decorative purposes, the ebb as such is abandoned, replacing it with a brick cornice. This is possible, but the facing brick on the cornice must be taken so-called. hyperpressed (hyperformed), the eaves-drip seams should be rubbed flush, and masonry mortar and use waterproof and moisture-proof grout with polymer additives. In amateur conditions, you can prepare them with your own hands by adding cement-sand mortar from M200 and grout for external use, 1-3 cups per bucket of PVA or polymer tile adhesive such as bustylate. You can also use glue for porcelain tiles or clinker (terracotta) tiles.
Hyperpressed brick is often falsified. The real one can be recognized by its uniform structure, the absence of visible inclusions and the even dark color of the matte or semi-matte surface, the so-called. “chocolate” bricks, pos. 3. On ordinary (quite suitable for their purpose) facing bricks that form a cast, after a winter or two the core will appear and efflorescence will begin to appear, pos. 3a, which means break the basement cladding and redo the ebb while the wall is frozen.
Finally, they build almost exclusively on protruding plinths. wooden houses: the minimum permissible width of the foundation strip here turns out to be greater than the thickness of the wall, and installing a log house or frame on concrete slab for a number of reasons this is not possible. In this case, the ebb can only be double; its options for log or timber and frame house shown in pos. 4 and 5. In a log/timber house, the fastening of the rim of the outer tray is sealed with silicone; in a frame house this is not required, because The wall cladding also serves as a teardrop.
Note: in all cases of using double ebb, the distance between the eaves of the inner and outer trays should be at least 10-12 mm at any place.
Preparation for cladding
The most difficult and time-consuming part of the work on finishing the base is leveling its surface for cladding; the base can be made of rubble stone, concrete blocks (possibly old, crumbling at the edges) or the above-ground part of the concrete foundation. In this case, the easiest way to prepare it for cladding with your own hands is to plaster it with cement-sand or cement-lime starting (rough) plaster for exterior work. You can make your own knead using the hydrophobic method described above (PVA, bustilate, etc.).

Leveling the surface of the plinth for lining with starting plaster using a reinforcing mesh.
To level with plaster, the base is treated with a deep penetration primer on the appropriate material (stone, brick, concrete), large protrusions are roughly knocked down, patching is done as needed with cement-sand mortar and a steel reinforcing mesh with a thickness of approx. 4 mm, see fig. I use a plaster solution that is thick and does not float; The layer is 1.5-2 mesh thickness. Rub it smoothly with a polisher immediately, without waiting for it to set. After setting, check the evenness with a lath (the norm is 3 mm/m), rub and re-coat as necessary. It is advisable to first make a separate plot of 1-1.5 square meters. m, after that the “teapot” with its hands from where it is necessary will at least put the start quite level under the cladding.
Materials and technologies
Materials for cladding the base, as stated above, must be resistant to thermal, chemical, mechanical influences and abrasion. Modern materials for finishing the plinth, depending on the price and complexity of the work, are generally divided into the following classes:
- Painted waterproof plaster is the simplest and cheapest option. It is best suited for a low, up to 40 cm, base, the finishing of which is still not clearly visible. Maintainability is limited, because It is difficult to choose paint for a patch that exactly matches the existing one.
- Artificial stone - in terms of complexity and cost, covering the base with it is comparable to plaster. The appearance is 3+ or 4–, but tracing the corners is much simpler, see below. Maintainability is complete.
- Natural (wild) stone and facing brick - lining the base with them can be inexpensive and does not require much labor, but if the base and blind area are insulated, the complexity of the work increases many times, also see below. Maintainability is very limited: it is very difficult to remove the damaged fragment(s) without disturbing the cladding over a sufficiently large area.
- Flexible stone – in terms of the combination of parameters price/quality/appearance/technical capabilities, it has no equal. Finishing the base with flexible stone is also possible in budget option. Maintainability is complete.
- Basement siding - depending on the region, it can be cheaper than plaster, and in appearance it is superior to artificial stone (not natural!). Correct installation simple, but requires certain knowledge and skills. Maintainability is complete, but repairs are quite labor-intensive.
- Basement cladding panels (not façade!) are somewhat more expensive than base siding with the same decorative qualities, but lack its weak points (see below). Maintainability is limited for the same reasons as with wild stone and brick.
- Clinker (terracotta) and porcelain tiles are the most expensive and labor-intensive, but the most durable and durable option. If you need a plinth surface to look like a noble polished stone, then porcelain stoneware is practically the only option at a reasonable price.
Plaster
Finish the base beautifully, but not very well this place There is no point in using permanent finishing decorative plaster. It is best to simply paint the rough base for finishing with alkyd enamels for exterior use. Yacht enamels will cost a little more, but will last much longer. The option is still a little more expensive, but even more durable and absolutely waterproof - the so-called. latex acrylic paints or acrylic emulsions; When dry, they give a layer similar to thick rubber, only colored.
The plastered plinth can be immediately finished to look like stone using silicone stamps. A set of stamps costs about 500 rubles, but you can make them yourself. In general, plastering a plinth under a stone is carried out as follows:
- Select samples (models) of natural stone of any type of suitable size and more or less matching along the contour, without overlap, up to 12-15 mm thick.
- For each model, a plywood or plank box is made - flask - with sides 2-3 cm higher than the stone.
- The models are generously soaked in mineral oil (you can use engine oil) and dried for 2-3 days.
- Next, the models are lubricated with Vaseline (lanolin), each is placed in its own mold and filled with silicone. Before doing this, the inside of the investment rings also needs to be coated with Vaseline.
- After the silicone has hardened, the flasks are disassembled, the models are pulled out from the stamp blanks (don’t be afraid to pull, silicone is stretchable and durable) and the stamps are cut with a knife along the contour with an allowance for the width of the seam.
- A layer of thick mortar up to 16 mm thick is applied to the base prepared as described above and stamped immediately until it sets.
- Once the coating has completely hardened, it is painted.
Fake diamond 
Finishing the basement of the house with artificial stone.
Cladding the base of a house with artificial stone, with all its mediocre advantages, is good for budget developers in that the forms for corner elements(see picture) you can do it yourself. Angles are the most weak spots cladding, this is where the masonry seams begin to crack and moisture under the cladding creeps exactly where it shouldn’t. They mount artificial stone on a plinth or similarly to natural stone without insulation, or on tile adhesive like tiles (see both below),
Methods for making artificial stone with your own hands are described in other materials; Any type suitable for paving paths will be suitable for the plinth. You can also make homemade artificial stone for cladding the base from the same plaster mortar. The working process differs from the production of stamps for stone in that it is not necessary to select models so strictly by thickness and that the casting mass is tinted in advance, which makes the color more durable; see video below. The technology for making artificial stone from plaster with your own hands is not strict; different options are possible here.
Wild stone and brick
The natural stone for cladding the base should be chosen to be heavy, with low moisture absorption, i.e. not susceptible to frost. Shales, sandstones, limestone, dolomite, travertine and tuffs are definitely not suitable. The best are granite, diorite, diabase, basalt, gabbro and other rocks that can withstand at least 1000 cycles of complete freezing/thawing. With current climate changes, this is not so much, in Central Russia in the off-season there can be a full cycle every day.
The technology for cladding a plinth with natural stone depends significantly on whether it is insulated or not. Without insulation, the matter is simpler; you just need to fulfill the following conditions (see figure on the right):

Note: Don't be afraid of moss and lichen on a stone plinth. They will not spoil the stone at all, they will only add chic to the house. Mold and efflorescence (salt stains on soaked and then dried out areas) are the bad things. But on the stones of the above-mentioned species, both do not happen.
Finishing the base with facing bricks differs from facing it with wild stone, firstly, in that the masonry seams make it normal for brickwork thickness 10-13 mm. Secondly, the masonry mortar must be waterproof with a plasticizer (see above), because Moisture likes to linger in the seams of brickwork and dirt accumulates. Thirdly, it is very, very advisable to use hyper-pressed brick, as for brick casting, see above.
Facing the base with natural stone and brick becomes seriously more complicated if the walls, foundation and base are insulated. Then not only does the heavy cladding have nothing to hold on to, but there is also a danger of capillary moisture penetrating into the insulation. What type of work is required to avoid both can be imagined by looking at the diagram of stone cladding of an insulated base in Fig.:

Scheme of stone cladding of the base with insulation
And the matter will become even more complicated if the base is covered existing house, because the retaining wall will shrink. In this case, it is better to cover the stone base with siding, panels, and, if you want the high cost to immediately catch your eye, with tiles. But first, let's finish with stone materials.
Flexible stone
Flexible stone in some sources is presented as a kind of “flexible tile on polymer resins.” Apparently, those authors remember the old Soviet flexible facing tiles, which, as they say, have been around for a long time. That's where she goes: polymer tiles dried out, tightened, cracked, quickly wore out even in heated rooms.

Flexible stone for finishing and cladding
The binder of the flexible stone is indeed synthetic resins, but not the mythical “polymer” ones, but polyester and urea, but the essence of this material is a textile base sprinkled with stone chips. The advantages of flexible stone as an external facing material are truly magnificent (see figure):
- Safe, environmentally friendly, chemically and mechanically resistant, chemically neutral.
- Estimated service life is over 150 years.
- Easy to process, can be cut with scissors.
- It shines through, you can hide the illuminators behind the cladding or even make a street lamp from flexible stone, which during the day, when turned off, will be a sculpture to match the decoration of the house.
- Available in an innumerable variety of unique textures and colors, completely consistent with natural ones, both solid and torn, with intervals to imitate masonry joints.
- The flexible stone can be used to trace curved surfaces and corners without any problems.
- There is no façade, plinth, external or internal flexible stone; it is suitable for all types of finishing work. The same material can be used to decorate the base, window and door trim, balcony, cornice, etc.
- Finishing the base of a house with flexible stone on a difficult terrain (uneven slope, etc.) costs 7-20 times less than comparable decorative qualities and durability of cladding with any other material.
- Careful preparation of the surface for flexible stone is not required. If the unevenness does not exceed 10-12 mm, the flexible stone is simply laid on tile adhesive (the minimum layer above the protrusions of the base is 2 mm). Otherwise, the potholes are roughly covered with cement-sand mortar. Which in any case won’t hurt to save expensive glue.
Flexible stone has only two disadvantages: it is rough; There are no glossy or semi-gloss (polished) finishes. Then, the base for the flexible stone needs to be strong, so you can’t glue it directly onto the insulation or SMP (see below), you first need to prepare the plaster base, as described above.
Siding 
Basement siding panel
The base of the house is covered with special base siding, which is more wear-resistant and durable than façade siding. Basement siding is available in PVC and propylene. The former is cheaper, brighter and can be glossy; the second one is more stable. Externally, basement siding differs from facade siding in that it is made not of boards, but of slabs with tongue-and-groove joints with snaps, see fig. Therefore, it is possible to file the basement siding to size only at the corners, and the seam must be covered with a standard additional element. The basement siding is mounted on a horizontal sheathing made of wood or steel profile on hardware (screws).
Siding cladding is the least labor-intensive way to finish a stone base at an affordable cost; it doesn't matter either an old house or new building. But the “law of free cheese” is adamant here too: serious problems covering the base with siding represents, firstly, damage to the sheathing, secondly, the accumulation of moisture in the cavities under the sheathing, and thirdly, the settlement of insects and rodents there. As a result, the cladding is not so cheap and simple due to the difficulties with the blind area.
The general installation diagram for basement siding is shown in Fig. below; drainage is highly desirable in fairly dry areas. Installation of basement siding is carried out after the blind area has been completely arranged. At the bottom and at the top, deformation gaps of 10-15 mm are left, which are foamed, sealed with plastic glue recommended by the manufacturer (for example, CM14) and covered with additional elements (plinth, cornice).

Basement siding installation diagram
However, each manufacturer of plinth siding struggles with the problems of its product in its own way, which, by the way, indicates that optimal solution Not yet. Therefore, if you choose siding for the plinth, then:
- Ask the supplier or search the manufacturer’s website for the material specification and make sure it suits your conditions (temperature range, annual precipitation, soil properties, plinth design and material, building design).
- Use extensions, sheathing material, fasteners and sealant of the recommended types.
- Follow the manufacturer's installation instructions exactly.
- In no case do not skimp on the starting and finishing bars: moisture, dirt, mice and spiders with their relatives are just waiting for that.
Panels and slabs
Finishing the base with panels is somewhat more complicated and more expensive than siding, but does not have its disadvantages, because There is no sheathing with its pockets; the panels are installed with glue. Metal composite panels, however, are mounted on the sheathing, but they are rarely used for finishing private houses because of their utilitarian appearance. Most often, the base is finished with facade thermal panels with clinker stone overlays and polyurethane insulation; they are quite suitable for this purpose. The paneled base looks no worse than under the siding. Thermal panels are mounted on the base in the same way as on the facade; surface leveling to an unevenness of 3 mm/m is required. Insulation is obtained automatically.
You can also find recommendations to finish the base with glass-magnesite plates (GMP), but this is far from the best option: GMP are fragile and have little resistance to abrasion and soil chemicals. On the outside, at resorts, the facades of rental houses are sometimes finished in a half-timbered style with high-quality SMP (on the right in the figure), but such cladding lasts for 10-15 years, and during this time it is necessary to make 2-3 cosmetic repairs.

Glass-magnesite panels (GMP)
In private construction, SMP is sometimes used as permanent formwork for a towering strip foundation, which, in general, is good in all respects except price. In this case, the SMP above the ground can be prepared for finishing, as described above, only the mesh fasteners need to be taken longer so that the screws sit in the base. And then natural stone and brick as finishing for the base disappear: under the weight, the cladding will peel off along with the plaster and mesh.
Tile
Tiling the base is a poor man's solution left over from Soviet times. The porous material absorbs moisture, and the glaze loses its appearance due to the appearance of microcracks and the influence of grains of sand. The plinth is finished with either clinker (terracotta) or porcelain tiles. Covering the base of an existing house with tiles is technologically no different from that during the construction process, which is a definite advantage. But in both cases, the work is very labor-intensive and requires fairly high qualifications: the base surface is leveled and its patching repairs are carried out. Then the base is primed with a deep penetration primer. The tiles are placed on glue (layer - 2-3 mm) in sections 1-1.5 m long. Immediately, before the glue has set, the tiles are fixed with crosses or other dividers (see figure), otherwise the cladding will slip. Separators are also placed at the bottom; a gap of 10-12 mm is needed there, which is subsequently sealed with the same glue. The next section is coated after the glue on the previous one has hardened.

Tiling the plinth
Note: It is impossible to prepare the surface for tiles using the method described above (mesh + plaster), otherwise the lining will peel off.
If you still want to decorate your base with tiles (it looks rich, nothing can be said), then it is better to cover it with porcelain stoneware. Firstly, the hardness of porcelain stoneware is comparable to the hardness of sapphire and corundum; it doesn’t care about sand. Secondly, strong inorganic acids, except hydrofluoric and fluorine-antimony, do not affect porcelain stoneware. Thirdly, porcelain stoneware is produced in slabs up to 30x60 cm, so the work won’t be such a hassle. Fourthly, it is possible to split porcelain stoneware on a solid base and with a sufficiently elastic layer under the tile only with a shot from a rifled weapon; Buckshot fired from a 12-gauge pump-action shotgun from a distance of 15 m flattens and bounces. Fifthly, porcelain stoneware slabs are also available with a glossy surface, almost indistinguishable from polished stone. Sixth, due to the low TCR (thermal expansion coefficient), porcelain tiles on the plinth can be laid “without a seam”, i.e. with a seam 1-2 mm thick, which enhances the decorative effect.
And more about the stone
Let's look again at what types of stone are suitable for cladding the base. Yes, this is... a heavy boot! Fractionated broken stone is not cheap, but if you order a dump truck of solid rubble and sort through it yourself, you will find enough pieces to build a stone plinth, and, smaller ones, to later fill the recesses between large fragments. So, while building, as they say, tightly on a budget, also consider the option of a stone base. There is no need for cladding/finishing as such, but with 100% natural stone any house will look solid.
The construction of any building always begins with laying the foundation. This is an integral part of construction work, without which it will not be possible to achieve structural strength and balance.
Most often, the foundation rises several centimeters, and sometimes even meters, above ground level. This part is called the base. Naked concrete wall it looks unsightly from an aesthetic point of view, so designers recommend decorating it.
Installing panels on the base of the house
There are many different materials for finishing, which differ:
- price;
- quality;
- operational abilities;
- physical and technical characteristics.
Before you start construction works, namely laying the foundation, you need to think in advance about what type of material you would like to finish the basement of the building. In this case, you should take into account the features of the exterior, climate and financial capabilities.
In addition, it is necessary to know and clearly understand why finishing with facing materials is needed: is it just an aesthetic whim or important detail designs?
For most people, the exterior design of a house is one of the important points during its construction. Such nuances are discussed in advance with builders, designers and architects.

Covering the base with decorative tiles
However, few people know that plinth cladding is not only about decorating cold, sloppy concrete. Finishing work initially has a completely different purpose:
- Protecting the foundation from damage. Colonies of fungi or mold can grow on concrete over time. Also, the base is not protected from damage by corrosion and erosion. Constant rain, snow, frost or heat contribute to the appearance of cracks and splits, which in turn threatens the integrity of the building.
- Protection against contamination. The environmental situation in the world contributes to the fact that acid rain falls, and polluted air contains elements that destroy even concrete. If the base often succumbs to such contamination, then very soon it will begin to collapse beyond the possibility of restoration. The consequence will be irreparable destruction of the house. Cladding saves the foundation from such processes.
- Warming function. Despite the fact that the basement is located much lower than the floor of the living space, its excessive cooling helps to reduce the temperature in the house. This is due to the fact that concrete instantly absorbs cold and distributes it vertically along the walls. Even an insulated floor cannot always prevent this process. At the same time, colossal financial resources for heating. However, there is little result from this. In addition, due to exposure to cold, erosion processes can begin or mold can grow, for which cold and dampness are an ideal environment.
- Protection from external influences. The strength and durability of concrete, brick and any other foundation are affected by weather and atmospheric conditions. Ultraviolet radiation gradually destroys the structure. Strong winds, frosts, excessive air humidity, etc. also have a negative impact. Facing materials protect against such factors, which can be easily replaced if necessary. With the base the situation is much more serious.
Based on the above factors, we can conclude: finishing the base is a necessity. No builder can guarantee the strength and reliability of a building without finishing.
Base cladding options
To prevent the destruction of the foundation and ensure comfortable living conditions in the house, the base must be finished with facing materials. You can choose cladding colors and textures that match the rest of the building materials.
There are also special insulation systems for walls. Can be picked up protective covering from corrosion, erosion, fungus and mold.
If you don't know what type of cladding fits better In all cases, consult a specialist. The architect or builder who is constructing your home is competent in this matter.
Cladding option No. 1: Plastering or painting
The most popular method of processing the base is plastering. Its fame is associated with its availability and reliability. A layer of plaster strengthens, decorates and protects the structure from environmental influences.

Plastered basement of the house
Features of the material.
In order for the plaster to perform its function, you must follow the rules for its application:
- The level of protection and thermal insulation depends on the thickness of the layer. The thicker the layer, the better.
- To ensure a durable and moisture-resistant finish, apply a cement base before plastering.
- The coverage will be uniform when applying two layers. Use decorative plaster as the final coating.
- Reinforcement of the structure will help to avoid cracking and falling off of the top layer.
Important: The classic mortar, cement-sand, is best suited for lining the gap. Apply the composition intended for facade decoration on top.
Installation.

Plastering the basement of a house
| Step-by-step instructions for plastering the plinth | |
|---|---|
| Free the basement spaces from excess layers and remove dirt and dust. Also get rid of oil stains. |
| Prime the clean surface with primer. |
| Stuff the plaster mesh. For 1 sq. m there must be at least 16 fastenings. It will be better if you make 20. Use dowels with wide heads. |
| Screw in the screws and attach plumb lines to them. The distance between the screws and the corners of the wall is 30 cm. Pull the thread in a vertical position over the free screws. Connect the screws using horizontal threads. Place the threads at a distance of 2 cm from the wall. |
| Make beacons and fix them with cement mortar. Step – 1.5-2 m. Distance to corners – 30 cm. The most reliable material for beacons is a steel profile. |
| After the cement hardens, pour cement-sand mortar between the beacons. To cast, use a ladle, level the protrusions and depressions using the rule. Leave to dry for 6 hours. |
| Remove the beacons and smooth the surface with a plaster float. |
| Cover the base surface with plastic wrap. Leave to harden for 2 weeks. Moisten the surface with water once every 2-3 days. This will help with ripening. |
| Prime the base and cover it with decorative plaster. |


Advantages.
Plaster for cladding is chosen for the following reasons:
- Relatively low cost of materials and installation work.
- Installation is done by hand: not required special tools and equipment.
- Simple repair.
- Reliable coverage.
- Possibility of applying decor.
Flaws.
Negative features of plaster include:
- Low level of strength compared to analogues.
- Short service life.
- Low thermal insulation.
- Water and moisture permeability.
- Strength degrades over time due to freezing and thawing.
- Installation cannot be carried out if the structure is exposed to direct sunlight. Negative temperatures and precipitation are also restrictions for work.
Since plaster and paint peel off quickly, you need to constantly monitor the condition of the coating on the facade and regularly make cosmetic repairs.
On a note.
- You can cover the base with several layers of plaster yourself. To do this, you do not need to do any preliminary work. It is enough to buy plaster of the desired color and cover the concrete with it in several layers.
- If for certain reasons you do not want or cannot plaster the base yourself, hire a master painter-plasterer. A professional will do this work for you efficiently and quickly. However, don't forget that good specialists They don't come cheap. But the result is worth it: the base will be durable and protected from all types of damage.
- If you are not satisfied with the color of the plaster, then after drying, you can apply two layers of facade paint on top. Today there are more than 50 shades that can be used to decorate the foundation. In addition, building materials stores sell special decorative plaster different colors and textures.
- An interesting option would be to decorate the facade with homemade stones. They can be made from ordinary concrete. To do this, form the desired shape of the stones using a spatula and let them dry. Then cover the artificial stones with paint or plaster. This design will be cheap, but it will look just great.
Cladding option No. 2: Use of natural and artificial stones
To make the façade look elite and rich, use stone cladding. Each stone has its own advantages and characteristics. Experts advise consulting with builders or architects before purchasing, since in a particular case a particular stone may not be suitable. The following are taken into account: the strength of the foundation, weather and the size of the house.
Types of stone.

Types of stone for plinth cladding
In addition to choosing between artificial and natural stone, decide on the texture. The stone comes in the following textures:
- smooth;
- polished;
- chopped;
- sawn
Features of natural stone.
Natural stone has various shapes: rectangle, square, circle, non-standard (made to order).
Also has different thickness: 0.5 and 1 cm.
This thickness is determined by ease of installation and durability of the structure. As the thickness increases, the stone becomes heavy and there is a risk of spalling.
TO positive features natural stones include:
- High level of strength.
- The surface is produced using special equipment. Therefore, the coating will be uniform without additional work.
- Long service life: more than 10 years.
- You can do the installation yourself.
The complexity of finishing is determined by the size of the stone and the tools for work. You also need to take into account that stone is a heavy material. Therefore, not every surface is suitable for cladding. In cases where the surface cannot withstand the stone, it needs to be strengthened.
How to prepare the surface:


Installation of stone on reinforcing mesh
Important: Tight fastening of the mesh is ensured by metal lugs. Screw them into the mesh.
After strengthening, level the surface with plaster or concrete mortar. Remember that concrete mortar cannot be leveled with sandpaper.
For cladding you will need the following materials:
- building level;
- concrete solution;
- putty knife;
- tile cutter
Tips for cladding:
- Work from the bottom up.
- First of all, lay out the corners and fasten them tightly.
- Create additional insulation with the following materials: polystyrene foam, extruded polyurethane foam, polystyrene foam, mineral wool. This is necessary because the stone itself is cold.

Cladding with artificial stone.
Natural stones look noble, but have significant disadvantages: heavy weight and high cost. Therefore, if you do not pretend to be aristocratic and royal nobility, artificial materials may well replace natural ones. The main thing is to choose the right shape, texture and type of fastening.

Finishing the base with artificial stone
Surface types:
- smooth;
- torn;
- structural;
- embossed.
The following materials are used for cladding: shell rock, granite, sandstone, etc. (see table below).
A special feature of artificial stone of different structures is the ability to create an individual house facade. For such purposes, stone with a torn structure is most often used.
Finishing with artificial stone is practically no different from cladding technology natural material. Recommendations for leveling and insulation are similar.
Differences in technology:
- There is no need to insulate the surface, since artificial material has less weight.
- Any surface can be finished by covering the insulating layer with materials such as drywall, plywood or OSB. The stone is installed directly on top of these materials.
For installation, concrete mortar and ceramic adhesive are used. A durable and fresh surface is ensured by applying a coat of primer.
When finishing decorative stone The following work is being carried out:

Features of natural and artificial types of stones.
Find out the features of the most popular stones from the table below:
| Coverage type | Material | Photo | Advantages | Peculiarities |
|---|---|---|---|---|
| A natural stone | Shell rock |  | Low cost, high strength, visual appeal. | Heavy weight, difficult to install. |
| Limestone |  | Affordable price, decorative effect, ability to choose shape, color and texture. | Heavy weight, difficult to operate, risk of making the foundation heavier. | |
| Granite |  | Refined and rich appearance, resistance to cold and heat. | High cost, heavy weight, risk of foundation collapse. | |
| Marble |  | Durability, aristocratic and rich appearance, 100% protection from damage. | High cost, difficult to install and operate, heavy weight. | |
| Gabbro |  | The appearance and color resembles the starry sky, high strength, protection from cold, heat and moisture. | Sky-high cost, heavy weight, difficult to operate. | |
| Labradorite |  | One of the most beautiful facing stones. Durable, reliable and weather resistant. | The material is more expensive than all others. It is difficult to install and weighs a lot. | |
| Artificial stones | Canyon panels |  | The panels are not much different appearance from natural stone, but are much cheaper. They are durable, and there are options with insulation. | They are attached to special iron hooks, which is very convenient. |
| Tiles attached with glue |  | The panels are lightweight and easy to use. There is a choice of different colors and textures. | They are attached with glue, so they do not always fit. It is better to choose models that are attached to iron hooks. |
Prices for various types of facing stone
Facing stone
Option No. 3: Finishing with brick or “brick-like”
Brick or its imitation is a classic finish. The material is suitable for any type of exterior without making the structure look cheap.
Brick can be combined with any type of wall and roof decoration, as it looks equally neat and harmonious with all building materials. A special substrate is made under the brick, which serves as insulation for walls and floors in residential premises.
Advantages of brick.
Positive aspects of finishing the base with brick:
- High degree of structural strength.
- Possibility to carry out installation yourself.
- No maintenance required.
- Service life is more than 10 years.
- High maintainability.
How to choose the right brick?
If the foundation is designed for heavy loads, choose ordinary building bricks. If the building stands on a columnar or strip foundation, use light-weight facing bricks.
Properties that a good brick should have:
- Low moisture absorption coefficient.
- Frost-resistant, tolerates low temperatures. Frost resistance is determined by the endurance of thawing and freezing cycles.
- High tensile strength, since the plinth bears part of the weight of the walls.
Preparatory work.
The finishing of the base with bricks is done at a distance of 2-3 cm from the external wall insulation. This creates ventilation and prevents moisture accumulation. Normal ventilation will also be facilitated by mortar-free seams, which must be left in the first row.

Finishing the base with brick
The facing and load-bearing walls are connected in two ways:
- Placement of galvanized anchors. One end is attached to load-bearing wall, the second - between the rows of masonry.
- Fixing a dowel tied with wire. The ends of the wire are attached between the rows.
Important: Every 1 sq. m must have at least 5 ligaments with load-bearing wall. Place them horizontally every 50-70 cm, vertically every 3-4 rows. In the openings, make more dense strapping.
Methods for preparing the solution:
- Cement and sifted sand 1:4.
- Cement, sifted or river sand, limestone dough 1:7:2 or 1:8:2.
Add water and stir. Make balls from the resulting mixture: they will not crumble in your hand.
The cement sets quite quickly. Therefore, prepare the solution in small batches.
Layout features.
Precision and accuracy when forming and opening seams are the 2 basic rules for laying a plinth with bricks.
Let's consider methods of cladding over the foundation.

Chain ligation of masonry.
Lay out 2 rows of hatching bricks interior wall. Using brick scraps, level the height of the masonry. They are mounted above the rows, laid end to end against the load-bearing wall.
Use a multi-row dressing system. Remove bandages after every third row.
Pay attention to the condition of the foam concrete: if it is poorly dried, after a while the interlocking bricks sandwiched in the rows may be cut off. This is due to different degrees of shrinkage of brick and foam concrete.
Important: To prevent shrinkage from stopping, foam concrete blocks must lie for some time before starting construction work.

If the final surface will be laid out with decorative bricks, start with the installation of the facing verst.
The 1st row is laid with a poke, the 2nd and 3rd with a spoon.
If you use halves of finishing bricks, lay them in a butt pattern.

Reverse installation.
This method differs from the previous ones in the order of installation. First, a series of exterior finishes are laid, then the interior verst and backfill are constructed.
In this case, perform dressing with bonded masonry. Since the bonded masonry has a height of two rows, the dressing is half included in the finishing row.
The main advantage of this method is the reliable fastening of internal and external walls.

- When applying the mortar, make sure that it does not reach the edges of the brick.
- Wipe off excess solution.
- After laying several rows, wipe the walls with a damp cloth.
Features of types of bricks are presented in the table:
| Coverage type | Material | Photo | Advantages | Peculiarities |
|---|---|---|---|---|
| Natural brick | Hyper-pressed |  | Available different sizes(Russian, American). Durable, durable. | The heaviest option, does not absorb water well. |
| Silicate |  | More economical option. Light weight, easy to operate. | Unstable as a facing material, poor hydro- and thermal insulation. | |
| Ceramic |  | The best option for cladding among all types of natural bricks. It has an internal filled structure, light weight and high strength. | The material is easy to use, the price is quite high. | |
| Artificial brick | Clinker tiles |  | In terms of technical and physical characteristics, it is not inferior to natural brick. | Light weight, easy to work with material. |
| Plinth panels |  | Looks like real brick, you can order a panel with insulation. | It has a polyurethane foam or polystyrene base, easy to install and use. |
On a note: If you decide to finish the base with brick or “like a brick,” make a separate strip foundation for the facing material. The brick is laid with a small gap from the wall, and the cladding foundation must be connected to the main foundation.
Prices for various types of facing bricks
Facing brick
Option No. 4: Siding as a finish
It happens that brick and natural materials should never be used to decorate a particular building. At the same time, plaster may not completely satisfy aesthetic needs. In this case, it is best to give preference to basement siding. It comes in the form of panels and imitates pattern, color and texture natural material. Moreover, siding can be used to cover not only the base, but also all the walls.

Siding options for finishing the basement
On a note: In order for the siding walls and the same base to look harmonious, it is recommended to select materials of different colors for their finishing. As a rule, darker shades are suitable for the base, and the walls should be lined with light siding.
The material consists of the following components:
- polyvinyl chloride;
- fiber cement;
- polymer sand mixtures, etc.
Types of siding.
| It is mainly used for roof lining. It can be either solid or perforated to ensure better roof ventilation. |
|
There are three subtypes:
|
|
| Such panels are used exclusively for vertical installation. | |
| Metal siding "under the timber". This type of siding externally imitates a round log and is similar to wooden lining type of block house. |
Metal siding "under the timber" |


The siding covering is equipped with special panels for fastening. This leaves a gap between the cladding and the wall. It should be filled with insulation or shell rock. Thus, the structure becomes more durable and the level of thermal insulation of the house increases.
In hardware stores you can choose any color, texture and shape of building siding panels. In addition, there are original options that imitate not only stone and brick, but even wooden beams, roughly chopped shingles, ship planks, etc.
Benefits of siding.

How to cover a basement with siding
Siding is chosen due to a long list of positive features:
- Simple installation without calling specialists. The parts are connected by locks and latches. Fastening - screws and nails.
- The panels do not lose their original appearance: they do not deform or fade.
- The surface material does not peel or delaminate.
- There are no chips or scratches on the siding panels. They are not afraid of wind pressure and impacts.
- The structures are durable: they last more than 50 years.
- The material can withstand temperatures in the range from -50 to +50 degrees, and is not susceptible to ultraviolet rays.
- The panels look like natural materials.
- PVC does not rot and is not subject to corrosion.
- The material is not interesting to insects, small rodents and other pests.
- Easy care: wash once a year with water and detergent.
Installation.
Instructions for finishing work in the basement area using siding:
| Clean the base, remove protruding parts, repair cracks and other defects. |
| Attach the profile strips to the wall. For fastening, use dowels. Fix the bottom bar horizontally. It should be located at a distance of 2-3 cm from the ground. The top bar is attached at the top. The middle one is attached parallel to the top and bottom strips, exactly in the middle. |
| Layer down mineral wool and cover with a windbreak. You can use polystyrene foam. |
| Make a starting strip along the bottom bar. The strip must run horizontally. Measure the distance between the basement and the wall. These data will be the dimensions of the corner strip. Attach the corner strip to the corner that is to the left of the structure. |
| Trim the panel along the left edge. Then insert it into the starter bar and push it into the corner. Leave a gap of 6-10 mm. When fixing, do not tighten the screws to the end by 1-2 mm. |
| Next, do everything in the same way to the corner. Before the corner, cut the panel and insert it into the starting strip. Connect to the previous part and secure. Place the bar on the corner and secure it. |
| Cover the top edge with a cornice. You can also use the finishing strip for these purposes. |


Siding prices
Installation of flashings for finishing the base
First of all, it is worth noting that the base can have a different location. The most successful option is considered to be one in which the foundation protrudes slightly forward from behind the walls, forming a small step. This arrangement is ideal, since the base is protected from excessive moisture, dirt, etc.

Installation of ebb tides
However, it must be remembered that mandatory stage facing is the installation of flashings. Otherwise, the finishing will have no meaning.
Types of tides
There are these types of ebbs depending on the material they are made of:

Installation

Flashing fasteners to protect cladding
Step-by-step instructions for installing low tide:

Important: To prevent water from being retained during drainage, bend the side of the visor facing the wall up and the opposite side down.

Important: If you hit the plastic with a hammer while bending, you will ruin the structure. Place a rubber pad on top of it. Felt can be used for the same purposes. Leave one edge uncurled.

Gloss black option

Prices for basement flashings
Ebb tides on the base
Video instructions for installing drip sills on a plinth
Consider the following nuances when installing basement flashings:
- To avoid distortions, be sure to make markings before attaching to the foundation.
- Wash the joints with frost-resistant sealant.
- Cut outer and inner corners from a solid plank.
- The width of the ebb should be no more than 50 cm.
- If the house is wooden, take care of reliable waterproofing: make a polymer or copper coating.
There are a great many options for finishing the base and ebbs. The main thing is to intelligently calculate how much is needed building materials and which cladding will look most advantageous, while matching the type of structure. You also need to evaluate your financial and physical capabilities. Initially, it is better to entrust the work to specialists in order to avoid annoying mistakes due to inexperience.