If an Uzambara violet appears in your apartment, then every flower lover will want to increase his collection, supplementing it with new unique varieties that produce large, medium and small flowers of various colors. Usually, asexual propagation of violets at home occurs step by step using the leaves of an adult plant, but there are other methods.
A young rosette will grow from a strong and correctly cut leaf, which will turn into a powerful bush with lush flowering. It is not difficult to propagate violets with flower stalks at home, so every amateur gardener can cope with this work. The most suitable period for propagating violets by stepsons at home is spring or summer, when the plants are in the active growth phase and receive sufficient light and heat.
 Good breeding result indoor violets depends on the planting material, so the strongest young leaves are chosen for planting. It is better to take and root leaves from the second or third tier, since those from the lowest row are considered the oldest and weakest, and they are also very often affected by fungal spores and harmful bacteria from the soil. Sometimes flower growers from nurseries or friends receive drooping leaves that have lost their elasticity and healthy appearance. appearance to breed them.
This happens because of the long road that you have traveled planting material, however, such a nuisance can be easily eliminated. Withered leaf Before planting, it is necessary to place it in boiled warm water for several hours with the addition of several manganese crystals, which will disinfect it and return it to its previous appearance. The color of the solution can be seen in the photo in any of the books on violets. Place the material completely in water, after which it is taken out on a napkin and dried. Next, the stem of the leaf is cut off sharp knife at an angle of 45 degrees. Only after these manipulations is the material planted in the ground or rooted in water. You can find out which pots are suitable for violets.
Preparation of planting material and planting dates
To prepare violet planting material for propagation step by step, its leaf must be properly trimmed and planted.
 They do this in several ways, any of them gives a positive effect. For example, you can simply break off the stem of a leaf with your hands. However, it is more correct to use a sharp knife, a regular blade or pruning shears for cutting. Most gardeners prefer the second method, since it is painless for the flower, simple and convenient. But some propagate miniature violets with a leaf horizontally across (or, in other words, propagated by the apex), by making a cut, or by planting it in a substrate without a petiole.
However, you need to remember that the cut must be correct, so the stem of the violet leaf is cut at an angle of 45 degrees. After cutting, a small stump of 1-4 cm in size should remain, the rest is removed. The place where a leaf is cut on an adult violet is sprinkled with activated carbon powder or wood ash. The leaf cut must be fresh before planting; it cannot be dried for a long time. If it is dry, then it is renewed, retreating 5 mm.
When everything is ready, you can move on to planting the half-mini violet leaf. For this purpose, specially prepared soil is used, which is steamed in microwave oven for 30 minutes. After this time, the soil cools down and is ready for planting. This measure will help kill pathogens that multiply in the soil. The most the right time for planting micro violets - this is spring, summer and early autumn, when there is no scorching sun and there is enough light and warmth. That is why exhibitions of violets and other indoor plants are held at this time.
Methods for propagating indoor violets
Saintpaulias are propagated by leaves, seeds, lateral rosettes, a leaf fragment (violet propagation by dividing a leaf), peduncles, stepsons, and even in vitro. Seeds indoor varieties violets are bred and planted in the ground, for this they create the necessary conditions. Rooting of the leaf and its part occurs in the ground or water. If the chimera reproduces by rosettes or stepsons, then they are separated from the mother bush and planted in the ground. For propagation by peduncles, they are bent to the ground or rooted in cut form. To root small pieces and parts of a leaf in a test tube, a nutrient mixture is placed in it. The drug Zircon and Epin has proven itself well. The use of zircon increases the rate of root formation.
Leaf propagation in water
 Asexual propagation of mini violets by leaf in water is the most common way to increase the number of bushes of this beautiful flower. It is advisable for these purposes to use dark glass containers into which boiled water room temperature. Before placing the sheets in the container, add an activated carbon tablet to the water and completely dissolve it. The stem of the leaf is immersed in water at least one centimeter.
It is important to ensure that the water level in the container is always at the same level, so add it as needed. There is no need to expect roots to quickly appear from the cuttings, since their growth depends on the specific variety of mini violet, on the temperature in the room and on the condition of the planting material. For example, if an old leaf is taken for propagation, then the roots do not appear quickly. But, if the most good conditions, then in 1-2 weeks it will give the first roots. To do this, you can use jars, glasses or compact bottles with a neck in which the sheet will not tip over.
 The leaf is planted in the ground when the roots on the stem are at least one centimeter. The main problem with this method of propagation is rotting of the cutting cut, especially if it was done incorrectly. To eliminate such damage, part of the leg is removed and the rest is placed in another container with water. Most people learned this technique after watching a video with a famous florist. If the cut and roots are in order and do not rot, then the leaf is planted in the ground, but it cannot be buried too deep, since young bushes will take a very long time to break through the ground. A situation may occur when, due to deep deepening, young rosettes become severely weakened and rot right in the ground.
When planting a leaf with roots, the soil around its stem is slightly compacted and moistened, and then covered glass jar or polyethylene to create a greenhouse effect. After young leaves appear on the surface of the soil, the jar or film is removed. Once a day, the pot with the leaf needs to be ventilated for a few minutes so that it does not rot and the soil is saturated with oxygen.
Planting directly into the ground
 If the violet is propagated in this way, then small pots with holes in the bottom are suitable for this, which will prevent stagnation of water and rotting of the roots. It is also advisable to place pieces of foam plastic or stones at the bottom of the pot to act as drainage. The drainage layer should be no more than 2 cm; soil is poured on top of it, leaving a little free space in the pot. The leaf is planted in the soil at an angle of 30-45 degrees.
After planting a Saintpaulia leaf, its stem is sprinkled with soil and compacted to make it more stable. If a leaf falls and comes into contact with the ground, it is advisable to prop it up with a stick.
The next stage of planting is the creation of a greenhouse, for which the leaf after planting is covered with a glass jar or plastic film, which is periodically opened to ventilate and eliminate condensation. As the soil dries, water it in the pot. It is important to note that it is strictly forbidden to place planting material on sunny window sills, where the straight lines go Sun rays, otherwise the leaf will die. After the young bushes reach 3 cm in diameter, they can be divided and replanted in separate pots.
For planting, it is advisable to select soil with an acidity of 5.5-6.5 pH. For the first time, ordinary ones may be suitable. plastic glasses, in which holes are made at the bottom. When the bush grows, it, together with a lump of earth, is transplanted into a permanent pot with a nutrient mixture.
For full development For a young violet bush, a bright, spacious window sill, where there will be no drafts and direct sunlight, is suitable.
Usually, it takes 1.5-2 months to form a strong, healthy flower bush, and after 6 months there will be its first flowering, which is characterized by the largest flowers and powerful peduncles. The bush will become depleted every month, so it requires periodic feeding. mineral fertilizers. The first transplant of an adult bush is performed after the violet stem is exposed. It is done in two ways: by deepening the roots and stem or completely removing the root part.
Transplanting children into pots
 To transplant violet babies at home, small pots with a volume of 80-100 ml are used, so plastic glasses may be suitable. Each bush is transplanted into a separate container, at the bottom of which there should be drainage holes. The soil for planting is selected to be airy, light and nutritious. To transplant, the babies are separated from the stem of the mother leaf and shaken off excess soil. When doing this work at home, there is no need to rush, as tiny babies are very fragile and can be easily damaged.
Indoor violet with fragile delicate flowers the most different shades few people are left indifferent. If one flower appears, then most likely their number in the apartment will grow, given all the diversity of Saintpaulia in nature. Frequently asked question for novice gardeners: “How to propagate indoor violets without spending money on buying a full-fledged flower in a pot?” You will find the answer in this article.
Under what conditions do violets reproduce?
If it is possible to create certain conditions, then you can breed Saintpaulia at any time. Violet – quite capricious indoor plant, which will not tolerate neglectful treatment.
Time
The best time to get new plants is spring and summer. At this time, the sunny day is quite long.
The flower itself, which has been dormant all winter, gradually begins to come to life and grow actively.
Daylight hours for rapid reproduction should be more than 12 hours. In winter, it is necessary to supplement the lighting with fluorescent lamps or special phytolamps.
Humidity
Violets do not like dry air, especially during the breeding season. To maintain a suitable level, a pot with a rooting leaf, peduncle or seeds of a given indoor plant must be created as a “greenhouse”. Optimal humidity for propagation of violets is 50-60%.
Temperature
Violets do not tolerate temperature changes well. Adult plants themselves can tolerate cold of 10℃ and heat of 35℃, but they develop well at 22-24℃. The optimal temperature for growing violets is 24-27℃. Moreover, this temperature should be constant: violet does not like temperature fluctuations.
The soil
 The soil for the most favorable growth and reproduction of violets must have a certain composition. It should be slightly acidic, breathable, and loose.
Therefore, soil taken from the garden will not work: it may be too dense.
For beginning flower growers, there is an option to choose a special soil in the store. There is a large selection there, the main thing is to ask a competent seller to choose the right one.
But experienced flower growers say that purchased soil may differ greatly from what is written on the packaging itself.
To be sure of quality, they make the soil mixture themselves. The composition of such a mixture includes the following components:
- washed sand – 1 part;
- slightly acidic peat – 3 parts;
- leaf humus – 1 part;
- green moss – 2 parts;
- sphagnum (peat moss) – 1 part;
- charcoal (or perlite, vermiculite) – ½ part;
- turf soil from the garden - 1 part.
Perlite or charcoal is added to maintain optimal level humidity, bactericidal properties, soil loosening agent to prevent the soil from drying out too much or being too wet.
A moisture regulator is sphagnum, which cannot be overdone: it can cause putrefactive processes. It is better to take the land in a mixed forest where they grow coniferous trees, alder, linden, but garden soil will also do.
Pot
 For a leaf, peduncle and seed taken for propagation, any small container 4 cm in diameter and with holes at the bottom for good drainage land.
The grown plant needs to be transplanted into a larger pot when the violet is twice the size of the previous pot.
If its size is no more than 6 cm, the violet is simply rolled over, adding a little earth around the edges and below. A little expanded clay is needed at the bottom to prevent water from stagnating.
Reproduction methods
Violets are easily propagated using leaves in soil and water. Rare specimens can be propagated using a leaf fragment. In this way, you can not only expand your collection, but also save a plant that cannot be helped.
There are methods of propagation using seeds, peduncles and stepsons. Let's consider each of the reproduction methods separately.
Leaf propagation
This method of rooting in water or directly in the ground is most often chosen by gardeners. This method is explained by its simplicity and relative ease. The main thing is to be careful and patient. Main stages of breeding:
- selection of planting material (leaf);
- rooting the leaf in special soil or water;
- separation of children;
- transshipment of young rosettes.
If everything is done correctly, then the indoor violet will definitely delight you with new healthy offspring.
How to choose a suitable leaf for propagation
 From the right choice planting material depends on the final result.
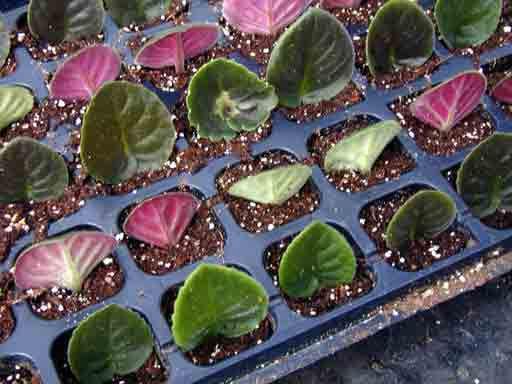
For propagation, it is better to use a leaf not from the bottom row, but from the middle one, example in the photo on the right.
It should not be lethargic, unnatural in color, or have spots. It will be difficult to get a good baby from such a sheet. It is better to choose a brightly colored leaf that matches the variety, is elastic and strong. Don't take old leaves.
Important! If the cut violet leaf has become limp, you can put it in boiled water, slightly tinted with potassium permanganate, for several hours. Then you need to cut the leaf 3-4 cm from the base and use it for further propagation.
How to cut a leaf correctly
You need to cut a suitable leaf with a sharp knife, scalpel, or blade. Treat the cutting part itself with an antiseptic. The cutting angle should be approximately 45⁰. The length of the stem on the leaf remaining after cutting should exceed 3 cm.
You need to rinse and dry completely on a towel or clean napkin for about 20 minutes. This will stop the release of juice and avoid further rotting of the leaf. You can skip the drying step when rooting in water. Apply powdered charcoal to the cut area. You can watch the video below for more details.
How to root a leaf in water
Step-by-step instructions for rooting indoor violets:
- Take a suitable container: a dark glass jar (for example, an empty medicine bottle) is best.
- Pour water at room temperature, boiled or distilled into it. Dissolve an activated carbon tablet in it.
- Dip the violet leaf into water so that the submerged part is no more than a centimeter. To do this, it is convenient to fix it using paper sheet with a slot.
- Carefully monitor the water level so that the cut does not dry out due to insufficient water. Support optimal temperature, avoid drafts and direct sunlight.
- After about 2 weeks, the first roots will appear. The plant needs to be transplanted into the ground when their length reaches one centimeter.
Important! If the leaf begins to rot, you need to cut off the affected part, rinse the container and change the water.
Rooting directly into the soil
Another method of rooting violet leaf, which is popular. The procedure here is as follows:
- Take a suitable pot no larger than 100 ml in volume (flower growers often use a plastic cup with holes);
- Fill one third with expanded clay or crushed foam for drainage. Fill in pre-purchased or self-prepared soil. Make a hole.
- Dip the cut leaf into Fitosporin solution to protect the plant from fungal diseases. Pour the same solution into the well for additional disinfection.
- Deepen the stalk of the indoor violet by one and a half centimeters, do not compact it too much.
- Place in a bright and warm place, away from drafts. Do not place in bright sun. To maintain humidity, cover the pot with a plastic bag or a jar. bigger size. Water as soon as it dries upper layer soil.

It is not necessary to make a greenhouse from a bag or container, especially when we're talking about O unpretentious varieties violets. Nose rare species It is better not to experiment with plants and follow all recommendations.
How to plant baby violets
The first leaves appear after one and a half to three months. You need to start planting violet babies after 4-5 leaves appear. The height of the plant (if it is not a mini-violet) should be about 5 cm.
You need to take a pot of a suitable size (about 7-8 cm), fill it with drainage (expanded clay or polystyrene foam), and fill it with special soil for violets by about two-thirds. Soil acidity should not exceed pH 6.5 (slightly acidic soil).
Place the grown rosette in the center of the pot, sprinkle with a new portion of soil. It is important not to cover the growing point, otherwise the plant may die. Afterwards, water the soil well and provide the transplanted children with high-quality lighting and comfortable temperature. You can watch the video below for more details.
Reproduction by leaf fragment
Propagation in this way is appropriate when there is a limited number of planting materials, when the violet variety is quite rare, and when an individual leaf has begun to deteriorate and rot. The leaf stalk is cut off completely. The leaf itself is divided in such a way that at least one vein remains on it. More often, gardeners root the upper third of the leaf.
The cut is allowed to dry and then treated with crushed coal. You need to plant a fragment of a violet leaf so that the cut is in close contact with the soil. It is even better to plant in this way in sphagnum, which has bactericidal and moisture-retaining properties.
Interesting fact! When propagating violets using a fragment of a leaf, there will be more children than with any other method.

How violets reproduce by peduncles and stepsons
This method should be used when you want to preserve as much as possible all the characteristics of a given violet variety. For example, chimera violets have beautiful petal colors. These methods will help maintain the color of the petals as bright as those of the parent plant.
Reproduction by stepsons occurs as follows: the lateral stepsons (rosettes), formed in the axils around the main rosette of the plant, are separated. The rooting process occurs in the same way as leaves. Then, after rooting and new leaves appear, they are transplanted into a suitable pot. In chimera violets, the color potential does not appear in the first flowering, so you should not be upset if the first flowers do not live up to expectations.
Reproduction by peduncles is also used for chimera violets. Blooming or faded will do. For this method unopened buds unsuitable. Using disinfected scissors or a sharp blade, cut off the peduncle along with the stipules and plant it in sphagnum, creating a greenhouse above the peduncle. You need to wait for rooting (a new outlet appears) and transplant it into a pot.

Propagation by seeds
First you need to select a pair of parent violets with suitable characteristics. Plants should be healthy and bloom lushly. Pollen is carefully collected from the flowers of one plant, and the pistils of another flower are pollinated with it. After 4 months, the seed boxes will be fully ripe and dry. In this form, we collect them and send them for storage for a couple of days.
Plant violet seeds as follows. We moisten the soil with a high perlite content. Mix the seeds with sand and plant. There is no need to cover with a layer of soil. Cover the container with the planted seeds with glass and place it in a warm place under special lamps.
You need to water with a spray bottle, watch carefully and not allow it to dry out. When the rosettes reach 0.5 cm in diameter, they need to be planted in separate containers with special soil and grown as seedlings. From time to time, violets need to be replanted into larger pots.

Proper planting of violets step by step
In order not to damage the plant or worsen its condition, the plant must be replanted correctly. We will analyze all the nuances in detail and tell you step by step how to plant a violet correctly:
- The frequency of replanting violets ranges from six months to 9 months.
- For a sufficiently strong plant (no longer a baby, but not mature plant) you need a pot with a diameter of 8-9 cm, maximum size for an adult violet – 11cm. Miniature violet develops well in a 5 cm pot. The ratio of the diameter of the new pot to the diameter of the plant itself should be 3:1. The size of the holes at the bottom should be about 3 mm. You need several of them. If the pot is reused, it must be disinfected; do not use it from sick plants!
- Fill a quarter of the height of the pot with drainage, then sand (to cover with a thin layer drainage layer), then the prepared soil mixture for violets.
- When replacing it with a more spacious pot, the violet is simply transferred, adding new soil around the edges. If the old pot is used, the exhausted soil should be shaken off the roots a little. Remove damaged roots and sprinkle the cuts with crushed coal. Place the flower in the pot and, holding it by the root collar, carefully add soil in parts, carefully distributing it between the roots. Lightly compact the top.
- Water the transplanted violet well. During the first 2 weeks the plant will adapt. During this period, you need to monitor it more carefully: keep the temperature slightly above 24℃, if necessary, create a greenhouse around the flower.
Possible errors during reproduction
List of main mistakes made by flower growers:
- incorrect soil: too dense, with incorrect acidity;
- low humidity and temperature, direct sunlight;
- weak or too much watering;
- strong deepening of the root collar;
- lack of disinfection during rooting.
Such errors arise due to ignorance of the rules for caring for violets and their features. They lead to slower rooting, rotting of planting material, inhibition of flowering and the formation of new leaves.
Caring for shoots
Caring for rooted violet shoots is similar to standard care for adult plants.
- After rooting, the temperature is reduced from 27℃ to 22-24℃, which is comfortable for violets. Humidity is needed within 50⁰.
- The difference between watering shoots and adult violets is that watering is more frequent.
- You can add more perlite to the soil for the shoots to prevent the young tender roots from rotting.
Useful video
Find out more in the video below:
Summarize
Breeding violets is quite an exciting activity. In addition, self-propagation will help you save money by not buying a ready-made plant in pots at an inflated price in a flower shop.
Knowing the rules and methods of propagating violets, you can easily cope with the task of increasing the number of indoor violets and replenishing the collection of this plant with new varieties.
Saintpaulia is one of the most popular and “prolific” plants. Violet indoor propagation which provides several methods, takes root quite well and quickly forms lush rosettes. And to breed this the most delicate flower has become successful and easy, you need a little patience and knowledge of some nuances. The spring-summer period is best suited for propagation of violets. However, if you consider certain features and create favorable growing conditions for Saintpaulia, you can get new bushes all year round. The main thing is to do the seating correctly.
Propagation of indoor violets by leaves
Exist different ways propagation of violets. Moreover, the choice of one of them may depend not only on personal preferences, but also on the plant variety. The agricultural technology of this flower provides for the following types of propagation:
- leaf rooting;
- propagation using peduncles;
- placement of stepchildren.
Each of these types has its own advantages and disadvantages. But, no matter what method you choose, it is necessary to select offspring only from a healthy and strong mother bush. It’s better to start with the easiest and most common method.
Growing new bushes from leaves
Vegetative propagation of violets is one of the most common. This is due, first of all, to accessibility and ease of implementation. Having mastered this method, it will be much easier to cope with more complex methods of reproduction. Therefore, let’s look at it in more detail.
Last but not least, the quality of the new bush and the success of propagation depends on correctly selected planting material. When choosing a sheet, you need to ensure that it is:
- elastic and juicy;
- had a rich color;
- free from pests, rot or stains.
Do not try to select the largest leaf for replanting. Usually, large leaves are located in the first row and are the oldest on the bush. Such material will take a long time to take root. Young leaves from the very core should also not be used, as they have not yet gained strength. The best option For propagation, cuttings will be sheets of 2 and 3 rows from the growth point.
If a lot of time has passed since the leaf was separated and it has become a little limp, before rooting it must be immersed in warm water with a small amount of manganese for a couple of hours and then dried.
The method of separating the sheet is also of considerable importance. Of course, if there is no cutting object at hand, then the sheet can simply be broken off. But if we are talking about preparing planting material at home, then it is better to use a clean and sharp knife. The leaf is cut so that a shoot of at least 5 mm remains on the bush. To avoid infection, the cut area should be sprinkled with ash or crushed coal. The cut itself is made at an angle of 45º. The length of the leaf stem should not exceed 4 cm.
Make sure that the leaf cut does not dry out. If it is not possible to root the leaf right away, immediately before planting, cut the tip again.
There are two methods to root a Saintpaulia leaf: in water or in soil. The advantage of the first method is that the grower can observe the formation of the root system and timely evaluate the result. In the second case, the plant will not have to be replanted and disturb the young root system, which significantly reduces the adaptation period of the sprout.
Rooting a violet leaf in water
If you decide to make sure that the leaf will give roots, then you only need to use boiled water for rooting. Add an activated carbon tablet to a glass of water; this will disinfect the water and remove excess impurities. Do not place the glass with the leaf in the sun. A warm, dry and shaded place is best for rooting. It’s difficult to say how quickly the first root will appear. It all depends on the violet variety, germination conditions, and leaf readiness. The main thing in this process is to monitor the tip of the leg. If it begins to rot, it must be cut off and the water in the glass changed. After the leaf has given roots about 1 cm, it can be safely transplanted to permanent place.
Violet amazing plant, it can be propagated even by leaf fragments

Propagation of violets by leaf fragments
Rooting a violet leaf in the ground
When rooting directly in the ground, you need to take a small pot or disposable cup. Place drainage at the bottom of the container, then soil. It is better to use nutritious, but not oversaturated soil. Turf soil is well suited for germination. The soil should be light, loose and well drained.
An important point when rooting a leaf in the ground is maintaining the moisture regime.
Violets do not like excess moisture, so water the plant well when planting. The next time you can moisten the soil only after it dries. You can speed up the process by covering the planting material with a transparent bag, thus creating a greenhouse effect.
When germinating in the ground, it is more difficult to assess the result of rooting, so carefully monitor the condition of the leaf. If, after several days after planting, it begins to wither, carefully remove it from the ground and renew the cut. After about a month and a half, young shoots should appear next to the leaf.
We use flower stalks for propagation
Saintpaulia flowers are not only distinguished by their delicate beauty, but are also well suited for propagation. Or rather, reproductive function In violets, it is not the flowers themselves that do the work, but the peduncles. This option differs little from propagation by cuttings. True, rooting a peduncle is a little more difficult than rooting a leaf. But this method Perfect if the mother plant is too young or for some reason it is not possible to obtain high-quality planting material.

Violet propagation by peduncle
For propagation, it is best to choose peduncles with large stipules. You can trim them right away, or you can first admire the flowering, and as soon as the flowers begin to fade, cut off the stem. Flowers are not needed for rooting. They are cut almost to the very base of the peduncle, leaving 1-2 mm. Bottom part The peduncle depends on the variety of violet. If the length allows, then the cut is made at an oblique angle; if not, the stem can be cut evenly.
Before planting, the sections are dried for several minutes, and the soil mixture can be treated with a solution of preparations containing zircon. This will help the flower stalks take root faster, accelerate growth and comprehensively support the plant. The soil used is the same as for rooting sheets.
It is better to place pots with flower stalks in a small greenhouse or covered with film. At the same time, do not forget to ventilate the seedlings and monitor the soil moisture. If the process goes well, then after 1.5 months new leaves will appear on the stem.
Minus - flower stalks do not give roots well. Plus - plants bloom several months earlier than bushes obtained by other methods of propagation.
There are 4 types of growing violets: leaf, peduncle, stepson and cuttings. Each of them is good in its own way, but we offer the simplest, but somewhat time-consuming method of propagating violets with leaves.
Violets can be propagated by leaf cuttings when creating certain home conditions. all year round. If there is not enough heat and light for this, then it is better to postpone the reproduction process to the spring-summer period.
It is not recommended to take planting material for rooting from the bottom row of the rosette, since the leaves there are old, they may not produce babies, and the violet leaf will disappear. It is preferable to choose 2-3 mature and mature leaves closer to the upper tier sockets It is very important that there are no damages, scratches, bends, and that the leaf itself is green and elastic.
A leaf is cut from the mother plant at an angle of 45 degrees, leaving a small stump, which is then sprinkled with activated carbon. The length of the stem should not be more than 4 cm; a little time is given for the cut to dry.

If the period of time between immersion in water and pruning is long, for example, a violet leaf cutting was taken at an exhibition or from friends. At home, before immersing in water, you need to make a fresh cut again and allow it to dry for about 3-5 minutes. Only then can leaf cuttings be placed in water or rooted directly in the ground.
Rooting violet leaves in water
At this stage, you need to pour boiled water at room temperature into a clean glass, and add an activated carbon tablet for disinfection. After drying, the violet leaf is placed in a container of water. The edge of the cutting should be immersed in water to a depth of no more than 1 cm.

Periodically, as it decreases, boiled water is added to the glass. Depending on conditions, violet leaf may produce roots within 1-2 weeks after being immersed in water. If the stem begins to rot, you need to make a new cut and start the rooting procedure again.
You can use small bottles where the leaf will be securely fixed at the neck and will not fall into the water.
Planting a leaf with roots in the ground
When roots approximately 1-1.5 cm long appear on the leaf, it can be planted in soil selected specifically for violets with an acidity of pH 5.5-6.5. IN plastic cup several holes are made for escape excess moisture, pour drainage or polystyrene foam onto the bottom and fill it evenly with soil. For a leaf with roots, make a depression in the moist soil, preferably at the edge, and plant it.
We place the leaf in a warm but not sunny place, water it periodically, create greenhouse conditions by covering it with a plastic bag. A cup with drainage holes can be placed in another cup of the same type, but without holes. Thus, the pot will be double - convenient for watering from below.
Depending on the conditions of detention, in one and a half to two months the leaf will have babies. Be very careful with watering so that the stem does not rot.
You can root a violet leaf directly in the ground.
From my experience I know that to propagate violets it is more convenient to plant leaf cuttings directly into the ground, there is less loss and time. We place a leaf without roots in the soil, cut side down, at an angle of 45 degrees or almost horizontally, placing the edge of the leaf on the side of the cup. Lightly press the cutting with your finger and sprinkle with soil. The shallower the depth of planting of the cuttings, the faster sheet will give new sockets.

Photo: growing violets from leaves with children...
Leaves planted without roots sometimes lose turgor, but there is no need to worry. As soon as roots appear, turgor will be restored. After some time, babies emerge from the ground.
If violet cuttings are planted in the summer, you do not need to cover them. But if the apartment is cool, then it is better to cover the cuttings or young rosettes with a transparent bag. Watering is careful so that the petiole does not rot; keep in a warm and bright place, out of the sun, to avoid getting burned.

Separating and planting rosettes in separate pots.
You can separate the violet babies after the leaves are sufficiently grown and deep green in color. Transplant into a small pot or individual cups. At the bottom you need to put drainage in the form of expanded clay or foam. Everything is covered with soil, a depression of about 1 cm is made and a rosette of violets is planted.

Children should receive lighting, warmth, and moderate watering. When the rosettes grow, it will be possible to “transfer” them to a pot, which should correspond in size to the plant. By following these simple requirements for propagating violets with leaves, you will get a beautiful plant with beautiful and long flowering.
There is a method of cuttings, when the violet leaf is propagated directly in a transparent plastic bag.
How to propagate violets, when a rooting substrate is poured into a small bag, a cut of the cutting is inserted into the soil, the bag is tightly closed and simply hung on the rack. At the same time, they make sure that leaf blade has not rotted from excess moisture, so it is often ventilated.
From cutting to violet blossom...
Having brought home a leaf of some unique variety, we always want to quickly see the result of its flowering, but, alas... In the best case, a propagated violet leaf gives birth to children in a period of one month, sometimes you need to wait longer.

Approximate time from the moment the leaf separates from an adult violet:
- after 3 weeks roots appear,
- in 5-6 weeks - violet babies,
- after 12 weeks - plant violet babies from the mother leaf,
- after 5 months - transplant into an “adult” pot,
- after 6-9 months the violet blooms.
Why do these deadlines depend?! Some factors should be taken into account when propagating and growing violets at home..
First of all, it depends on the conditions of keeping the rooted leaf (lighting, presence of a greenhouse, air temperature); from the nutrition of the mother plant (just do not need to feed young violet rosettes during cultivation).
In the spring, the plant will produce babies faster than in the fall. Also depends on varietal characteristics violets. There are varieties that germinate quickly, and there are slow-witted varieties with long petioles that have taken root and live happily ever after, but they are in no hurry to produce violets.

If you plant leaf cuttings in October-November, you will receive new rosettes in February. They are replanted and, with proper home maintenance, the violets bloom in full bloom in the summer. It is not advisable to propagate violets during flowering; it is better to wait until the indoor plant has finished blooming.
Experienced flower growers who are seriously involved in growing violets claim that their passion began from the moment the very first beautiful flower appeared on the windowsill. Immediately the desire came to expand the collection, purchase other varieties, or get new rosettes from the existing plant.
Our article is addressed to those who have just become interested in these plants and do not yet know how to root a violet leaf. Usually at home these beautiful flowers They are propagated precisely by leaves cut from an adult plant that attracts their attention. This is the simplest and most common way of growing young rosettes, which is quite easy to master even for beginners in floriculture who have recently become interested in this amazing crop.
When are violets propagated?
Most favorable time for propagation - summer and spring, when plants have enough light and heat. But in case of urgent need, when, for example, planting a violet from a leaf is the only way to save a rare variety, experienced florist can carry out its plans even during short daylight hours.
Selecting a sheet
To understand how to properly root a violet leaf, you first need to decide what the planting material should be. In other words, we will talk about how to choose a leaf for propagation. If he is sick or weak, you will not be able to raise strong, profusely blooming offspring. That is why, before rooting a violet leaf in the ground or in water, you need to be very careful in choosing it.

Experienced flower growers do not recommend using leaves from the lower tier closest to the ground for propagation. Firstly, they are the oldest, most likely already weakened, and secondly, they are sheet plates can be colonized by fungal spores and bacteria. You should choose a cutting from the second, or better yet, from the third tier, where the leaves are already well formed, they have reached the size of an adult plant, and have pronounced turgor.
Why does the leaf seem limp?
You can plant two or three leaves in one cup, but they must be of the same variety. As in the case when cuttings with emerging roots were planted in the soil, the soil is moistened and the glass is placed in the greenhouse. To prevent mold from appearing on the soil, the plants are periodically ventilated, but at the same time protected from drafts and too cold air.
Many beginners are interested in how to root a violet leaf in peat tablets, and does this method give good result. Yes, due to the nutritious and loose substrate, the plants in this case quickly produce roots and young rosettes. And the principle of planting remains the same as when planting in the ground.
Conditions for growing violets from leaves
How to root a violet leaf? What is necessary young plant? The most important condition The success of this process is constant attention to this tiny plant, which must be provided with:
- light nutritious soil;
- stable temperature;
- daylight hours at least 12 hours;
- uniform and regular watering;
- humidity and protection from drafts.
Violets feel very comfortable on shelves equipped with additional lighting, which provides plants with conditions for growth even in the autumn-winter period.

Socket separation
When a violet leaf takes root, several tiny rosettes with a diameter of three to five centimeters are formed at its base. This indicates that it is time to plant the plants. The children are divided in such a way that each rosette has at least a pair of leaves with a well-developed growing point and several roots.
In order for the separation to take place in the most gentle way, it is necessary:
- moisten the soil well;
- remove the plant along with the soil clod;
- Carefully clean the roots from the soil.
For children that do not have enough roots, it is better to plant them not in the ground, but in a mixture of soil and perlite, like a leaf cutting. Such a plant must be placed in a greenhouse for two weeks.
The grown rosettes are planted in a permanent place when their diameter is approximately twice the size of the previous pot. Plants will require containers with a diameter of up to six centimeters. Transplantation is carried out using the transshipment method, preserving the earthen lump. New soil is added around the circumference and to the bottom.