
Do not start repairs on the eve of the holidays - there is a risk of not investing on time. Do not start repairs with minimum budget, weigh your options. So where to start?
1. First of all, it is necessary to free the room from furniture as much as possible. Collect everything that cannot be taken out in the center and cover with polyethylene. If the baseboards and casings remain old, cover them with masking tape. paper based. It is also better to seal the windows with polyethylene.
2. If you have whitewashed ceilings, it is better to wash them out. Before removing, it is better to wet old wallpaper and leave it for 5-10 minutes to dry. It is better to remove wallpaper with a spatula up to 100 mm wide.

3. Windows, doors and other carpentry can simply be updated with fresh paint, or they can be restored. For restoration it is necessary to remove all the old paint; you can use a remover to old paint or an industrial hair dryer. In any case, this is a very long and labor-intensive process. After removing the old paint, repair all cracks, dents and other defects with wood putty. After the putty has completely dried, treat sandpaper and paint at least two layers.
4. If you have a wooden floor, the repair is at your discretion - simply refresh it with paint or restore it.

5. Before leveling the walls, be sure to remove all wooden caps, nails, screws and anything that interferes with the putty. It is also better to remove the sockets and insulate the contacts.
6. When everything preparatory work done, you can start repairing. It is better to putty walls and ceilings at the same time. Before doing this, think about moving sockets and switches. For example, about an additional outlet for an air conditioner. It is better to install it 20-30 centimeters below the ceiling. Switches can also be moved to more comfortable spot. Before plastering, the walls and ceiling must be primed. After drying, clean the putty with fine sandpaper and then prime it again.

8. Glue the wallpaper strictly following the instructions from the manufacturer.
A few years after a major renovation has been carried out in the apartment, you may notice that the coatings begin to wear out. The wallpaper is fading, the ceilings no longer look so white, and the paint is cracking. All these signs signal that it is time to begin cosmetic restoration work.
The essence of such measures is to update old coatings and replace materials that have served their purpose. Unlike capital redecorating will not take too much time, it is accessible even to a beginner and does not require special skills. The main thing is to decide on the order of work around the house.
Preparation
Before performing restoration operations, it is necessary to prepare the premises.
- Furniture is removed from the room. Otherwise, the surface of the furniture may be damaged. various compositions. Alternatively, cabinets and other heavy objects can be carefully covered with film.
- Any renovation traditionally begins with the ceiling and ends with the floor. If the floor is not planned to be restored, then it must be protected with sheets of dry corrugated cardboard or film. First, corrugated cardboard is lined. From above it is overlapped with film material. You should also pay attention to the baseboards. If they are in good condition and do not need to be replaced, they are covered with tape.
- After the floor and baseboards are reliably protected, you need to start removing the old coatings. At this stage it is necessary to remove the paint, wash off the lime and remove the wallpaper.

When the room is prepared, you can begin cosmetic repairs, but before that you need to determine the order of the work.
There are two principles that can guide you:
- repairs are done from top to bottom;
- the sequence of operations must meet the requirement “from the dirtiest to the cleanest”.
Both principles are true. So, traditionally, they first renovate the ceiling, then the walls, and after that they start working on the floor. This, however, is only justified when the wall finish is dirtier than the floor covering. For example, if decorative plaster is applied to the walls, and the floor is covered with parquet or laminate.
If changing the floor will produce more dirt, then this stage begins immediately after finishing the ceiling. And only then can you start working on the walls.
Skirting boards are installed last.
Ceiling renovation

The first stage is updating the ceiling. You should think about what type of finishing is best suited for the apartment. The previous one has already been dismantled by this time, and it is possible to show creative imagination. Before making cosmetic repairs, you should decide on the materials in advance.
If the apartment has a problem with the evenness of the ceilings, and this is almost impossible to fix with the help of various building mixtures, that is, it makes sense to install suspended ceiling. It will perfectly level the surface and additionally protect the room from flooding.
Another option is special tiles or panels. However, such repairs go beyond cosmetic ones. The easiest option is to paint the ceiling. It must be durable and washable. Information about the properties of the paint is contained on the can with the composition.
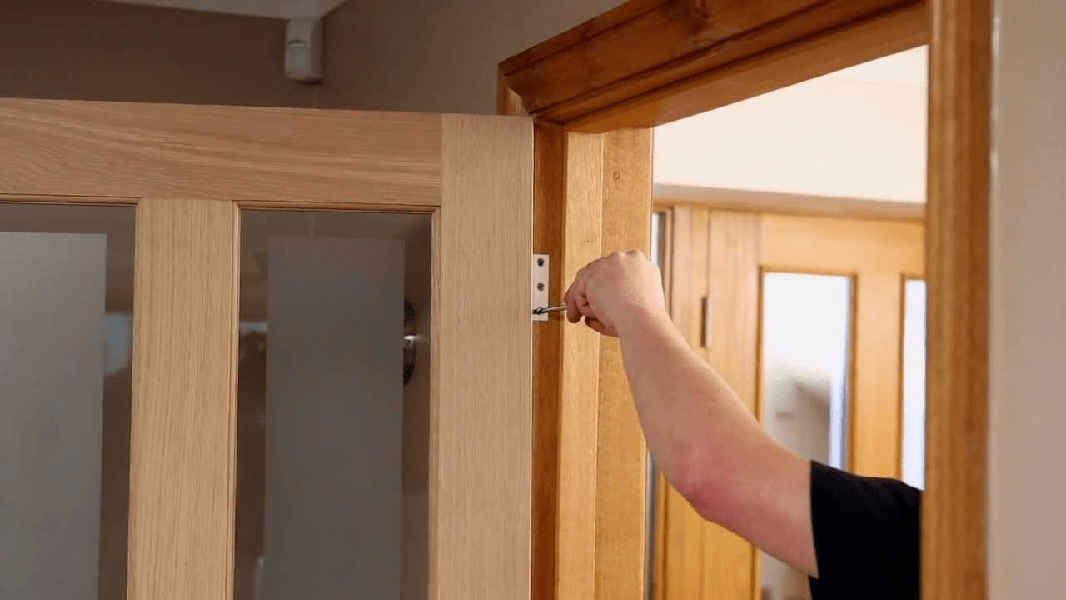
Replacement of doors and windows

It is best to replace doors and windows when all rough work in the room has been completed. Surfaces must be completely plastered and leveled. The floor screed must be well dried, the floor covering must be selected in order to correctly determine the size door frame. Otherwise, doors and windows may be installed with some errors, which will lead to their deformation.
If you install windows and doors before starting rough work, you can seriously damage them during subsequent operations. If you install windows and doors after completion finishing stages, repairs will most likely be damaged.
If the frames are still in good condition, then they can simply be tinted, having first cleared the old coating and primed them. Removing paint and sanding the surface, if required, is carried out before finishing the walls and floors, and the painting itself, if done carefully, can be done after finishing the walls and floors. Before painting, you will need to seal the perimeter of the window with masking tape and cover the floor next to the windows to prevent paint stains from appearing on it.
Working with the floor

This is the next stage. If the floor is not too damaged, then it can simply be updated externally. For example, varnish or replace some damaged fragments. Worn out linoleum will have to be completely replaced. Working on the floor will take more time than repairing the ceiling. Because you have to wait until the varnish or paint dries.
Wall decoration

After the floor, they begin finishing the walls. It is recommended to choose liquid wallpaper as a coating. They apply well, do not create construction debris, and are easy to care for. If you wish, you can make decorative plaster in the apartment. This is a rather long and complex process, so it is better to start with something simple. For example, choose a piece of wall for plastering. This kind of work will give you some practice for the future.
Finishing touch
On final stage baseboards are made. Also as decorative decoration You can add stucco to your interior design.
Other jobs

Eat whole line works, the order of which a beginner does not know when he is redecorating an apartment. These are operations such as replacing radiators, heating pipes, installing new plumbing, electrical wiring.
It must be said right away that conducting electricity or replacing old wiring carried out at the very first stage, immediately after preparatory activities. Wires installed at the final stage can significantly damage appearance premises. But cosmetic renovations are carried out just to make the apartment look attractive. The same applies to installing new outlets. Before wallpapering walls, sockets are usually removed. But it is desirable that these are new sockets. Otherwise, replacing them later may damage the wall covering.
It is better to change radiators and pipes somewhere in the middle of the apartment renovation process. Such replacements are usually carried out by specialists who are not very careful about the updated floors and walls.
As for plumbing, it all depends on the complexity of installation. The toilet is replaced before the main work is carried out, but the sink can be installed after.
Video
The issue of renovating a room almost always depends on the budget for future work. Most often, the owners of an apartment or house are faced with a choice - to renovate the room with their own hands in a cosmetic way, without postponing the matter, or to plan a major overhaul for the indefinite future with redevelopment and a serious update of the design. Most craftsmen in such a situation recommend redecorating the room, during which the vast majority of problems with the interior of the room can be solved.
How to properly approach the organization of renovation in one room
Starting a room renovation is always inconvenient and even scary, especially if you don’t have enough experience, and the only assistants at hand are a cheat sheet on how to renovate a room with your own hands for beginners. But, as a rule, uncertainty and doubts pass when the scope of future work becomes clear and the question of in what sequence to make repairs in the room is resolved.
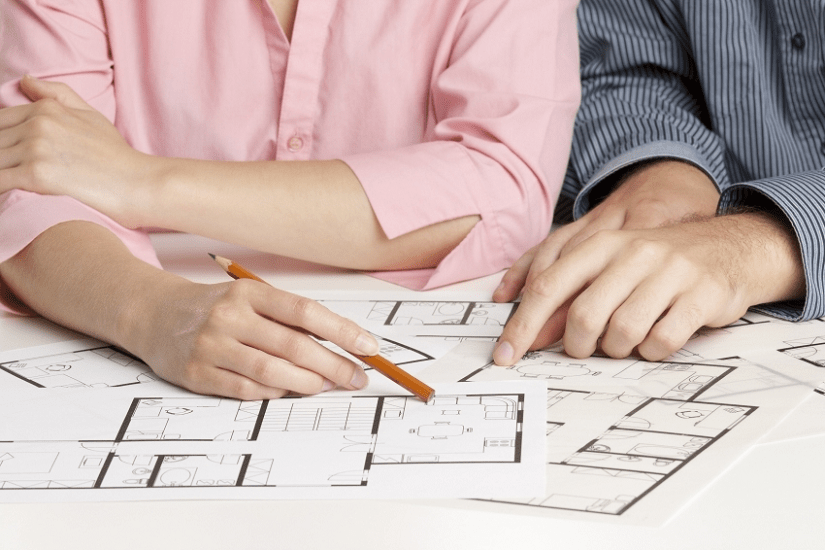
Therefore, the first thing to do is draw up general plan carrying out cosmetic repairs, and most importantly, before attempting to make repairs in a room, it is necessary to draw up a detailed estimate for the purchased materials and consumables. This required condition, even for renovations in a small room you will need to make a list of several dozen items.
Where to start renovating a room is not important; you can carry out repair work in the sequence that seems more convenient in given specific conditions. Traditionally, renovating a room with your own hands begins with the most “dirty” or rough work and ends with delicate finishing procedures.
A typical list of work or sequence of repairs in a room is as follows:
- The old finish is removed from the walls, ceiling and floor. Removing the floor covering produces the largest percentage of dust and dirt, so it is removed first;
- Held rough preparation floors for further installation of new flooring;
- Wiring repairs are carried out, lamps and switches are moved and hung, corrugations are laid out for television and Internet cables;
- The walls and ceiling are cleaned and puttied. If the redecoration plans involve changing the wallpaper to a more modern type finishing, then you will need to level the walls with gypsum plaster;
- In a similar way it is leveled ceiling surface. Before whitewashing or painting with water-based emulsion, the ceiling is rubbed down, plastered with a lime-gypsum mixture and a decorative coating is laid;
- Performed decorative finishing walls, glued ceiling skirting boards, facing changes interior doors;
- New is being laid flooring, baseboards are installed, lamps are hung, switches are installed.
Of course, at each stage of room renovation, photo, a large amount of debris and dust will be generated. Not only will you have to regularly clean the room and remove rubbish rubble, you will also need to try to cover areas with already completed repairs with protective plastic film to avoid dust on the surface.

What Shouldn't Be Included in a Room Redecoration
Finishers often call cosmetic repairs a “three-day job”; in order to update the interior of a room, as a rule, no more is required. The list of repair activities does not include the most expensive work:
- Redevelopment of premises with the transfer of interior partitions;
- Replacing the heating system;
- Installation of expensive multi-tiered suspended ceilings;
- Glazing of the balcony and replacement of windows with double-glazed windows;
- Equipment for heated floors in the room.
It is clear that all of the above repair components require serious financial costs and attracting qualified specialists to the work. It will take more than a day or two to carry out such serious events. In addition, such is the specificity of the renovation in the room that, willy-nilly, dust and construction garbage spreading throughout the apartment. Therefore, the situation is regulated in this way - either cosmetic repairs are made in a single room, or the entire apartment is “stood up” for major repair work.
In general, the redecoration plan includes everything that can be done in a couple of days with my own hands for relatively little money.
The main task of cosmetic repairs
The main goal of renovation work is to refresh the interior of the room, remove minor defects and damage that have accumulated over the years, which are incredibly annoying and interfere with everyday life.
In rare cases, cosmetic repairs become a consequence of force majeure circumstances, for example, flooding of a room by neighbors on the floor above or preparing the premises for renting. There may be many reasons, but the main thing is still maintaining the premises in a comfortable condition for living.
Properly performed cosmetic repairs make it possible to save on future volumes overhaul For example, screeding the base of the floor and leveling the walls will at least reduce the time and effort required to prepare for a major overhaul, naturally, provided that the renovation of the room with your own hands (photo) is done as conscientiously and efficiently as possible.
The next stage of repair, distribution of costs and load
Budget planning and procurement of materials are rightly considered one of the most difficult stages of redecoration. Especially if you plan to do most of the repair procedures yourself. The reason is simple - amateurs and novice craftsmen have no idea how much specific material will be required for this or that area of work.
In this case, the problem can be solved in two ways:
- Compiled list works and estimates can be shown to an experienced master, which will help calculate the flow rate based on the square footage of the room;
- Calculate consumption based on standard recommendations from building materials manufacturers, increasing the stock of glue, plaster mixtures, wallpaper, flooring by 10% of the calculated figures.
In the latter case, the cost of purchasing materials will increase significantly, but ultimately, the remains of cement, dry plaster and glue can be used for cosmetic repairs of other rooms in the apartment. In addition, having a list often helps to get a bulk discount, so that there are no significant gaps in the budget for a future cosmetic renovation of a room when competent organization there should be no procurement.

Preparatory stages of renovation in a room
The first, most labor-intensive stage has always been and remains the rough stripping of the walls and ceiling. Typically, renovations in a room begin with removing pieces of furniture and fixing up front door protective awning. You can use thick plastic wrap or an old blanket. An improvised curtain will protect the rest of the apartment from noise and dust, which even with very careful work, using a vacuum cleaner and wet cleaning flooring always accumulates in a room in considerable quantities.
Before repairs, the lamps must be removed; instead of a chandelier, a socket with a light bulb is left in the room. If double-glazed windows are installed in the room, then it would be useful to cover the window opening with film before the repair. It is clear that the film also covers the floor covering; it is easier to roll up the laid polyethylene than to wash the dirt in the room every evening.
Removing old finishes from walls
Preparing for a redecoration takes about a third of the planned time. During this time, you will need to remove the whitewash and wallpaper from the walls of the room. If there are areas with damaged plaster, it will take another day to knock the plaster off the walls.
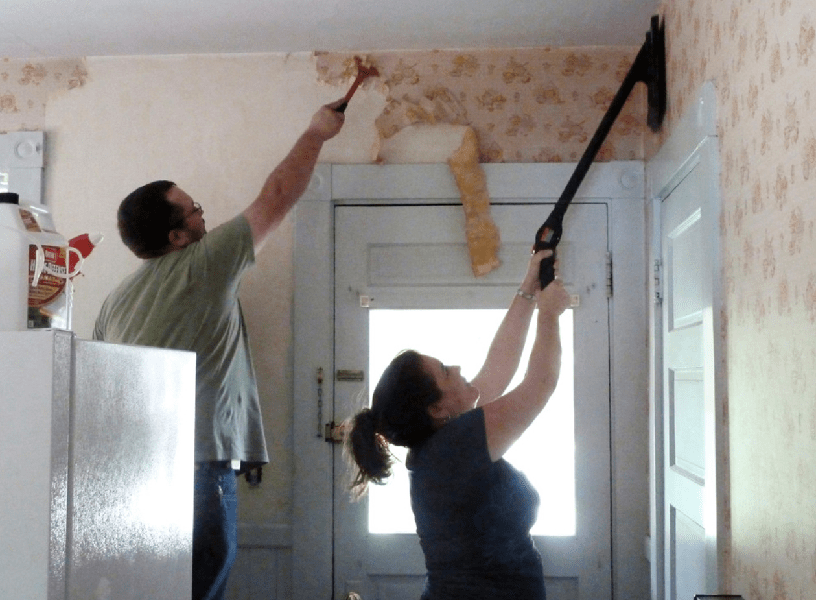
Old wallpaper is removed either in one sheet or scraped off in small pieces for a long time, it all depends on the glue used. Before removing the wallpaper, moisten the surface with a small amount of water using a spray bottle. After 20-30 minutes, the trellises can be removed in patches. For especially strong adhesives, boiling water and steam are used. In any case, after stripping the old trellises, you will need to use a vacuum cleaner and a stiff brush to remove dust and glue residues.
Peeling and restoration of the ceiling surface
The ceiling is freed from the decorative coating much faster and easier than the walls. If your redecoration plans include sticking polystyrene plates or laying plastic panels, then it will be enough to remove upper layer whitewashing
The situation is more complicated if the ceiling in the room is painted with water-based paint or whitewashed with lime. In this case, it will take at least a day to remove the durable layer of old finish.
The most common option for restoring the ceiling during cosmetic repairs involves leveling the plane of the ceiling. In any room of any apartment, the floor slabs lie with a differential of several degrees, which leads to a difference in ceiling height near the opposing walls of the room from 2 to 5 cm.
If time and budget for cosmetic repairs allow, then it is best to level the ceiling using high-quality gypsum plaster.

To do this, plastic slats are sewn onto the ceiling and the plane is tightened plaster mesh. Beacon slats are glued with alabaster, guided by pre-tensioned horizontal marking cords. The mesh is sewn on dowels. Total time required to completely level the ceiling in a room is 5-6 hours of work.
In one working day you can complete complete renovation ceiling. The next day you can sand, prime and paint the surface.

Cosmetic repair work to the walls of the room
During cosmetic repairs, walls are leveled and plastered only in exceptional situations, when the situation requires it, for example, the appearance large quantity cracks or chipping of plaster. In addition, the total area of the walls of the room, as a rule, is three times the area of the ceiling, which in itself requires a lot of time and materials.
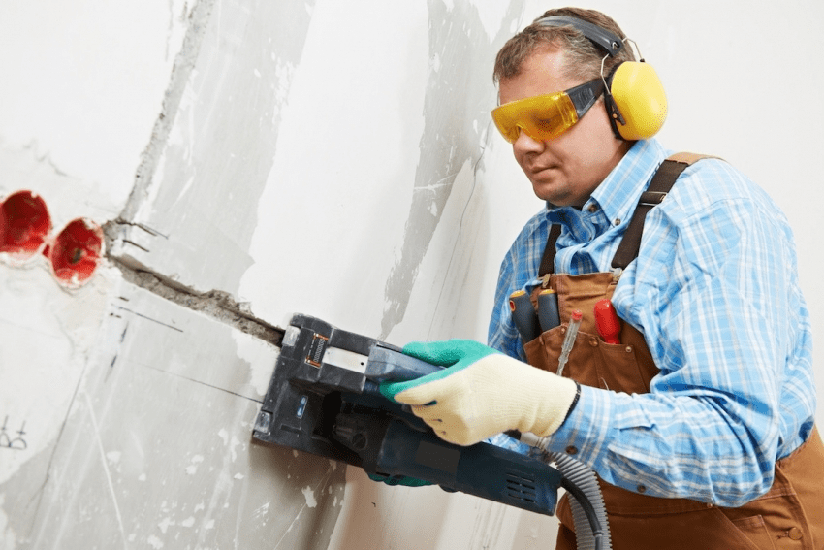
Therefore, during cosmetic repairs, the preparation process is limited to cutting small cracks, followed by puttying and grinding the surface. Sometimes, in order to level the plane of a single wall, particularly problematic areas are sanded with an electric sander.

In addition, at this stage of the renovation work, it is easy to change the profile and configuration of the electrical wiring in the room. It is enough to drill channels in the lower part of the walls to the installation site of new electrical outlets, break through the “glasses” for the trimmers and install the sockets themselves. The corrugations with wiring laid in the channels can be rubbed with plaster or alabaster mass. All work will take a maximum of 2-3 hours. Upon completion of preparation for finishing, the surface is vacuumed and primed.
Rough floor preparation
After finishing the most labor-intensive work with preparing the ceiling and walls, you can move on to cleaning and preparing the floor. If the floors are concrete, with laminate flooring, then cosmetic repairs may be limited to re-laying the laminate slabs, with or without replacing the lining material. Most often, damaged slabs in a room are replaced, after which the coating is polished using wax mastic.

During cosmetic repairs, linoleum coverings are cut out, the base is cleaned down to concrete, primed and covered with a heat-insulating lining based on foamed polyethylene.

If the room has wooden floors, then first of all the floorboards themselves are cleaned and repaired, then the joints are hammered and hammered, after which the surface is sanded and prepared for painting.
Don't forget about garbage and dust
Any repair work, even the simplest and most superficial, is always accompanied by the formation of a large amount of debris and dust. Before repairs, you need to prepare two or three polypropylene bags into which all the garbage from the room will be collected daily. At the end of the day, after each finishing operation, the walls and floor are cleaned of crumbled crumbs and residues plaster mortar, and before finishing the walls, go over them with a vacuum cleaner or a damp brush.
If the walls of the room are supposed to be leveled with gypsum plaster, then the amount of debris will increase five to six times. It will be necessary to think in advance and find a way to collect and remove 150-200 kg of cement-sand waste screenings from the premises. You cannot send it to the garbage chute or trash cans; you will need to order a special service for the removal of construction waste.
Cleaning redecoration operations in the room
First executed fine finishing ceilings. Usually the repaired and sanded surface is primed and painted. acrylic paint light colors.
If wallpaper is used in the interior of the room, the ceilings can be decorated with non-woven or vinyl wallpaper to match the future wall decoration. A common practice for decorating lamps and chandeliers is to use imitation polystyrene stucco molding and decorative ceiling plinths.
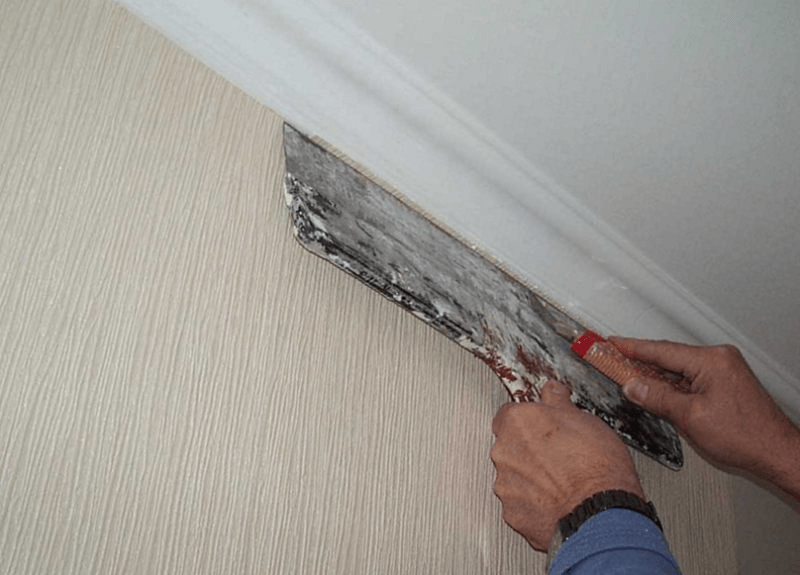
Finishing the walls in a room is considered one of the most important and at the same time time-consuming cosmetic operations. Even taking into account the fact that half the walls in the room will be covered with furniture, a certain part of the walls will still be clearly visible to everyone present in the room. If during cosmetic repairs it was not possible to properly level the surface of the walls, you can hide the imperfections only under the wallpaper. It is best to use trellises on a fabric basis or with a pronounced relief textured surface. Pasting a room will take 7-8 hours or a full working day.

Repairing doors and floors in a small room
Wood plank floor old layout Often you have to hide it under linoleum or laminate. In this case, the surface of the floorboards is sanded with a sanding machine, and the joints are sewn together with nails driven at an angle to the board. At the next stage of repair, the floor surface is sewn up OSB boards, after which you can lay linoleum or any other flooring option in the room.

The situation becomes more complicated if the concrete floors are leveled to the level of the screed throughout the apartment. In this case, any floor covering in the room will lead to the appearance of a threshold, so the installation of laminate or parquet must be planned simultaneously in all rooms.
The final stage is the restoration of interior doors. The hatch and the door itself, if they are in good condition, can not be changed, but undergo restoration with cleaning and polishing of the surface. External cladding The door frame is traditionally replaced with a new one during repairs. The replacement of doors with a supporting frame is planned for a major overhaul, usually so that the entire apartment or house has doors of the same style and design.
Conclusion
Repairing a room, even in a cosmetic form, requires careful preparation, first of all, in the details of the future interior of the room, the method of decorating the walls and floor. Any attempts to postpone the decision to the future, to do it at random, as it turns out, will lead to a significant increase in costs and an increase in the time required to restore the room by two to three times.
Do-it-yourself cosmetic repairs are essentially not a difficult task. You don’t need a lot of money, desire, patience, and everything else will work out, without a doubt.
First preparation
It is important to inspect the room before starting work. It is important to prioritize in what order to clean. Here is an example of the sequence.
First, take out the large furniture. Done in an empty room spring-cleaning. The floor is swept and washed thoroughly. Newspapers or cardboard are laid out on the floor and covered with regular film on top to protect the flooring.
Secondly, they remove curtains, curtains, and tulle. To prevent damage to windows, use film and secure with household tape. If necessary, cover the doors with the same film.
Thirdly, bookshelves, paintings, and everything that hangs on the walls are removed from the walls. The room or premises is disconnected from electricity. Chandeliers are dismantled, electric wires wrap up insulating tape. Switches and sockets are removed, electrical wires are wrapped with insulating tape, and open boxes are wrapped with construction tape.
Fourthly, the ceiling and walls are prepared. If there is chalk or lime whitewash on the ceiling, it is washed off, first dissolve it in 8-10 liters hot water one kilogram of salt. At a temperature of 40 degrees the solution is ready. In the case where the whitewash layer is large, the wet whitewash is cleaned off with a wide spatula. To remove old wallpaper use: a bucket of hot water, foam roller and spatula, and wallpaper remover if necessary. When there is paint on the walls, it is best to remove it using a hair dryer and a spatula. The room is ready for renovation.
Repair
First of all, it is necessary to prime the dry walls or ceiling with an acrylic primer. After 4-5 hours you can putty. After the putty has dried, after about 12 hours, we again apply an acrylic primer. Work surfaces are ready for next steps. To paint the ceiling you will need a roller with a wide handle and medium pile.

Wallpaper glue is selected according to the type of wallpaper. How to prepare glue? Warm water (40 degrees) is poured into a bucket with a capacity of 8-10 liters, then according to the instructions for wallpaper, measure the amount of dry mixture. While stirring the water, gradually add the dry mixture, it in turn will achieve the required properties.
Rolls of wallpaper are cut to the required height, taking into account the pattern. Pasting begins from the far wall to the near one. If the edge of the wallpaper is longer than necessary, cut it off after drying construction knife or sharp scissors. Avoid drafts while wallpapering, and after completing the work, until the wallpaper is completely dry.

Small touches: we assemble switches, install sockets, hang a chandelier, bring in furniture and arrange it as desired. We enjoy the pleasant comfort of home.
February 16, 2018 No comments
When the environment in your own squares ceases to please the eye, the need for change arises. They are easy to implement: just figure out how to make cosmetic repairs with your own hands. Most important point here is a sequence of actions that the owner will have to become familiar with. A person who is far from the construction and installation industry is not immediately able to understand the features of the selection of materials and their application. This article will help you get rid of extra costs and clearly plan the further course of changes towards enriching the interior.
Preparatory work is an important stage of renovation, ensuring the durability of the finish and the safety of the property located on the premises. Determine which room you will start renovating from and empty it of all household items and furniture. If there are fixed parts of the furniture here, then use film and tape to isolate them from dust and splashes.
If finishing the floor is not included in your plans, cardboard or fiberboard sheets, with which you need to tightly cover the entire flooring. The baseboard will be protected by masking tape, which will not leave marks and will cover the porous material from dust.
Next, you should turn off the power to the room, remove the sockets and switches (covers), and seal them with film or masking tape. Main principle the sequence of wall processing is from top to bottom, where the dirtiest and most labor-intensive types of work are always performed first.
If renovation is planned for all rooms, then the one furthest from the exit from the apartment should go first, moving towards the corridor. If the apartment is one-room, then you can start both from the room and from the kitchen, since there are no walk-through options here.

Having removed the old wallpaper, paint, plaster from the walls, and washed off the whitewash from the ceiling, you can begin to dismantle the old doors and windows, if this is part of your plans.
In order to get rid of old paint or enamel, use a narrow steel spatula. After complete removal of paint residues, the walls must be sanded to improve the adhesion of all subsequent layers. The whitewash is also removed with a spatula, after soaking it with water. To do this, it is better to choose wider versions, since it can be removed easily and quickly. Wallpaper made of paper can also be soaked, other materials can be removed dry, and their bottom layer of glue does not need to be removed.

This approach is relevant for vinyl or textile wallpapers containing a multilayer structure. If there is presence on windows and doors old varnish, it is strictly removed in case of cracking. To do this, use a special wash or construction hair dryer in conjunction with a spatula. If the surface is smooth, it is subject to another layer of surface application to refresh the product.
After complete removal of all remnants of the old finish, it is necessary to eliminate all minor surface defects. Potholes, cracks, chips, all moving parts old plaster are eliminated with a spatula; in other words, they are knocked down. Then a deep penetration primer is applied.
After it has completely dried in a few days, you can prepare an alabaster solution or use ready-made gypsum plaster, which is evenly applied to the entire periphery of the walls. This manipulation is performed with a wide iron, as the masters call it.

Let it dry again and apply another coat of primer. After the primer has absorbed and dried, you should finishing putty. It is thinner and more filigree. Aimed at leveling the wall, this DIY cosmetic repair job is the most important one. The layer here is small - only 2-3 mm, so rough transitions between strokes, protrusions and depressions are excluded.
When this layer has dried sufficiently, you can begin wallpapering the room. If you plan to paint the walls, then there is another important and very dusty stage ahead - grouting the walls with a special trowel. This grinding makes its surface perfectly smooth, which is necessary for painting.
Before the final stage of finishing the walls, it is necessary to tidy up the ceiling. IN modern interiors Whitewashing is rarely used, but this method is still considered the cheapest.

The ceiling can be covered with wallpaper, polystyrene foam tiles, decorative plaster or paint. If you are not able to carry out cosmetic repairs to the ceiling with your own hands, then the most profitable option would be tension structure. But here you cannot do without the help of specialists.
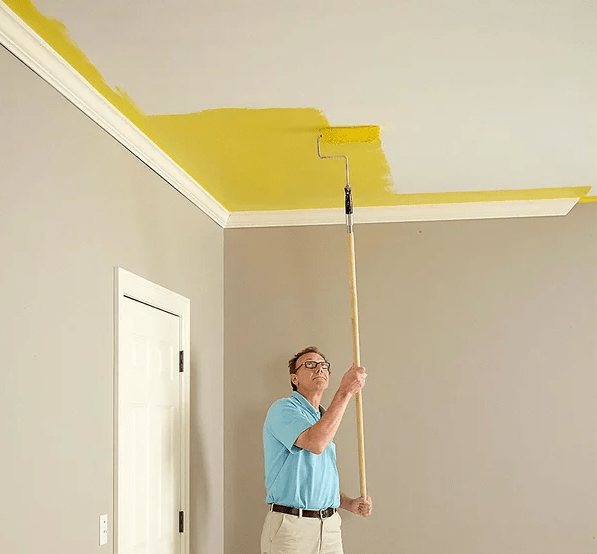
To paint the ceiling, you will need a special roller with an elongated handle, with a pile of 1-2 cm. A convenient stepladder is a must for this procedure. At the same time, there should be a platform on it for placing the paint tray. Water-based paints usually applied in two layers. The lower one is carried out with a slightly diluted composition, the upper one - with a concentrated one.
We are finishing the renovation and enjoying the results!
There are a lot of options for wall decoration today. We need to choose those whose application does not require the use of expensive equipment or specific skills. Wallpaper is an option for all times. Don't choose overly complex prints so as not to suffer from choosing a small design and throwing away a lot of waste. Dilute the glue slowly, pouring it into a container of water in a thin stream - then there will be no lumps in it.
Start gluing from the window, then the “overlapping” application option will not show the seams. Drive out air bubbles from the center to the edges; this is convenient to do with a special wallpaper roller. To avoid tears at the baseboard and ceiling edge, the wallpaper should be cut using a metal ruler using a special wallpaper knife.
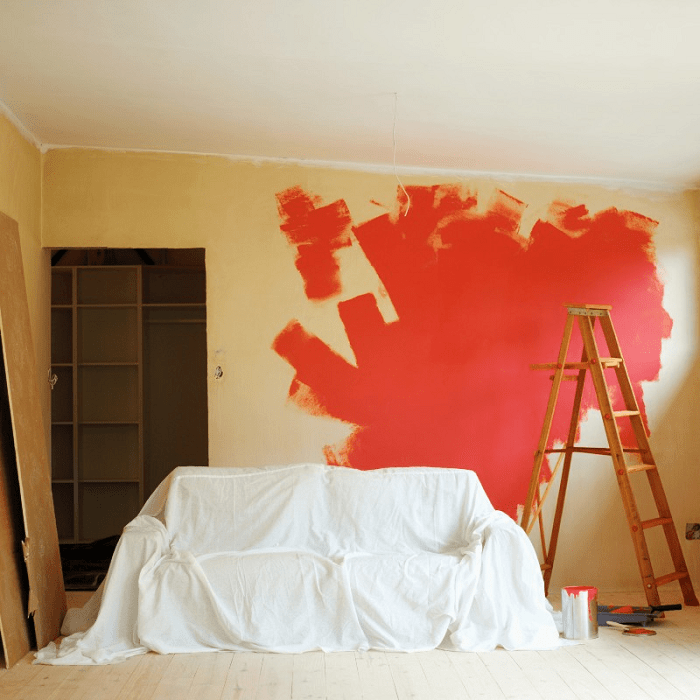
Wall painting can be done using any collection of interior paint offered by the market. There are smooth and structural views, which look interesting and are very easy to apply.

Painting is a creative process, here you can play with shades and paint on the walls geometric figures, drawings. Can be given different walls a special coloring, thus modeling the room. Here everything is in the hands of the performer. And if you don’t like it, you can always repaint it!
Decorative plaster is one of the most popular finishing materials. Its texture allows you to depict any ornament on the wall, and some types contain mineral chips and pigment. In this case, all that remains is to simply apply and dry. The advantages of such a finish include an attractive appearance and speed of application, while the disadvantages include high cost and more thorough preparation of the walls before application.
All of the above tips are only part of practical experience masters You will probably come across a number of personal features specific to your apartment. In any case, nothing is impossible, and the main thing is to believe in your success!
Video: Cosmetic renovation of an apartment: