Gold, red and black- you can find this combination of colors on many objects of ancient Russian applied art and works of folk craftsmen. For “Khokholoma” these colors are especially important: red gives warmth and softness to artificial gold, A black enhances its radiance. In addition, the round surfaces of objects do not have sharp contours and diffuse light. It is characterized by two types of ornament: "horse painting" And painting “to match the background”. The leading place in painting is occupied by herbal patterns: branches, long stems, “grass,” leaves, berries, flowers. The traditional coloring of Khokhloma products is a combination of gold with cinnabar and black.
“Golden Khokhloma” - painting to match the background.
Step #1
Sketch
Step #2
On tracing paper, make a composition of flowers, leaves and fruits. Don’t forget to leave a 1 cm frame. Use ready-made compositions from the books and coloring books I have posted on this topic (in the “drawing, painting” section). Then place the tracing paper with the drawing on the board and translate, tracing the drawing with a non-writing pen. It will leave a pressed mark on the acrylic layer.
Step #3
We begin with black color (with the addition of green so that the color is velvety) with brush No. 1 to outline the outline of the design, not forgetting about the stem, tendrils, and berries.
Step #4
We paint over everything unnecessary with the same black color, without painting the frame (with brush No. 2). We make a black background on the leaves and on the bottom of the flowers (“horseshoe with a beard”) with a brush No. 1.
Step #5
On the top of the flowers, add black “brackets”. color (brush No. 1).
Step #6
Now we will write in red. We paint the strawberries with red, and the smaller round berries with red mixed with yellow (so that they are slightly different in color from strawberries). Leave the moon-shaped highlight on them unpainted. Let's brighten up the flowers with the elements “horseshoe” and “bracket” with red. We will outline the frame in red, leaving a golden stripe of 0.5 cm.
Step #7
Using matches or the back of the brush, place the pokes: red - on the beard (3 on each), black - under the brackets (3 under each), yellow - on the round berries. On the strawberry, use a brush No. 1 to paint it with “droplets” of yellow color.
Step #8
Make a break with green
On the top of the strawberry (arbitrarily) in the form of droplets or blades of grass.
Step #9
Using the same green, we begin to draw the grass along the stem and in the free places. As if we were pulling the droplets away from the leading stem. The more perpendicular the droplets, the more graceful the bush will be. You can start it with a long tendril, around which droplets will then be added. It’s better to paint pot-bellied grass, apply pressure on the middle, just at the turn, and slowly raise the brush, adding the tip of the blade of grass with the tip of the brush. The grass alternates with tendrils and droplets. In some places we’ll just extend long antennae.
Step #10
Let's dilute the pink color (from white and red). Using a cotton swab, place pokes (5 pokes in a circle) on the free places and elongated tendrils, forming a flower.
The undoubted advantage of this gift is that it can accurately take into account the tastes of the person being gifted, depicting on the board exactly what he likes. It doesn’t take much time to paint and prepare for it, but this process is very exciting, and most likely you will want to repeat the experiment.
You will need a wooden board, since not all paints will be applied to the plastic, and it will be more difficult to choose a varnish for coating. It is best to choose a board that is not varnished and not sanded; it is much easier to work with such a surface, and its price is lower. This is an important factor, since the first or even second time the result may not be so good.
You can take any paints - watercolor, gouache, acrylic or oil will do. But it is most convenient to work with oil or acrylic: watercolor will require several layers of application, since it is a transparent paint, gouache becomes much lighter after drying, and both of these paints are washed off with water and blur during the varnishing process. This effect may be very suitable for some drawings, so these options should not be completely dismissed. Oil paints take a long time to dry, but then they will stay on the board almost forever, even without varnishing. Acrylic can also not be coated with varnish, but if it remains in water for a long time, the design may lose contact with the surface and separate from it in the form of a solid film.
Brushes are chosen depending on the chosen paint. It is preferable to work with oil and acrylic using synthetics, but bristles are also suitable. Do not use soft natural brushes such as squirrel or kolinsky. You can use any brushes with gouache and watercolor.
The surface of the board is washed thoroughly, if necessary, it is rubbed with fine sandpaper if there are many uneven areas, then wiped with a clean cloth and dried. The drawing can be first drawn onto the board with a pencil and painted according to the intended outline, or you can draw it directly on the board with paints.
First, large elements and general outlines are drawn; if there is a background, then they do it first. After each layer, the board must dry, which slows down the work only when painting with oils, since watercolor, acrylic and gouache dry almost instantly, sometimes leaving no chance to correct the wrong line.
In this case, whenever possible, use colors from light to dark, unless the painting is on a black background. The smallest elements that complement the design, regardless of color, are done last, before varnishing or final drying. When varnished, the pattern becomes darker and more contrasting. After 5-6 applied layers it gains volume. Each layer must be completely dry before applying the next. It is best to apply the varnish in a thin layer with a brush so that it dries faster. Thick layers often become deformed when drying, wrinkles or bubbles appear on them, so it is better to apply several thin layers.
- wooden cutting board,
- brushes and acrylic paints,
- glass of water,
- colorless varnish.
- Gouache paints - yellow, green, black and red
- Squirrel tassels 2 and 3
- Jar of water
- A soft cloth to remove excess paint
- Small white plate without patterns, for the palette
Khokhloma painting is quite popular. Such painting will not require too much skill in drawing, the main thing is to put in a little effort, perseverance and attention.
As an example of a painting element, you can draw this:
Khokhloma welcomes winding lines, berries, flowers and birds.
First, draw the base - a winding line. And then you start drawing the berries, and then the leaves.


Everywhere you need to start with the main winding lines, and then paint.
I propose to paint the cutting board in the Khokhloma style.
To work you will need
First of all, let's mix the paints to get a golden color. To do this, take yellow and metallic colors.
Let's start drawing the stem.

let's draw a berry at the top

then two more berries

a little lower we also draw a twig with berries

on the left we draw a twig with leaves on it

now a twig with three leaves, and a curl in the middle

let's start drawing the background

continue to draw the background

paint over the background completely


We also cover the side of the board with golden paint.

Now we cover the board with clear varnish. All is ready!


Even a child can draw Khokhloma painting. The basis of such painting is plant elements and sometimes birds and fish. These are mainly twigs, berries and leaves, all work is done in four colors: black, red, gold and green.
Even a child can handle curls, circles and dashes:

First, we draw a picture with a pencil, you can copy it from the Internet, and then we start coloring, starting with the largest elements:

After we have painted everything Large with the color we need, paint the background black. After the background has dried, we add additional touches to our twigs, drawing on the blackness of the background.
If painting occurs on a wooden surface, after drying it can be coated with several layers of alkyd varnish with intermediate drying.
Here are a few elements and step-by-step master classes on drawing Khokhloma painting:


Video master class on creating Khokhloma painting with your own hands:
If you study with your child, you need to start with gouache (4 colors - yellow, black, red and green) and drawings on paper, studying the required patterns, and then, having studied the main techniques for drawing flowers, berries and blades of grass, you can take up wooden boards, wooden boxes and paper boxes made of papier-mâché for decoration with acrylic and oil paint. Be sure to cover the top with at least 2 layers of varnish (but not nitro - it spoils oil paint).
The drawing is placed on a black or yellow-gold background; the large elements are first marked, then the medium ones and only then the small ones. At the end, small curls, strokes and dots are added. First, everything is painted in turn with each color, allowed to dry well, and only then the next color is taken.
It’s better to start studying with the main elements:
Kholm painting was very popular during Rus', but now it has gone out of fashion, but the trend for Kholm painting has remained.
Kholm painting is ideal for painting a variety of dishes, kitchen utensils and simply for painting walls.
Even a child can learn to draw in this style; there is nothing complicated here, because this technique uses mainly vegetation, and sometimes animals.
Here are a few examples that you can draw yourself:


Also, it will be very useful to watch a special video:
Painting with Khokhloma is very exciting. They used to teach this in ordinary Soviet kindergartens, because I remember some of the lessons. Now this is no longer fashionable and they teach children something completely different. If you do everything according to the old custom, then this is a complex technique. But for children they made it simplified and understandable.
So, for work we need:
To begin with, we start with simple elements, which in Khokhloma painting are called grass. It is performed with separate rhythmic strokes. The brush should be held perpendicularly with three fingers.
Here are the main and basic elements of weed.


Now for the practical lesson. Looking at the bowl, which is decorated by the master, children are given the opportunity to come up with an ornament themselves and paint a wooden spoon with a grass pattern.

And this is a grass ornament using kriul.

Kriul serves so that the rounded shape of the product can be emphasized.

More important leaf patterns.

By combining all these patterns, you can paint pottery in a very original way together with your child.
Draw Khokhloma painting patterns in the form of curlicues with berries, leaves, and flowers. Draw a wavy line from which curls are drawn on both sides. On each curl, draw two leaves and a berry at the end of the curl. You can draw a Khokhloma painting pattern in the form of several curls, one black curl and from it two to four colored curls of the same shape, for example, two green, two yellow. Below are several patterns of Khokhloma painting. You can take the grass pattern as a sample for training, practice on a separate piece of paper, and then draw on a blank sheet. You can draw a pattern on the image of a jug or plate.


This will sound funny, but painting in the Khokhloma style is done using exactly the same technique as painting dishes, which was done in ancient times in Nizhny Novgorod and surrounding villages. Each element of the drawing is done with one paint, after which the picture must dry. As soon as you are sure that the colors will not mix, you can take another paint and paint the necessary elements with it:
It's even easier with a pencil - you don't have to wait for the paint to dry:

You can make a drawing in a graphic style, simply repeating the Khokhloma style. If you want to follow all the rules, then you should take colored pencils.
Khokhloma painting is a beautiful painting on dishes that was used back in the 17th century. The name is given from the area where the painting comes from, from Khokhloma, from the Nizhny Novgorod region. Khokhloma painting appeared thanks to the crafts of craftsmen from that area.
Before painting the product, you first need to turn spoons, mugs, tablets and other utensils on a wooden machine, make the surface smooth, then cover it evenly with drying oil in several layers, and make a layer of aluminum powder. After this, you can apply the painting.
Khokhloma painting is an ornament with the appearance of plants, twigs, berries, flowers, symbols, curls. Red, yellow, black, as well as green and others are often used in such painting.
The finished item is coated on top for strength.
Oil paints are used.
There are different techniques for Khokhloma painting. The gingerbread pattern is a large pattern in the center from which smaller patterns branch off.

There is also a pattern for the background - curls, which is done with yellow and red paint on a black background.

To complete a drawing, you need to use creativity and invention to create ornaments. To make a pattern yourself, there are basic lines, symbols from which you can start learning to draw. Simple elements are accessible even to a child; it is also useful for children to learn painting, it develops skills.
I suggest painting the board at home. Let's take a board, as well as gouache paints, PVA glue, and brushes.

You can make a drawing for painting yourself or take templates from the Internet. Then you need to copy from paper to the board.
First of all, we will treat the board with egg white as a primer. Once processed, let it dry.

Following the egg white, cover the entire product with gold paint.

We paint the berries with bright paint.

Draw the veiny part of the leaves.


Paint the entire background around the contours with black. Then you need to let the paint dry completely.
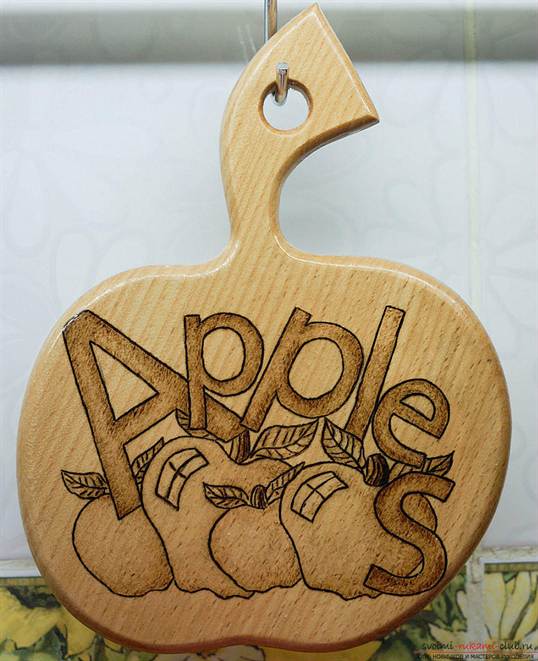
Often, when we come to a housewarming party, we think in stereotypes and give tea sets or dishes. But what if each guest comes with a set of cups or plates? We advise you to pay attention to such a wonderful gift as a cutting board, especially since you can paint it yourself. Or rather, not even paint it, but burn your own drawing on it! The topic of designs for burning on a cutting board is very popular today, and that’s what we’ll talk about.
Even if you have no experience in pyrography or wood burning, it’s okay, this activity is available to everyone: both adults and children. There is absolutely nothing to be afraid of here, because pyrography is not difficult, but very exciting. You can see an example in the photo.
Wood burning designs are easy to find online and there are a wide variety of templates and stencils that are suitable for beginners. The main thing in this matter is to be patient and have 1.5-2 hours left for a simple drawing.
What you will need

First of all you need pyrograph. This is a special wood burner. It can be purchased at craft stores. The pyrograph also comes with a special set for wood burning. This set includes a board (not a cutting board) and a ready-made stencil for burning.
It is very easy to buy a set; today they are distributed in almost all hobby hypermarkets and handicraft stores.
You will also, of course, need cutting board. It is best to choose a board made of light wood. Linden or birch are perfect. The next thing you need is sandpaper. Acrylic or watercolor paints will also come in handy. paints, to decorate the board with color. Additionally you will need wax to carry out the waxing procedure after finishing painting the finished drawing. Waxing will add richness to the image and preserve the colors of both wood and paint for a long time. You will also need stencil and pencil to transfer the drawing to wood.

Learning to translate

Many people ask the question “How to transfer a drawing onto a board?”, so this is done using a stencil. You need to find and download pictures of fruits, flowers or animals that interest you, as these are the most commonly used patterns for wood burning. It is best to choose simple templates, especially if you are doing pyrography for the first time.

Print the downloaded stencil and cut out the figure if the figure in the picture is empty. If there are additional internal parts, you need to use carbon paper. Place it on the wood, place the printed stencil on top and trace the design. Try not to let the image move.

There is another way to transfer a picture to the board. You also need to print the stencil you like, printed in a mirror image. Prepare a bowl of water, decoupage glue, wood varnish, acrylic paints, a brush and a sponge.
Cut out a stencil or finished design, then carefully coat it with decoupage glue and attach it to the wooden surface with the design facing down. Smooth the design with a sponge so that it does not “bubble” and also so that there is no excess glue left. Let dry. It is best to leave the work to dry overnight.

Once dry, moisten the motif with a damp sponge and begin to erase the paper until the design appears on the wood. Carefully get rid of all the paper. Then we begin to rub the remaining paper with our fingers, making pellets that remain on the wooden surface. We brush them off the tree, and what remains is a finished design, which, after complete drying, can be supplemented by burning (for example, burning its outlines) or simply decorated with paints. Then coat the work with varnish.

Mastering the technique
Once the design is traced onto the board, it’s time to start burning. Make sure the board is completely dry. Then heat the burner until the nib turns dark red.
Be careful when working with a hot pyrograph, it is very dangerous! It is better to do everything more slowly, but there will be no consequences.
Burning is best done from the contour to the center. That is, we first outline all the outer edges and only then move on to the inner ones. It is best to burn in separate areas: once you have worked on one, move on to the next, but in another part of the drawing. This will allow the drawing to cool evenly and will not create unnecessary lines or random strokes. When the work is completed, it can be decorated with paints. And then treat it with wax so that the board has a shine.
Let the owner of the house decide for himself whether to use your gift in everyday life or hang it on the wall or put it on a shelf. In any case, your gift will find a worthy place in the kitchen and in the heart of your friend!


One of the oldest crafts of arts and crafts in Russia is Khokhloma painting. For more than three hundred years, craftsmen have been making incredibly beautiful dishes, which can already be called the calling card of the Russian people. The process of creating a masterpiece is quite complex; it includes both the creation of blanks and their processing, as well as further painting. But anyone can master this skill; you just need to learn about the characteristic features of the creative process.
One of the oldest crafts of arts and crafts in Russia is Khokhloma painting
It is customary to apply complex ornaments to products using a stencil, which can be purchased or printed, but in order to learn this type of painting, you need to master the basics. The simplest patterns are applied with a brush.
Beginners should first master the following:
- blade of grass The pattern is a sideways curved line. The brush is pressed in the center, and pressure is kept to a minimum from the edges. There is a smooth but strong thickening;
- curl. The element is more complex. The brush is applied with the same degree of pressure, and the line should be curled like a snail;
- droplet. Ideal for pressing training. In this case, the brush must be placed with the base of the bristles and rotated 180 degrees, slowly removing it from the surface and pulling it forward;
- bush. The droplets are drawn in the form of a fan, and a small dot is placed at their base;
- leaf Drawing this pattern is quite simple. You just need to draw out the blades of grass in a mirror image, bending them outward, and fill the void inside with paint of a similar color.
Gallery: Khokhloma painting (25 photos)


Master class on Khokhloma painting (video)
Elements of Khokhloma for preschool children: step-by-step templates
Even a small child can create a Khokhlo pattern with his own hands, having mastered basic skills. Children's drawings have always been valued and pleased the eyes of parents. Often, an activity such as applique is carried out in the senior or preparatory group of a kindergarten. To create a pattern, it is enough to make a stamp from a tube and paper into which the paint will be dipped. Smaller elements are already painted with a brush, as in the pictures.

Even a small child can create a Khokhlo pattern with his own hands, having mastered basic skills
Drawing with children:
- lingonberry. Using a stamp, red circles are drawn, which do not need to be supplemented with other elements;
- currant. Berry circles are collected near a blade of grass, on which golden dots must be placed with a brush;
- Rowan. Berries are drawn with a stamp, and fairly narrow and elongated droplets are added with a brush, as well as leaves at the base of the resulting bunch. Additionally, you need to make inclusions of gold color;
- raspberries. Six circles are drawn with a stamp, without maintaining a certain distance, but slightly overlapping one on one. Highlights are added using the grass blade technique. Additionally, dots are placed with a brush;
- sepal. Blades of grass are gathered together, a twig and leaves are drawn.
Decorating a kitchen board: Khokhloma painting on wood step by step
Khokhloma painting is more often used when painting on wood.. Craftsmen often resort to decorating kitchen boards with classic patterns. This product can be presented as a souvenir to guests, or you can decorate your own kitchen.
What you will need:
- cutting board;
- glue;
- gouache;
- egg white;
- paper;
- pencil;
- paint brushes;
- paint brush.

Khokhloma painting is more often used when painting on wood.
Progress:
- Coat the board with egg white and leave to dry.
- Take paper and draw a sketch on it with a pencil.
- Now apply gold paint to the board and let it dry.
- Transfer the drawing to the board.
- Color floral patterns and berries red.
- Draw the stems and veins with thin stripes.
- Thinly outline all the contours with a brush.
- Color the board so that the drawing appears on a black background.
- After the paint has dried, continue painting.
- Add green grass.
After the board has completely dried, apply varnish to its entire surface.
Khokhloma painting on a plate: step-by-step description
Decorating a plate or wooden spoon with an ornament is not at all difficult, the main thing is to know the basic principles. The drawn elements look colorful and solemn. Even a schoolboy can cope with this task.
What you will need:
- acrylic paints;
- pencil;
- tassels;
- palette;
- disposable plate;
- jar;
- ornament.

Decorating a plate with an ornament is not at all difficult
Progress:
- Choose a pattern that will be applied to the plate. It could be a rooster, a bird or simple berries.
- Transfer the ornament to a plate.
- Make the bon red.
- Carefully paint all other elements.
- Be sure to make a black rim both on the inside of the plate and along the edge.
- Add droplets along the rim.
- Leave the plate to dry completely in a suitable place.
Apply varnish and let the product dry.
Painted Khokhloma box: master class
The very name of this product indicates its nobility and grace. The box turns out to be fabulous, traditionally colorful, but very unusual.
What you will need:
- paints;
- background paint (bronze or copper);
- masking tape;
- squirrel brushes;
- varnish brush;
- pencil;
- tracing paper;
- sandpaper;
- wooden box.

The box turns out fabulous, traditionally colorful, but very unusual
Progress:
- Plaster all uneven areas on the box. Only after the surface becomes smooth can you begin to work.
- Cover the surface of the product with background paint and wait until it dries.
- Draw a drawing on paper that will later be applied to the box.
- After the box has dried, transfer the prepared sketch onto it with a pencil. To do this, attach the paper to the box itself using tape.
- Outline the design with black paint using the thinnest brush.
- Paint larger elements black as well.
- Wait until the black paint dries.
- After this, paint all the other elements and give the paint more time to dry.
- Additionally decorate the product with tendrils and droplets.
Apply varnish to the box (at least two layers) and let it dry.
The most popular ornaments of Khokhloma painting
Before you begin such an original painting of a jug or plate, you need to find out which of the ornaments are most often used in the creative process.
In most cases, craftsmen resort to applying the following:
- grass pattern. The grass in this case only vaguely resembles sedge growing in a meadow. It is applied to products only in black or red, but nevertheless this pattern is perceived as herbal;
- saffron milk cap This is a pattern of individual blades of grass. It is used in the process of framing various kitchen utensils;
- Kudrina. The ornament is characterized by all kinds of curls and rings that unobtrusively encircle berries and flowers. Suitable for painting round objects, as well as flat ones, such as chairs and tables;
- Gingerbread. This is a geometric figure that fits into a rhombus or square. Suns with twisted rays are drawn in the center of the ornament.