The issue of renovating a room almost always depends on the budget for future work. Most often, the owners of an apartment or house are faced with a choice - to renovate the room with their own hands in a cosmetic way, without postponing the matter, or to plan a major overhaul for the indefinite future with redevelopment and a serious update of the design. Most craftsmen in such a situation recommend redecorating the room, during which the vast majority of problems with the interior of the room can be solved.
How to properly approach the organization of renovation in one room
Starting a room renovation is always inconvenient and even scary, especially if you don’t have enough experience, and the only assistants at hand are a cheat sheet on how to renovate a room with your own hands for beginners. But, as a rule, uncertainty and doubts pass when the scope of future work becomes clear and the question of in what sequence to make repairs in the room is resolved.
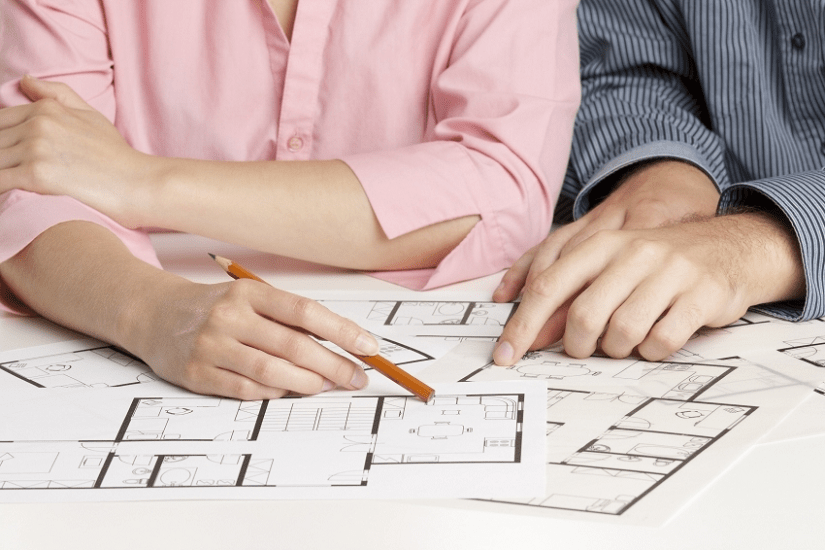
Therefore, the first step is to draw up a master plan for cosmetic repairs, and most importantly, before attempting to make repairs in a room, it is necessary to draw up a detailed estimate for the purchased materials and consumables. This required condition, even for renovations in a small room you will need to make a list of several dozen items.
Where to start renovating a room is not important; you can carry out repair work in the sequence that seems more convenient in given specific conditions. Traditionally, renovating a room with your own hands begins with the most “dirty” or rough work and ends with delicate finishing procedures.
A typical list of work or sequence of repairs in a room is as follows:
- The old finish is removed from the walls, ceiling and floor. Removal flooring gives the largest percentage of dust and dirt, so it is removed first;
- Held rough preparation floors for further installation of new flooring;
- Wiring repairs are carried out, lamps and switches are moved and hung, corrugations are laid out for television and Internet cables;
- The walls and ceiling are cleaned and puttied. If the redecoration plans involve changing the wallpaper to a more modern type finishing, then you will need to level the walls gypsum plaster;
- In a similar way it is leveled ceiling surface. Before whitewashing or painting with water-based emulsion, the ceiling is rubbed down, plastered with a lime-gypsum mixture and a decorative coating is laid;
- Decorative finishing of the walls is carried out, glued ceiling skirting boards, the lining of interior doors is changing;
- New flooring is being laid, baseboards are being installed, lamps are being hung, and switches are being installed.
Of course, at each stage of room renovation, photo, a large amount of debris and dust will be generated. Not only will you have to regularly clean the room and remove rubbish rubble, you will also need to try to cover areas with already completed repairs with protective plastic film to avoid dust on the surface.

What should not be included in redecorating rooms
Finishers often call cosmetic repairs a “three-day job”; in order to update the interior of a room, as a rule, no more is required. The list of repair activities does not include the most expensive work:
- Redevelopment of premises with the transfer of interior partitions;
- Replacing the heating system;
- Installation of expensive multi-tiered suspended ceilings;
- Glazing of the balcony and replacement of windows with double-glazed windows;
- Equipment for heated floors in the room.
It is clear that all of the above components of repair require serious financial costs and the involvement of qualified specialists in the work. It will take more than a day or two to carry out such serious events. In addition, such is the specificity of the renovation in the room that, willy-nilly, dust and construction debris spread throughout the apartment. Therefore, the situation is regulated in this way - either cosmetic repairs are made in a single room, or the entire apartment is “stood up” for major repair work.
In general, the redecoration plan includes everything that can be done in a couple of days with your own hands for relatively little money.

The main task of cosmetic repairs
The main goal of renovation work is to refresh the interior of the room, remove minor defects and damage that have accumulated over the years, which are incredibly annoying and interfere with everyday life.
In rare cases, cosmetic repairs become a consequence of force majeure circumstances, for example, flooding of a room by neighbors on the floor above or preparing the premises for renting. There may be many reasons, but the main thing is still maintaining the premises in a comfortable condition for living.
Properly performed cosmetic repairs make it possible to save on future volumes overhaul For example, screeding the base of the floor and leveling the walls will at least reduce the time and effort required to prepare for a major overhaul, naturally, provided that the renovation of the room with your own hands (photo) is done as conscientiously and efficiently as possible.
The next stage of repair, distribution of costs and load
Budget planning and procurement of materials are rightly considered one of the most difficult stages of redecoration. Especially if you plan to do most of the repair procedures yourself. The reason is simple - amateurs and novice craftsmen have no idea how much specific material will be required for this or that area of work.
In this case, the problem can be solved in two ways:
- Compiled list works and estimates can be shown to an experienced master, which will help calculate the flow rate based on the square footage of the room;
- Calculate consumption based on standard recommendations from manufacturers of building materials, increasing the stock of glue, plaster mixtures, wallpaper, and flooring by 10% of the calculated indicators.
In the latter case, the cost of purchasing materials will increase significantly, but ultimately, the remains of cement, dry plaster and glue can be used for cosmetic repairs of other rooms in the apartment. In addition, having a list often helps to get a wholesale discount, so there should not be significant gaps in the budget for a future cosmetic renovation of a room if the purchase is properly organized.

Preparatory stages of renovation in a room
The first, most labor-intensive stage has always been and remains the rough stripping of the walls and ceiling. Typically, renovations to a room begin with removing pieces of furniture and sealing the front door with a protective awning. You can use thick plastic wrap or an old blanket. An improvised curtain will protect the rest of the apartment from noise and dust, which even with very careful work, using a vacuum cleaner and wet cleaning flooring always accumulates in a room in considerable quantities.
Before repairs, the lamps must be removed; instead of a chandelier, a socket with a light bulb is left in the room. If double-glazed windows are installed in the room, then it would be useful to cover the window opening with film before the repair. It is clear that the film also covers the floor covering; it is easier to roll up the laid polyethylene than to wash the dirt in the room every evening.
Removing old finishes from walls
Preparing for a redecoration takes about a third of the planned time. During this time, you will need to remove the whitewash and wallpaper from the walls of the room. If there are areas with damaged plaster, it will take another day to knock the plaster off the walls.
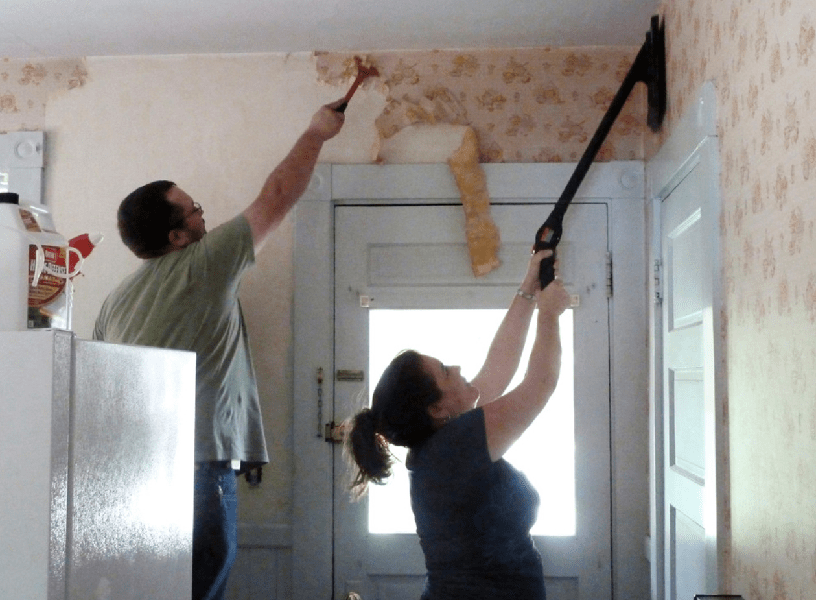
Old wallpaper is removed either in one sheet or scraped off in small pieces for a long time, it all depends on the glue used. Before removing the wallpaper, moisten the surface with a small amount of water using a spray bottle. After 20-30 minutes, the trellises can be removed in patches. For especially strong adhesives, boiling water and steam are used. In any case, after stripping the old trellises, you will need to use a vacuum cleaner and a stiff brush to remove dust and glue residues.
Peeling and restoration of the ceiling surface
The ceiling is freed from the decorative coating much faster and easier than the walls. If your redecoration plans include sticking polystyrene plates or laying plastic panels, then it will be enough to remove upper layer whitewashing
The situation is more complicated if the ceiling in the room is painted water-based paint or whitewashed with lime. In this case, it will take at least a day to remove the durable layer of old finish.
The most common option for restoring the ceiling during cosmetic repairs involves leveling the plane of the ceiling. In any room of any apartment, the floor slabs lie with a differential of several degrees, which leads to a difference in ceiling height near the opposing walls of the room from 2 to 5 cm.
If time and budget for cosmetic repairs allow, then it is best to level the ceiling using high-quality gypsum plaster.

To do this, plastic slats are sewn onto the ceiling and the plane is tightened with a plaster mesh. Beacon slats are glued with alabaster, guided by pre-tensioned horizontal marking cords. The mesh is sewn on dowels. The total time required to completely level the ceiling in a room is 5-6 hours of work.
In one working day you can complete complete renovation ceiling. The next day you can sand, prime and paint the surface.
Cosmetic repair work to the walls of the room
During cosmetic repairs, walls are leveled and plastered only in exceptional situations, when the situation requires it, for example, the appearance large quantity cracks or chipping of plaster. In addition, the total area of the walls of the room, as a rule, is three times the area of the ceiling, which in itself requires a lot of time and materials.
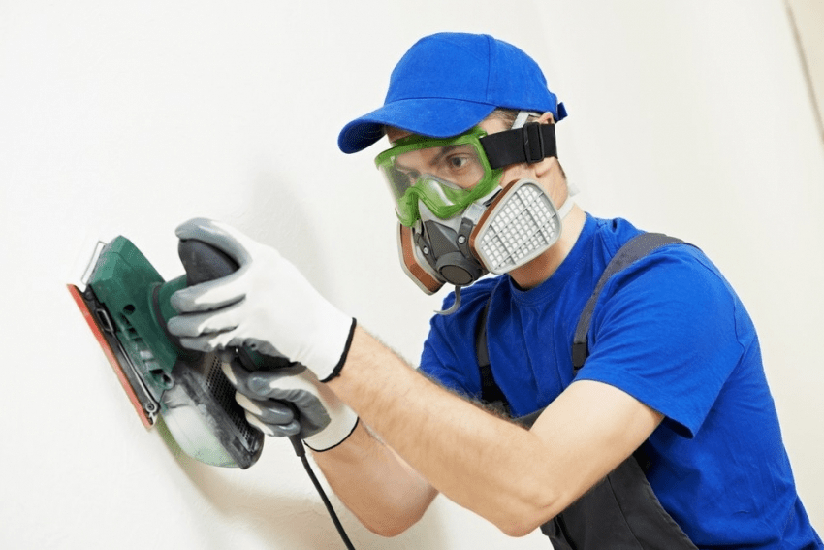
Therefore, during cosmetic repairs, the preparation process is limited to cutting small cracks, followed by puttying and grinding the surface. Sometimes, in order to level the plane of a single wall, particularly problematic areas are sanded with an electric sander.
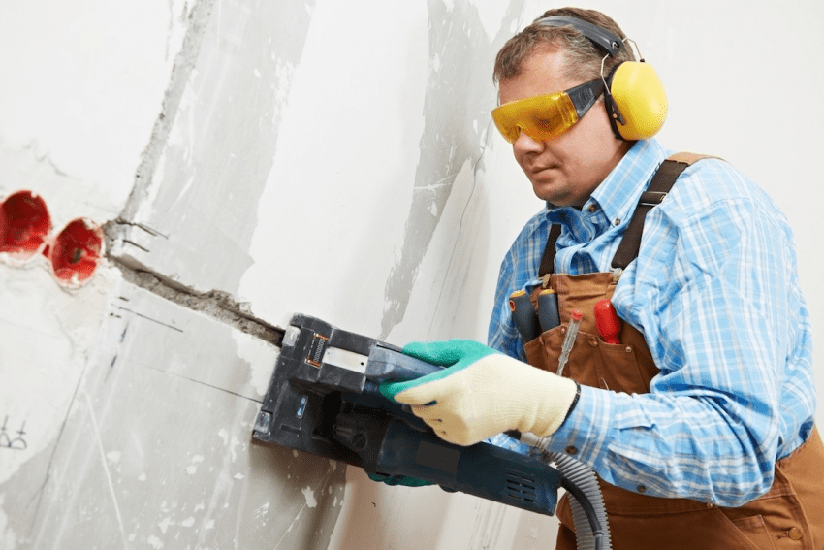
In addition, at this stage of the renovation work, it is easy to change the profile and configuration of the electrical wiring in the room. It is enough to drill channels in the lower part of the walls to the installation site of new electrical outlets, break through the “glasses” for the trimmers and install the sockets themselves. The corrugations with wiring laid in the channels can be rubbed with plaster or alabaster mass. All work will take a maximum of 2-3 hours. Upon completion of preparation for finishing, the surface is vacuumed and primed.
Rough floor preparation
After finishing the most labor-intensive work with preparing the ceiling and walls, you can move on to cleaning and preparing the floor. If the floors are concrete, with laminate flooring, then cosmetic repairs may be limited to re-laying the laminate slabs, with or without replacing the lining material. Most often, damaged slabs in a room are replaced, after which the coating is polished using wax mastic.
During cosmetic repairs, linoleum coverings are cut out, the base is cleaned down to concrete, primed and covered with a heat-insulating lining based on foamed polyethylene.
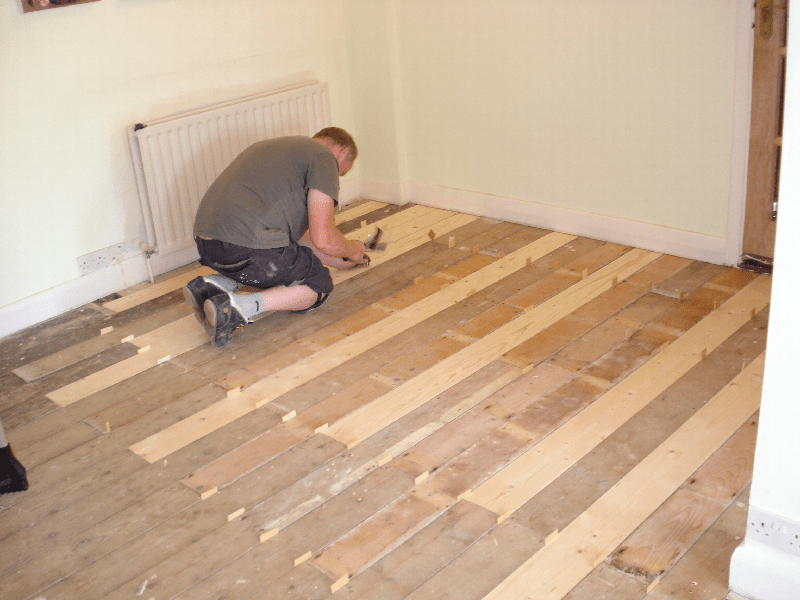
If the room has wooden floors, then first of all the floorboards themselves are cleaned and repaired, then the joints are hammered and hammered, after which the surface is sanded and prepared for painting.
Don't forget about garbage and dust
Any repair work, even the simplest and most superficial, is always accompanied by the formation of a large amount of debris and dust. Before repairs, you need to prepare two or three polypropylene bags into which all the garbage from the room will be collected daily. At the end of the day, after each finishing operation, the walls and floor are cleaned of crumbled crumbs and residues plaster mortar, and before finishing the walls, go over them with a vacuum cleaner or a damp brush.
If the walls of the room are supposed to be leveled with gypsum plaster, then the amount of debris will increase five to six times. It will be necessary to think in advance and find a way to collect and remove 150-200 kg of cement-sand waste screenings from the premises. You cannot send it to the garbage chute or trash cans; you will need to order a special service for the removal of construction waste.
Cleaning redecoration operations in the room
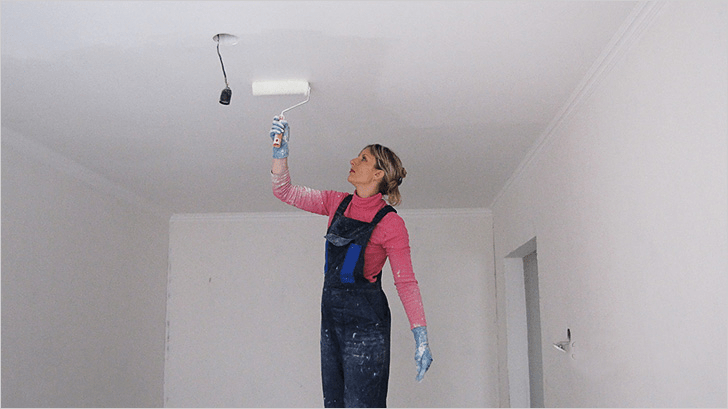
The first step is finishing the ceilings. Usually the repaired and sanded surface is primed and painted. acrylic paint light colors.

If wallpaper is used in the interior of the room, the ceilings can be decorated with non-woven or vinyl wallpaper to match the color of the future wall decoration. A common practice for decorating lamps and chandeliers is to use imitation polystyrene stucco molding and decorative ceiling plinths.
Finishing the walls in a room is considered one of the most important and at the same time time-consuming cosmetic operations. Even taking into account the fact that half the walls in the room will be covered with furniture, a certain part of the walls will still be clearly visible to everyone present in the room. If during cosmetic repairs it was not possible to properly level the surface of the walls, you can hide the imperfections only under the wallpaper. It is best to use trellises on a fabric basis or with a pronounced relief textured surface. Pasting a room will take 7-8 hours or a full working day.

Repairing doors and floors in a small room
Wood plank floor old layout Often you have to hide it under linoleum or laminate. In this case, the surface of the floorboards is sanded with a sanding machine, and the joints are sewn together with nails driven at an angle to the board. At the next stage of repair, the floor surface is sewn up OSB boards, after which you can lay linoleum or any other flooring option in the room.

The situation becomes more complicated if the concrete floors are leveled to the level of the screed throughout the apartment. In this case, any floor covering in the room will lead to the appearance of a threshold, so the installation of laminate or parquet must be planned simultaneously in all rooms.
The final stage is the restoration of interior doors. The hatch and the door itself, if they are in good condition, can not be changed, but undergo restoration with cleaning and polishing of the surface. The outer lining of the door frame is traditionally replaced with a new one during repairs. The replacement of doors with a supporting frame is planned for a major overhaul, usually so that the entire apartment or house has doors of the same style and design.

Conclusion
Repairing a room, even in a cosmetic form, requires careful preparation, first of all, in the details of the future interior of the room, the method of decorating the walls and floor. Any attempts to postpone the decision to the future, to do it at random, as it turns out, will lead to a significant increase in costs and an increase in the time required to restore the room by two to three times.
The word “repair” immediately evokes negative emotions. This feeling is due to the fact that this is a very labor-intensive, lengthy and costly process. Especially if the work is done independently. This article describes in detail where to start renovating an apartment, depending on its type, what materials to choose and in what sequence to carry out the work so that the renovation proceeds without problems, and the result exceeds all expectations.
The stages of apartment renovation and the cost of work depend on the condition of the premises, the type of repair and the size of the area covered, i.e. it can be the entire apartment or its individual premises. There is a major, cosmetic and European-quality renovation. Each of them has its own clear sequence of actions, the correct execution of which determines the final result and the duration of the operating period.

Major repairs are considered the most large-scale and labor-intensive, which will require not only a lot of effort, but also significant financial costs. It involves a complete reconstruction of the apartment with possible redevelopment, replacement of windows, doors, utilities, ceiling, wall and floor coverings. This usually starts from scratch.
How to legalize an apartment redevelopment that has already been done. How to obtain permission to redevelop your own home.
Interior design selection
Where to start renovating a room or apartment as a whole? From the choice of room decoration style. Properly selected interior design will help create comfortable and stylish housing. His choice depends on the taste, character and outlook on life of the owner of the apartment. Today there is a variety of interior styles with distinctive features that should be studied before making renovations in order to be able to successfully bring the chosen direction to life.

Designers divide all existing style trends into certain groups:
- classic, which includes Provence, Empire, Baroque, English and antique styles;
- ethnic style covers Japanese, Egyptian, African, Scandinavian and Chinese styles;
- modern style combines country, modern, classicism and minimalism.
The most popular remains classic design interior Characteristic Features directions are considered pomp, grandeur, functionality, evoking aristocracy and noble grace. All interior elements indicate the high status of the apartment owners.
The premises are decorated in discreet pastel colors. Business card becomes massive expensive furniture with carved patterns self made. There is an unusual painting on the ceiling. IN classic style Large-sized apartments are often designed in which there is no need to save on free space.

Modern youth prefers to decorate the premises in modern style. This is especially justified for apartments with a small area. Everything here should be simple, restrained and concise. The premises contain a minimum amount of furniture, which should be compact, mobile, functional and modern. Dilute the calm palette decorative finishing rooms can be decorated with bright decorative elements.
The ethnic direction reflects the owner’s predisposition to a certain culture, the main features of which are embodied in the interior design. With help modern technologies and finishing materials, you can make your dreams come true and create an imitation of your favorite country in your apartment. This direction is chosen by people who think outside the box with a great love of adventure and travel. You can see each style more clearly in the photos of renovated apartments.
Where to start renovating an apartment: basic strategy
After the design project of the apartment has been developed and the question of what sequence to carry out the repairs has been decided, you can begin to carry out the work, which consists of the following stages:
- preparatory stage;
- rough work;
- finishing of the room.

Where to start renovating an apartment with your own hands? WITH preparatory stage, which consists in performing the complex dismantling works. This applies to both a new building and an old apartment. Regardless of what kind of repair is planned, cosmetic or major, all surfaces must be cleaned of old finishes. At this time, window units are dismantled with the subsequent installation of higher quality products. The front door also needs replacing. Here you may need to expand or reduce the doorway. Based on the project, partitions are dismantled and erected, sealed or installed doorways for installing interior doors or creating arches.
Helpful advice! Repairing a room with your own hands should begin with dismantling the interior doors.
Surface preparation is one of the most important steps in DIY repairs. Where to start the process depends on the condition of the foundation. This stage includes cleaning the walls, ceiling and floor of the old coating and eliminating all defects on the surface of the structures using building materials. It is the quality of work at this stage that will determine how firmly and neatly the new finishing coating will adhere.

First of all, the ceiling is cleared of the old coating. The whitewash is washed off with a brush dipped in water. Old putty is removed using a grinder with an iron brush.
Take off regular wallpaper from the walls you can use a spatula, having previously moistened them with water. Vinyl wallpaper is quite resistant to moisture, so you can remove it using a steam generator or ironing. If there is no such device, you can use a regular iron with a steaming function, which is brought to the wall at a distance of 10-15 cm. Under the influence of steam, the wallpaper easily comes off the wall. You can remove the paint using a sander with a special attachment or construction hair dryer. Next, you need to remove the old floor covering.
Helpful advice! If the project involves the installation of a suspended or suspended ceiling, the old coating does not need to be removed. Enough to process everything problem areas strengthening primer and antiseptic.

Where to start renovating an apartment with rough finishing in a new building
Where to start decorating an apartment depends on its condition structural elements. Usually the developer performs minimum required works, without strictly adhering to the technology of their implementation and without the use of high-quality building materials. Therefore, all elements of the room require rough rough finishing of the apartment with your own hands or with the help of specialists, which consists of performing the following activities:
- dismantling old and building new non-load-bearing structures based on a new layout;
- window replacement;
- preparing holes in the walls for laying new utilities according to the developed scheme;
- electrical wiring;
- installation of technological communications: water supply, drainage, heating, ventilation, inter-block air conditioning line;
- leveling all concrete surfaces;
- installation of insulation and sound insulation;
- floor screed.

After completing the rough repair work in the apartment, finishing of the premises is carried out. The solution to the question of how to plan repairs at the final stage will depend on the type of finishing material and the method of its installation. For example, if the walls and ceiling are painted or covered with wallpaper, then the finishing work begins with the ceiling, then the walls are tiled and the flooring is laid. In the case of a suspended ceiling, installation work is carried out after finishing the walls.
If parquet is installed, the work is carried out before finishing the walls and ceiling, so as not to damage the surface. Doors can be installed both before and after finishing the walls. If there is no casing, then installation door leaf is carried out before finishing in order to be able to seal the joint between the wall and door frame. In the case of a platband, the gap is filled with foam, and the platband is attached to the wall after finishing the walls.
After completing all finishing works begin the installation of skirting boards, sockets, switches, trim, lighting and plumbing fixtures. Then it is produced spring-cleaning, after which you can begin arranging furniture and decorative elements. This is the sequence in which repairs are carried out on your own.

Where to start renovations in a rough apartment: installation work
The list of installation work when performing repairs from scratch includes:
- construction of non-load-bearing partitions;
- replacement of windows and doors;
- work related to the installation of electrical wiring and other communications.
The construction of non-load-bearing interior partitions is carried out on the basis of a previously developed plan. For installation of structures, gas, foam concrete blocks, brick or metal frame with plasterboard finishing.
Concrete blocks create a strong structure that can withstand significant cantilever loads. Therefore this is the most suitable option if there is a TV hanging on the wall or wall cabinet. The surface needs basic plaster for further decorative finishing.

Much less often, partitions are erected from building bricks. This is explained by the fact that the structure occupies a significant part of the free space. After all, in order for it to be stable, the thickness of the partition must be at least 170 mm. In addition, this design creates a significant load on the base.
The most popular option is to create a partition from a metal frame, which is covered with plasterboard. The design has good sound insulation and does not create a significant load on the supporting element of the building.
Helpful advice! In plasterboard partitions it is necessary to provide for the installation of embedded parts that will withstand the load from possible suspended structures .
The installation of windows and entrance doors should be entrusted to specialized organizations, the quality of whose work will determine the nature of the apartment’s protection from the cold and the likelihood of burglars entering.

Features of installation of communications
Where to start with your own repairs after remodeling your apartment? From performing electrical wiring and laying other utilities. First you need to do everything plumbing work. New radiators are installed and the pipelines are connected to the general heating system. Pipes are laid out to connect faucets, toilets, washing machine, sinks, bathtubs, shower stalls, water heaters and dishwasher. Before installation, you should clearly know the location and connection details of all devices.
Hot and cold water supply pipes can be hidden in wall niches or mounted in plasterboard or plastic boxes. It is recommended to use polypropylene as a material for pipes, which has high strength and performance characteristics.
Helpful advice! The size of the holes for laying plumbing communications should be twice as large as the diameter of the pipelines, which is due to the high coefficient of thermal expansion of the material.

Electrical wiring is usually done hidden. All cables and wires are laid in wall grooves, above a suspended or suspended ceiling, or in the floor under a screed.
Important! When performing repairs panel apartments Wall gating for future electrical wiring is performed only vertically. Horizontal sections are mounted at the junction of the wall and floor or under the ceiling.
Work must begin with markings, which are carried out on the basis of the developed apartment plan. Using this marking, the walls are chipped. The size of the holes is determined by the number and thickness of the cables being laid. In new buildings, all electrical wiring is installed from scratch, starting from the electrical panel. In old apartments, when carrying out major renovations, you can also completely change the electrical cables, or install individual sections of it necessary to connect electrical appliances based on a new design project.
At this stage, it is necessary to provide for the laying of cables for the intercom, TV, telephone and Internet, which can also be hidden.

Where does ceiling repair begin in an apartment?
Where to start renovating a rough apartment? All renovation work in an apartment is usually carried out from top to bottom. This means you need to start from the ceiling. In new buildings it is presented in the form of a monolithic concrete slab, the surface of which must be cleaned, plastered, primed and covered with decorative finishing. If the renovation is being carried out in an old apartment, then at the first stage the surface should be cleaned of old finishing material.
The further plan of action depends on the chosen ceiling design option. If the surface is perfectly flat, then the simplest and cheapest option is to whitewash or paint it. If the base requires preliminary elimination of defects using plastering work, then this option will be very labor-intensive and costly.
Another budget-friendly, but not so labor-intensive option is installing ceiling tiles, which even a beginner can do. The base surface does not require preliminary leveling. The main thing is to choose the right quality finishing material and glue.

A more acceptable, but expensive solution is to create a suspended structure made of plasterboard, which can be of any shape and have several levels, which determines the cost and time of the work. Thanks to this solution, you can get free space between the ceiling and the structure for laying and installing spotlights.
A modern solution today is to create a stretch ceiling from PVC sheets. The result is perfect level base any texture and shade. Installation is carried out in a matter of hours by a specialized team. Before carrying out work, you should first prepare the wall structures. Because the process of installing a stretch ceiling involves making edging from baguettes. In addition, it is necessary to complete all dirty work in the room so that dust and possible contamination did not settle on the clean ceiling.
Finishing of wall structures
Leveling the walls is an important undertaking, the quality of which determines the durability and aesthetic appearance of the future decorative finish. Usually, when renovating apartments with a rough finish, they are faced with fairly smooth concrete walls, which only need light adjustments using plaster mixtures. However, if the walls are made of expanded clay blocks, gas silicate or brick, quite labor-intensive and costly work is required to level them.

Before you begin leveling the walls, you must thoroughly clean the surface of the old coating. This mandatory stage to carry out major repairs of old apartments. Any cracks or other defects found need to be repaired. To do this, problem areas must be embroidered, primed and sealed with cement mortar, putty or sealant. Wide gaps and cracks in corners can be filled with polyurethane foam.
Wall alignment can be done in two ways:
- plastering walls with building mixtures;
- finishing of walls with gypsum plasterboard and gypsum fiber sheets.
The first option involves the use of plaster mixtures on gypsum or cement based. If the wall has minor unevenness, visual alignment is performed using a building level. If the surface has a significant difference, then it is advisable to perform leveling using beacons. This is especially important when the walls will be painted. When installing furniture along flat wall eliminates the possibility of cracks occurring.

Along with leveling the wall surfaces, finishing of door and window openings. To do this, you can use plaster, drywall or plastic panels.
The second option is preferable when the walls are made of brick or have significant unevenness. Using plaster turns out to be an unreasonably costly and time-consuming undertaking. GKL or GVK sheets are mounted on a previously installed metal frame. As a result of this finishing, a gap is formed between the wall and the cladding, into which various communications can be hidden. This process characterized by the absence of dirty work and low labor intensity. The walls do not require further plastering before finishing with decorative material.
The main disadvantage of this design is its fragility. Therefore, if hanging furniture or appliances will subsequently be placed on the surface, you should take care of the embedded parts that are installed before performing the leveling layer.

Where does floor repair begin?
The apartment begins with a screed, which is used to eliminate significant damage and unevenness of the base relative to the horizon. This occurs by backfilling or pouring the floor. special composition, which forms a perfectly flat surface necessary for further installation of the floor covering. In addition, the screed serves to strengthen the surface of the concrete slab and increase its strength characteristics. Before performing it, it is necessary to create a sound and heat insulation layer. For this purpose, expanded clay is often used, which is laid at least 5 cm thick. Due to the leveling layer, you can raise the floor level or perform a technological slope.
Helpful advice! In the bathroom, it is advisable to set a certain floor slope for water drainage in case of a flood, which will prevent flooding of the entire apartment.
The floor screed can be:
- concrete;
- cement-sand;
- self-leveling;
- dry;
- semi-dry.

The traditional way to adjust the floor surface is to use concrete or cement-sand mortars, which are advisable to use to eliminate significant unevenness and damage to the surface. They are used when installing heat and sound insulation.
The most practical and modern solution is the use of self-leveling compounds, consisting of two mixture options: leveler and leveler. The first is used to eliminate significant unevenness in the base, the second is finishing layer, creating a flat and smooth surface without defects.
However, despite the less labor-intensive process when using these compositions, their cost is significantly higher than traditional mixtures. Therefore, it is advisable to use self-leveling compounds when the difference in height relative to the horizon does not exceed 4 cm.
The semi-dry or dry version is used to level the base when the height difference reaches more than 3-5 cm. This is a good alternative to traditional compositions, however, the new layer will create much less pressure on concrete slab. Therefore, this method is recommended when renovating apartments in old houses and installing carpet and laminate flooring.

The procedure for floor screeding
First you need to prepare the base of the floor. For this purpose it is opened old design floor with dismantling of skirting boards, flooring and old screed. Next, the surface is cleaned of construction debris and dust. If cracks, potholes and chips are detected, it is necessary to carry out repair work using sealing mixtures. To eliminate deep damage, a jointing method is used, which consists of making cuts perpendicular to the crack with a depth of 20 mm and a thickness of 5 mm. Next, all damage must be repaired with concrete mortar.
Floor leveling begins with its marking, namely determining the lowest and highest points relative to the horizon. A level is indicated on the walls, which indicates the thickness of the future filling layer. Beacons and guides are installed based on the markings. Pouring the mixture begins from the far corner of the room. The solution is distributed and leveled using a metal rule.
The concrete screed must dry for three weeks. After 24-30 hours after completion of work, it is necessary to wet the surface once a day.

Helpful advice! To get a durable and quality foundation It is not recommended to disrupt the natural process of moisture evaporation using heating devices and room ventilation.
In a similar way, the floor surface is leveled with a semi-dry solution, which is evenly distributed and compacted using a regular shovel. After complete drying, the surface must be treated with wooden grout. The process is carried out until the floor surface is perfectly flat.
Dry screed involves laying a layer of expanded clay with a fraction of 1-5 mm, on top of which gypsum fiber boards are mounted. They are connected to each other using self-tapping screws with the end edges coated with special glue. This is the easiest way to level the floor, which allows you to obtain a coating of increased strength. After the floor screed has been completed, you can begin installing the selected floor covering.

Turnkey apartment renovation. Price per square meter
Regardless of what kind of renovation you plan to do in your apartment, you can do it yourself or use the services of professionals. You can also attract specialists to perform specific types or stages of work in the entire apartment or in a specific room.
The cost of cosmetic repairs includes the following list of works:
- dismantling old finishing from room elements;
- painting or whitewashing the ceiling;
- partial leveling of walls;
- gluing non-woven or paper wallpaper;
- laying flooring;
- partial replacement of electrical and plumbing;
- laying tiles.
The cost of such a list of works starts from 2500 rubles/m², which depends on the labor intensity of the process. The renovation will cost 85 thousand rubles, a two-room apartment - 110 thousand rubles, a three-room apartment - 120 thousand rubles. This is all without taking into account the cost of materials.

If it is necessary to perform rough work, which includes installation and dismantling wall structures, alignment of all elements of the room and electrical installation work, the price for services averages 3500-4000 rubles/m².
When it is necessary to complete all turnkey electrical work in a new building, the price of the work will be for studio apartment 25 thousand rubles, two-room - 35 thousand rubles, three-room - 45 thousand rubles.
The cost of a turnkey overhaul is on average 5,500 rubles/m². It all depends on the condition of the apartment and the total area of the room. Many experts offer premium repairs, which include the development of an individual design project. The price of such repairs is about 7,500 rubles/m².

Turnkey apartment renovation price with materials
The cost of repair work, taking into account materials, depends on many factors: the area of the apartment, its current condition (new or secondary housing), the volume and labor intensity of the work stages and the quality of the building materials used. You can approximately calculate the cost of repairs using an online calculator, which is located on specialized websites. Here the average cost of apartment renovation per square meter of area is taken into account. More accurate information can be obtained only after drawing up an estimate in each individual case.
Thus, the cost of a budget renovation of an apartment in a new building with materials will cost on average 6-6.5 thousand rubles/m². If more expensive building materials are used to renovate the apartment, the price of the work will be about 11-12 thousand rubles/m². Those wishing to decorate their home with exclusive finishing products must prepare at least 20 thousand rubles/m². The price of repairing secondary housing will be 10-15% lower, which is determined by the condition of the apartment.
Also the cost of repairs with materials is affected functional purpose premises. So, renovating a living room will cost 6,000 rubles/m², a corridor - 6,500 rubles/m², a kitchen - 8,500 rubles/m², a bathroom - 8,000 rubles/m², a loggia or balcony - 5,000 rubles/m².

When deciding where to start renovating a house or apartment, you need to study each process in detail. Especially when it comes to doing the work yourself. If you are not confident in your own capabilities, it is better to entrust all the work or a specific stage to professionals who will offer a clear plan for renovating the apartment. As a result, the work will be completed efficiently and in a short time.
Do-it-yourself apartment renovation. Video story
I’m ready to tell everyone (and show them in pictures) how you can make good repairs yourself relatively inexpensively. If your hands are okay, it's not difficult.
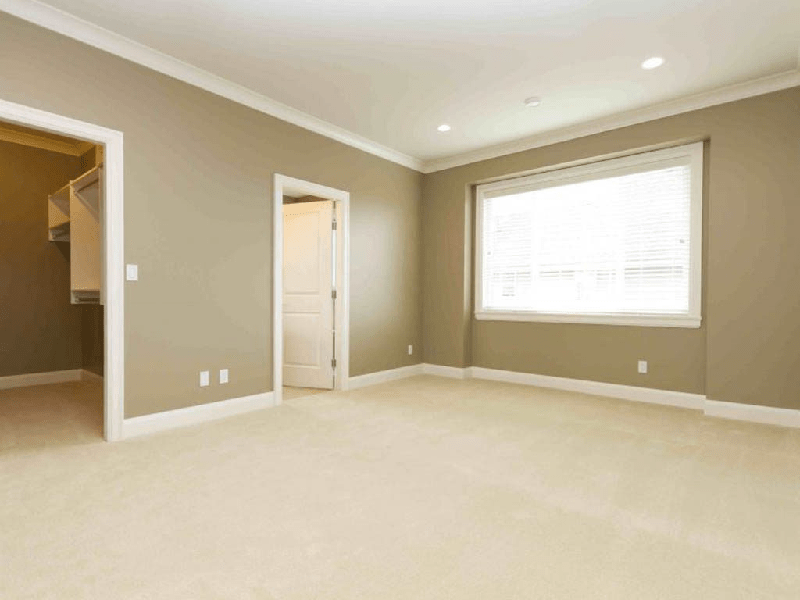
So, a specific object. Room 15 sq.m. Future bedroom. Rectangle 3x5m, height 2.65m. No repairs have been made to it for a long time. There are no obvious construction defects (the walls and ceiling are visually smooth, the floor is level along the horizon).
Due to the fact that the removal of furniture was gradual, the renovation took a little longer. It all started with drawing up a project for the future room, approximate arrangement of furniture and original design ideas. The renovation began with the replacement of the old wooden frame on a modern plastic two-chamber window. Manufactured and installed without any complaints. The next step was replacing the radiator. I used a grinder to cut down the old pipes and put them in their place metal-plastic pipes with a new radiator. In the future, it was planned to cover the pipes with plasterboard. The floor, thank God, turned out to be in very good condition, it was decided not to touch it and not to make a screed. After removing the part old furniture started making a frame for gypsum plasterboard metal profiles. At first it was decided to sew outer wall with a window. Ceiling profiles PP 60x27 and guide profiles PPN 27x28 were used, which were used in the future. The main difficulty was in accurately measuring the installation of gypsum board from the wall. The pipes were in the way, and the already installed window sill did not allow increasing the distance from the wall. But the level and plumb line did their job here too. First, we fixed the profile to the ceiling. Using a plumb line, we marked the place where the profile should be installed on the floor. After that, we screwed the PN onto the walls. Next, we installed the PP vertically and secured them in several places to the wall using direct hangers. The result is a finished frame for one wall. Having laid the opening mineral wool For heat and sound insulation, the wall was covered with plasterboard. Insulated and sewn at the same time window slopes, using the same metal frame for this.
After this, we began making the frame on the adjacent walls. We determined the angle from which all measurements are taken, and using a tapping thread we drew parallel lines on the ceiling and floor along which the PPN guides should subsequently be attached. Niches were marked on the walls, which should be according to the project. Having secured the PPN to the floor and ceiling, they began to make vertical racks from PP 60x27. The profile was cut 7-10 mm less than the height of the room, inserted into the PN every 60 cm and attached to the wall in three places at approximately 70 cm intervals using direct hangers. In places where there were niches, first the PN was attached to the wall along the marked line, cutting and bending it as needed in place.
At the same time, in the places of future sockets, a wall was built under mounting boxes. The bulk of the sockets and all the switches were planned to be made on a plaster wall, so the walls had to be tapped in at least two places, under the TV socket and the socket in the niche.
After the main frame was made, low-current wires were installed - telephone, Ethernet, TV. The weak point ran along the top, 3-5 cm from the ceiling. The power cable was subsequently laid a little lower, about 10 cm from the ceiling.
While construction was underway, the old door was not dismantled. It was removed at the last moment, when all the dirty and dusty work was done, almost before wallpapering. While the frame was being erected, Ursa-100 insulation was laid between the guides. At first, it was held on the wall due to the fact that it was held by the frame itself, and subsequently, power wires were laid on top, which pressed the insulation quite well against the wall, so that it did not fall under its own weight. All power wires were NYM 3x1.5, NYM 3x2.5 and NYM 4x1.5 was used on the pass-through switches. The entire power cable was laid in corrugation for reinsurance. The electrical circuit was quite complicated and it took a lot of cable. At 15 meter room it took about 150 meters of power cable and about 50 meters of low current. The power cable was attached to metal frame from the inside using clips, and between each other using plastic ties. Connection boxes were planned in the corners of the room, one for the socket group, two for lighting.
After some time, all the walls were insulated and all the cables were installed. The frame began to be covered with plasterboard. We used ordinary drywall (not moisture resistant) 1200x2700mm. I cut it to height, installed it, and secured it with self-tapping screws. On the spot, I marked holes for sockets and switches and drilled them with a crown, immediately installed mounting boxes and pulled the wires out. Niches in the gypsum board were also cut out in place using a jigsaw. After I sewed up all the walls, I sewed up the sides of the niches with plasterboard. In semicircular niches, I soaked the sidewalls and bent them in place.
When the walls were all covered with plasterboard, I began making a multi-level ceiling structure. All markings were made on the ceiling, the contours of the ceiling, the location of lamps, and mirrors were drawn. Based on this marking, the ceiling frame was subsequently made. The entire sequence of work can be seen in the photographs. At the same time, electrical connection boxes were assembled, the wires were twisted and welded.
After the ceiling was ready, all joints were filled using Fugenfüller, Vetonit KR, serpyanka and corner-forming paper tape. The curves of the niches and ceiling were reinforced with plastic flexible corners, which were later filled with putty. After putty work old door was dismantled and replaced with a new one. Before wallpapering, the window slopes and sides of the niches were painted with Delux white washable paint. The ceiling was painted with water-based paint several times.
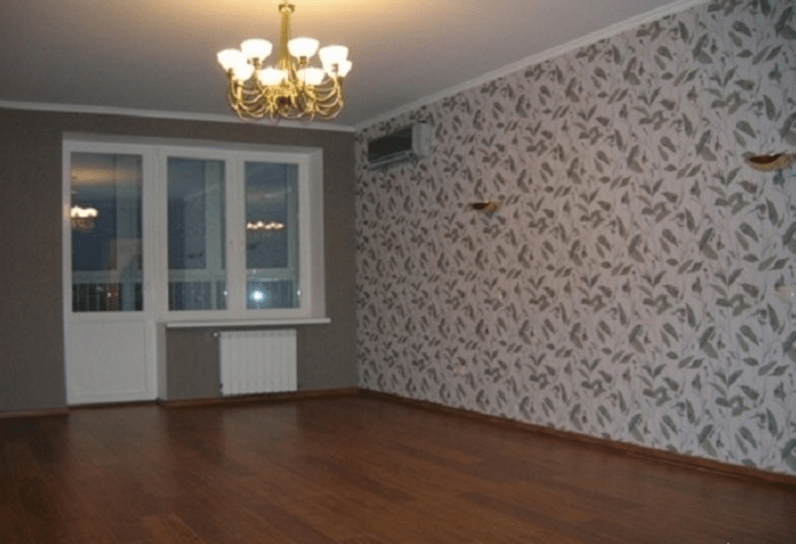
Wallpapering took one day. After this, the floor in the room was cleaned for some time, the remaining pieces of gypsum board were taken out to the trash, and the instrument was partially taken out.
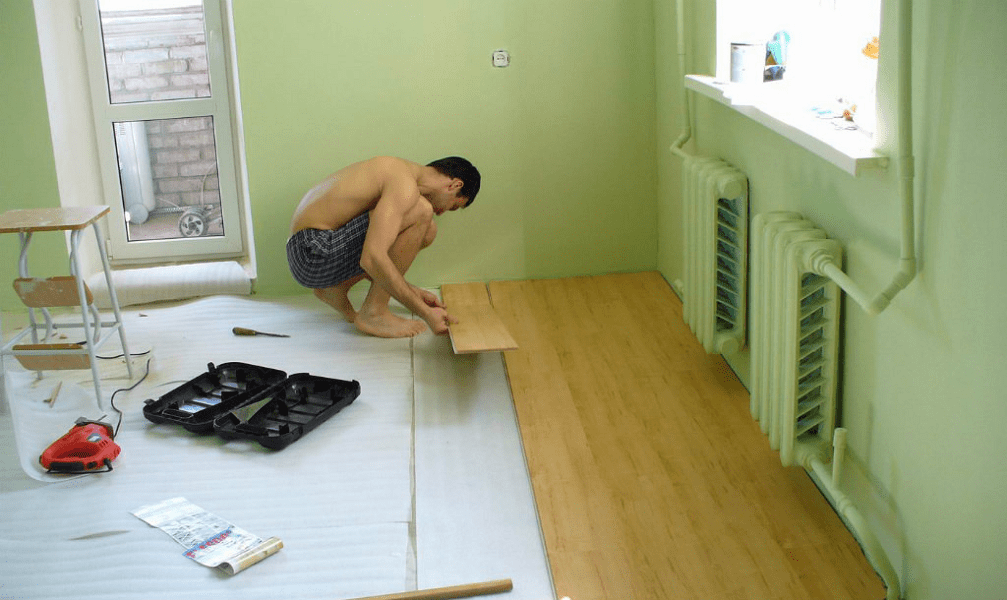
It was decided to put German Tarkett laminate on the floor. Thank God, the floor was level and we decided not to even remove it old linoleum, and place it directly on it using a 2mm backing. Waterproofing was also not done due to the fact that linoleum itself does not allow moisture to pass through. According to the design, the laminate was supposed to lie diagonally, so it was laid that way. After the floor was done, all that remained was to finish the little things. Secure the baseboard, trim the wallpaper here and there, clean the mirror on the ceiling from the tape, silicone the joint between the window and the slope, etc. The room is ready, all you have to do is wait for the ordered furniture to arrive.
Naturally, after everything was ready, ideas appear on how it could have been done better, more correctly. You understand what you shouldn’t have done. Here also. It was necessary to route the heating pipes to the radiator differently. The water flow through the battery goes from bottom to top, but it should be the other way around. Because of this, there is no 100% efficiency in heating the radiator. The second disadvantage during the renovation is that, due to laziness, the old wallpaper was not completely torn off. They can get wet under the insulation. The third disadvantage is that no vapor barrier was made. And the last defect is the lack of fresh air ventilation. Sealed windows do not allow air to pass through and the room feels stuffy. I would like to install a KIV valve in the future. This can be fixed, although it would be easier to think about it at the very beginning of the repair process.


A common everyday thing: the apartment clearly requires renovation, and there is little money. How to make inexpensive apartment renovations with your own hands? Seems to be the simplest obvious way: superficial cosmetic repairs. That is, wallpapering, whitewashing the ceiling, painting, fixing the creaky floor; Possibly replacing windows.
However, if you calculate the labor costs and consumption of materials, it turns out that by increasing the labor costs by half and the money spent by a quarter, you can give the apartment a completely different look, and for a long time. How much you need to invest specifically depends on prices in the region, but the general methods by which you can make your apartment cozy and elegant inexpensively are the same.
Saving Money when renovating an apartment with your own hands, like the Earth in ancient legends, it stands on three whales and a slowly hurrying turtle under them:
- We are not afraid of work. Nothing comes from nothing. Either money or labor.
- Wherever possible, we don’t change old things that are capital but have lost their appearance, but renew them.
- We place maximum savings where it will not affect the quality of work and will not be visible.
- We spread the costs of labor and money over time: having planned a renovation in the summer or fall, we spend a year preparing, and then we rush in and do everything quickly. Spending 200-300 thousand rubles at once is a problem, but breaking it up in parts over a year is quite possible. In addition, there will be time for measure seven times and cut once.
Where is it difficult to save money?
The only area where you will have to invite a specialist is to redo and strengthen the electrical wiring, if it is old and weak. The only way to save money here is to negotiate with a DEZ electrician. He will do the work in chunks, in his free time, but the likelihood of hackwork will be even less than with “branded” specialists: after all, he will then have to service it all.

It’s better not to skimp on electricity and wiring, but you can do some things, like installing sockets, yourself.
Tool
A good specialized tool makes the job much easier and cheaper. But buying it is expensive. Therefore, it is better to rent a tool as needed. In terms of costs, it will not cost much if you decide on the design in advance and draw up an approximate work plan for yourself.
Season
Plumbing
A sore point when doing cheap DIY repairs is replacing plumbing fixtures. If it is still “alive”, just dirty, then you can clean and paint it. How to do this will be described below. But if there are chips and cracks, then whether you like it or not, you need to replace it.
For such a case, here’s some information for you: new residents, especially in houses above the budget category, often immediately begin major renovations upon moving in, and excellent, completely new earthenware and cast iron plumbing ends up in a landfill. Landfill operators (simply landfill workers) have long since turned this circumstance into a profitable business.
They do not make direct contact with strangers via their office phone, but it is quite possible to reach them using word of mouth methods. The rate is from a third to half of the factory price for a household item. And don’t think that they will take you to the landfill and show you where it lies. In the back room you will be offered a choice of clean, thoroughly washed products, which you can immediately sit on.
Construction garbage
The next sore point is the removal of construction waste. The operation is not cheap and requires paperwork. Exit: basement, barn, cottage or closet and several used bags made of plastic sackcloth, bought for pennies. Construction garbage it does not sour or rot; it can then be poured into a container in the house trash bin by the bucket. There is nothing illegal about this.