A lightning rod is a special device installed on buildings and structures to protect them from lightning strikes. Whether or not it is necessary to make lightning rods, home owners only find out when their buildings burn down due to a fire caused by lightning. But not everything is as simple as it seems at first glance; only an understanding of physical laws will allow you to make the optimal decision on installing a lightning rod on the roof of your house.
A very interesting question with an unexpected answer. The vast majority are sure that lightning always hits the tallest building, structure, tree, etc. The explanation is quite simple - they are closest to the clouds. This means that a high lightning rod will catch all lightning and direct its huge electrical charge into the ground. In fact, a properly mounted lightning rod should not be struck by lightning; it is precisely to achieve such results that it is made.

Why does lightning strike? During friction between clouds, negative charges are formed, and positive charges accumulate in the ground. As the voltage increases, a so-called stepped leader appears - a relatively small charge that moves from the cloud to the ground along the path of least resistance. Approaching the ground, it changes direction and moves towards those areas where the most positive ions have accumulated. Conclusion - main the charge is coming not from cloud to earth, but on the contrary, from earth to cloud.
Where and why does lightning strike?

This dependence is clear to everyone. But why does lightning most often strike near ponds and rivers, although they are located very low, and there are higher structures nearby? This happens because the soil in these places is very moist, and it accumulates and conducts the maximum amount of charges. The stepped leader is not directed towards a tall building on dry soil, but towards a low-lying swamp with a lot of ions. Another factor influencing the frequency of lightning strikes is the presence of metal in the ground. This may be ore or other conductive formations.
It is advisable to install a lightning rod on buildings if they have at least one of the following features:
- located on waterlogged soils;
- houses are built in industrial areas with large mineral reserves;
- the buildings have metal supporting frames that perfectly supply current to the upper floors of the structure.

If your wooden cottage is located on dry sandy soils, then the probability of being struck by lightning is virtually zero; no lightning rod is needed.
Conclusion. The task of a lightning rod is not to attract (receive) lightning, but, on the contrary, to create conditions under which their strike in a given area becomes minimally probable. This means that the structure does not have a lightning rod; on the contrary, it has a rod for discharging earth charges. That's why correct name lightning rod, not lightning rod. Through the lightning rod, the charge from the ground escapes into the atmosphere, the voltage drops significantly, and there are no prerequisites for lightning to occur in this area.

The purpose of a lightning rod is to prevent lightning from striking the roof
If you come across illiterate or frankly promotional articles on this topic, then you should not waste time reading them. Not a single lightning rod adorns the roof or facade of a building; in addition, installation of devices costs significant money. And one last thing. The more elements a lightning rod has, the higher the likelihood that during their installation the tightness of the roofing will be damaged.
What elements does a lightning rod consist of?
Prices for lightning protection and grounding
Lightning protection and grounding
Regardless of size, technical data and installation location, all structures consist of common elements.

If, after a competent analysis of data about the site on which the building is located, a decision is made about the advisability of installing a lightning rod, then you should prepare for the work.
Important. It is only necessary to create a comprehensive lightning protection and grounding system; only together these measures ensure the efficiency of the structure.
Step 1. Calculate the number of elements, the dimensions of the building, the length of the wires and buy a set of equipment.

Lightning rod calculation. Educational electronic text edition
Step 2. Attach the down conductor holders to the roof ridge.

They are fixed with metal adjustable brackets, the wire holders themselves are plastic with special clamps. The holders are hooked with paws to the bottom of the skate, and the selected position is fixed with two screws.

Practical advice. Select the specific design of the holders depending on geometric shape skate. They can be semicircular, triangular, wide or narrow.
Step 3. Attach the down conductor to the holders.

To do this, use wire with a diameter of at least 0.5 mm. Try to level it as much as possible, do not allow the metal to touch the ridge, the down conductor should hang freely above the roof.
Step 4. Bend the ends of the wire at an angle of 45°.

According to manufacturers, this significantly increases the lightning protection coverage area. But this is an incorrect statement; we have already explained earlier in this article that the device does not attract lightning, but, on the contrary, creates conditions so that they do not appear in this place. The protective effect is achieved by removing ions from the ground into wet air, during rain it tends to conduct electrical charges.
Step 5. After the wire is installed on the ridge, you should begin installing the down conductor holders under the tiles.

Depending on the wishes of the client, companies produce several types of holders: with a straight hook, with a twisted hook and with a special metal holder. In order to secure the devices to the sheathing, you should carefully remove the tiles. How many pieces depends on its size, but for most types one is enough. Installing holders on slopes is quite a complex job; everything must be done very carefully and competently.

Practical advice. It is strongly recommended to provide for the installation of a lightning rod at the design stage of the house. Then the brackets (holders) can be installed without problems during production roofing works– much simpler, faster, safer and better quality.
Step 6. Screw the side ones installed on the slopes to the central ridge down conductor. To do this, you need to use special metal clamps.

Installing the down conductor into the holders

Important. If ordinary wire, rather than galvanized wire, is used for the lightning rod, then the contact points should be generously coated with thick grease. It will prevent oxidative processes; the current resistance at the junction will remain within normal limits for a long period of time.
Step 7 Install special holders on the surface of the brick chimney.

These elements are attached using the principle of dowels. First, holes are drilled in the masonry, then plastic elements are inserted into them, and only then the metal holders are screwed in. All wire connections are made only using special clamps.

Step 8 Attach plastic holders to the façade walls. It is necessary to provide the most inconspicuous place, preferably on the back side of the building. The distance between the holders is approximately 1 m; the method of fastening to the wall depends on the material of its manufacture. Please note that the control clamp must be located 70 cm above ground level. A flat current-carrying grounding bus is connected to the control terminal.


Distance between fasteners and element options


In order to hide the wires as much as possible and improve appearance buildings, recommended guide the wire through the drainage system. How it's done?
- Install the holder onto the gutter. It is a curved plate 3 cm wide, one end of it lies on the roof of the roof, and the other on the edge of the gutter. A special upper clamp secures the wire.
- Attach the clamp holders to the drainpipes. They should be screwed at each turn of the drainage system, and the holders themselves should be located on one side. The distance between elements is approximately one meter.
- Install the down conductors into the clamps and tighten them firmly with the bolts.


On our website you can learn not only about mounting lightning protection equipment, but also about the procedure for installing a drainage system. Detailed information in the article. Step-by-step instructions and master class.
This completes the installation of the external part of the lightning protection. You can start making grounding.
Installation of a metal grounding bus
The efficiency of the device depends on this element; during work, the recommendations of electricians should be strictly followed. They must calculate grounding parameters depending on the physical characteristics of the soil, the depth groundwater, size and purpose of the building.
Step 1. Dig a trench approximately one meter long and 50 cm deep, in which the grounding bus will lie.

Step 2. Connect the conductor busbar to the control terminal. We have already mentioned that it is located at a height of 70 cm from the ground. A conductive busbar is a metal strip approximately 2 cm wide and at least 2 mm thick. The tire is fixed using special holders. They are installed on the façade walls and plinth; the mounting method is selected by the craftsman on site, taking into account the individual factors of the building’s façade walls.

Prices for facade holders
Facade holder
Step 3. Bend the strip into an “L” shape and place it at the bottom of the previously dug trench.

Step 4. After everything is prepared, you can put the control and measuring well in place. If its dimensions exceed the width of the trench, then it will have to be expanded slightly.

Step 5. According to the instructions supplied by the manufacturer, assemble a set of grounding pins and put couplings on them to connect additional elements.


Important. The total length of the grounding pins should be determined by an electrician after measuring the soil resistance.
During assembly of the kit, manufacturers strongly recommend using an electrically conductive lubricant to protect the contacts from rust and a special tape that prevents corrosion processes on the surfaces of the pins covered with earth. They should be wrapped very tightly and carefully; any gaps or kinks are prohibited.


Step 6. Install the pin-strip elements on the grounding and connect them firmly.


The installation work has been completed, it is necessary to carry out mandatory tests - the electrician must use a special device to check the resistance parameters and write a report on their compliance with the calculated values. Only such a lightning rod will guarantee that lightning will not strike the area near the cottage.

Developers should be aware that the more grounding points around a building, the more reliable protection. The stepped lightning leader begins to adjust the trajectory of its movement at an altitude of several hundred meters. It reacts mainly to the strength of the electric field, the height of the lightning rod has minimal influence on its behavior, the specific location of the lightning strike depends on the number of positively charged ions in the ground. It is they who create the voltage between the charges, and here there is already a direct connection between the number, the actual location on the ground and the correct manufacturing of the grounding points.
Prices for popular hammer drill models
Hammers
Conclusion
Grounding is the main element of a lightning rod. The best option is to bury metal plate an area of at least 2 m2 and a thickness of 1 cm to a depth of 1.5–2.0 m. The use of metal rods greatly reduces the efficiency of the structure.
But there is another problem - many people drive not several interconnected metal pins into the ground, but only one. If the grounding is done carelessly, there is only one metal rod, driven in a dry place and not deep enough, then the effectiveness of even the most expensive and complex roof structure is zero.

Video – Instructions for installing lightning protection for a cottage
No one is safe from money or prison, and even more so from a lightning strike. After a blinding flash and a deafening roar, the most pleasant thing is to get away with a slight fright and delight from the impressions you experienced. It's not good if the electronics in the house burn out. It's even worse when there's a fire. It is completely unacceptable for a person to be struck by lightning. The conclusion is simple: we make a lightning rod!
A lightning strike to a house cannot be called beautifulWhere does lightning come from?
The reason for this is cheerful clouds, which, as a thunderstorm approaches, gradually grow and turn into dark cumulus-type masses. The upper layers of moisture in the air turn into small ice crystals, while the lower layers remain as water droplets. This is how we got two plates of a giant capacitor.
Huge structures move in the air and are charged as a result of friction: the upper layers accumulate positive ions, the lower ones – negative electrons. There is a limit to everything, and the accumulated potential turns into an electrical discharge. As a result, it “breaks through” where there is the least resistance: tall trees, roofs of houses and... lightning rods!
How does lightning protection work?
From the above, the strategy for a lightning protection device follows: to direct a possible electric discharge along a path that is safe for us and thus insure ourselves against troubles. For this purpose, an lightning rod is installed at a sufficient height, which is designed to capture a lightning discharge.
 Lightning rod device diagram
 Next, an electric current of about 100,000A passes through the down conductor to the ground electrode. The latter ensures the connection of the protective system with the ground. Thus, the lightning strike bypasses the protected objects and is absorbed by the ground.
This protection system is widespread and is called passive. There are active lightning rods that have an ionizer that provokes a lightning strike. This increases the likelihood of protecting the target from damage. This type of lightning rod costs a lot, and its installation is difficult to do with your own hands.
Lightning rod options for a private house
There are three main types of lightning rods based on the type of design:
- rod lightning rod;
- in the form of a grid;
- cable lightning rod;
- roof covering as a lightning rod.
 You can purchase a pin lightning rod or make it yourself
 An air terminal in the form of a rod is the most famous and widespread. There are industrial products with ready-made fasteners. For those who like to create with their own hands, it is possible to make an elegant structure that decorates a building. In any case, a steel pin must have a cross-section of at least 70mm2, and for a copper product 35mm2 is sufficient. Thus, its diameter can be 7-10mm.
The length of the rod can vary between 0.5-2 m, and it must protrude at least half a meter above all objects surrounding the building. The lightning rod accepts the charge at one point and is especially effective in protecting small buildings.
 Lightning rod in the form of a mesh is convenient for a large roof
 An air terminal in the form of a mesh is made of wire with a diameter of about 6 mm. In the photo you can see what a structure of this kind looks like in practice. There are already ready-made structures with a cell size of 3-12 m. Lightning protection of this kind is convenient for use on a large roof area. To prevent the fire of the sheathing, the lightning rod is mounted at a distance of 0.15 m from the roof surface.
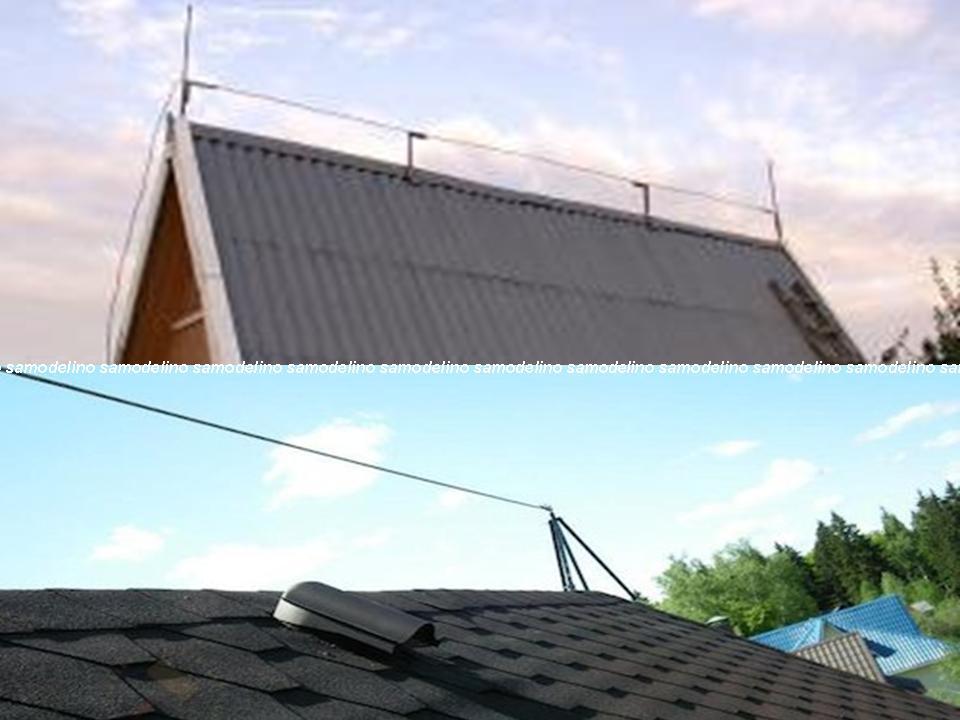 The cable lightning rod can be conveniently placed on the ridge
 In a private home, it is more convenient to use an lightning rod in the form of a cable. It is mounted on the roof ridge, secured to two supports on opposite gables. A combined option is also possible, when pin lightning rods are installed on the mentioned supports in addition to the cable.
The cable must have a diameter of more than 5 mm and be mounted at a safe height from the roof. This type of construction is usually used on a roof with a non-metallic covering.
 Seam roofing as a lightning rod
 Metal roofing The roof, under certain conditions, can also act as a lightning rod. In this case, the thickness of metal tiles, corrugated sheets or galvanized sheets must be at least 0.4 mm. It is tempting to provide lightning protection without using additional materials.
In practice, this is not easy to do, since there should be no flammable materials under the decking, while the sheathing is most often made of wood.
Moreover, it will be necessary to connect the down conductor to each individual sheet of coating, which is labor-intensive. This option is suitable for seam roofing, where the metal sheets are already securely connected. In this case, ignition of the sheathing is impossible if the coating is laid on a metal sheathing.
How does a down conductor work?
Ideally, for a self-made structure, the material of the lightning rod, down conductor and grounding conductor should be the same and connected by welding, that is, steel. This solution ensures reliability and durability of protection. In practice, it is possible to use galvanized and copper-plated elements, as well as various materials. Their connection is ensured by using clamps with bolts and nuts.
 Down conductor on the roof, wall and basement of the house
 A steel conductor in the form of a rod or strip must have a cross-section of at least 50mm2, an aluminum conductor allows a size of 25mm2, and a copper wire can be used with a cross-sectional area of 16mm2, which approximately corresponds to a diameter of 8.6 and 5mm, respectively.
The down conductor is placed so that it connects the lightning rod and the ground electrode along the shortest path.
In this case, sharp bends are not allowed, which can lead to a spark discharge and ignition in this area. For the same purpose, the conductor is placed at a distance of at least 100 mm from the surfaces of combustible materials of walls and other elements of the building.
Requirements for the ground electrode
 This is what a ground loop ready for testing looks like:
 Please note that it is not recommended to use a protective ground loop to connect a lightning rod. If a common grounding conductor is used during a lightning discharge, dangerous voltage may arise on the surfaces of household appliances. To protect electrical wiring and household appliances In a private house, against lightning strikes, impulse noise protection devices (SPDs) are installed on the input switchboard.
Grounding for the lightning rod is placed no closer than 5 m from the porch and paths and the horizontal connector is buried at least 0.8 m. This is necessary to reduce the likelihood of injury to people in the event of a lightning discharge.
Lightning rod protection zone
You should not be under the illusion that a lightning rod on a neighboring house or a metal tower located nearby will completely protect your home from a lightning strike. The lightning rod's protective zone has very specific boundaries. In any case, the dacha will have to arrange its own lightning protection.
 The size of the protected zone is determined by the height of the lightning rod placement
 The safety cone created by the rod lightning rod has an angle of 45-50°. This rule is valid for lightning protection installation heights of up to 15 m. The above sketch shows that at an angle of 45°, the radius of the protective zone is equal to the height of the top point of the rod above ground level. At a value of 50° the protection zone will be slightly larger.
Thus, the higher we place the lightning rod, the larger the area of the protected surface will be.
Anyway, a private house must fall completely within the protection cone area.It is highly desirable that all buildings in the yard be protected according to the same rule. Thus, it is convenient to place a lightning rod on the roof of the house. It can be easier to fix the pin on one side of the building than in the center, and the likelihood of lightning hitting the roof is reduced.When large plot It may be necessary to install another lightning rod. It can be mounted on a special mast.
We install lightning protection with our own hands
First of all, you need to select an air terminal in accordance with the above recommendations and the materials at hand. On the roof country house The easiest way to mount is an ordinary steel pin. Galvanized pipe or aluminum rod will work even better. When using a pipe, its upper end should be plugged.
If there is a piece of cable required length and diameter it will not be difficult to stretch it along the ridge. On a large roof area it is more effective to use a grid option. An air terminal of any design should be secured so that it is not disturbed by the wind.
Please note: it is easier to ensure electrical contact of the entire system by making all three components of the lightning rod from the same material.
If you do not have welding in mind, it is easier to make a down conductor from thick copper wire in accordance with the recommendations above. A reliable connection to the lightning rod can be ensured using galvanized clamps with bolts and nuts. It is practical to secure the conductor to the drainpipe supports.
 Dimensions of the ground loop in the form of a triangle
 It is best to install a grounding loop where there is the least likelihood of people being present. It is also beneficial to place it in a place where moisture is always present. This will improve the contact of the ground electrode with the ground. It wouldn't hurt to install a warning sign next to it. It is better to make a bolted connection to the ground electrode above the ground on the base of the building, and provide contact in the ground by welding.
After installing the entire system electrical connection from the lightning rod to the grounding can be checked with a multimeter. The resistance of the ground loop can only be checked with a special device. Its value should be no more than 10 Ohms if there may be people nearby. For a separate lightning rod installed far from the house, the grounding resistance should not exceed 50 Ohms.
 Standard Ground Resistance Tester
 At least once a year, it makes sense to check the integrity of the entire system visually. Once every few years, you should dig up the grounding and assess the degree of metal corrosion. If the rods in the ground become noticeably thinner, they need to be replaced.
The tall tree will help us
To set up a lightning rod in your dacha, you can use a tall tree growing nearby as a mast. The lightning rod should be fixed to its crown so that it protrudes at least 0.5 m above the crown. It should not be forgotten that the tree grows and changes its size.
 Pyramid poplar will protect the house from thunderstorms
 This means that the lightning rod and down conductor should be secured with plastic clamps that will not damage the barrel. It is better to use flexible stranded copper wire and it should be laid with a spare length. In addition, once every few years you will have to climb up and move the lightning rod above the top of your head.
Before you start developing lightning protection for your home or cottage, you need to understand what a lightning rod is in principle and how to organize its installation. A lightning rod is a system of conductors that divert an electrical discharge into the ground so that it does not cause harm to the protected object. The task of any lightning rod is to protect the building from lightning striking it. In this video of a lightning rod in action, you can feel the full power of the elements.
Metal roofing is the most dangerous
The key to lightning protection – an integrated approach
Lightning protection of a private home is a fairly broad concept. First of all, it is divided into two subspecies: external and internal. Only an integrated approach and correct device Both external and internal protection guarantees the safety of the home.
The external component of lightning protection is a lightning rod. Depending on the design of the lightning rod, there are several types:
- core;
- cable;
- reticulate.
The most popular type of lightning rod for a private home is the rod type. This is due to the simple design and ease of making it yourself. A cable lightning rod is one or more metal ropes stretched on supports above the roof of a house. An equally effective type of lightning rod is a mesh design. This is a metal mesh with grounding that breaks the roof over the entire surface.
 Lightning protection device
Internal lightning protection should protect the house, its residents and everything in it from the consequences of a lightning strike. A discharge of such power cannot pass without a trace, even if a good lightning rod stands in its way. A super-powerful electromagnetic field is formed, within the range of which all conductors fall, most often - engineering Communication: gas pipeline, water supply, heating system. Severe overvoltage occurs.
For internal protection of the building and electrical appliances, a special device is installed - a surge suppressor or SPD - a surge protection device. This equipment, combined with high-quality external lightning protection, will make the house protected from lightning strikes.
 Internal lightning protection is also important
What does a lightning rod consist of?
In order to design, manufacture and install lightning protection in your home yourself, you need to understand what elements it consists of. A lightning rod in a private house consists of several components:
- lightning rod;
- down conductor;
- ground electrode.
In simple language, the principle of lightning protection can be described as follows: the lightning rod “collects” all lightning in its area of action and directs them along the down conductor to the ground.
The lightning rod is the part of the lightning rod that is the first to receive a lightning strike. The most common option for homemade lightning rods is the rod type. Depending on the size and configuration of the house, it can be installed on the roof or on a free-standing support.
 Roof lightning rod
A down conductor is a conductor that directs lightning to the ground. It is copper, steel or aluminum wire. The main condition is that the down conductor should not come into contact with other metal parts of the house.
Ground electrode – metal rods that conduct current into the ground. Most often, the ground electrode takes the form of three long profile sections dug into the soil. They are connected to each other by a triangle. All lightning protection elements in a private house are connected to each other by welding. If this is not possible, use a bolted connection.
Preparing to install a lightning rod yourself
The most simple step organization of lightning protection is its installation. Considered much more responsible preparatory work: calculations, choice of location and materials. Absence critical errors at this stage guarantees 60% success. That is why the importance of careful and scrupulous preparation should not be underestimated.
 Lightning strike diversion scheme
Formula for accurate calculation
You should not assume that any long piece of reinforcement installed on the roof of a house and connected to the ground with a wire will protect the home from a lightning strike. A lightning rod is a rather complex and extremely responsible design. Before making a lightning rod in a private house, it is necessary to make all the calculations, assess the risks and take into account all the smallest nuances.
To calculate, you don’t need to study a manual on electromechanics and remember the gimlet rule. The task is to select the required lightning rod size to provide protection in the area you need. If you accurately calculate the coverage area using formulas, you can achieve 98% protection, which eliminates lightning from entering your home.
If we're talking about about the rod type lightning rod, which is ideal for protecting small house or cottages, the protection zone has the shape of a cone. Calculation methods were used to obtain coefficients that are used to determine the required height of the lightning rod.
h = (rх+ 1.63hx)/1.5, where h is the height of the lightning rod; hx is the height of the protected building; rx – required radius protection zones at the level of the top point of the protected building.
This formula is correct for lightning rods with a height of no more than 150 m, which is more than enough to provide lightning protection for a private house.
 Lightning rod protection zone
Selection of material for lightning rod
Before you make a lightning rod at your dacha or at home, you need to decide on the materials. The metal for manufacturing has great importance. Today it is made of steel, copper or aluminum. The difference in the resistance values of these materials determines the different required area cross section.
To display the properties of all three types clearly, the data is included in the table:
 Minimum conductor sizes when using different materials
The table shows that copper copes best with the task. It is cheaper to make a lightning rod with your own hands from a steel profile. The down conductor has a smaller cross-section than other lightning protection elements. It would be correct to gradually increase its thickness from the lightning rod to the grounding. It is best to use the same metal for the entire structure.
 Copper is the most reliable material
Place of installation of lightning rod and grounding conductor
It is equally important to choose the right installation location. The lightning rod should be the highest point on the site. Don't forget about the cone-shaped protection zone. Make sure your entire home falls within this zone. It turns out that the further the protection is from the house, the higher it should be.
For economic reasons, it makes more sense to place the lightning rod on the roof of the house, then you will not have to spend money on additional construction of a high support. Professionals do not recommend installing a lightning rod in the center of the roof; it is better to fix it on one of the walls. This reduces the likelihood that some element of the roof will get in the way of lightning.
Separately, you should think about the placement of the ground electrode. At the moment when a huge power discharge goes into the ground, there should be no one near the ground electrode. Therefore, the minimum distance from the grounding loop to the wall of the house is limited - 1 m, and to pedestrian paths and sidewalks - 5 m. Place the ground electrode in secluded place, make a fence or install a warning sign.
 The support must be securely fastened
Lightning rod installation algorithm
After everything necessary calculations completed, the installation location has been selected, and the required amount of suitable material has been purchased, you can begin the construction of lightning protection. Installation is carried out in several stages. Main installation work preceded by earthen ones. Detailed instructions You can watch the video on how to make a lightning rod in a private house:
Video:Lightning rod of a private house
Mandatory grounding work
Despite the fact that the lightning rod is located on high supports, its installation should begin from the ground. The first step is to dig a hole for grounding. Before making a lightning rod at your dacha or personal plot, decide on the type of grounding.
A closed-form grounding electrode consists of three metal rods welded into a triangle using a metal strip. For this type of grounding, you will have to dig a hole of the appropriate shape and depth. The linear type of grounding requires a trench for installation. Grounding electrodes are installed in one line and connected by welding.
 For a closed ground electrode the pit will look like this
You should not dig a hole with a depth equal to the length of the electrodes. It is enough to go 0.5-1 m deep into the ground. The grounding rods will still need to be driven into the ground. Analyze where the down conductor will meet the ground and connect this point to the location of the ground electrode with a deep trench.
The internal lightning removal system must also be grounded. The shield is connected to the ground electrode with a long wire, which is laid underground. For these purposes, you need to dig another trench connecting the future ground electrode with the surge protection device.
Take care of the soil. In order for current to flow easily into the ground, the soil must have a high electrical conductivity. Sandy soils cannot boast of this property. Often the soil in the grounding area is artificially saturated with a salt solution to increase this indicator.
Order of main work
The grounding design is simple, but must meet all requirements for reliability and operational safety. As a grounding conductor at home, use several long sections of steel profile: corner, strip, pipe. They are connected to each other very firmly - by welding. The material for the grounding conductor should be taken with a large reserve. While underground in humid environment, metal easily corrodes, rusts, breaks down and decreases in size.
 Grounding a private house
Install the lightning rod support in the selected location. It must be stable and durable so that the lightning protection does not fall or break from strong wind before the storm even starts.
Prepare a lightning rod of the required length, which you calculated using the formula. If you don’t have one long piece of rolled metal, that’s okay. Several parts can be connected by welding. If you use a hollow pipe as a lightning rod, plug its edge with a metal plug and weld it. Install the lightning rod on the support.
 The lightning rod must be securely fastened
A wire of suitable diameter and length must be very securely connected to the lightning rod. Instead of thick wire, you can use a steel strip. It is also quite flexible and copes just as well with discharge discharge along the ground loop.
 The down conductor must be isolated from metal parts of the roof
Make sure that the entire length of the ground loop does not come into contact with metal parts of the house. As you know, current moves along the path of least resistance. Improper organization of lightning protection can send a lightning discharge of 200,000 A in the other direction.
 Copper down conductor
The down conductor must be welded to the grounding conductor not only at the point of their connection, but also along the entire length of the grounding conductor, going into the soil. Hammer the ground electrode into the ground, and fill the hole and all trenches.
Regular maintenance of lightning rod
Lightning rod is a structure made of metal. And metal does not withstand aggressive influences very well. environment. To prevent your lightning rod from becoming rusty and losing its properties, you need to regularly inspect and check the system.
Initially, during the installation stage, all bolted connections must be insulated and protected from corrosion. special composition. This procedure should be repeated annually. Welded joints needs to be coated with paint for protection.
 Check the entire length of the system
In the spring, before the start of the thunderstorm season, it is advisable to conduct a visual inspection of the entire circuit, check the contacts, and, if necessary, clean them of oxide. Poor contact in the lightning rod circuit is very dangerous and can cause the system to open or cause a fire.
The underground part of lightning protection should also be controlled. This can not be done annually, but at least once every three years. The ground electrode and down conductor are dug out and checked for damage and corrosion damage. Sometimes rust “eats” the metal so much that some elements of the ground electrode have to be replaced.
It is important to understand that it is better not to install protection at all than to do it illiterately. When it comes to such high voltage and current, any mistake can be fatal. If you are not confident in your abilities and doubt that you can install a lightning rod in a private house with your own hands, it is better not to take risks, but seek help from professionals.
No one is safe from money or prison, and even more so from a lightning strike. After a blinding flash and a deafening roar, the most pleasant thing is to get away with a slight fright and delight from the impressions you experienced. It's not good if the electronics in the house burn out. It's even worse when there's a fire. It is completely unacceptable for a person to be struck by lightning. The conclusion is simple: we make a lightning rod!

A lightning strike to a house cannot be called beautiful
Lightning rod options for a private house
There are three main types of lightning rods based on the type of design:
- rod lightning rod;
- in the form of a grid;
- cable lightning rod;
- roof covering as a lightning rod.

You can purchase a pin lightning rod or make it yourself
An air terminal in the form of a rod is the most famous and widespread. There are industrial products with ready-made fasteners. For those who like to create with their own hands, it is possible to make an elegant structure that decorates a building. In any case, a steel pin must have a cross-section of at least 70mm2, and for a copper product 35mm2 is sufficient. Thus, its diameter can be 7-10mm.
The length of the rod can vary between 0.5-2 m, and it must protrude at least half a meter above all objects surrounding the building. The lightning rod accepts the charge at one point and is especially effective in protecting small buildings.
Lightning rod in the form of a mesh is convenient for a large roof
An air terminal in the form of a mesh is made of wire with a diameter of about 6 mm. In the photo you can see what a structure of this kind looks like in practice. There are already ready-made structures with a cell size of 3-12 m. Lightning protection of this kind is convenient for use on a large roof area. To prevent the fire of the sheathing, the lightning rod is mounted at a distance of 0.15 m from the roof surface.

The cable lightning rod can be conveniently placed on the ridge
In a private home, it is more convenient to use an lightning rod in the form of a cable. It is mounted on the roof ridge, secured to two supports on opposite gables. A combined option is also possible, when pin lightning rods are installed on the mentioned supports in addition to the cable.
The cable must have a diameter of more than 5 mm and be mounted at a safe height from the roof. This type of construction is usually used on a roof with a non-metallic covering.
Seam roofing as a lightning rod
The metal roofing of a roof, under certain conditions, can also act as a lightning rod. In this case, the thickness of metal tiles, corrugated sheets or galvanized sheets must be at least 0.4 mm. It is tempting to provide lightning protection without using additional materials.
In practice, this is not easy to do, since there should be no flammable materials under the decking, while the sheathing is most often made of wood. Moreover, it will be necessary to connect the down conductor to each individual sheet of coating, which is labor-intensive. This option is suitable for seam roofing, where the metal sheets are already securely connected. In this case, ignition of the sheathing is impossible if the coating is laid on a metal sheathing.
How does a down conductor work?
Ideally, for a self-made structure, the material of the lightning rod, down conductor and grounding conductor should be the same and connected by welding, that is, steel. This solution ensures reliability and durability of protection. In practice, it is possible to use galvanized and copper-plated elements, as well as various materials. Their connection is ensured by using clamps with bolts and nuts.
Down conductor on the roof, wall and basement of the house
A steel conductor in the form of a rod or strip must have a cross-section of at least 50mm2, an aluminum conductor allows a size of 25mm2, and a copper wire can be used with a cross-sectional area of 16mm2, which approximately corresponds to a diameter of 8.6 and 5mm, respectively.
The down conductor is placed so that it connects the lightning rod and the ground electrode along the shortest path. In this case, sharp bends are not allowed, which can lead to a spark discharge and ignition in this area. For the same purpose, the conductor is placed at a distance of at least 100 mm from the surfaces of combustible materials of walls and other elements of the building.
Requirements for the ground electrode
The ground electrode consists of several metal rods driven into the ground and connected to each other by a horizontal strip by welding. The strip is brought to the surface of the earth and welded to the down conductor. How to properly arrange a grounding circuit is described in detail in the article “How to make 220V and 380V grounding in a private house with your own hands - device and all sizes.”

This is what a ground loop ready for testing looks like:
Please note that it is not recommended to use a protective ground loop to connect a lightning rod. If a common grounding conductor is used during a lightning discharge, dangerous voltage may arise on the surfaces of household appliances. To protect electrical wiring and household appliances in a private house from lightning strikes, surge protection devices (SPDs) are installed on the input switchboard.
Grounding for the lightning rod is placed no closer than 5 m from the porch and paths and the horizontal connector is buried at least 0.8 m. This is necessary to reduce the likelihood of injury to people in the event of a lightning discharge.
Lightning rod protection zone
You should not be under the illusion that a lightning rod on a neighboring house or a metal tower located nearby will completely protect your home from a lightning strike. The lightning rod's protective zone has very specific boundaries. In any case, the dacha will have to arrange its own lightning protection.

The size of the protected zone is determined by the height of the lightning rod placement
The safety cone created by the rod lightning rod has an angle of 45-50°. This rule is valid for lightning protection installation heights of up to 15 m. The above sketch shows that at an angle of 45°, the radius of the protective zone is equal to the height of the top point of the rod above ground level. At a value of 50° the protection zone will be slightly larger.
Thus, the higher we place the lightning rod, the larger the area of the protected surface will be. In any case, a private house must fall entirely within the protection cone zone. It is highly desirable that all buildings in the yard be protected according to the same rule. Thus, it is convenient to place a lightning rod on the roof of the house. It can be easier to fix the pin on one side of the building than in the center, and the likelihood of lightning hitting the roof is reduced.
In the case of a large area, it may be necessary to install another lightning rod. It can be mounted on a special mast.
We install lightning protection with our own hands
First of all, you need to select an air terminal in accordance with the above recommendations and the materials at hand. The easiest way to install an ordinary steel pin on the roof of a country house. Galvanized pipe or aluminum rod will work even better. When using a pipe, its upper end should be plugged.
If you have a piece of cable of the required length and diameter, it will not be difficult to stretch it along the ridge. On a large roof area it is more effective to use a grid option. An air terminal of any design should be secured so that it is not disturbed by the wind.
Please note: it is easier to ensure electrical contact of the entire system by making all three components of the lightning rod from the same material.
If you do not have welding in mind, it is easier to make a down conductor from thick copper wire in accordance with the recommendations above. A reliable connection to the lightning rod can be ensured using galvanized clamps with bolts and nuts. It is practical to secure the conductor to the drainpipe supports.
Dimensions of the ground loop in the form of a triangle
It is best to install a grounding loop where there is the least likelihood of people being present. It is also beneficial to place it in a place where moisture is always present. This will improve the contact of the ground electrode with the ground. It wouldn't hurt to install a warning sign next to it. It is better to make a bolted connection to the ground electrode above the ground on the base of the building, and provide contact in the ground by welding.
After installing the entire system, the electrical connection from the lightning rod to the ground can be checked with a multimeter. The resistance of the ground loop can only be checked with a special device. Its value should be no more than 10 Ohms if there may be people nearby. For a separate lightning rod installed far from the house, the grounding resistance should not exceed 50 Ohms.

Standard Ground Resistance Tester
At least once a year, it makes sense to check the integrity of the entire system visually. Once every few years, you should dig up the grounding and assess the degree of metal corrosion. If the rods in the ground become noticeably thinner, they need to be replaced.
Why do you need a lightning rod
Some not very literate developers think that a metal pin attached to the ridge of a house will attract all the lightning along a cylindrical circle above it and lead them to the ground along a wire. For this purpose, a piece of wire rod is specially buried near the house. Such ideas are very far from science; a metal pin stuck into the ground near the house and tied to a rod on a ridge will not bring any benefit. Why?
- Where can I find a wire that can withstand a current of 500,000 A and a voltage of 1000000000 V? This is exactly the type of discharge that lightning has when it hits the ground.
- Why, in principle, attract lightning and direct it along the wire, risking setting the building on fire due to overheating of the down conductor?
- What to do if summer cottage several buildings of different heights? Will we have to make a lightning rod system for everyone?
Conclusion. It is necessary to install not a lightning rod, but a lightning rod. All actions should not be aimed at attracting lightning, but, on the contrary, at creating conditions that minimize the likelihood of it hitting a structure.

A lightning rod protects a building from lightning strikes
These are very complex calculations; simplified formulas give a big error. Sometimes it is not possible to complete the initial technical specifications, there may be several reasons, some of them are objective and not amenable to human influence.
When to install a lightning rod in a private house
Again, we need to remember a little theory about lightning - the actions during the installation of a lightning rod will become clearer. There can be several types of lightning, but we are only interested in the cloud-to-ground direction. At the initial stage, streamers appear, which later connect and form stepped leaders. They are the ones who glow brightly and quickly head towards the ground.

Ground-to-cloud lightning
As it approaches, the voltage of the eclectic field on the earth increases, all the electrons in it rush upward and, at the highest point, throw out a response streamer towards them. It connects to the leader, the circuit is closed, and the electrical discharge goes into the ground. The channel heats up to 20,000–30,000°C, the air expands and creates strong sound waves (thunder).
Now it will be clearer when it is necessary to install lightning rods on a house.
- If the earth in a given area has a large number of ions. Such zones are located in waterlogged areas; they are the ones that can accumulate a large amount of charge. Pay attention to how often lightning occurs in your area, talk to old-timers. If they cannot remember cases of lightning hitting any objects, then there is no need to install a lightning rod.
- The house is located on lands capable of accumulating charge; lightning strikes are not uncommon in this area. Installation of a lightning rod is mandatory, but you must strictly follow the installation rules and perform preliminary calculations.

It is worth taking care to protect your home from lightning
How does a lightning rod work?
An effective lightning protection system is aimed at minimizing the direction of stepped lightning leaders into the building area. And for this there is only one condition - electric potential land in this area should be minimal and certainly much smaller than in neighboring ones. Lightning rods should perform this task. They constantly, and not just during a thunderstorm, send electrical charges into the atmosphere and thereby significantly reduce the voltage potential. The conditions for the appearance of oncoming streamers disappear, lightning finds other energy outlet points.
Important. If a lightning rod is struck by lightning, it means that it is not installed correctly and is causing harm instead of benefit.

A lightning strike is followed by a fire. And it’s better to warn him than to extinguish him
The size of the protected area depends on the number and quality of grounding pins; they collect electrons and send them through wires to the vertical pin of the lightning rod. From there, the electrons gradually move into the atmosphere. Due to this continuous process, the potential under the house is reduced and the likelihood of lightning striking it is automatically minimized.
Now that the principle of operation of a lightning rod is clear, the tasks of each element of the system are clear, you can begin installing home protection.
Step-by-step installation instructions
As is already clear from the above, lightning protection should be installed only in conjunction with effective grounding, otherwise the system will not function.
It is recommended to begin work only after calculating the number, size and location of grounding conductors. Only qualified specialists can perform such calculations. By the way, they should check the effectiveness of grounding after installation special devices(megohmmeters), if the performance turns out to be unsatisfactory, then it will have to be corrected or completely redone.

The roof on which lightning protection will be installed
Step 1. Bend the wire fastening tendril and assemble the two halves of the ridge holders.

How to bend a tendril

What should the part look like?
They are made in such a way that with the help of adjusting holes and screws it is possible to change the main parameters. The elements can be firmly fixed to skates of various sizes, while the reliability of fastening is maintained throughout the entire period of operation, spontaneous unscrewing is completely excluded.

Fixing elements
Step 2. Attach the down conductor holders to the ridge. If you are purchasing a lightning rod system industrial production– excellent, it has all the elements necessary to install the equipment. You can make them yourself, but this will require additional time. In addition, handicraft holders significantly lose in designer form and do not decorate the building in any way.
The distance between them is approximately one meter; care must be taken that the wire does not touch the roof covering. Try to mount with the same pitch, this way the system looks much better and does not affect negative influence on the exterior of the house.
Practical advice. Always use a safety rope when working on roofs, especially on metal roofs. If it is not possible to purchase industrial equipment for climbers, then make some basic equipment yourself.
Tighten the wing nuts firmly, use open-end wrenches or pliers. Remember that it is difficult to correct the mistake you made later; you will have to climb onto the roof again. Please note that everyone vertical racks for installation, the wires were positioned strictly on the same line.

Tightening the nuts
Step 3. Start laying the wire on the ridge holders. It must be even, the diameter is calculated by a specialist, but in most cases it cannot be less than 6 mm. It is desirable that the surface of the wire be coated with a layer of zinc, due to this the performance characteristics are significantly improved.

Fastening wire in holders
- The wire does not rust, and brown streaks do not appear on the roof. Traces of rust greatly worsen the appearance of the building.
- Due to the fact that the wire does not rust, the resistance indicators remain unchanged for a long time. And this is a very important parameter of any lightning rod.
- Resistance is reduced at the connection points; during operation it does not deteriorate the physical and electrical characteristics.
You should not skimp on the quality of all lightning protection elements, otherwise the effectiveness will be insufficient, and money for purchase and installation can be considered wasted. Clamp the wire with special tongues and pliers.
Step 4. Bend the end of the wire protruding beyond the slope at a right angle, leave a piece approximately 50 cm high, cut off the excess with special wire cutters.

Step 5: Spread threaded connections special mastic, if it is not available, then you can use ordinary grease. Mastic provides additional protection metal surfaces from oxidation. The fact is that when tightening the nuts, the zinc on the thread breaks off due to strong friction, and the exposed metal requires protection.

Applying mastic or grease
Step 6. Proceed to attach the wire to the slopes in the longitudinal direction. Here, the installation technology depends on the type of roofing material.

Practical advice. There are situations when the design of a lightning rod requires moving one wire from the front slope to the rear. It is recommended to connect them at the intersection with the ridge wire; for this, use elements with bolted ties. This way you will achieve reliable contact between the down conductors.
Step 7. Screw the brackets to the edge of the gutter of the drainage system, the wire is fixed to them with bolts. Tighten connections with great force.

The brackets are screwed to the edge of the gutter

Method of laying down conductors
The down conductors installed on the house are connected to grounding.

To connect the down conductor coming from the lightning protection grid with the grounding conductor, use a cross clamp with a separating plate

Down conductor test terminal
Making grounding
This is the most important element of a lightning rod; as already reported above, only a specialist with special education should calculate the parameters. He must know the soil resistance, its composition, the proximity of groundwater and other initial data. Based on calculations, the material, metal pins, distance and quantity, and burial depth for each grounding are selected. Depending on the size of the house it is selected specific location grounding conductors.

Why are lightning rods grounded?
- For steel pins, the cross-sectional area must be at least 80mm2, for copper pins - 50mm2. It must be remembered that both steel and copper oxidize at different rates, and the oxides negatively affect current conductivity. The cross-section and surface area of the rods must be selected with reserve, and resistance measurements must be taken annually. When critical values are reached, it is recommended to dig out the rods and clean them of rust.
- The depth of the trenches is at least 5.0 m, the length is at least three meters. These indicators largely depend on the physical characteristics of the soil; decisions are made by a specialist at the work site.
- It is better to make all underground connections by welding; the clamps quickly lose their initial resistance values. Welding must be done on both sides, the length of the seam is at least five centimeters.
- Professionals advise using a metal strip with a thickness of at least 1 mm and a width of approximately three to four centimeters instead of round pins. Such metal is not only cheaper, but also significantly increases the operating time of the lightning rod due to the large contact area with the ground.
To make or not to make a lightning rod is up to each developer. Strict requirements are established only for government buildings and premises with a large number of people. There are no exact statistics on the performance of the system; no one knows how many lightning strikes were managed to be diverted from the building and how efficient the device is.
Now you know how to properly install a lightning rod in a private house. But we remind you once again that before starting work, you must carefully analyze all the factors that influence the likelihood of a lightning strike on a structure, and only then make a final decision. In order for the installation of a lightning rod to have the expected effect, the roof of the house must meet existing building codes. And how to achieve this can be read on the pages of our website.
The lightning rod is protective device, in which a system of conductors conducts an electrical discharge to the ground. Lightning protection is an essential element of ensuring the safety of residents and property in a building. If you wish and have certain knowledge, it is quite possible to build a lightning rod with your own hands.
Operating principle and device
The lightning protection system consists of three components:
- lightning rod;
- down conductor;
- ground electrode.
The device diagram is shown in the figure below.
The function of receiving a lightning discharge is assigned to the lightning rod. Through down conductors, electricity enters the ground loop, which transmits the discharge to the ground.
Lightning rod
There are three types of lightning rods:
- core;
- pin;
- reticulate.
The roof itself can also act as a receiver.
The rod receiver is a metal pin mounted on a frame (on the roof, next to the building, on high tree). Using a down conductor (conductor), the pin is connected to the ground loop. Copper, aluminum or steel are used to make lightning rods. Moreover, the first is the best option in terms of quality of protection, and the cheapest receivers are made of steel.
The cross-section of a rod-type lightning rod must be at least 35 square meters. mm, if we are talking about copper, and 70 sq. mm - for steel devices. The length of the pin ranges from 50 to 200 cm.
Rod receivers usually look aesthetically pleasing, but their coverage area is not very large. To calculate the covered area, a mental line is drawn from the highest point of the pin to the ground level at an angle of 45 degrees. The entire space within the triangle along the perimeter is protected. Due to their small coverage area, rod lightning rods are used for protection small houses, bath buildings, garages, etc.
Note! You can either make lightning protection yourself or purchase a ready-made one.
Mesh lightning rods are made in the form metal mesh and represent a reinforcement frame with cells ranging in size from 3 to 12 m. The thickness of the reinforcement is on average 6 mm. The mesh is placed at a certain height above the roofing material, leaving a gap of at least 15 cm. The most suitable objects for using mesh systems are large roofs (apartment buildings, shopping centers, industrial and warehouse buildings, etc.).
The cable receiver is located on two or four masts connected to each other with steel or aluminum wire. The cable is pulled along the roof ridge using wooden blocks that act as supports. The smallest recommended cable diameter is 5 mm.
Compared to rod devices, the described devices cover a much larger area. In terms of efficiency, cable systems are better than rod or mesh receivers at providing lightning protection. Such systems are especially common on slate roofs.
Sometimes the roof itself is used as a lightning rod. This is possible when the roof is made of corrugated sheets, metal tiles and any other materials based on metal. There are requirements that disqualify a structural roofing material if its thickness is less than 4 mm (otherwise it may be burned through by lightning). Also, any flammable materials that can easily ignite are not allowed.
Down conductor
For the manufacture of conductors, six-millimeter copper, steel or aluminum wire is used. Connections to other elements of the system - lightning rod and ground loop - are made using bolts or welds. The down conductor needs high-quality isolation from the environment (cable channels are suitable). Another requirement is to select the shortest path from the lightning rod to the grounding device for the down conductor.
Ground electrode
The grounding loop is located near the building. In this case, choose a place located outside the walking area and closer to any fence. Electric charge, entering the grounding loop through a down conductor, is discharged into the ground through metal rods. The rods are dug into the ground to a depth of approximately 80-100 cm. They are placed in such a way that when connected they form a triangle.
Preparatory activities
Before making a lightning rod, it is necessary to carry out preparations. Moreover, in terms of importance, this stage is no different from the actual process of installing a lightning protection system. You will need to make calculations according to the formula, select materials and find right place for installation of lightning protection.
Calculation formula
Lightning protection is a rather complex and responsible system due to the tasks it performs. When planning it, accurate calculations and assessment of potential risks are required. At the same time, there is no need for overly complex mathematical calculations. You just need to determine the coverage area of the system based on the formulas. For a rod lightning rod, there are coefficients used to calculate the required height of the device. The following formula is used:
It is suitable for lightning rods up to one and a half meters high, which is quite enough to protect a private home from lightning strikes.
Lightning rod material
To create a protective system you will need structural materials. You will have to make a choice from steel, copper or aluminum. In this case, the required cross-sectional area will differ, which is dictated by the different resistance of each type of the listed metals. To explain this more clearly, below is a table showing minimum requirements to lightning protection components, based on the type of metal:
| Material | Lightning rod | Down conductor | Ground electrode | |||
|---|---|---|---|---|---|---|
| Sectional area, mm | Diameter, mm | Sectional area, mm | Diameter, mm | Sectional area, mm | Diameter, mm | |
| Copper | 35 | 7 | 16 | 5 | 50 | 8 |
| Steel | 50 | 8 | 50 | 8 | 100 | 11,5 |
| Aluminum | 70 | 9,5 | 25 | 6 | Not applicable | |
Based on the data presented in the table, the optimal choice of material is copper. However, the cheapest option for a lightning rod made by yourself is steel.
The current conductor has a smaller cross-section compared to other components of the protective system. It is recommended to gradually increase its thickness from the receiver to the ground loop.
Advice! When creating lightning protection, it is advisable to use the same type of metal for all structural elements.
To manufacture lightning protection, the following materials and tools are required:
- Lightning rod. In the case of a rod system, you will need a metal pointed pin. A TV mast or antenna for receiving radio signals is also suitable. Ready-made receivers are available for sale, for example, GALMAR or SCHIRTEC.
- Metal wire of the required section.
- Grounding devices (metal pins, pipes or tape).
- Plastic clamps, brackets, bolts.
- Tools to do the job (welding machine, electric drill, hammer, shovel).
Installation location
The lightning rod should be located at the highest point available on the site. In this case, you need to remember about the protective cone-shaped zone. The lightning rod must be located in such a place that the building is completely covered with protection. It turns out that the more distant the lightning rod is from the house, the higher it should be.
For financial reasons, it is preferable to place the lightning rod on the roof of the building. In this case, there will be no need to build a high support, which, moreover, is unlikely to be aesthetically attractive.
Advice! It is not recommended to install a lightning rod in the central part of the roof. It is better to place the receiver at the edge of the roof and fix it to the wall. This approach reduces the risk of lightning striking any part of the roof.
A separate issue is the correct placement of the grounding device. When lightning strikes, a high-power discharge passes into the ground and at this moment no living creatures should be near the ground electrode. Therefore, requirements have been developed for the minimum distances from grounding to the wall of the house - 1 m and to pedestrian paths - 5 m. The grounding device must be installed in a place where there is no likelihood of people being present. In addition, a fence should be installed around the ground electrode and a warning sign should be placed nearby.
Note! Effective work Grounding is possible only in moist soil. This must be taken into account when choosing a location for the ground loop. If there is no constantly wet area, you should think about artificial irrigation.
Installation of cable lightning rod
First of all, you need to stretch the wire along the ridge of the roof. It will act as a receiver for lightning. If the roof is made of fire hazardous materials (wood, plastic tiles, etc.), the wire should be placed at a height of at least 15 centimeters from the material. In this case, the supporting function for it will be performed by plastic clamps. The ends of the wire are fixed to metal masts (they are called horizontal receivers).
The current lead is fixed to the receiver using a welding machine with bolted connections or rivets. Insulation is applied to adjacent areas. On the roof, the down conductor is secured with brackets, and on the walls - with plastic clips. It is better to place the conductor in the cable channel to avoid the harmful effects of moisture on it.
Grounding is created like this:
- Dig a trench with a depth of 80 cm.
- Metal pins are driven into the bottom of the hole.
- Connect them steel pipe or tape. For this, a welding machine is used.
- The tape is taken to the area of connection with the down conductor.
- The down conductor is connected to the grounding conductor.
Installation of a lightning rod
To install the rod system, you will need a high bed. Its functions can be performed, for example, by a TV antenna mast. The receiver is fixed to it with a welded or bolted connection.
Installation of the down conductor and grounding conductor is carried out in the same way as described above when talking about cable lightning protection. After installation is complete, the system resistance should be tested. Maximum acceptable indicator- 10 Ohm.
Tree as a lightning rod
Suitable for creating a lightning rod with your own hands ordinary tree. Moreover, its height should exceed the level of the roof of the building by approximately 2.5 times. The distance to the house should not be less than 3 m.
One end of a five-millimeter wire is welded to a grounding device and the connection is buried in the ground. The remaining end will be the receiver. He is brought to the top of the tree.
Structure care
Metal devices are sensitive to negative environmental influences. To avoid the development of corrosion processes and maintain the working properties of metals, it is necessary to regularly inspect the lightning protection system.
With the onset of spring - before the start of the thunderstorm season - it is necessary to conduct a visual examination of all components of the system. During operation, the metal can be so damaged that it is impossible to do without replacing parts.
Particular attention should be paid to contacts. Poor contact leads to system disconnection and fire. If necessary, they are cleaned of oxide.
The underground part of lightning protection also needs to be checked. However, due to the laboriousness of the process, it is allowed to do this not every year, but once every three years.
Lightning protection is such an important element of ensuring the safety of residents and the building that you should only undertake its creation if you have full confidence in your knowledge and experience. If this feeling is not enough, it is better to entrust the work to professionals.
Arrangement of a lightning rod at a summer cottage - important condition safety of being on it during bad weather. Discharges of electric current of enormous power in the presence of a lightning rod do not affect the structure of the house and other elements located in the protection zone. However, do not think that a lightning rod prevents lightning strikes. Things are different. It becomes a conductor for discharging the discharge from the house, diverting a current of up to 100 thousand amperes into the ground electrode.
Lightning rod design options
A classic lightning rod can be made in one of two options: in the form of a single rod or a system of cables stretched between lightning rods. The first option is usually used to protect an individual house, while the second is used to create a safe zone on an entire site. A cable lightning rod is also recommended for buildings of considerable length.
Components of a lightning rod
First of all, houses with a roof made of metal or metal tiles need protection from lightning, since such options do not have grounding, so they accumulate electrical charges during a thunderstorm.
In the case of a metal roof without an insulating layer, having a coating thickness for iron - 4 mm, for copper - 5 mm or for aluminum - 7 mm, a simplified lightning rod device is possible, when its surface takes on the role of a lightning rod. In this case, grounding is carried out every 20 meters of the roof. Here you need to take into account the quality of the roof, because if there are any breaks, then such a lightning rod will not have the desired effect.
In other cases, the lightning rod must consist of the following elements:
- lightning rod (1) in the form of a thin electrode or a system of electrodes installed above the house at a certain height;
- down conductor (2) – cable connecting the receiver to ground;
- ground electrode (3), which conducts current into the ground.

Lightning rod
The element into which, in the presence of a lightning rod, lightning strikes is the lightning rod. It is usually made in the form of a rod made of steel, copper or other material with similar conductivity. There is no need to cover it with paint or varnish to avoid corrosion, otherwise it will lose its desired properties.
Sectional area: for steel – 50 sq. mm, for copper – 35 sq. mm, for aluminum – 70 sq. mm.
Lightning rods can be installed on different sides or in the center of the roof. If several lightning rods are installed, they are connected into a common circuit closed to a grounding conductor. The rod can be placed not only on the roof surface, but also on a chimney or the nearest tall tree. The optimal height would be no more than 15 meters. If it is installed on a tree, then the fastening is done in such a way that the rod rises above the crown by at least 0.5 m and 10–15 cm above the house.
In addition to rods, options for a protective mesh (reinforcement 6 mm thick) and a cable system are possible. The second method is more rational for a country house, since the cable is tensioned at a height above the roof level, and the mesh is placed on the roof itself. A cable with a diameter of at least 5 mm is pulled along the roof ridge on racks, and then lowered down, where it is connected to the ground electrode. Thus, it performs both the function of a lightning rod and a down conductor.

Also, individual parts of the structure can be used as receivers ( drainpipes, metal fences). Their use is permitted if they have a cross-section larger than needed for normal protection.
The down conductor is designed to connect the lightning rod and the grounding conductor. It is made of aluminum or copper wire of large cross-section. For these purposes, a twisted wire is suitable, which is used for laying air lines power transmission The down conductor is fastened using terminal blocks, couplings or crimp tubes.

The distance between the lightning rod and the ground electrode should be minimal, so the wire is directed straight down. The number of down conductors depends on the area of the house. For cottages with an area of about 200 sq. m, it is recommended to install 2 down conductors at a distance of approximately 20 m from each other.
It is fixed on a special pole or directly on the wall of the house using plastic fasteners. To protect the down conductor, you can isolate it from the environment using a cable duct.
Ground electrode
Since the ground electrode is needed to divert a lightning discharge into the ground, it must have low electrical resistance. For these purposes, both expensive materials such as copper, aluminum, brass and other stainless metals, as well as cheaper ordinary steel, are suitable. The ground electrode should not have any damage or traces of rust, as they may cause a decrease in the diameter of the rods due to metal destruction.
For high-quality grounding, not one, but several rods can be used, which are immersed in the ground away from paths and roofing, especially if it is made of flammable material. In dacha conditions, you can also use any large metal object at hand as a grounding electrode: the backrest old bed, cast iron bath, reinforcing mesh and the like.
The type of grounding depends on the parameters of the house and the characteristics of the soil. Dry soil is different low level groundwater. In order for the current to reach moist soil, vertical grounding is necessary. The ground electrode in this case is made of two rods with a cross-section of 100 mm and 2-3 m in height, driven in at a distance of 3-4 m from each other. The rods are connected to each other by wire, cable (copper, aluminum) or tinned iron plates, to the center of which a down conductor is welded.
More typical for wet soil high level groundwater, so you can avoid vertical grounding by replacing the rods with corners of strip steel, water pipes or other similar metal elements. A horizontal grounding conductor is laid to a depth of 1 m.
In this case, the role of a grounding conductor can also be performed by a down conductor laid in the ground in such a way as to occupy the largest possible area of contact with the soil. The connected structure can have the shape of a scallop (the letter W) or a triangle. It is unacceptable to use hand twisting and pliers when fastening the wire; only regular or cold welding is allowed.

The placement of the ground electrode should be given special attention. This should be a place remote from the house and paths, inaccessible to children and pets, preferably fenced. Minimum distance the distance to the house must be at least 1 m.
Since water is an excellent conductor of electric current, it is better if the soil around the ground electrode is moist, then the discharges will quickly go into the ground without accumulating on the rod. Additional moisture can be provided by flowing rainwater from a roof drain or by targeted watering of the soil.
For each building it is necessary to calculate the lightning rod, since each configuration is capable of providing a protective zone of various sizes. The parameters of this zone can be calculated independently, taking into account the features and dimensions of the country house.
A single rod forms a protective zone, which in geometry is close to a cone with an apex angle of approximately 45°. The top of this cone will be at the highest point of the lightning rod. In a cable-type lightning rod, the protection zone has a more complex geometry, in which the cable serves as an edge, and each rod forms its own cone.
The protective zone of a single rod can be calculated using the following formula:
where R is the radius of the zone above the highest point of the house, h is the distance from the highest point of the house to the peak of the lightning rod.

To find out if the rod height is sufficient to protect a certain area at ground level, you can use the following calculation. Let's say the height of the cone will be designated h o, radius on the ground – R o, building height – h x, radius at the building height – R x, rod height – h. Then, taking into account the height of the existing lightning rod and the height of the house, the unknown values will be calculated using the formulas:
R x = 1.5*(h-h x /0.92).
In practice, the calculations look like this: if the rod has a length of 10 m, then the radius of the protection zone on the ground will be 1.5 * 10 = 15 m, the remaining parameters are calculated similarly.
To calculate the required length of the rod, you can use the same formulas, substituting the desired radius of the protective zone into them. In the case of complex geometry of the lightning rod, you need to draw a graphic model of the house and lightning rod and calculate the protection zone geometrically.
The height of the lightning rod should not exceed 12 m, therefore, if it is not possible to meet these restrictions using a single rod, it is recommended to use several masts to expand the protective zone.
Lightning rod installation
To ensure that the lightning rod is installed correctly, you should adhere to the following methodology:
- Measure the height of the roof and determine its geometry. For clarity, draw a diagram by which you can determine the future protective zone.
- Decide on the type of lightning rod. For square houses A single rod is sufficient; for long buildings, the use of a cable system is optimal.
- Calculate the protective zone and determine the required height of the rod(s). The minimum cross-section of the lightning rod must be related to its height in the proportion of 5 square meters. mm per meter.
- Determine the mounting point of the lightning rod and fix it on the roof or wall.
- Dig a hole for the ground electrode and place it at the required depth.
- Connect the grounding conductor and lightning rod together.
- Check the lightning rod with a multimeter. Its resistance should not exceed 10 ohms.
You can also install a lightning rod on a tree, which is 2.5 times taller than the house and located at a distance of at least three meters from it. In this case, the lightning rod is mounted on a long metal pole, fixed to the tree using synthetic cord clamps. The connection to the ground electrode is made with a wire of at least 5 mm in cross-section.

Further operation
The installed lightning rod does not require special care. It only needs to be periodically checked for damage and the quality of metal connections. If the lightning rod has decreased in diameter or the joints have lost integrity, then these elements require replacement. The location of the ground electrode should also be checked, and the ground around it should be kept moist.